Jen Hogg tackles sewing with thick fabric, coat construction, sustainable sewing, pattern matching, block interfacing, pad stitching and buttonholes

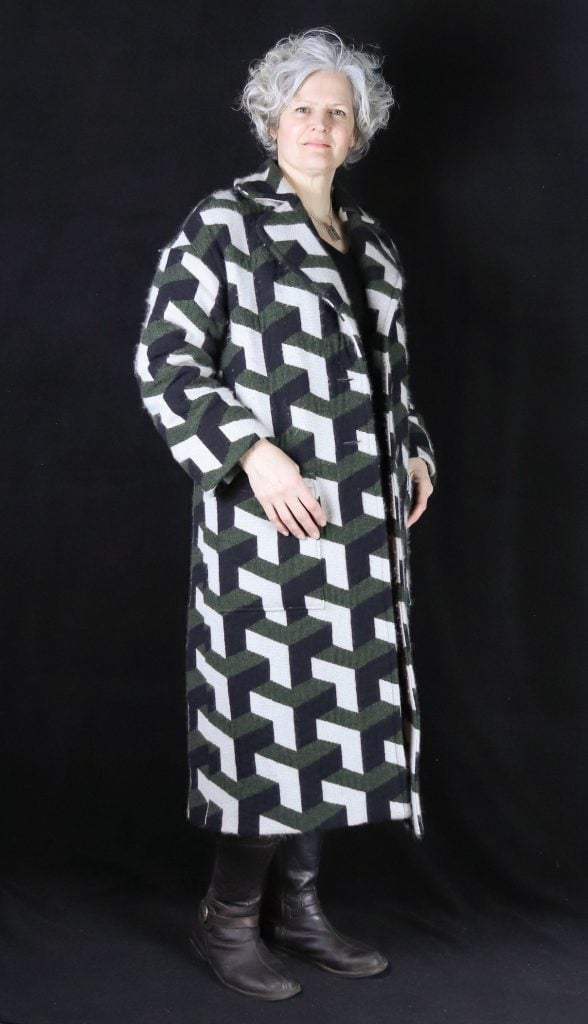
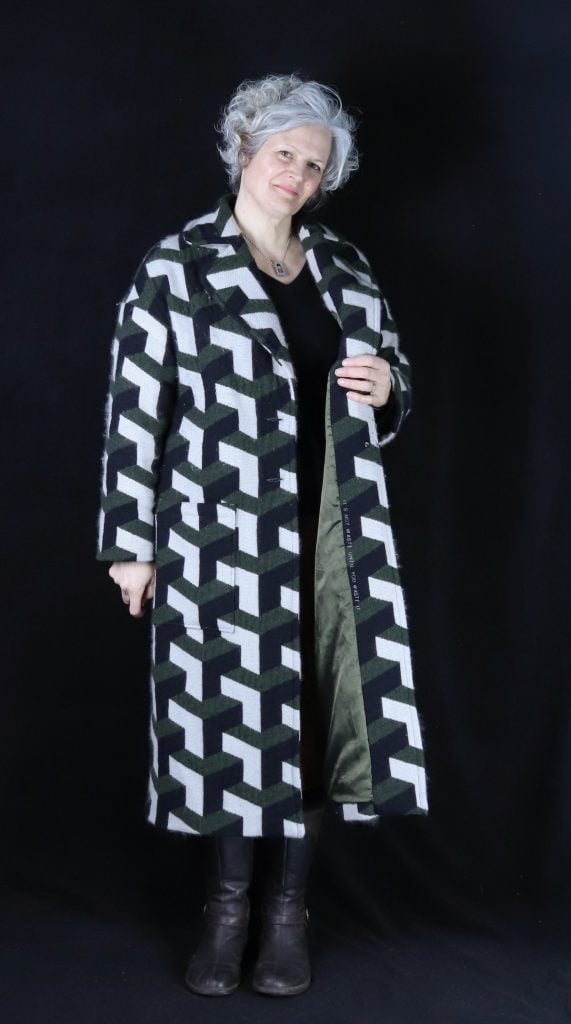
Confession: I’m addicted to making coats. Honestly. I now have more coats than I can wear, and I live in Scotland so that’s saying something. But they are such good fun to make! I love the challenge of sewing with fat, bouncy wool; hacking patterns I’ve tried before and using tailoring techniques for a professional finish.
The Fabric
This particular coat is made from upcycled blankets. There is a mill not far from Glasgow, Begg & Co, which weaves cashmere for the highest of high end clients as well as under their own label. As a member of the Sustainable Fibre Alliance, the team at Begg & Co make regular trips to Mongolia and China to ensure that the cashmere is sourced from herds managed to the highest standards of animal welfare. The sustainability manager showed me some stunning photos of his last trip to Mongolia: the vast dusty landscape and the round white tents of the itinerant herders, hung inside with rugs and blankets and with all kinds of things ingeniously stored in the eaves. If you would like to read more, there’s a short article on the mill’s website here.
Through the mill, I’m also involved in a project to promote use of the cashmere surplus which comes in the form of pieces and “slitter tape” – more on that in my next post. Recently, however, the mill contacted me to ask if I could use some blankets which fell short of Begg & Co’s standard for sale: ie perfect! Of course I jumped at the chance.
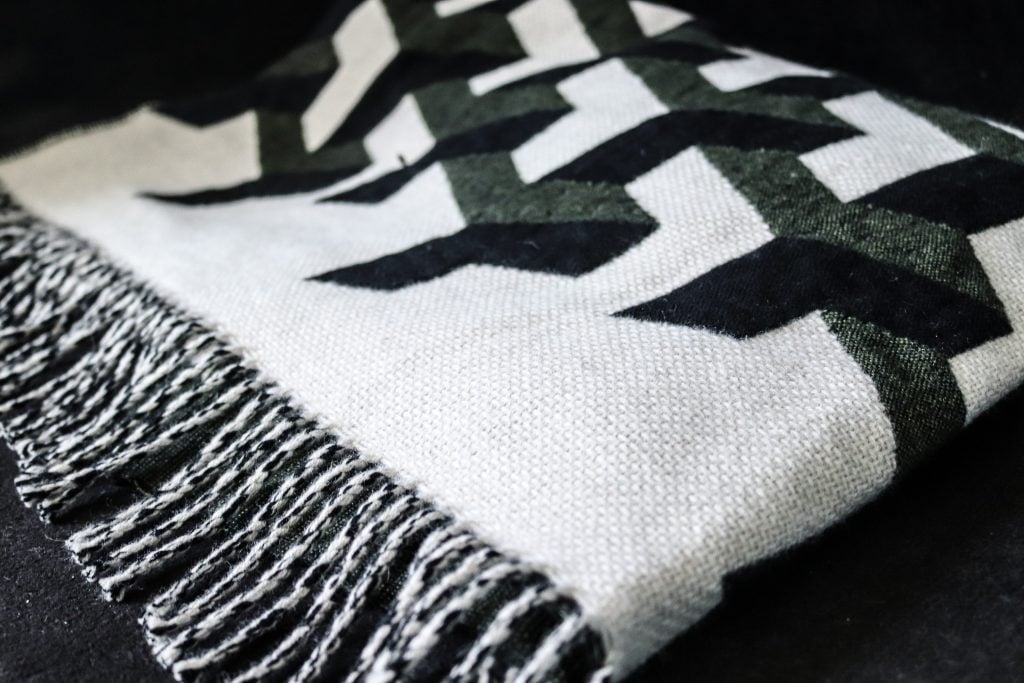
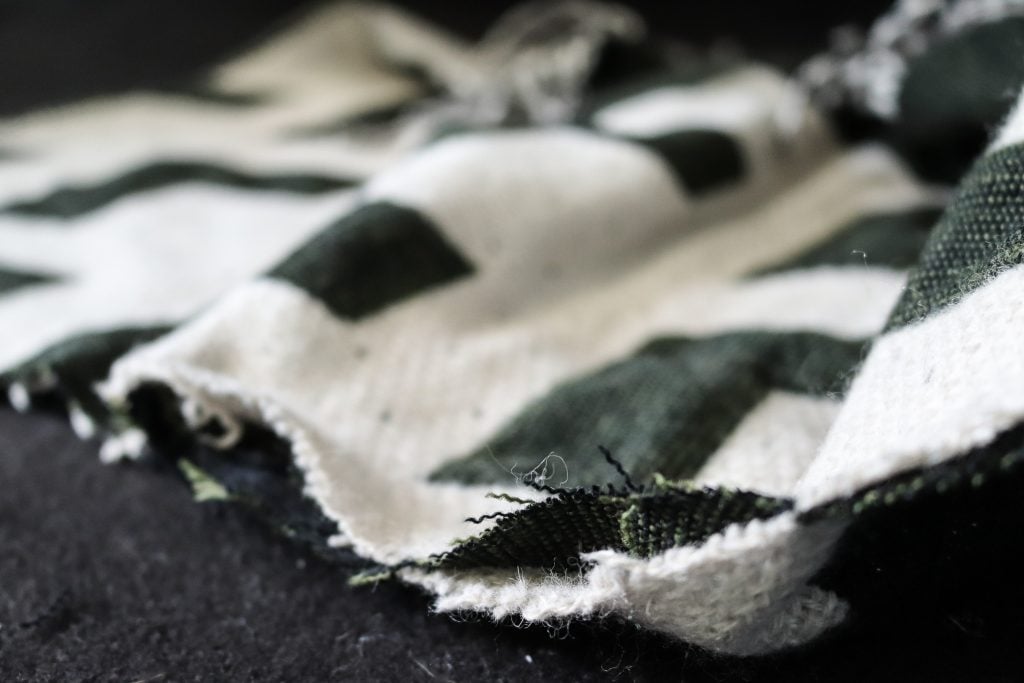
So this coat is made from three blankets, and to me the bold pattern required a simple garment shape which would let this glorious fabric sing. It’s 90% lambswool and 10% cashmere, and woven in two layers which are joined together with tags throughout. This made it an interesting fabric to work with, because of course when you cut it the two layers separate to an extent.
The Pattern
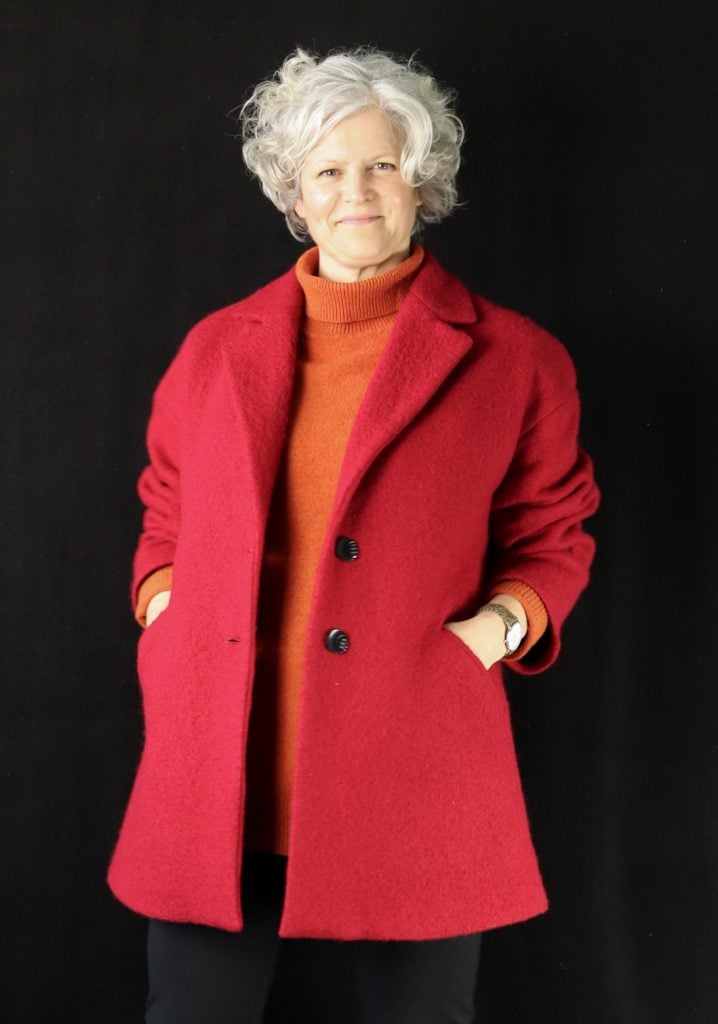
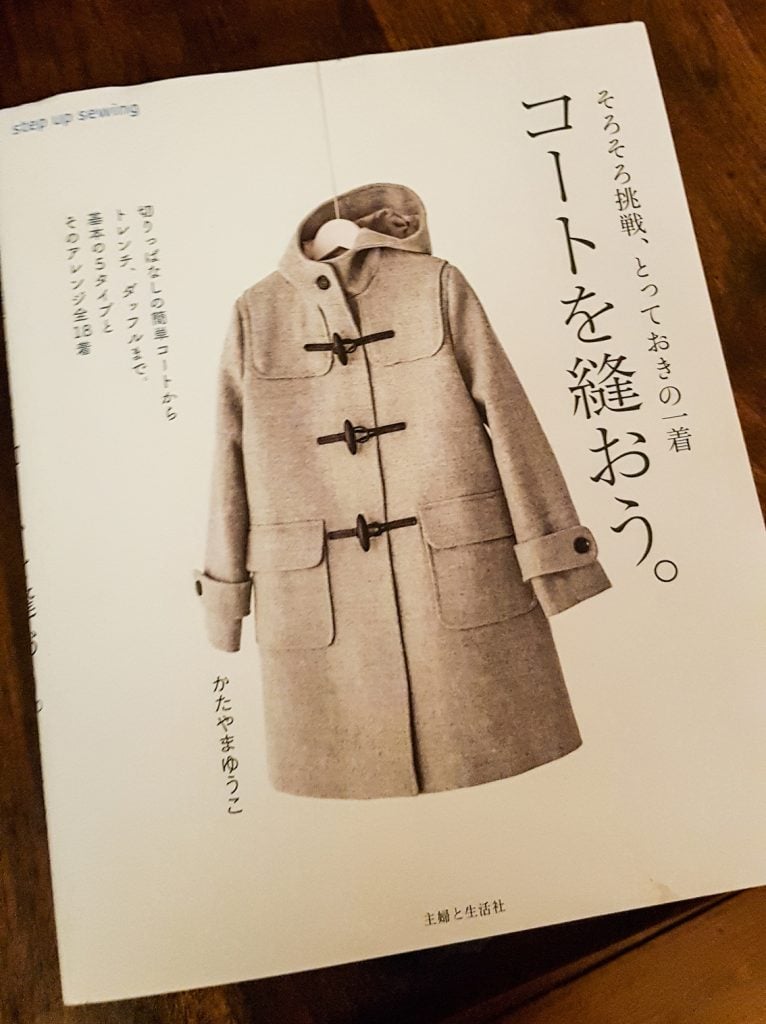
The pattern I opted to work with is from Coat Sewing by Katayama Yuko. I had used this already to make a short, red wool coat and as usual I wanted to take the pattern further. In this case I made the collar and lapel much larger and lengthened the coat. I’m quite tall and a long coat feels like such a luxury. I also added patch pockets as well as a small internal welted pocket over the facing and lining specifically sized for my phone. Lastly I took some height off the sleeve head, to reduce the width of the coat at that seam. I squared the shoulder a little, an adjustment I always need to make, but left the sleeve seam on the body pieces as they are. Reducing the height of the sleeve head improved the shape for me. When I made the red coat, I felt there was too much easing in required at the sleeve head for this pattern, and the small increase in the length of that seam on the sleeve dealt with that problem too.
The book is great, but it is in Japanese and I don’t have any Japanese beyond “konnichiwa”. Google Translate only takes you so far, and sometimes the translations are laugh-out-loud funny. However, the photos are helpful and if you know your way around coat construction anyway, it’s fine. I was worried that I’d have to grade up the patterns substantially but I didn’t need to at all. It’s not a book for non-Japanese speaking beginners though.
Construction
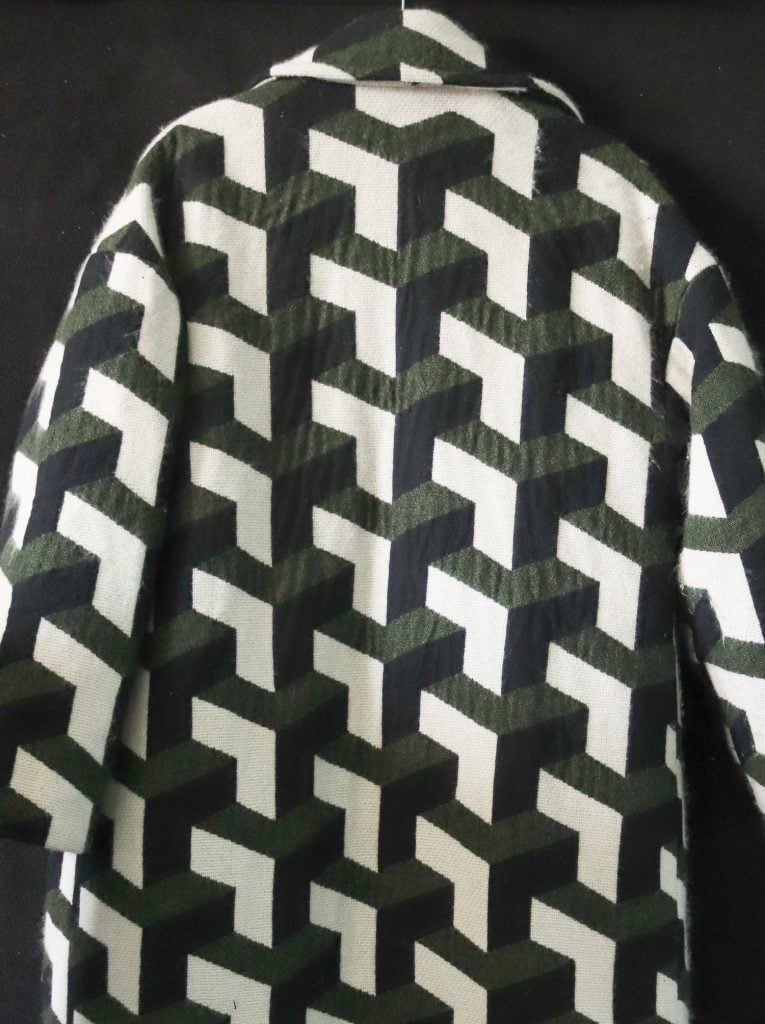
The pattern matching was a real challenge. My starting point was to have a line of the pattern running down the centre of the back and that dictated the rest. I knew that I couldn’t match the side seams because they’re at an angle, so I decided it was more important to keep the line of the white “arrows” in this fabric. Bizarrely one side actually matches really well while the other is just OK-ish. Ach well, every day is a school day. I cut the upper collar to line up with the back of the coat bearing in mind that the collar fabric is upside down after the fold line, and decided to feature the white arrows on the wide lapels.
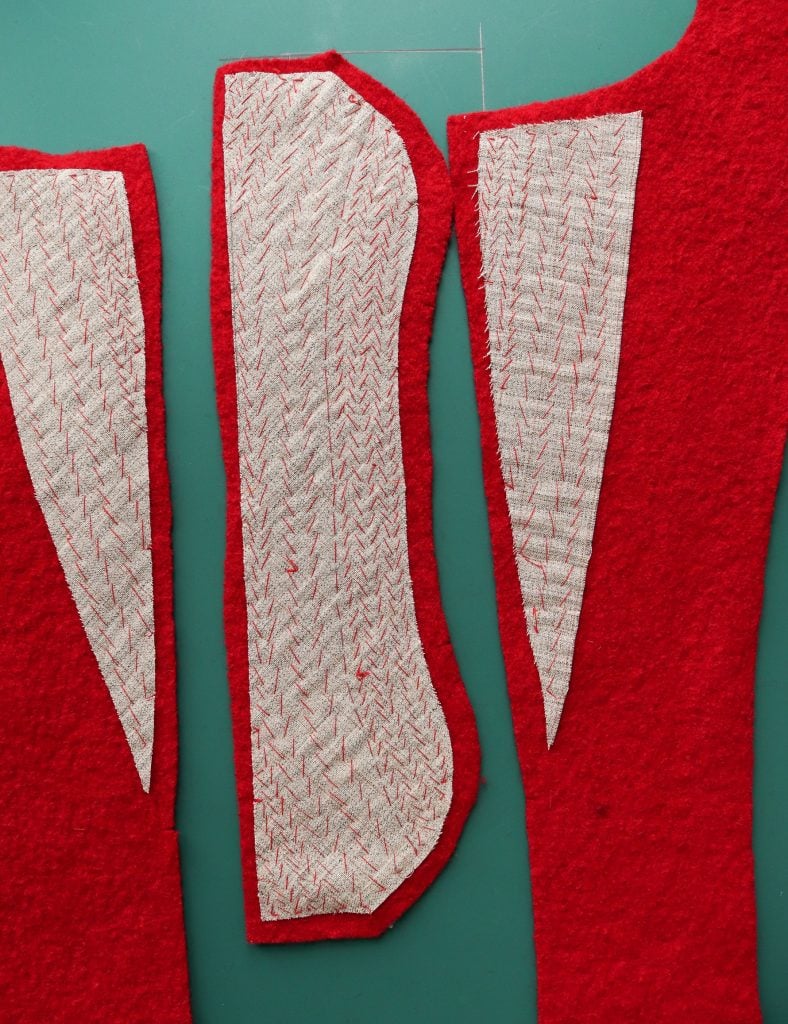
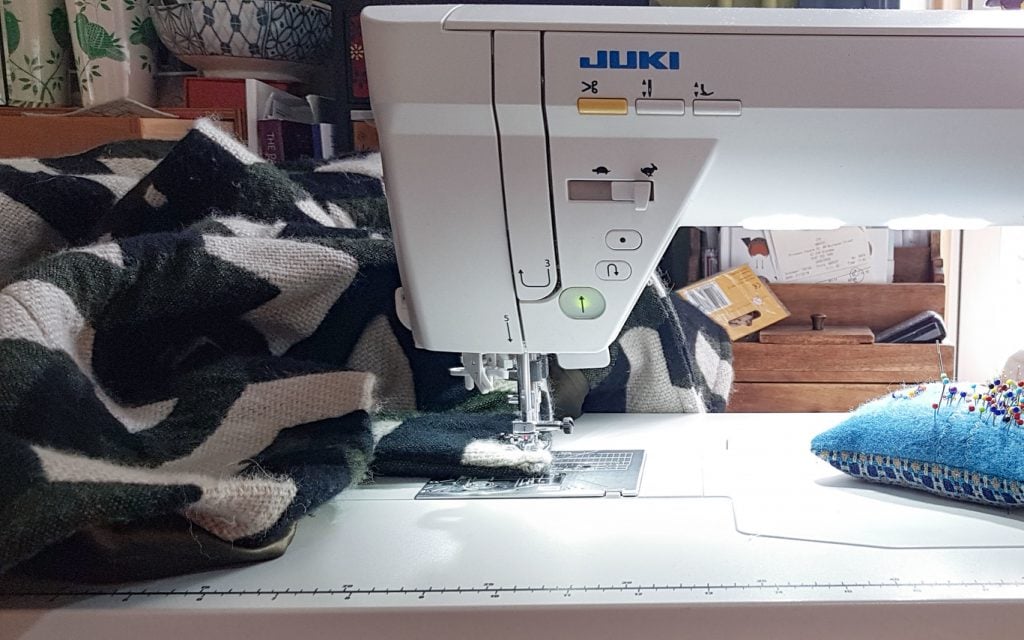
Once I’d cut everything out, my first move was to block interface all of the coat pieces with a fusible interfacing. The weave is loose, and I was worried about the fabric fraying during construction. Also the fabric is beautifully soft which is of course great for a blanket but a coat needs more structure.
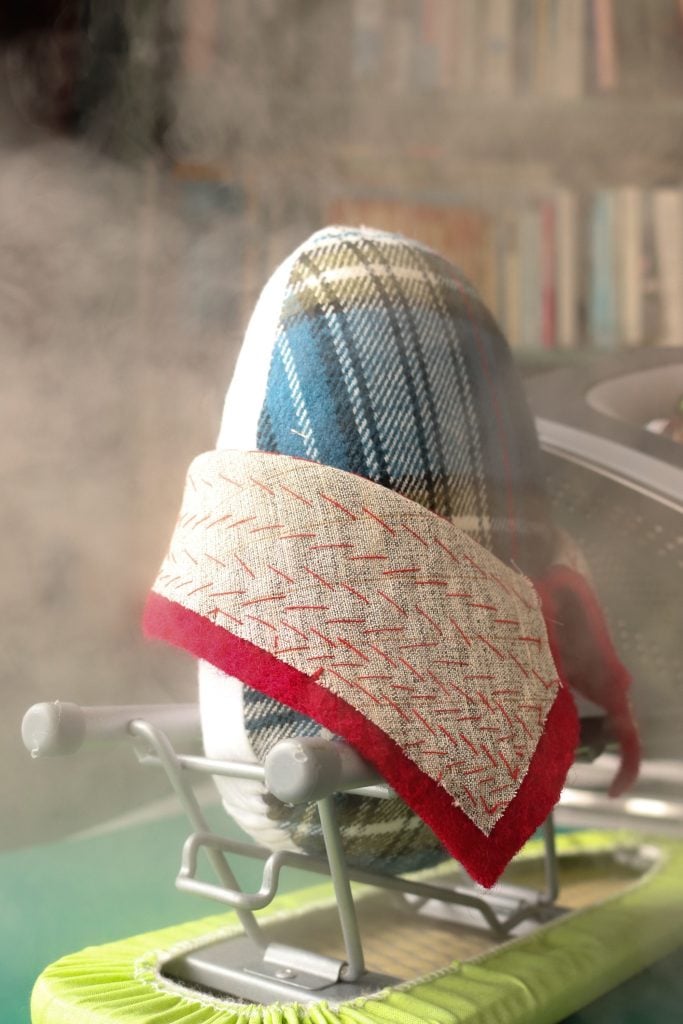
I took the time to hand pad-stitch the collar and lapel. It is such a worthwhile step, it makes a huge difference to how the collar sits. Plus it’s immensely satisfying once you’ve finished. Trust me, you’ll want to take photos so you can show people what the inside of your coat looks like. Once the collar is pad stitched it gets pinned to a tailor’s ham and steamed like my Gran’s clootie dumpling, then left to dry overnight. This sets the shape of the collar and also lets you trim the upper and lower collars to the same size, so that the seam will roll to the underneath. You can’t tell in advance how much will have to be trimmed off the lower collar because it depends on the thickness of your fabric.
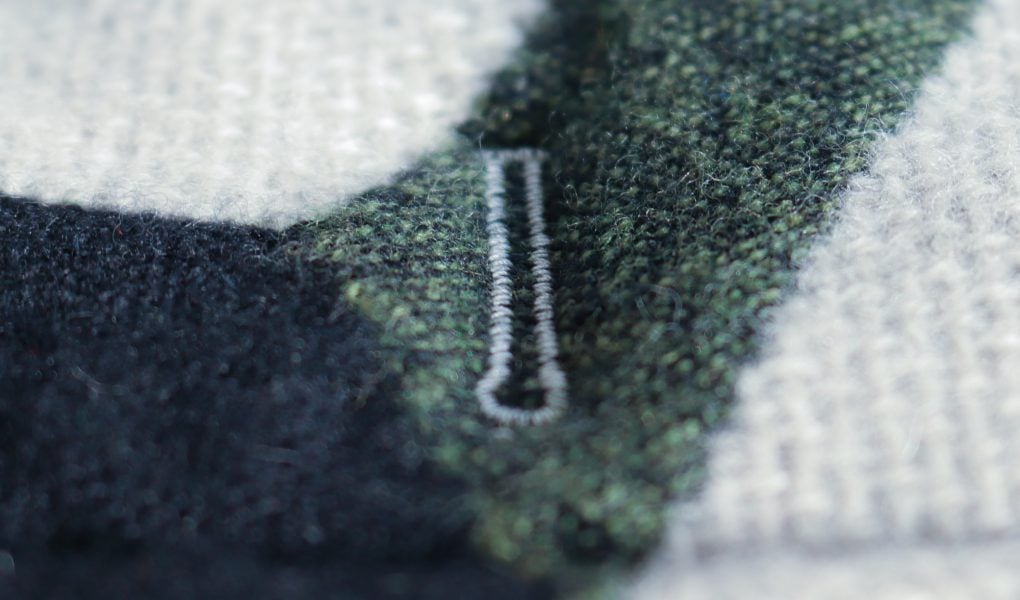
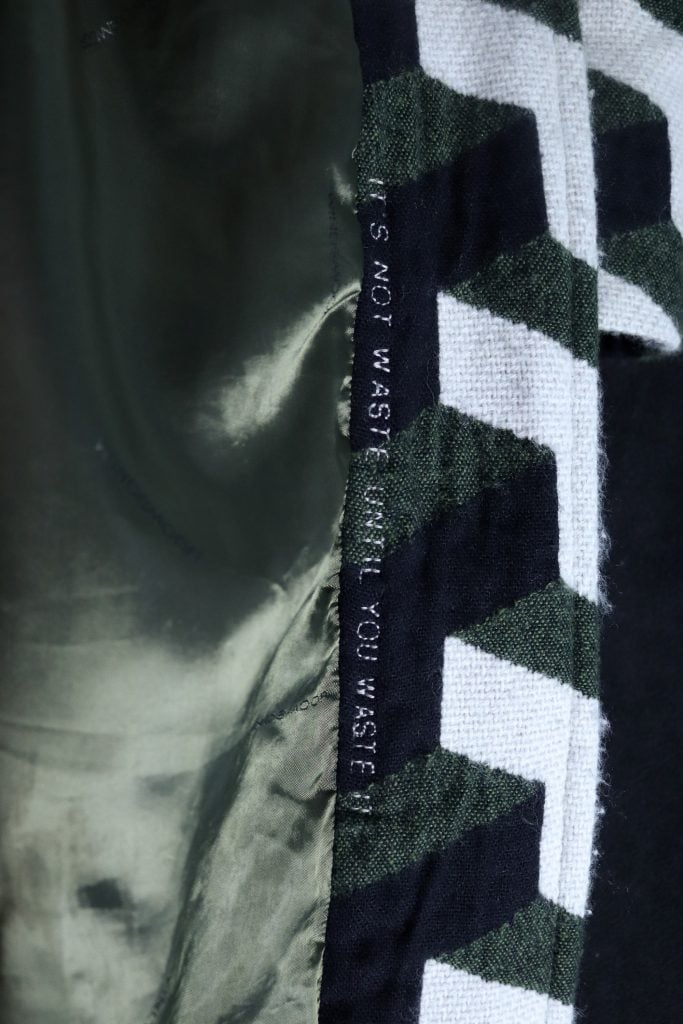
Once I’d attached the facing to the lining, I decided to add a hidden statement to this coat to celebrate its sustainability roots. It makes me smile every time I see it, and I’ve decided I should add a secret message in all my garments. I used the block alphabet on my Juki NX7, set to a wide spacing given the thickness of the fabric.
And of course you have the joy that is bagging out. I ran a coat workshop recently and one of the sewers got all emotional when she bagged out her coat. It was her first, a Papercut Sapporo, it looked amazing and she was overwhelmed with her achievement. A lovely moment!
One of the last steps in most coats is adding the buttonholes. To be honest, I find this terrifying – you’ve spent all this time and effort and now you have to add a buttonhole through two layers of thick, bouncy fabric, close to a seam where there are 4 layers, and right on the front of the garment. This is where I offer up thanks to the Juki Gods (or actually the engineers who develop these machines) because the buttonhole clamp is indeed a godsend. It keeps everything in place and means that the bump of the seam doesn’t inhibit the feed dogs. Result: perfect buttonholes. I also love the fact that I can set the buttonhole to wide, to accommodate the wool.
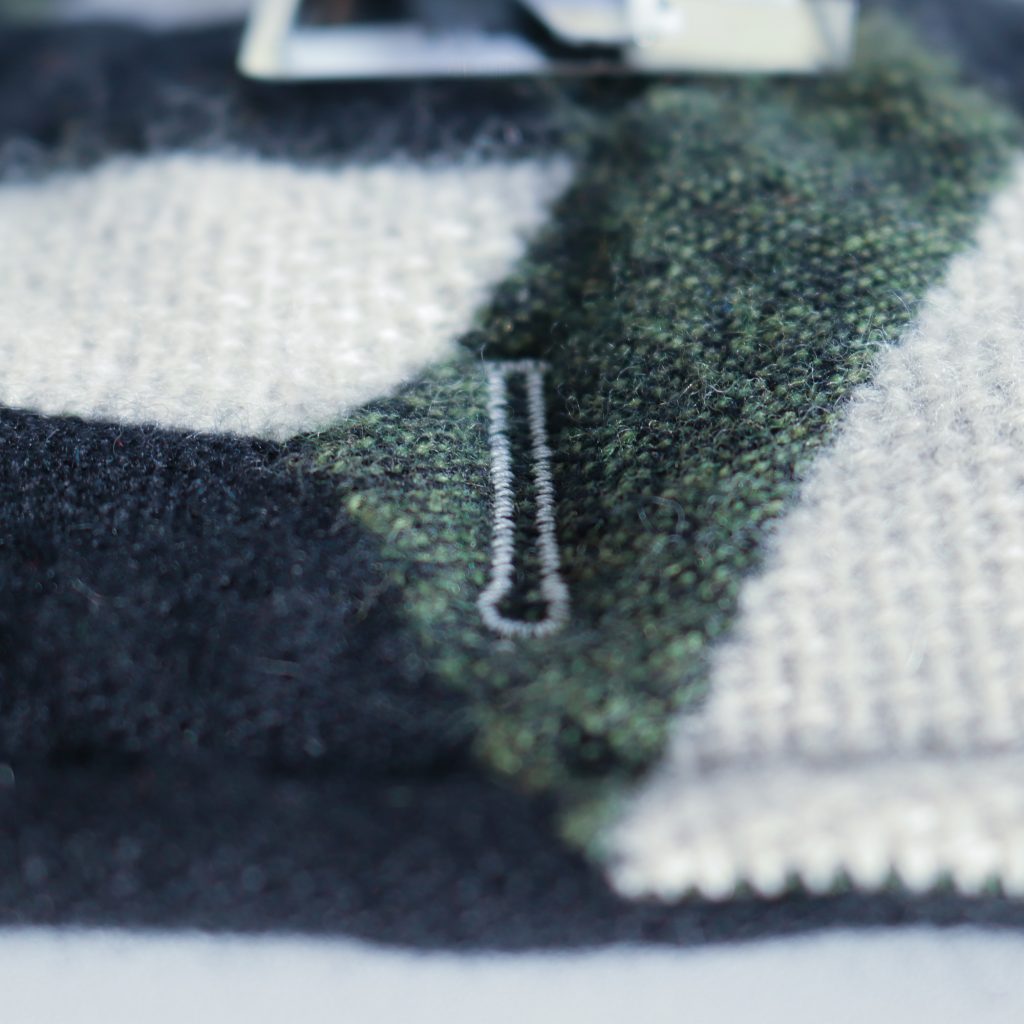
One tip – I use a buttonhole cutter, it look a bit like a mini chisel. For close-up precision work like this I also use cheap reading glasses which are a higher magnification than I need. Just remember to take them off before you look up or you’ll feel like you’re at sea.
All in all I’m delighted with this coat. I get comments on it from strangers (although I do live in Glasgow, and we’re notoriously chatty) and it’s so warm, as you might expect of a coat literally made from blankets. And I really love my hidden statement.
Some technical information:
- Universal needle size 90 (14). It was a fresh needle so I didn’t bother to change it when I was sewing the lining fabric.
- Straight stitch set to 3.4mm. The thick fabric takes a longer stitch
- Straight stitch foot
- Walking foot with differential feed set to 0, when sewing two layers of wool together
- Button hole clamp, keyhole buttonhole set to wide
- Alphabet text, block capitals, set to wide spacing
We’re excited to be running another sewing retreat at the glorious Stubton Hall, Newark, in November 2020. Jen will be holding a coat workshop, to help you with all of the techniques required to make a bespoke wool coat. You can bring any coat pattern, although good patterns for beginners are the Sapporo Coat by Papercut Patterns, and the Silvia Coat (with or without a hood) from Schittchen Patterns. More details will be posted shortly.

Jen Hogg lives in Glasgow with her husband and dog, and has two children at university. A former solicitor, she reached the semi-final of The Great British Sewing Bee Series 5 (2019). She has been described as “multicraftual” and also enjoys knitting and many other textile crafts, as well as silversmithing and photography, woodwork, wrought iron, stained glass, pottery and generally making things. You can follow her on Instagram and Facebook @jenerates, and at www.jenhogg.co.uk, and you can read our Juki Club introduction here.