
Sometimes when the pace of sewing slows down, it’s a good opportunity to do the non dressmaking jobs around the sewing room.
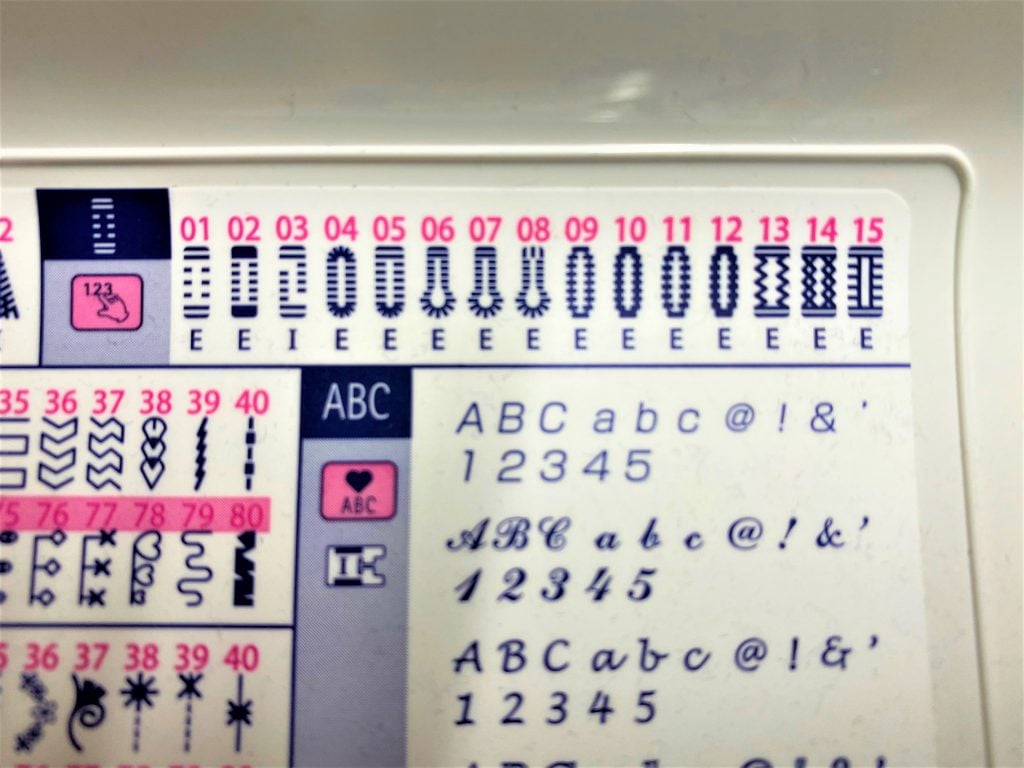
One such job I have been considering is a review of the 16 different buttonholes available on my Juki DX7 sewing machine. This stitch selection is specific to the DX7. But other machines in the range will have similar, if not such a wide choice. Other brands of machine will no doubt offer a choice of buttonholes, which are well worth exploring in more detail.
Preparing for buttonholes
I always interface where my buttonholes are going. If the pattern piece isn’t interfaced I attach a rectangle of iron-on interfacing under the buttonhole position to support the stitching. On jersey fabrics I use a jersey interfacing. But I will also add a small piece of non stretch interfacing immediately under the buttonhole.
I had occasion recently to look for alternative buttonholes for a coat, and also to use on a pair of sweatpants joggers. In days gone by I would happily have stuck with the basic buttonhole. But I have experienced stretching in buttonholes in wear on jersey garments. I wanted to figure out how to make buttonholes longer than the automatic buttonhole foot will accommodate.
My Juki DX7 offers a variety of styles of buttonhole, although the on board illustrations are not hugely informative. There are descriptions in the Instruction manual, but whilst I might refer to them, the information doesn’t stick around in my memory all that long. Why so many buttonholes, you may ask? I decided to find out the differences so I stitched them all out and noted the stitching routes.
Juki buttonhole options
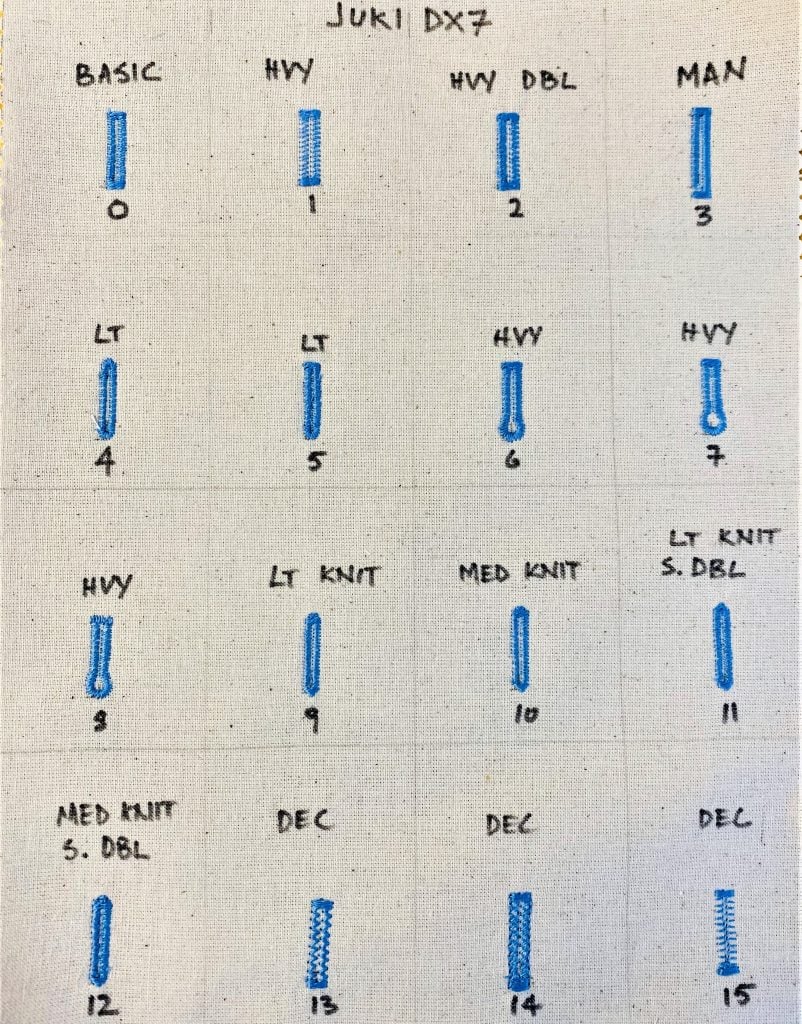
I used a substantial calico so the samples would hold their shape, and stitched them in a mid tone standard thread for clarity.
The buttonhole samples are sewn in a grid formation, with a matching sheet to describe the characteristics of each buttonhole. Both pages are inserted back to back into a plastic folder for future reference.
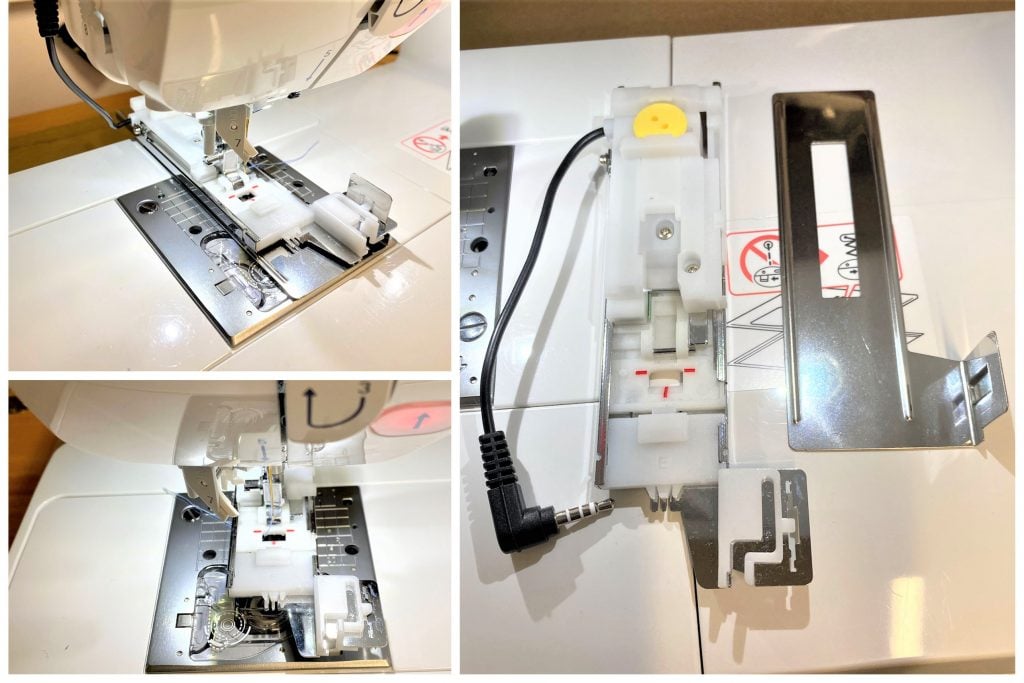
About the Buttonhole foot
The Juki DX7 comes with an automatic buttonhole foot, which needs to be plugged into a socket on the side of the machine, for use in all but the manual style of buttonhole (#3). This manual buttonhole, together with a manual buttonhole foot also supplied with the machine, allows you to exceed the size limit of 32mm of the automatic buttonhole foot.
The automatic foot also includes fabric clamp, which makes sewing with difficult fabrics a doddle because it clamps the fabric into the foot so it can’t slip and slide out of alignment. It is easy to attach and remove by holding the small white piece of plastic at the front right of the foot. The instructions are on p 52 of the instruction book.
I sewed my samples without the clamp in place.
It is possible to alter the overall width and the density of individual buttonholes with the stitch width and length buttons, and also the width of the gap between beads via the settings button. See p84 of the instruction book – good for thicker fabrics.
The basic buttonhole
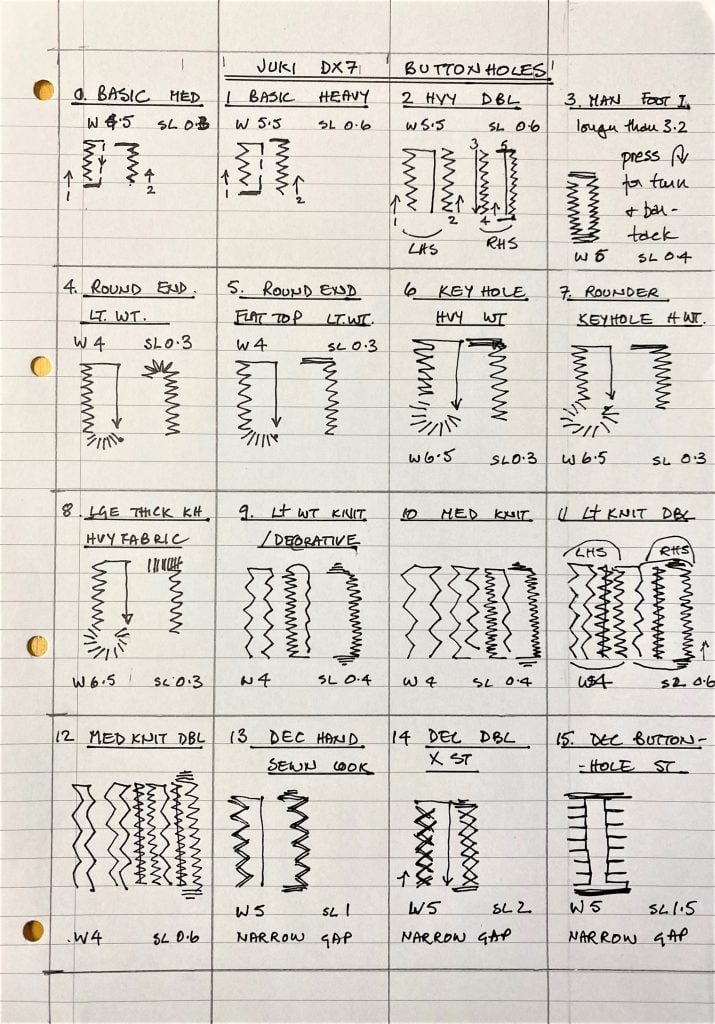
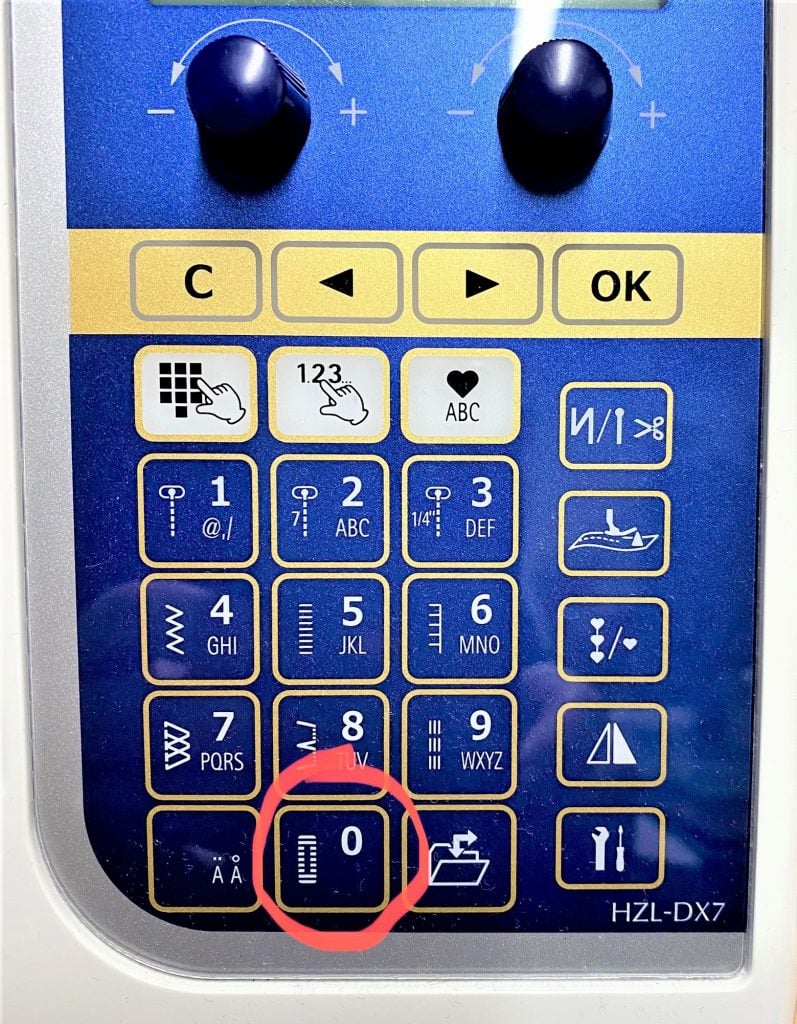
On the DX7 the basic buttonhole appears on the main screen as stitch #0. It starts bottom left, sews the first bead backwards, then moves across to the right hand bead and sews forwards with a straight stitch to the start point and sews the bottom bar tack. Next it zig zags backwards to the top and sews the top bar tack. A couple of lock stitches secure it.
This forms the basis of most of the remaining buttonholes. The variations include the size and length of the stitches, the shapes of the ends and the number of times each bead is stitched. I will run through each one individually. The information is all in the instruction book but not very detailed.
The rest of the buttonholes are in a separate stitch folder accessed through the selection button. They are numbered 1 – 15
- #1 is a heavier version of the basic, with a wider swing and a more spaced out stitch, suitable for heavier fabrics or if you don’t want a buttonhole as dense as #0
- #2 is like #1 but sews each bead zigzag twice perhaps good for a medium weight wool where you don’t want to stretch out the fabric but want a bit more strength.
Manual
- #3 is a two step manual buttonhole. It is the only one that doesn’t use. The auto foot and you will get an indication on the screen if you have the auto foot in place and try to sew #3.You need clear foot I.
- It allows you to exceed the maximum buttonhole length of 3.2 cos that you can do with the auto buttonhole foot. Frequently on coats and jackets you would have a larger or thicker button that needs this function
Round ends
- #4 is a basic buttonhole formation for lighter weight fabrics but with a round end at both ends, designed for sewn on buttons without a shank.
- #5 is like 4 but has a flat top end.
Keyhole
- #6 is a keyhole (its rounded end is wider to accommodate a button shank) It has a horizontally stitched top bar and is heavier.
- #7 has a larger round keyhole
- #8 is similar to 7 but has a vertically stitched top bar, similar to a bar-tack.
Knits
- #9 is for lightweight knits,
- #10 is similar, for medium knits, it under-stitches with two rows of small zig zag then sews each bead with a wider zig zag.
- #11 for light knits, single zig zag under stitch then double rows of wider spaced zig zag rows for each bead. I would use this on a light knit that will will get more wear and tear.
- #12 has two rows of zig zag under stitching then two rows of zig zag beads. This would be for thicker knits, sweater knits, sweat shirting, any knit that is going to get a lot of wear on the buttonholes.
Decorative
- These are for use on firmly woven fabrics which are less likely to fray. They have the same stitch route as the basic buttonhole but use more open, decorative stitches. They are intended to mimic hand sewing. I would use these judiciously. Note these all have narrow gaps which could prove problematic if you want to cut them open. As they are, I would only use them as decorative features where they are not cut open, with a button sewed over the top because they don’t provide much coverage to the cut edge.
- #13 has a simple double zig zag
- #14 is cross stitch
- #15 buttonhole stitch
Finding out for myself
That is a lot of choice, and I definitely feel more confident choosing different buttonholes now I have done this exercise.
The brief description of each one in the instruction book is useful information. However, actually sewing out each one, and making notes of how it is constructed has really imprinted on my mind how I could use each style in future makes. And the visual reference is there to prompt me.

Troubleshooting the collar
One of the areas I have frequently had problems with buttonholes is on the collar of a shirt. The varying thicknesses of fabric create obstacles for the fabric travelling smoothly while sewing buttonholes. My Juki DX7 has helped hugely, although precautions still need to be taken. Always make this the last buttonhole you sew on the front because by then you will be feeling more confident.
I suggest that you measure your buttonhole very carefully and mark the position of both ends on the collar stand. You may need to remove the clamp because of the width of the collar. But sew the buttonhole with the centre front of your shirt to the back of your machine. That is why you need to mark the length very carefully. The edge of your buttonhole needs to be a minimum of half a button width from the edge of the collar. The button won’t sit quite at the end of the cut buttonhole. So you want that part of the buttonhole to sit on the centre front line. I usually allow for the button to be sewn in line with the centre front of the shirt so everything lines up properly.
Closure
Don’t beat yourself up too much if it doesn’t work out precisely. I rarely fasten my top button, and you get better at it with practise. I promise!
Most modern machines offer a variety of buttonholes. Whatever your machine type it is a good use of time to do an exercise like this. I really recommend you do something similar, it will improve your enjoyment of your machine and your makes.

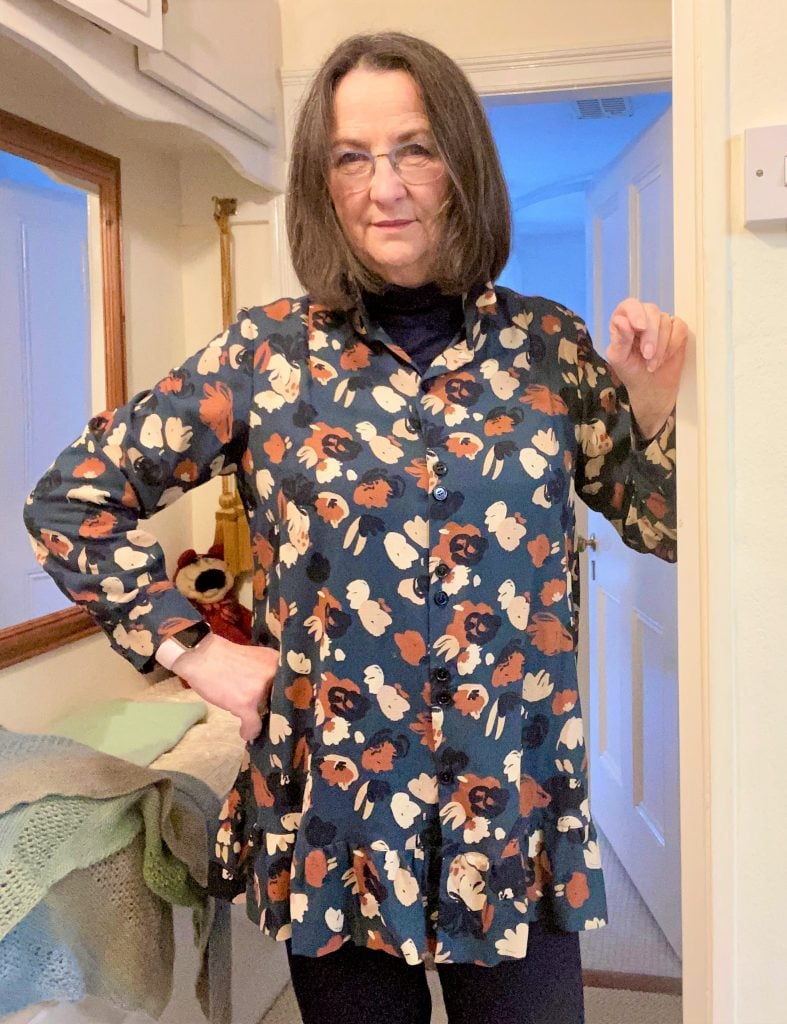
Janet Poole is one of our great British Sewing Bee Series 5 contestants. She lives in North Yorkshire with her husband. Janet’s been sewing since she was 16. She took a break of 20 years, while her three children were growing up. It was, ironically, the Great British Sewing Bee Series that inspired Janet to start sewing again. Janet is an advocate for SLOW Fashion. Now she mostly sews things for herself and her grandchildren. You can follow her Instagram @jannisews
Thank you for this review. I’m in the market for a new sewing machine and one that can take the pain out of buttonholes is a top priority.