The Fabric
Sewing with crinkle silk chiffon is possibly the most challenging substrate I have sewn with to date. I am the kind of person who can become bogged down in minor details, talk myself in circles and procrastinate on a seemingly difficult (or new) task.
I was extremely lucky to have the opportunity to select some fabric from We Are the Fabric Store in New Zealand to sew with in August. I don’t usually like to sew with a deadline, but ironically, I think this actually helped me get out of my head and just start the project!
The pattern
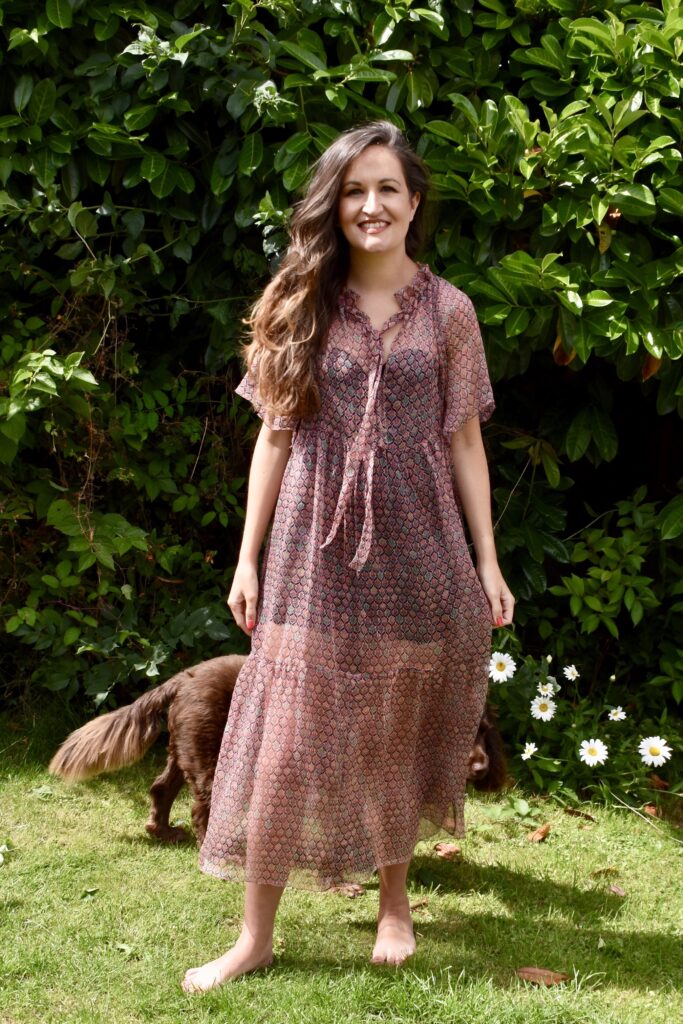
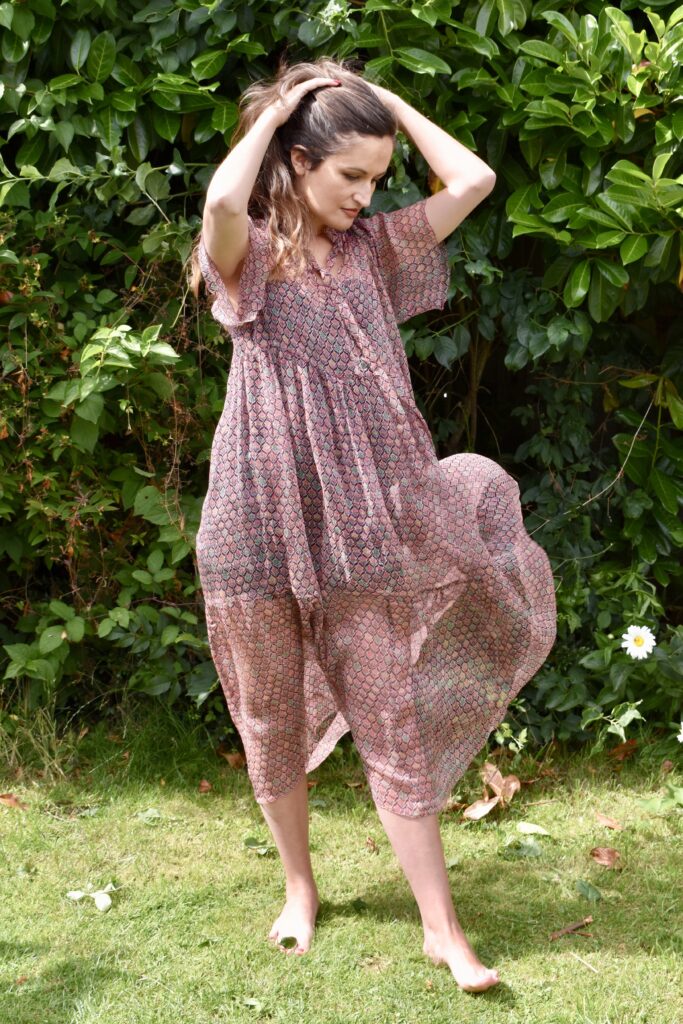
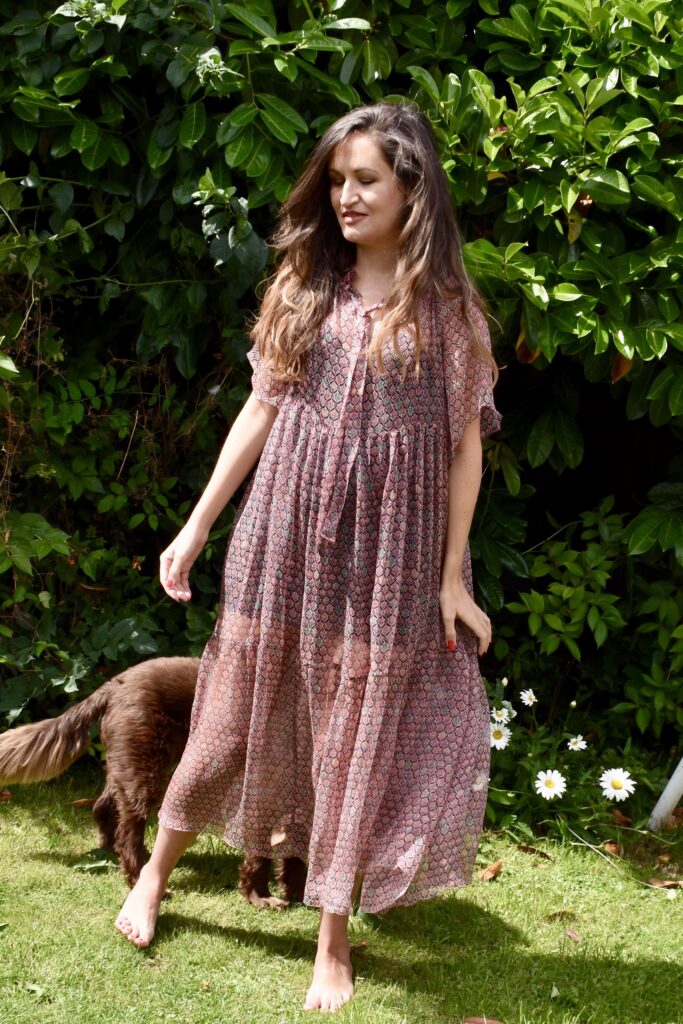
I chose to sew the Wilder Gown by Friday Pattern Company as I wanted a floaty dress to show the diaphanous quality of the silk. I also knew I didn’t want to tackle button plackets, zips and too many seams whilst sewing with a completely unknown quantity!
I think the pattern and fabric work harmoniously together in the final piece. The tiers and gathers show different depths of colour which change with the light and movement.
I did decide to widen the sleeve slightly at the bottom by using a method in the Palmer Pletsch fitting book. Taking the front half of the sleeve, it was pivoted from the front underarm seam and moved 2” out at the hem. This is repeated on the back half. By doing this, the integrity of the sleeve head is maintained so that it still fits into the armscye while adding volume to the lower half of the sleeve.
Cutting out
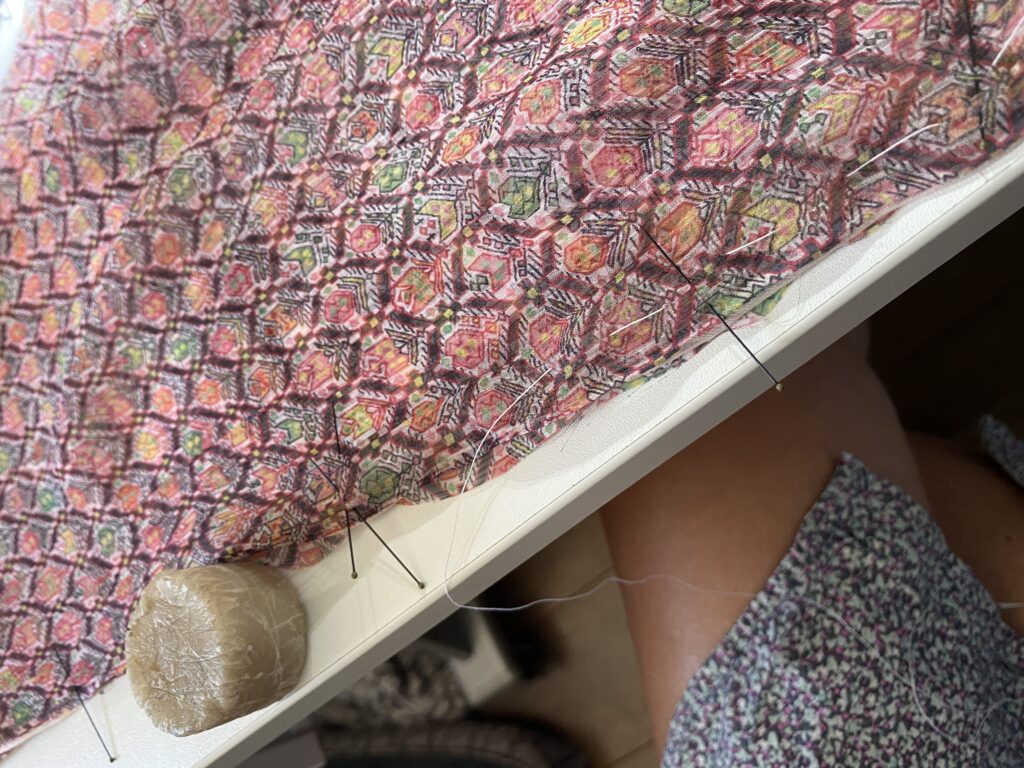
From my research, the majority of advice was to sandwich the silk in between two layers of tissue paper, and taping everything to the table. Now, I *just* about have the energy to wrangle pattern and fabric. Possibly in the long run it would be easier, but I decided to go for it, and skip the tissue paper part. Instead, I cut the pattern using a rotary cutter and pattern weights (weights being miscellaneous items found nearby!) to eliminate shifting and lifting when using scissors and pins. I even treated my poor long suffering rotary cutter to a new blade! It went surprisingly well, and wasn’t nearly as difficult as I had anticipated.
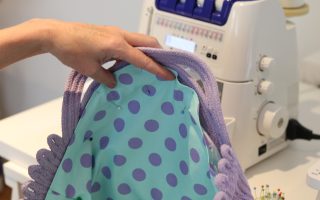
Sewing silk chiffon
Again, there was a lot of advice to back the silk with tissue to prevent the horror of your beloved fabric being sucked into the abyss of the feed dogs. In this respect, I am lucky in that I sew with a machine which has a changeable throat plate to perform a straight stitch only. (Juki NX7) The benefit of this, is that the gap in which the needle goes into is relatively small compared to a standard plate, giving significantly less opportunity for fine fabric to be pulled down with the needle.
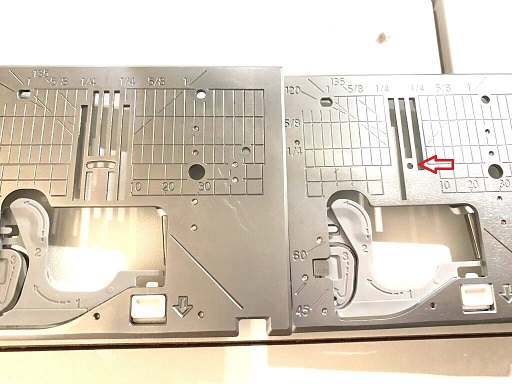
This was the first time I used the straight stitch plate, and unbelievably, the fabric remained sitting where it needed to. The additional use of the smart feed (essentially an integrated walking foot) also meant that the top layer got a helping hand in gliding effortlessly between the foot and feed dogs.
The short video clip below is NOT my dress, but it does give a good view of the Juki Smart Feed integrated walking foot. The smart feed is brilliant for very fine slippery fabrics like my silk chiffon. And, oddly enough, it’s also great for bulky fabrics like this quilted postcard.
Finishing touches
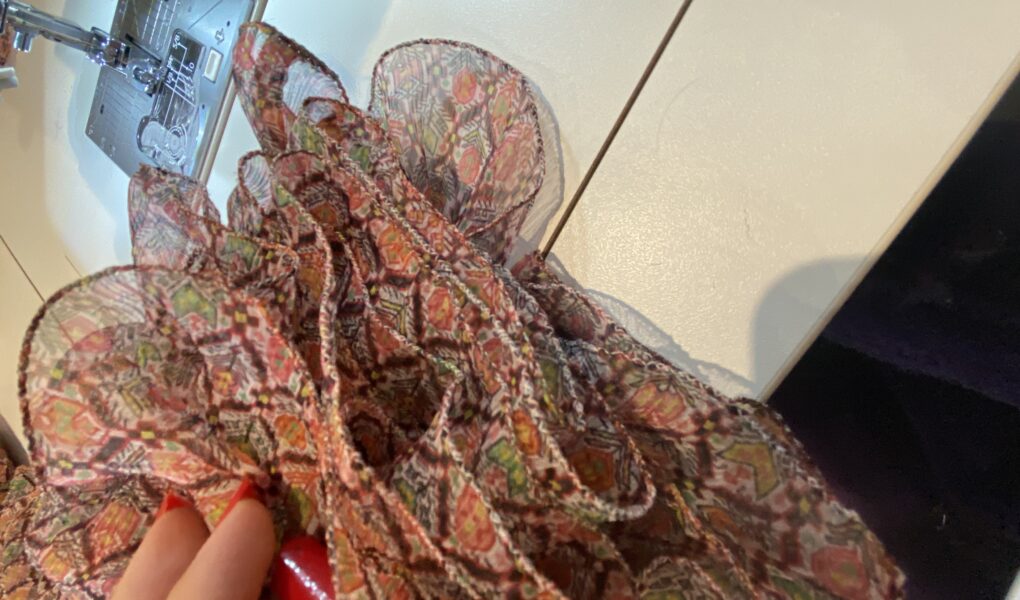
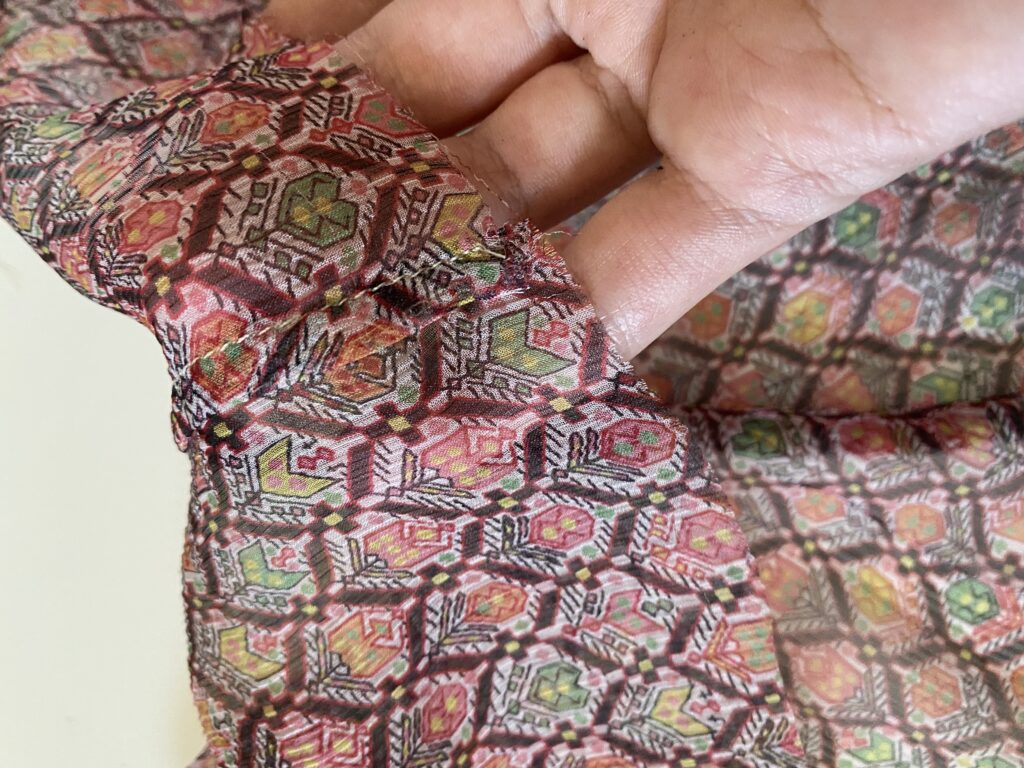
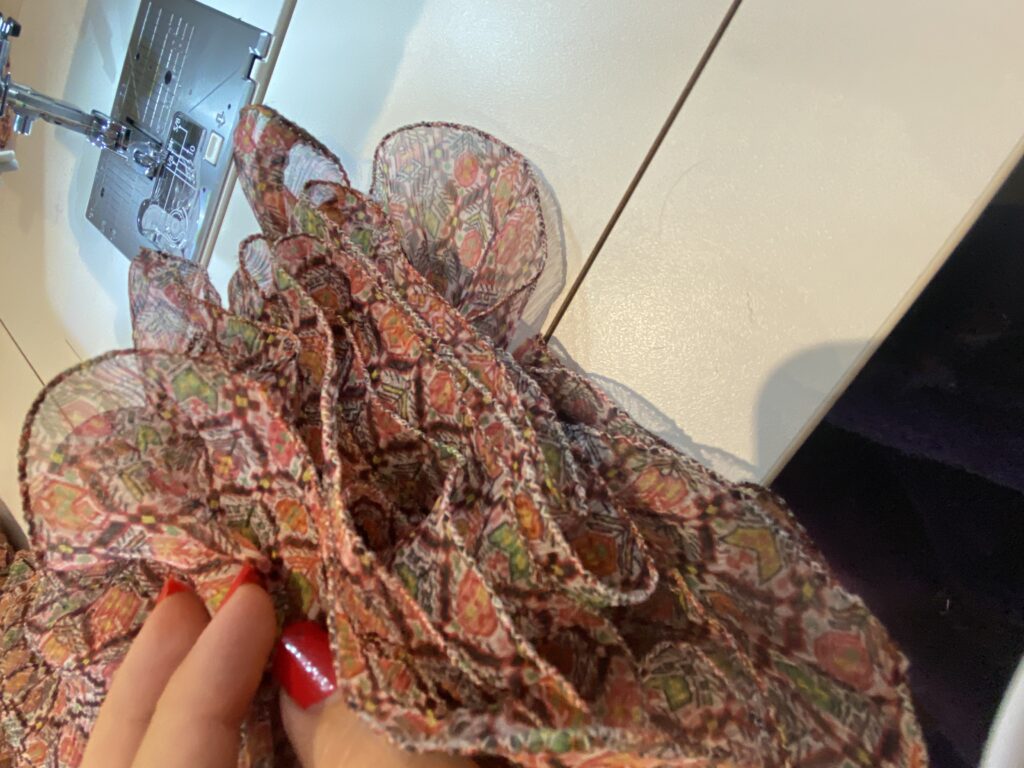
I knew this fabric deserved the best finish I could give it. So French seams were a must for this sheer silk. I knew I wanted a rolled hem, and Franklins kindly sent me a special foot for my machine to make things easier. I have tried a rolled hem foot before with varying levels of success. The ones I tried roll the fabric and neatly edge stitch all in one. There is very little room for error with these feet, and I often spent more time unpicking than sewing.
On a roll
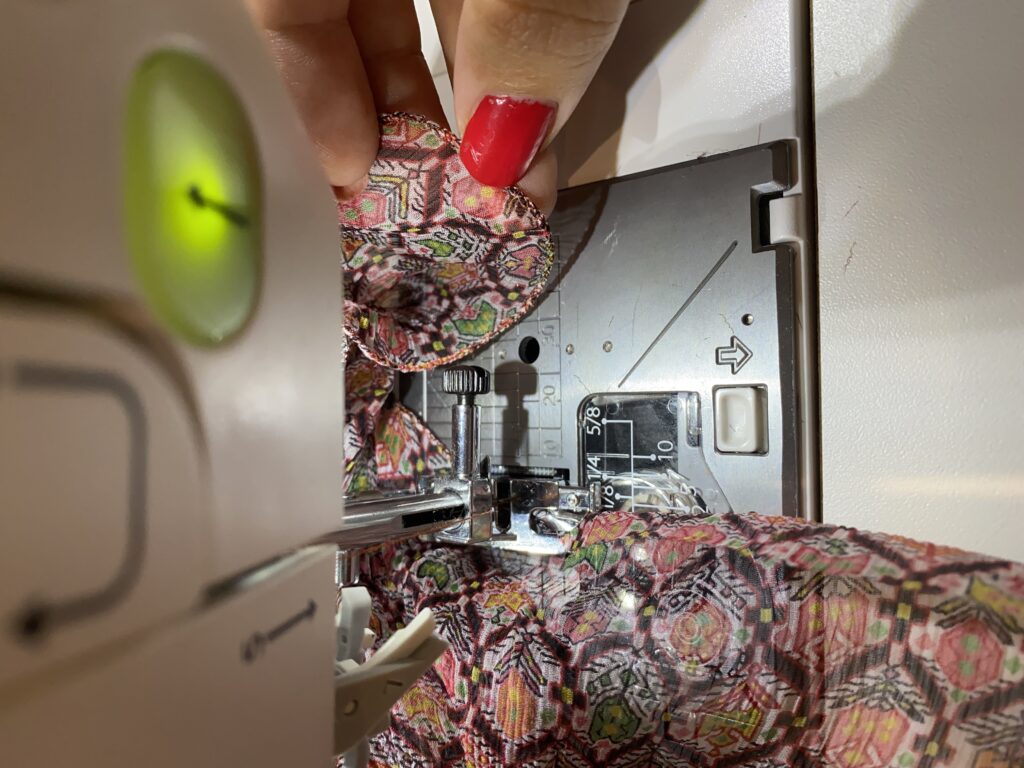
When I unpacked the new foot, I was surprised that the instructions directed that it be used with a zig zag stitch. I will admit I wasn’t at all sure how this would look or work and prepared myself for days of hand rolling. But this gadget was a revelation! The zigzag meant you have much more room for user error and it went through seamlessly. By using a well matched thread colour, the outcome was a barely visible overcast rolled hem. The weight and size of the hem are perfect for the fine fabric. It also feels like it will provide a long lasting as well as beautiful fluid finish.
So any wisdom to pass on from my first experience of sewing silk chiffon? Take all the basic precautions for dealing with fine slippy fabric. Use fresh blades, fine pins, and a new microtex needle in your machine to prevent snagging. (I used a size 8)
Further than that? Go with what you feel is right. Practice on scraps. Try and get out of your head that you’re embarking on an impossible task. You might just find that you will be wearing your hand made silk garment, wondering what all the fuss was about!
Marie is predominantly a garment sewer making sustainable choices. Having a disability often requires her to work differently in order to make the most of her sewing time. Marie works with Juki Club to help us make sewing more Accessible. You can follow her sewing on instagram@marie_stitchedup and at marie-stitchedup.com. Marie lives in Bedfordshire with her husband, and two children along with Woody, the Cocker Spaniel, who often makes cameo appearances in her feed.