
An easy sew at home Halloween costume of Dorothy from The Wizard Of Oz

I really wanted to share with you a simple way to create a fun girls Halloween costume out of an item you may already have.
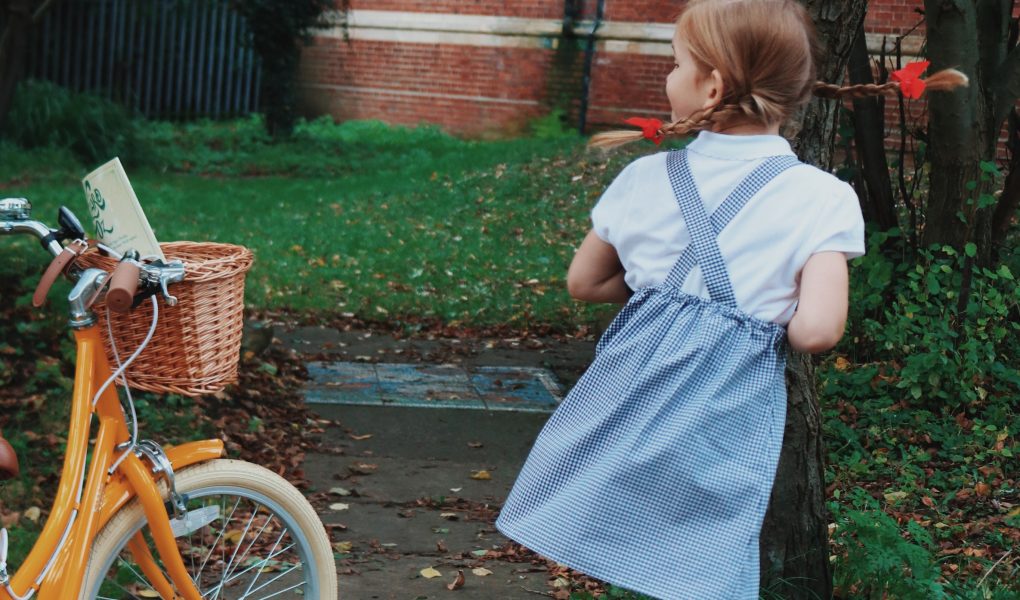
Like a lot of British schools, our children have a girls summer uniform which consists of a checked gingham dress. We have many of these in the cupboard as my daughter Etta loves to wear them. Having had a little look at homemade costume ideas for Halloween I came across quite a few Dorothy outfits from The Wizard Of Oz. Knowing I had a cupboard full of these blue gingham dresses it seemed like a good idea to chop one up and refashion it as a pinafore dress for Etta to wear.
Teamed with one of the school white t-shirts we have found that this fairly simple sewing project has maximum effect as a fancy dress costume.
Read on to find out how I made it!

Making the skirt
- Cut dress across waist
- Immediately iron a ¼ inch seam
- Fold to a ½ inch hem or one that can then take elastic. I am using a ½ inch width of elastic.
- When sewing you elastic hem, remember to leave a small gap to be able to thread the elastic through.
- That is the skirt part complete.


Making the top
- Remove pocket
- Cut the breast panel out. I cut in just by the sleeves and right under the collar.
- Hem all top and side edges on the panel
- I found hemming over the buttoned panel tricky so ironed it a few times to help.
- Zizzag the bottom hem of the panels as this is going to be attached to the skirt.


Attaching The bib
- Turn the skirt inside out with no elastic.
- Turn the breast panel over and stitch to the skirt along the seam line. Make sure you don’t go through you elastic channel.
- Turn the right way round and sew the top of the hem to the top.

Attaching the straps
- Cut the back of the remaining dress pieces across the back . I went from edge to under the armpit to get the most out of my fabric. I also kept the seams in from the sides of the dress to keep some length. You will not see these so don’t worry about it.
- Cut into two pieces. Try to keep it perfectly straight and straighten your edges as much as possible but recognise that the more you cut away the thinner the straps get.
- Place the right sides together and the stitch the joins; top and side leaving the bottom open for turning.
- Now fold the open end up ¼ inch and sew onto the back of the breast panel along the top.
- Now turn over dress and cross the two strap lengths. My straps were 20 inches long.
- You can then sew the ends of these to the skirt. This is good to do on the model as you can make a perfect fit.
- Leave the straps long and uncut {this is the hemmed end so don’t worry}


To Finish
- Thread the elastic through the skirt.
The Finished Dress
I found this a really simple project, it took an afternoon and really only thought about what to do as I made it.
The result is perfect for what we wanted, and teaming the dress with a classic pair of glitter red shoes really ties the outfit together!