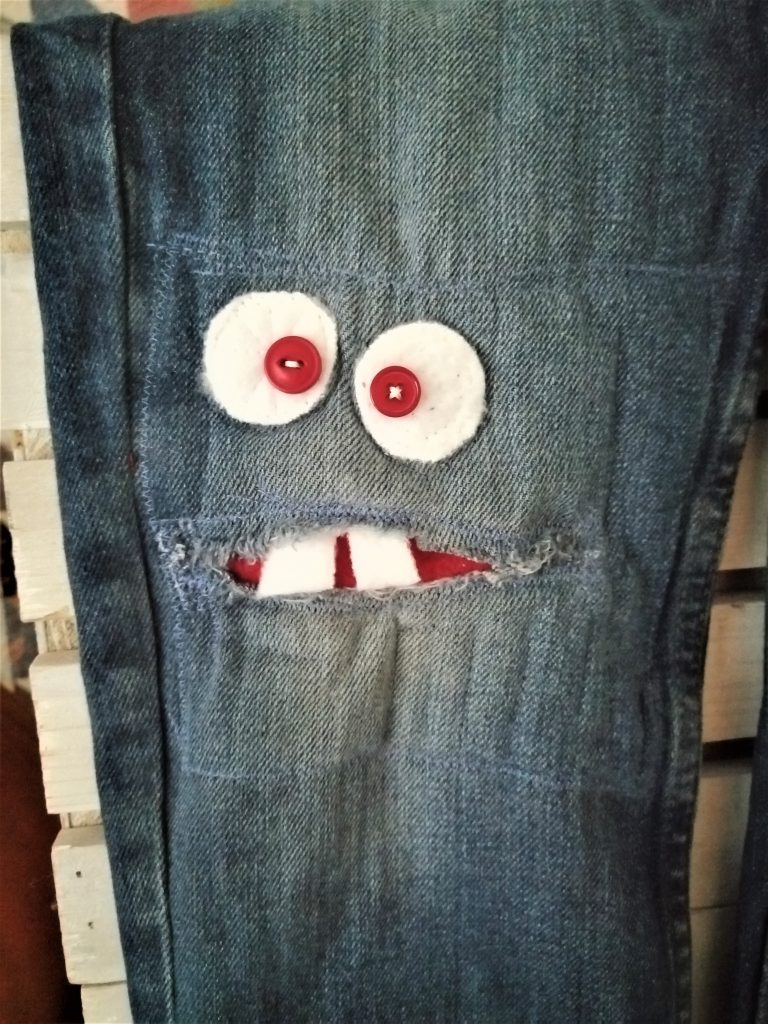
Monster Knees mending is one of my favourite forms of visible mending. Knees often seem to be the first part of a pair of trousers that need mending. My kids could get rips in the knees the very first time they put them on! Monster Knees mending transforms the hole into a monster mouth, that opens and closes as the child walks. It’s cute and quirky and the kids love it.

I discovered this idea on Pinterest. Visit our Just Jeans Pinterest board and get lots of ideas for monster knees and other forms of visible and invisible mending. Here, we’ll show our tips and tricks for monster knees mending.
What you’ll need and why
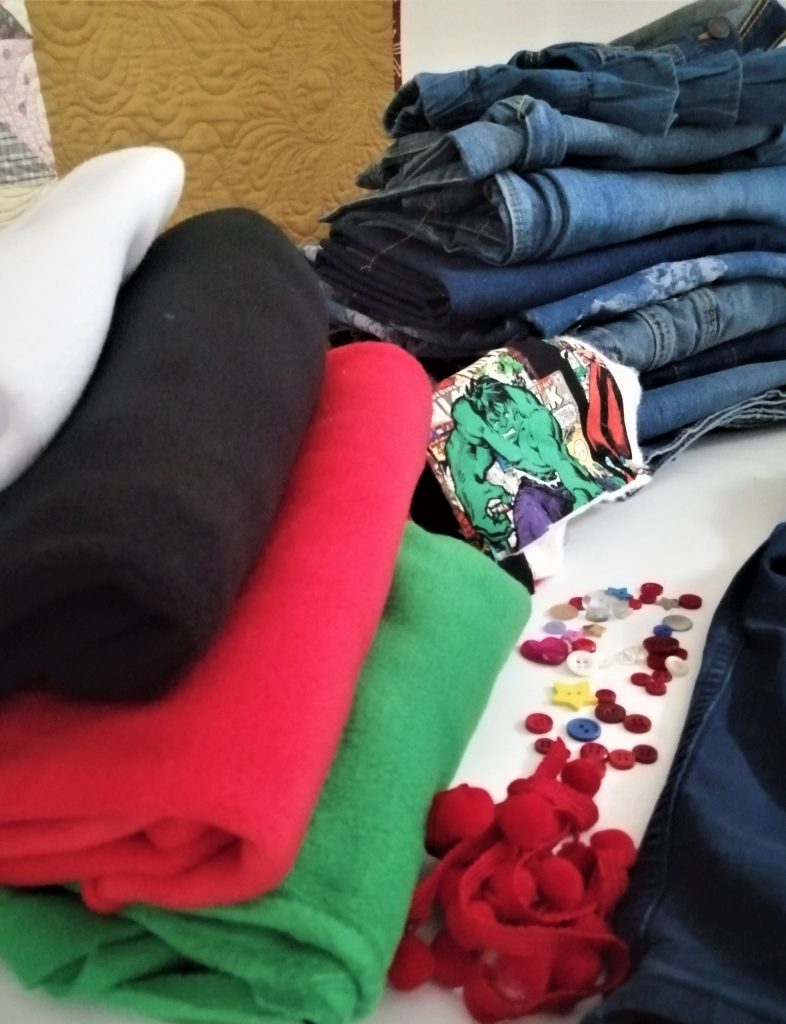
We’ve chosen materials for ease of sewing and comfortable wearing.
Fleece
Fleece is ideal for mending jeans. My favourite thing about fleece is that it doesn’t fray. That makes it work great for features like eyes and teeth. It is also soft and comfortable against the skin. Fleece has a bit of give in it which makes it flexible and less likely for the patch to pull away with wear. And “it’s machine washable, darling.”
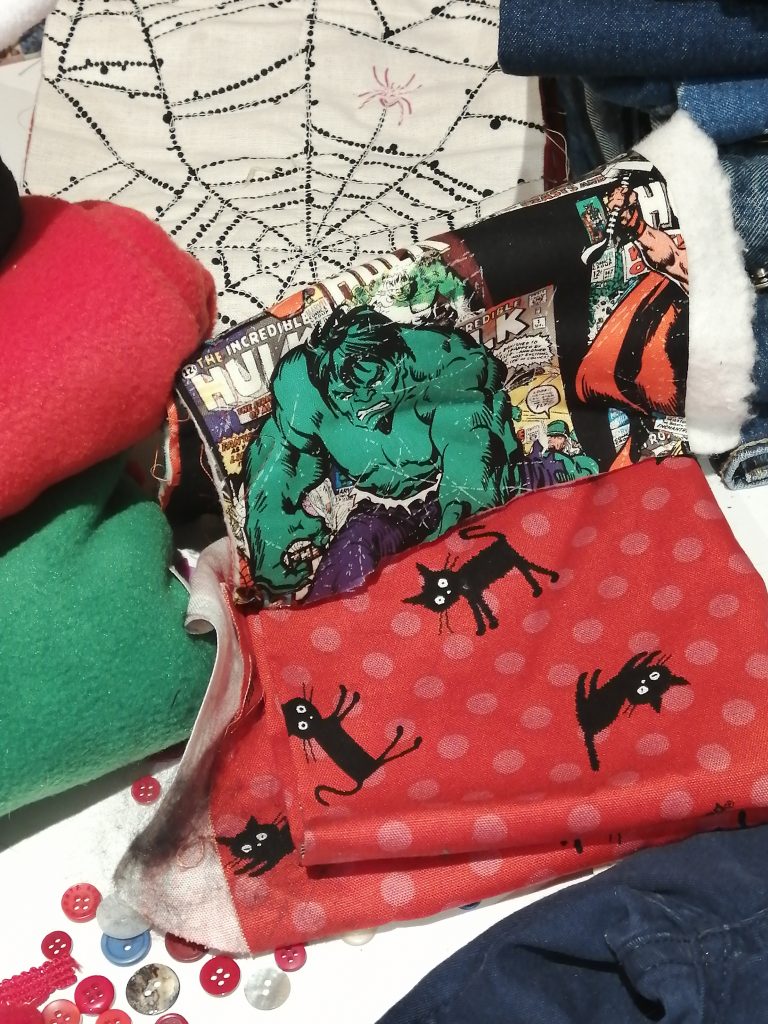
I use fleece as a backing on lots of my kiddie quilts, so I have plenty of scraps that I can repurpose for mending. It comes in lots of colours. I use white fleece for teeth. Red fleece as the mouth and tongue and various other colours for eyes.
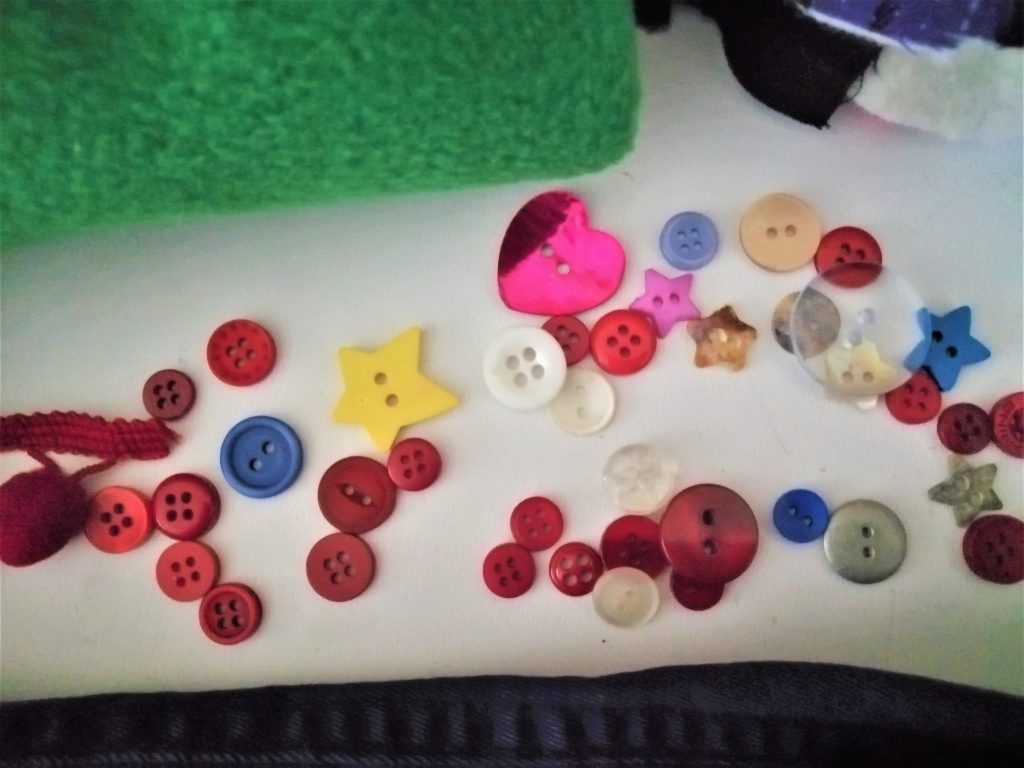
Buttons
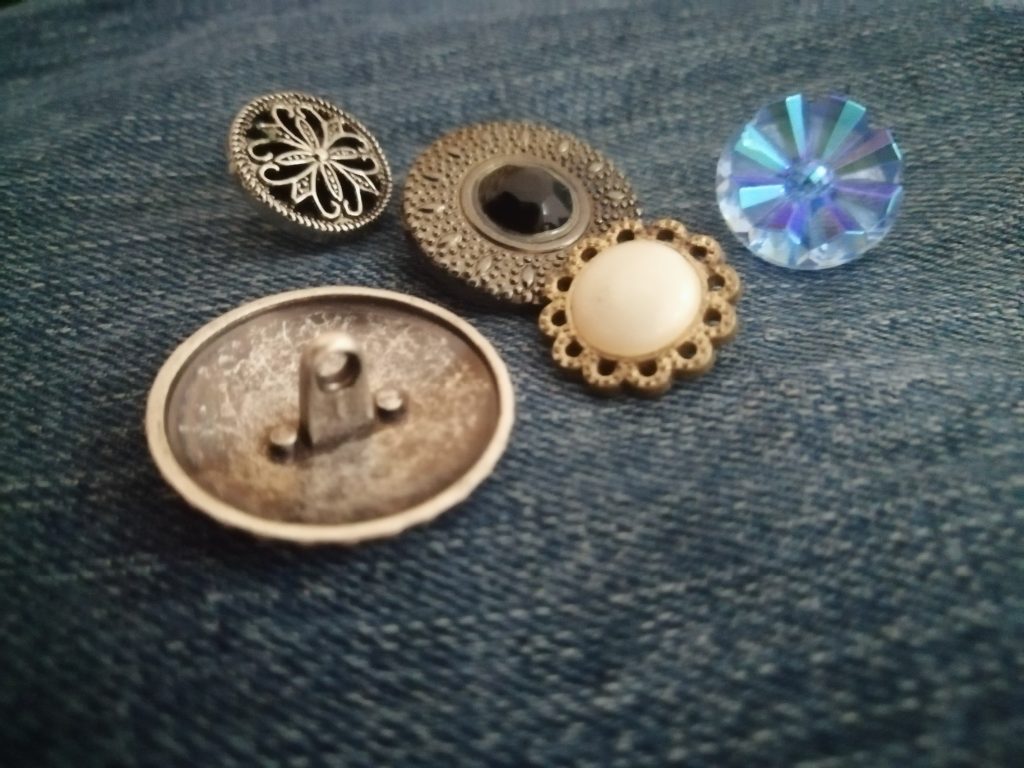
Raid your button stash for quirky buttons for the eyes. Avoid buttons with a shank on the back because the shank is uncomfortable rubbing against the knee. And if the children fall again, as they are very likely to do, the shank will be painful. Pom poms are a good button alternative.
Thread
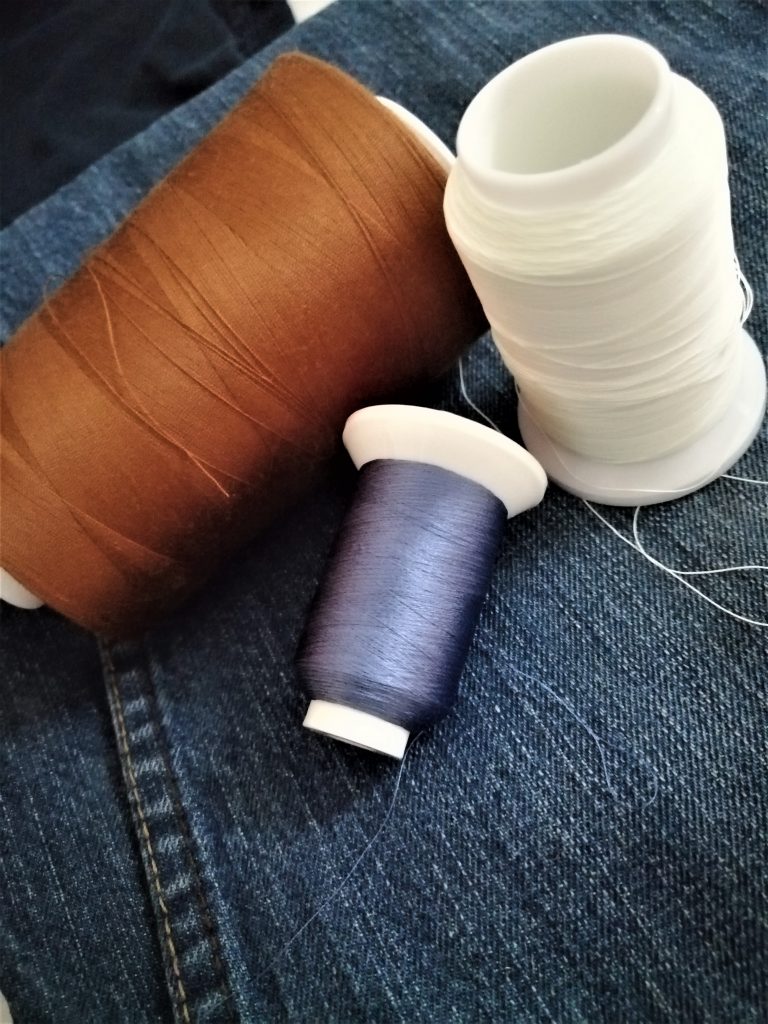
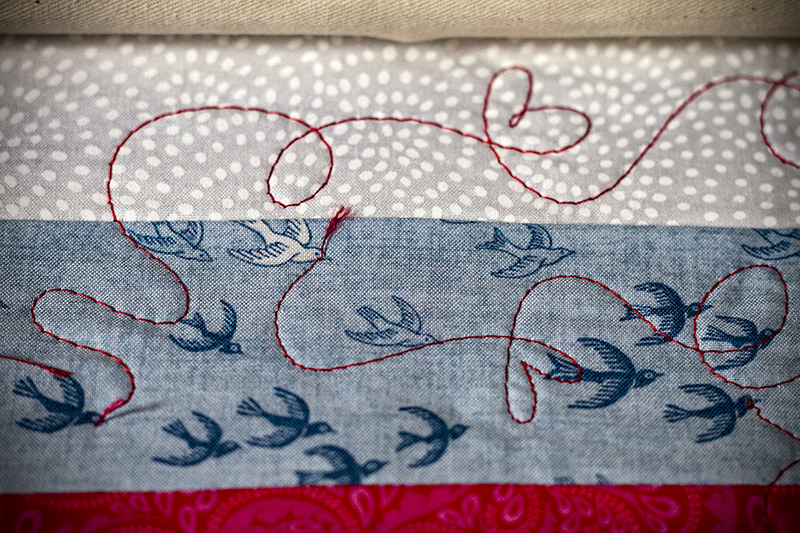
I love playing with thread. Sometimes I want it to blend in and other times I want it to stand out. In this project I’ve used a variety. There’s a beautiful Kimono Silk thread that blended perfectly with the jeans. I used a red thread to make bloodshot eyes and a white glow-in-the-dark thread. Finally I used some of the classic copper coloured thread that is often used for topstitching on jeans. All the threads that I used were threads designed for sewing machine use. But hand sewing threads or embroidery threads would work fine too.
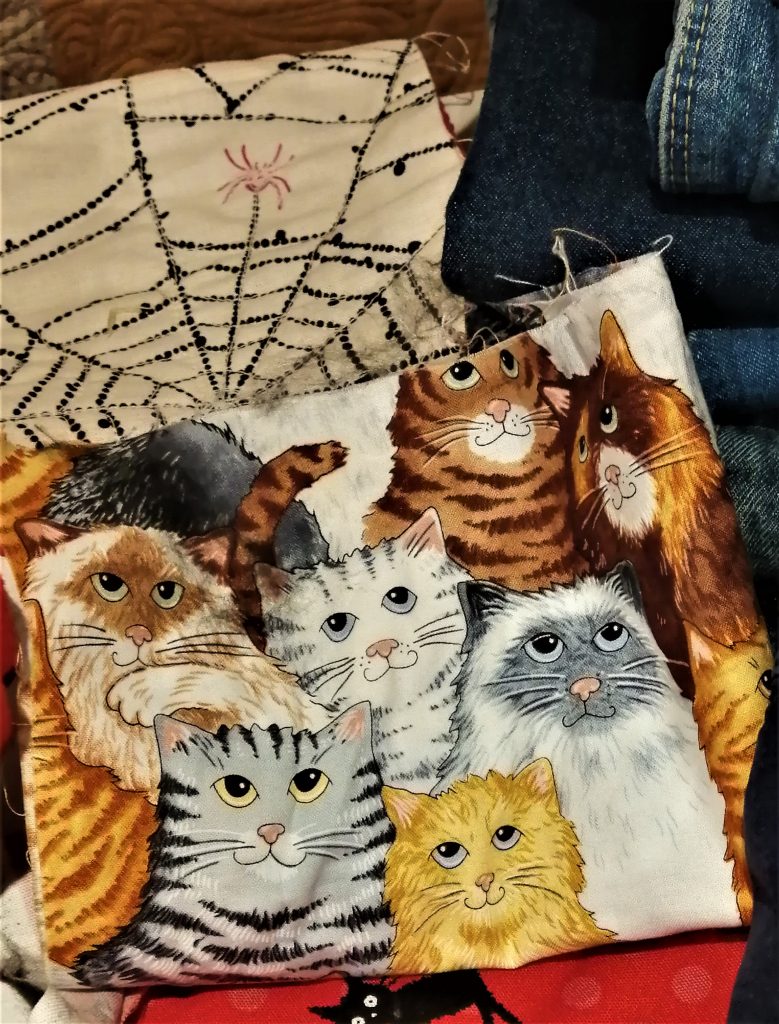
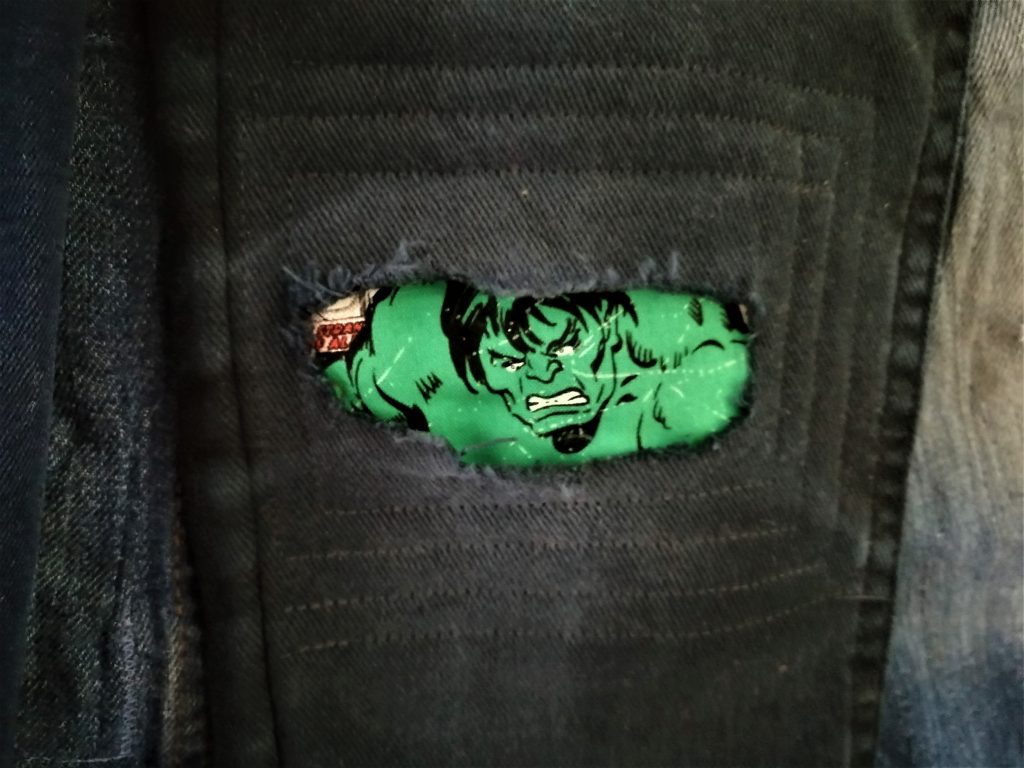
Fussy cut fabrics
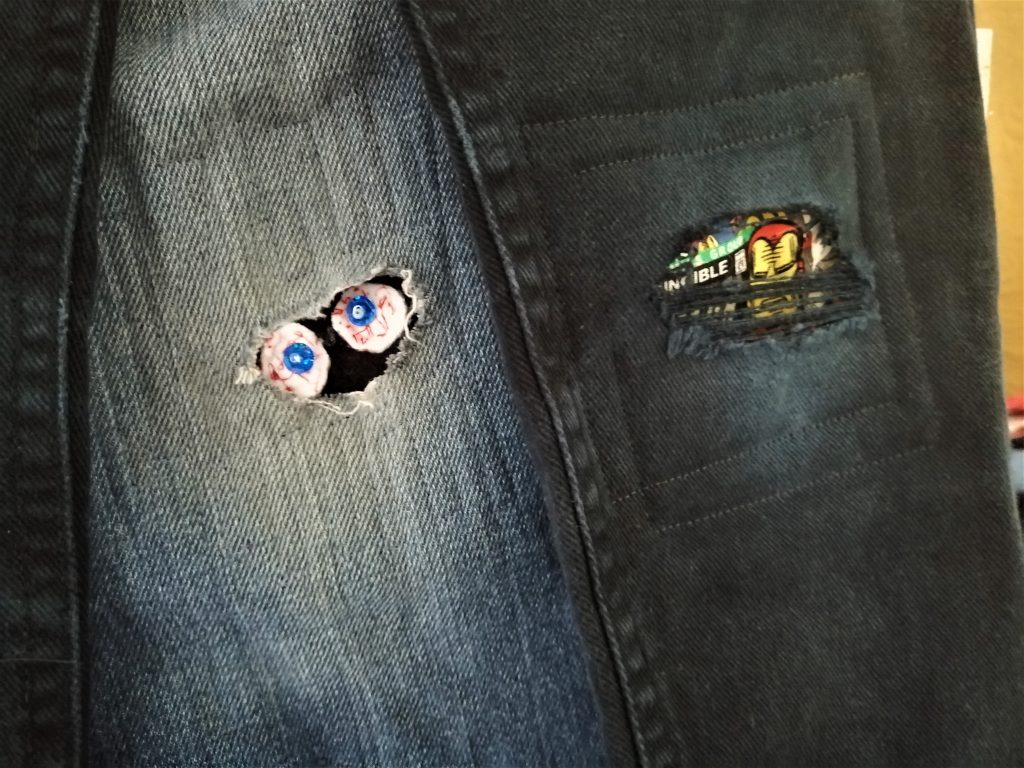
Instead of turning the rip into a mouth, you can use the rip as a window to showcase a monster motif printed on the fabric. The Incredible Hulk looks awesome coming through a rip in some jeans. I’ve got some pussy cat fabric that would look sweet peeking through a hole too.
General sewing supplies
Finally, you’ll need your sewing kit with hand needles, perhaps some glue and a sewing machine.
Mending by hand
The knee can be an awkward place to access for mending. So sometimes mending by hand will be easier. Monsters are messy so your stitching does NOT have to be perfect. Wonky is wonderful. Rustic stitching will give an authentic Frankenstein look to your monster knee patch. Check out our Juki Club Pinterest board for ideas about hand mending.
Mending by machine
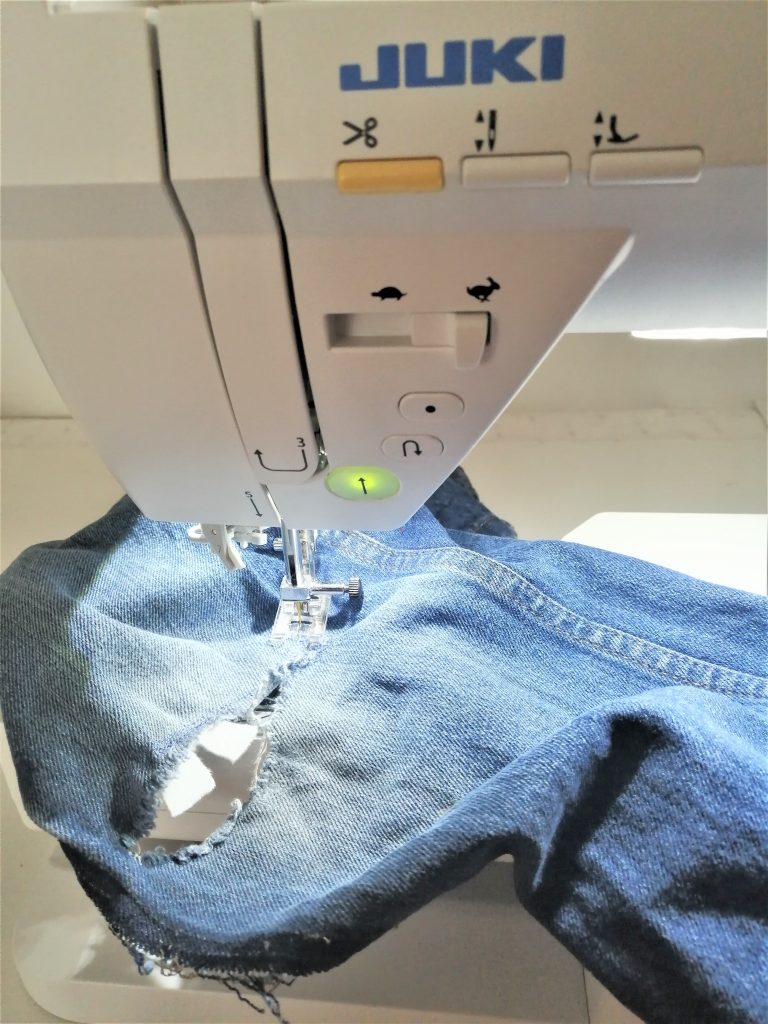
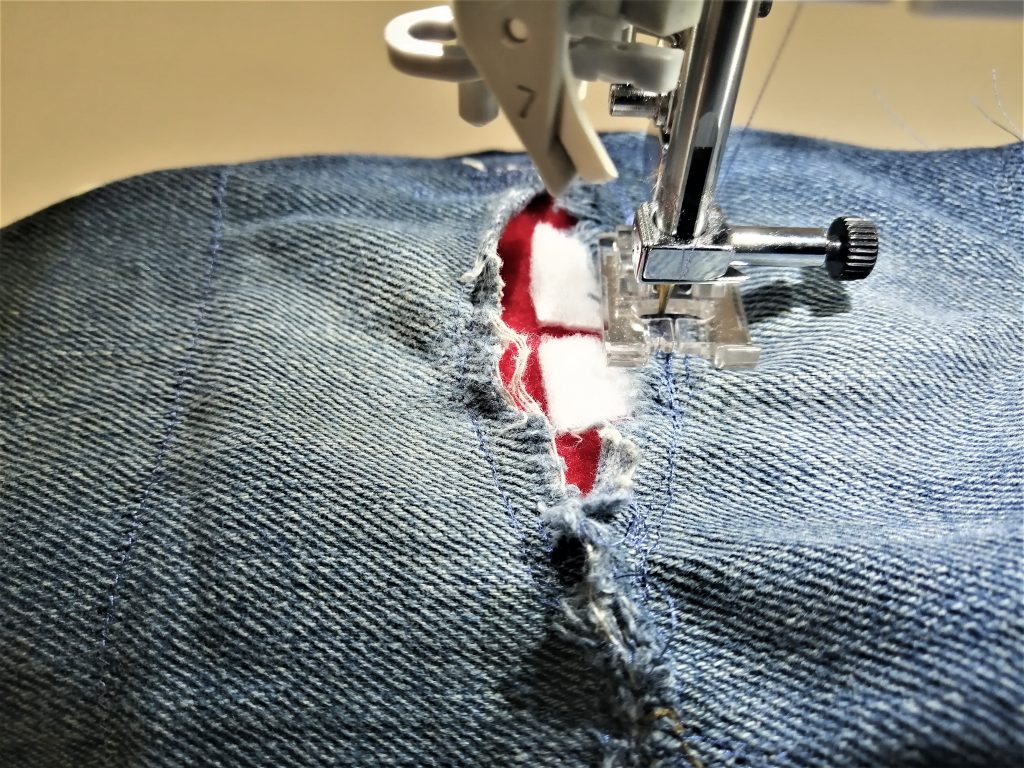
Time is precious and using a sewing machine is great for mending if you’re in a hurry and need a good sturdy mending job. I used the Juki NX7 for this project. I took off the extension table so that I could slip the trouser leg around the narrow base of the machine. Even so, I was still struggling to maneuver the fabric.
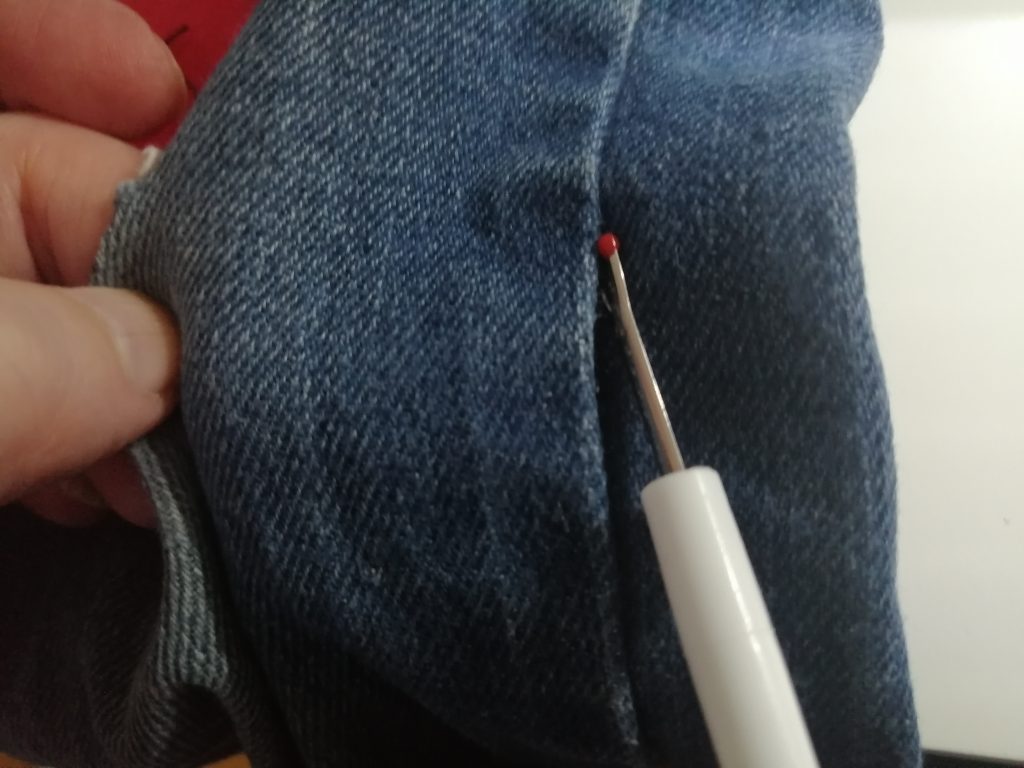
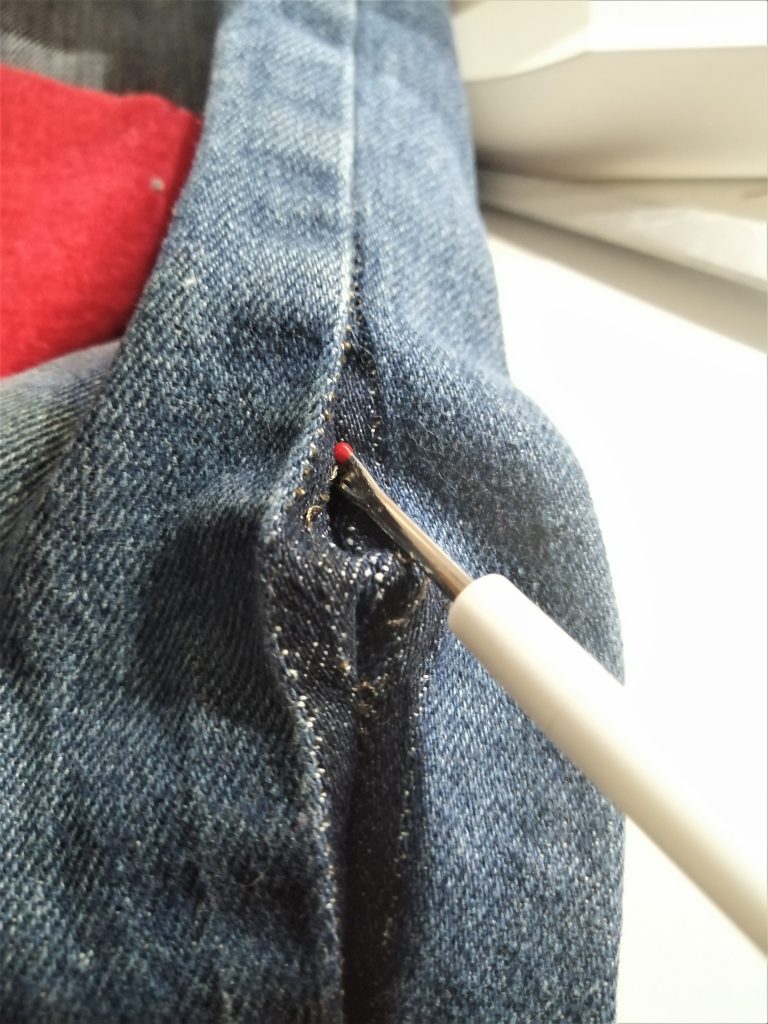
Creating access
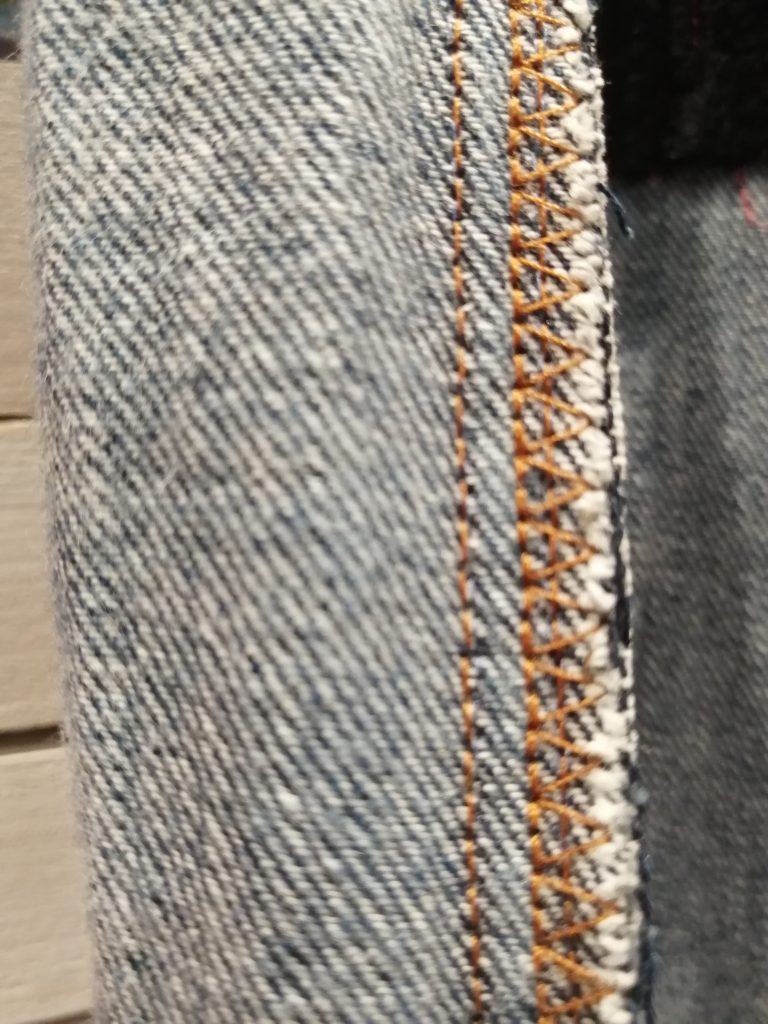
I solved the problem by unpicking the seam on the outside of the trouser leg. Not the whole leg, just the middle next to the knee. I unpicked about 8 inches in the middle of the leg. This way I could access the inside of the trouser leg more easily. This is particularly an issue with smaller sized trousers. Wider adult trousers would not present the same difficulty.
Adding the teeth and mouth
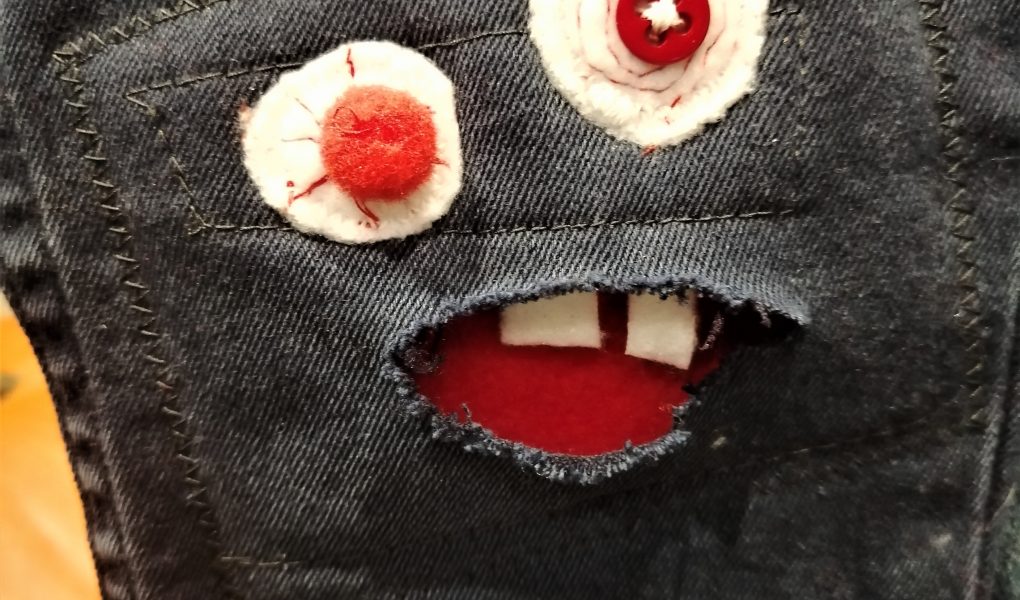
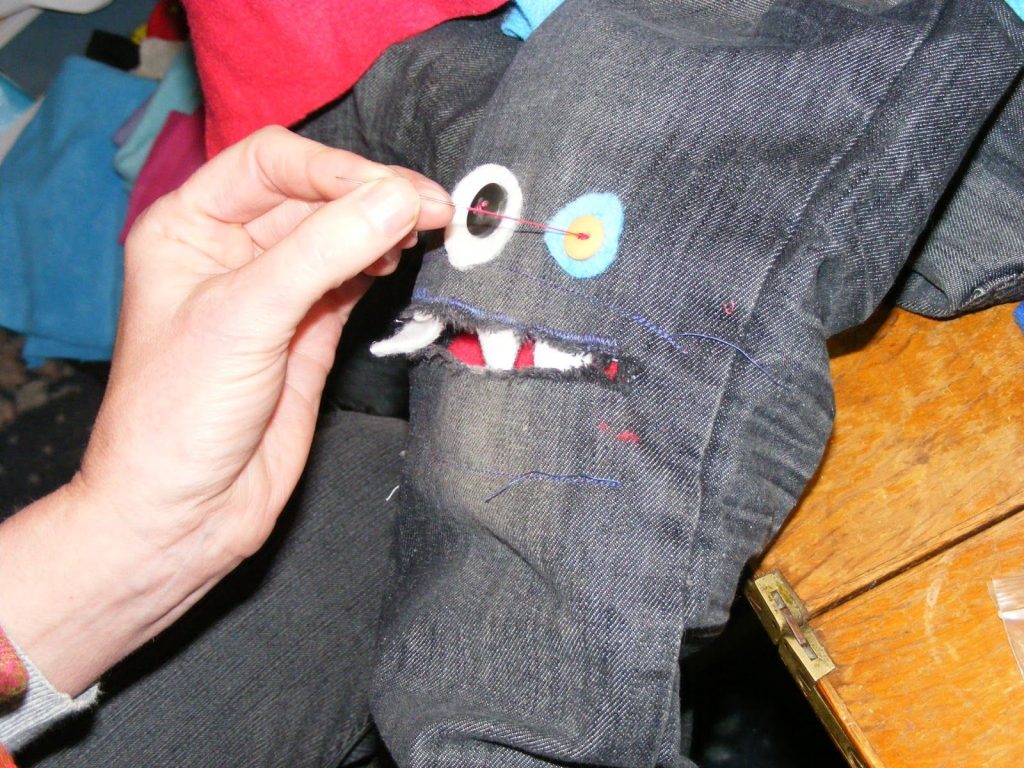
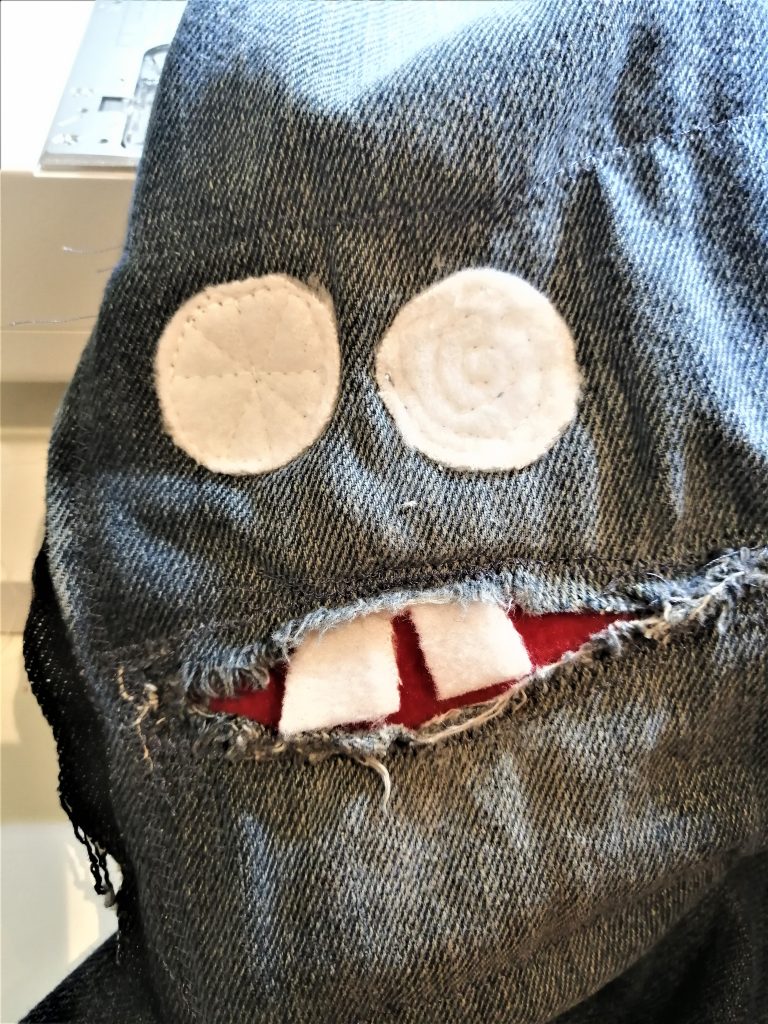
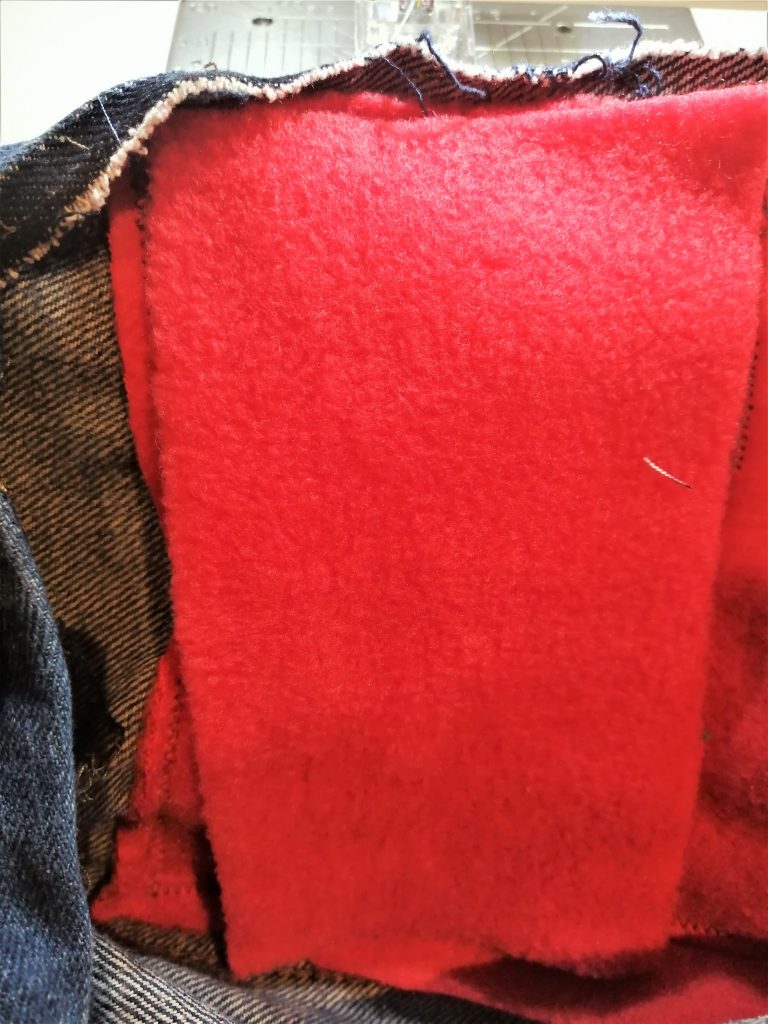
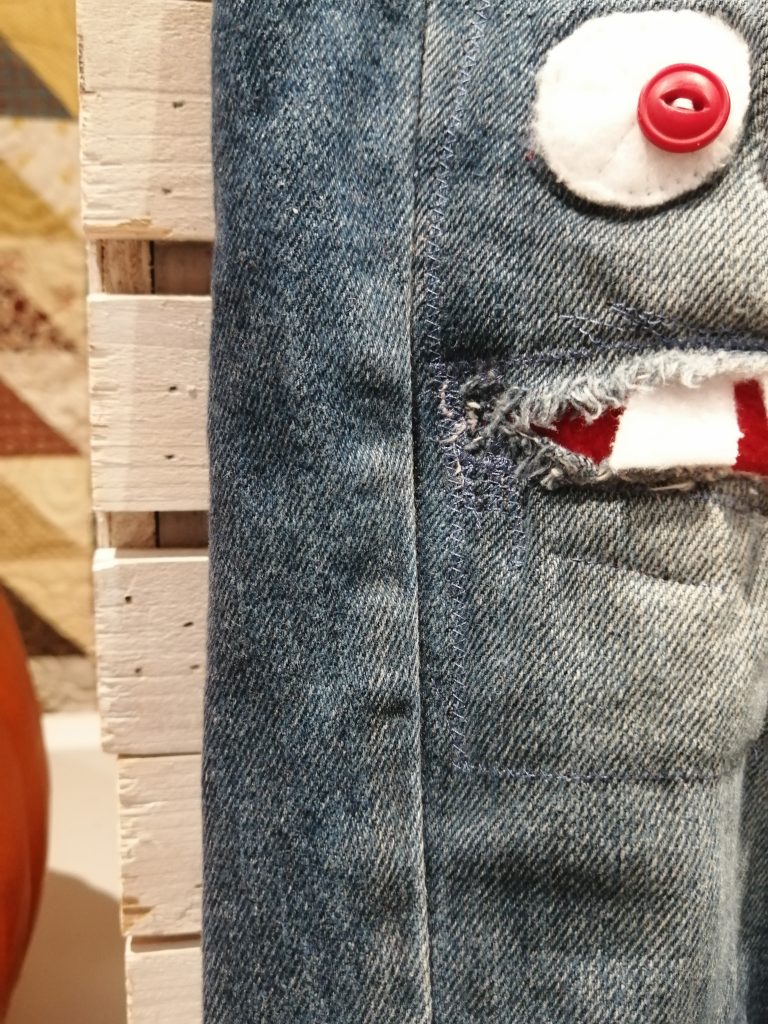
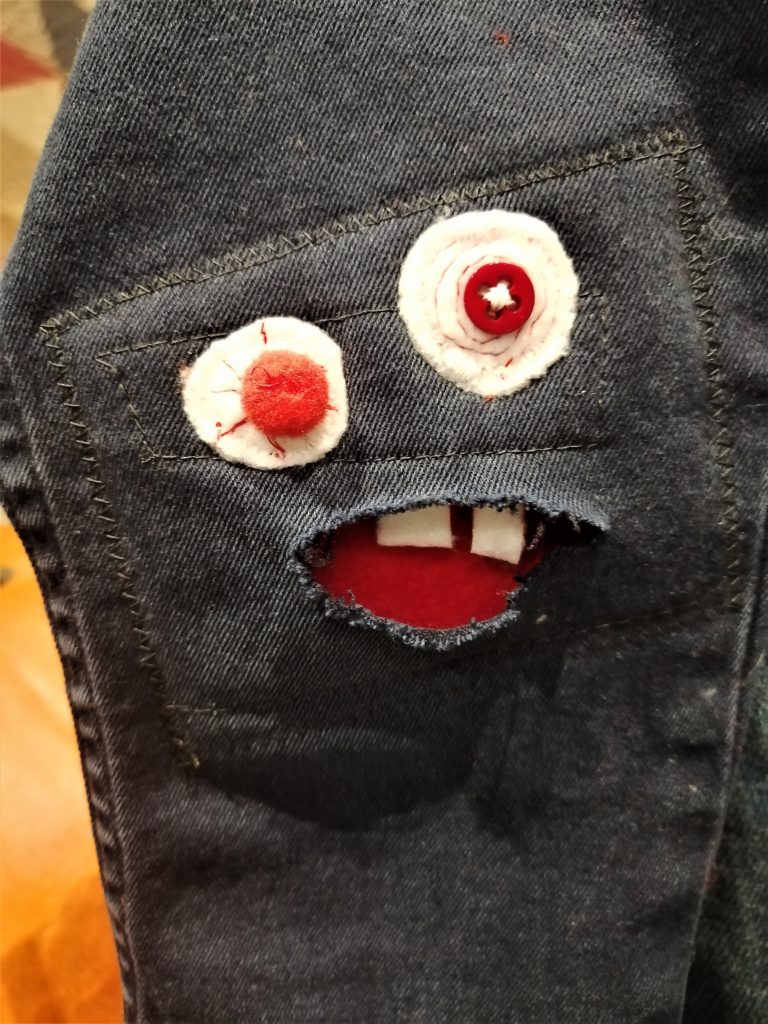
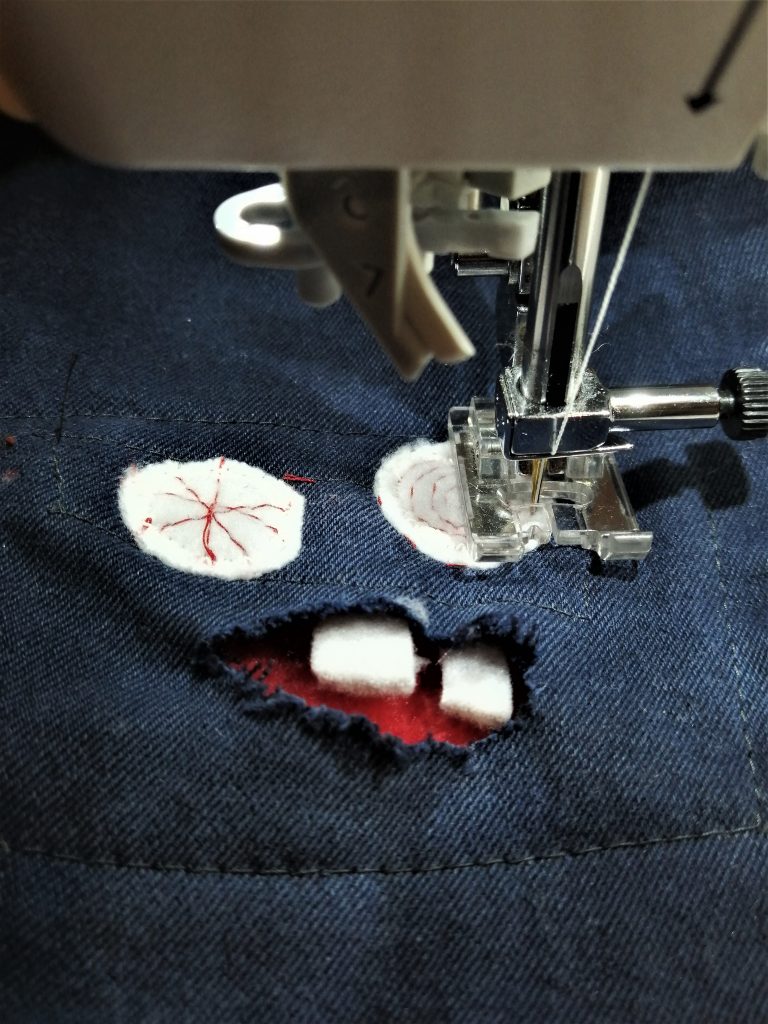
First I stitched a bit around the tear with the matching smoky blue thread to secure the fabric and keep it from ripping more. Then I cut out some teeth out of white fleece and stitched them near the top above the tear.
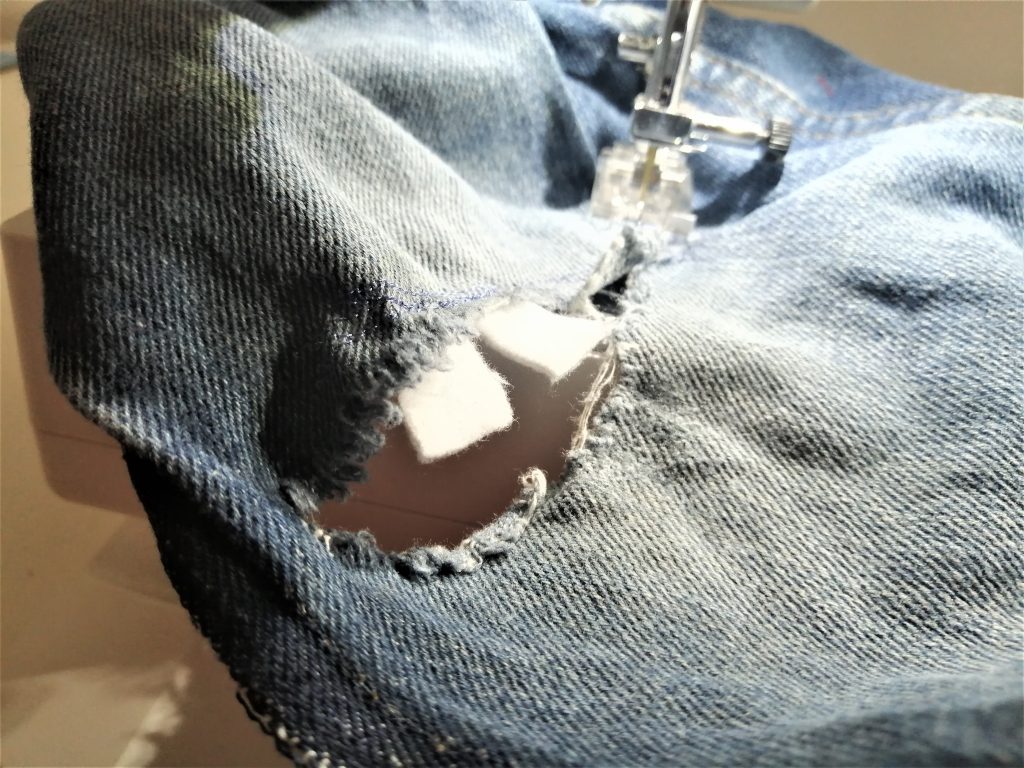
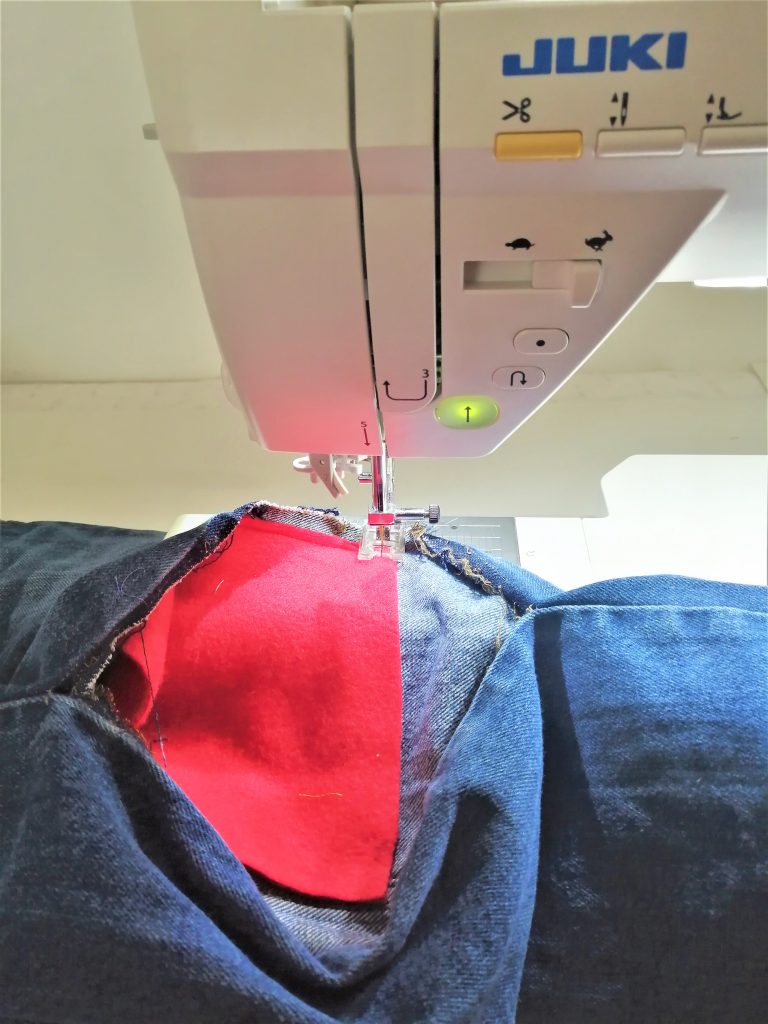
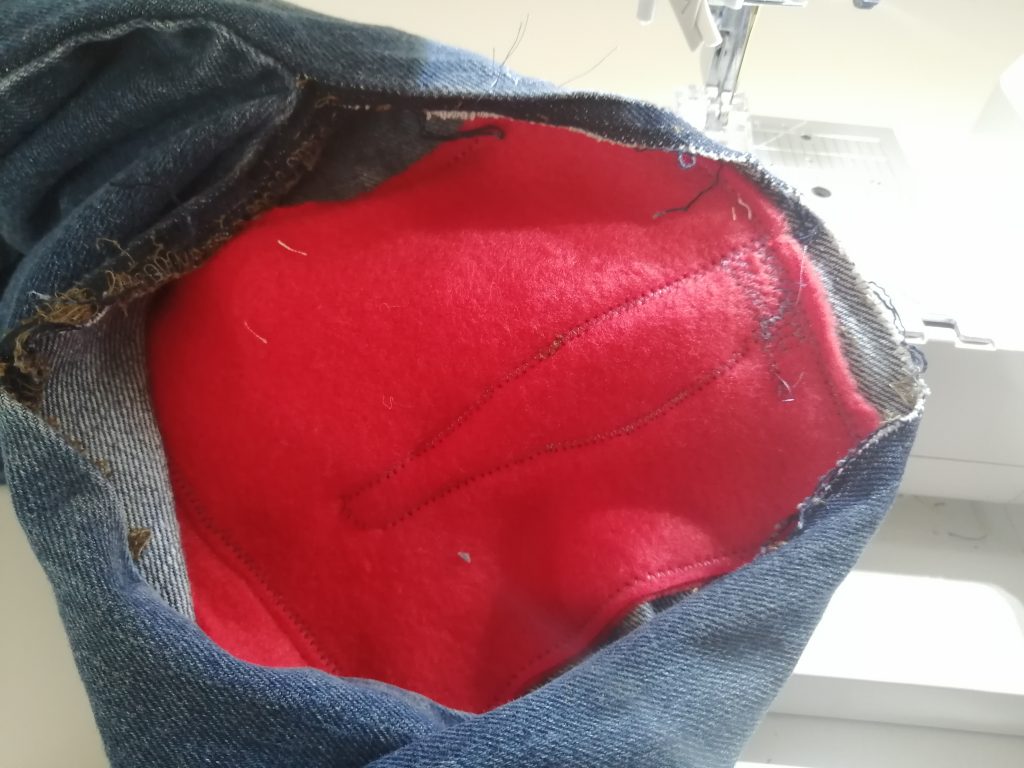
Next I cut a large patch of red fleece. This was going to be the inside of the mouth and I wanted it wide enough to go from the inside edge to the outside edge of the trouser leg. I wanted it tall enough to cover the entire monster face. The fleece patch patch is large enough so that I was stitching it onto non-ripped fabric. I positioned it so that the good side of the fleece was showing through the hole. Then I stitched the red fleece patch in place.

Adding the eyes
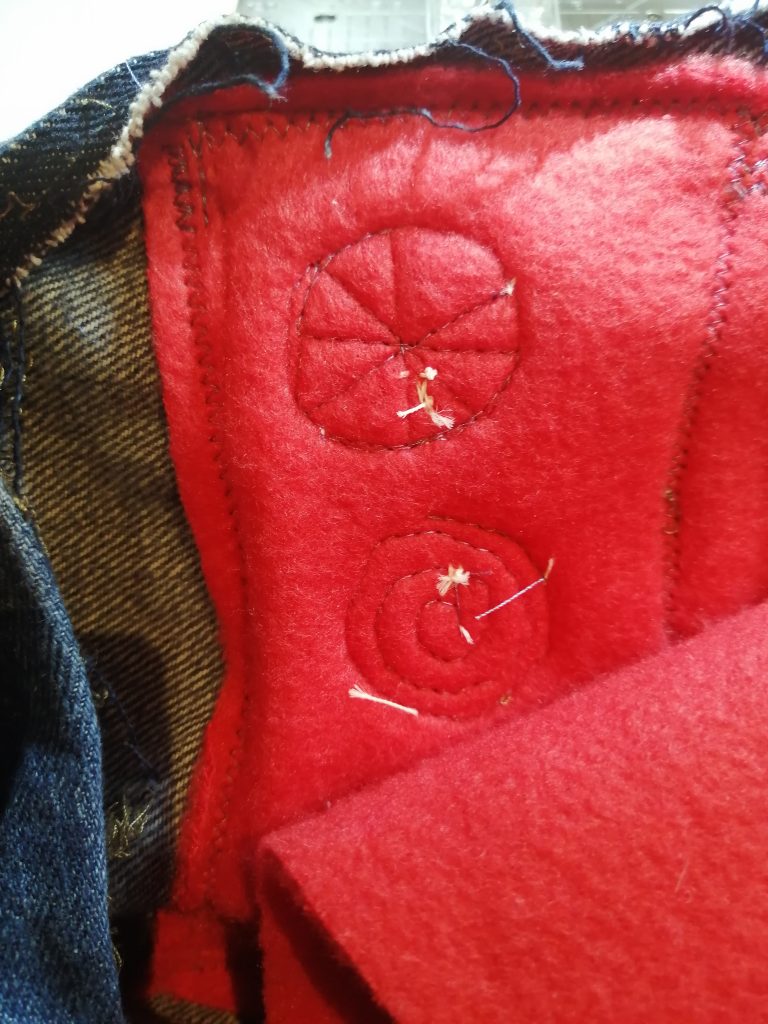
I used a combination of fleece circles and buttons for the eyes. I machine stitched the white fleece circles and added the buttons by hand. You can get different monster expressions by playing with the placement. As I mentioned earlier, avoid buttons with shanks. Use the buttons with holes instead or pom poms or even smaller circles of fleece in another colour.

Comfort zone
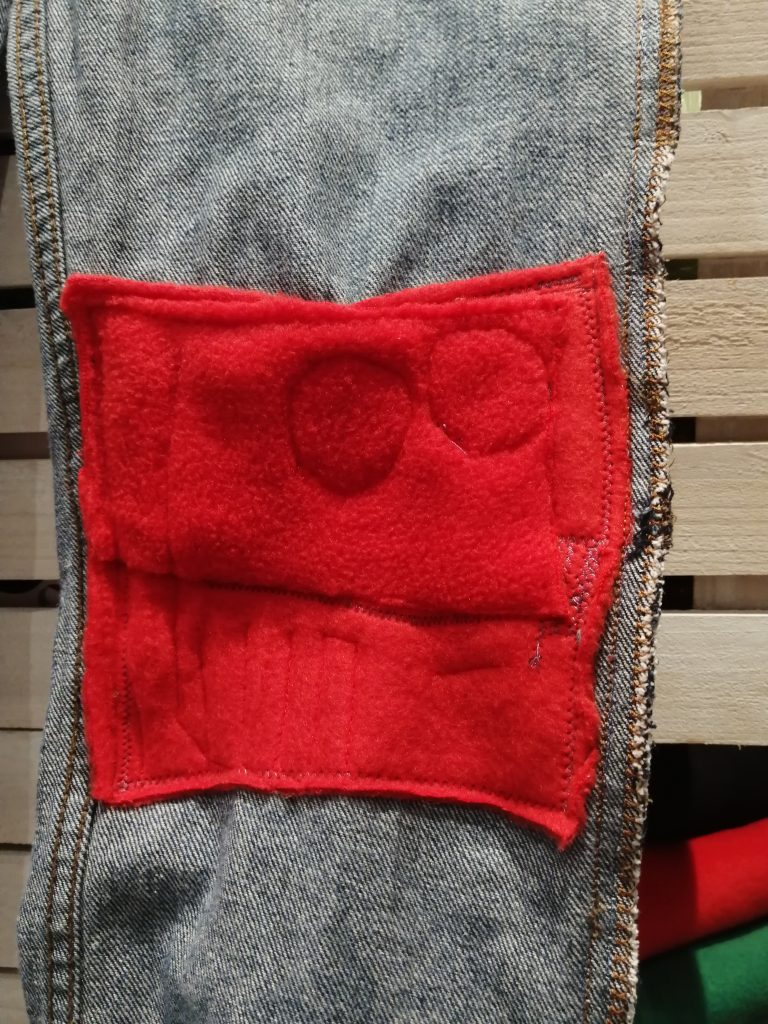
Finally, I added one more layer of fleece, mainly to cover up the hand stitching so it wouldn’t feel scratchy. Also the extra layer of fleece adds a bit of buffering between the button and the knee so it’s more comfortable the next time the monster hits the pavement!
Stitching the layers in place
Next I used the smoky denim blended thread to stitch the layers in place. I went around the eyes and up and down the patch to hold all the layers in place and create some interesting texture.
Closing up the access
Finally, all that was needed was to stitch up the outside seam that I unpicked to gain access. This time I was aiming for INVISIBLE mending. I carefully followed the original line, double stitched for extra strength and used a special stitch that looks like an overlocking stitch to tidy up the edges. The jeans leg looked as good as new. Even better!
Variations on a theme

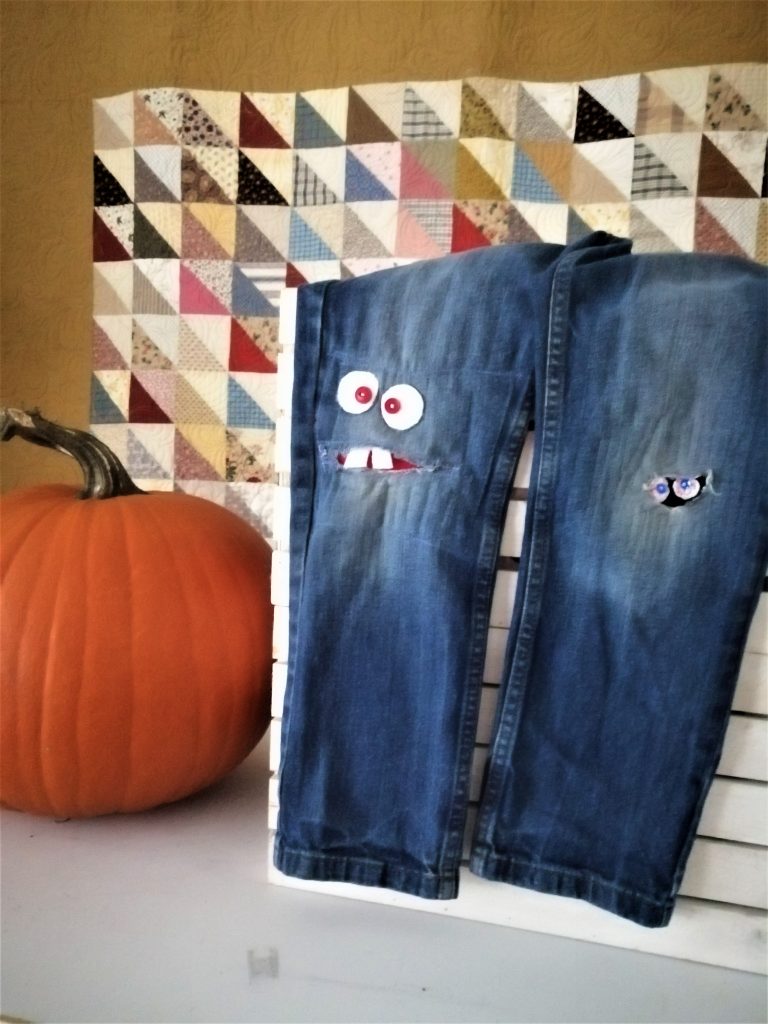
For the other knee, I used black fleece and free motion quilted some bloodshot eyeballs peeking through. Once you get going you’ll begin to look at tears and rips in terms of the kind of monsters that you can create.

Tips and tricks worth remembering:
- have fun, monsters are messy
- use fleece – it won’t fray, washes great and feels cuddly
- enter the knee through the side seam, it’s quicker
We hope you’ll be able to apply these tips and tricks to your next mending project. It’s a fun half term project to do with kids. If they’re too small to sew, they can help to draw the monster face or hand stitch the eyes. Make your little monsters happy with Monster Knees Mending!
Martha’s little monsters are all grown up and some have little monsters of their own. But they still remember the monster knees. These monster knee jeans are heading off to family friends.