Send some love! Make Mother’s Day postcards. Here in the UK Mother’s Day falls on Sunday 10 March 2024. Most of the rest of the world celebrates Mother’s Day in May. Whatever the date, send some love with these pretty fabric postcards. It’s a fast and fun little project that could make someone you love very happy. Straight line quilting with pretty thread is a simple way to make most fabric come to life. These postcards have just that extra special touch with personal notes and quotes printed on Photo Fabric and stitched to the postcard. More about that later.
What you need
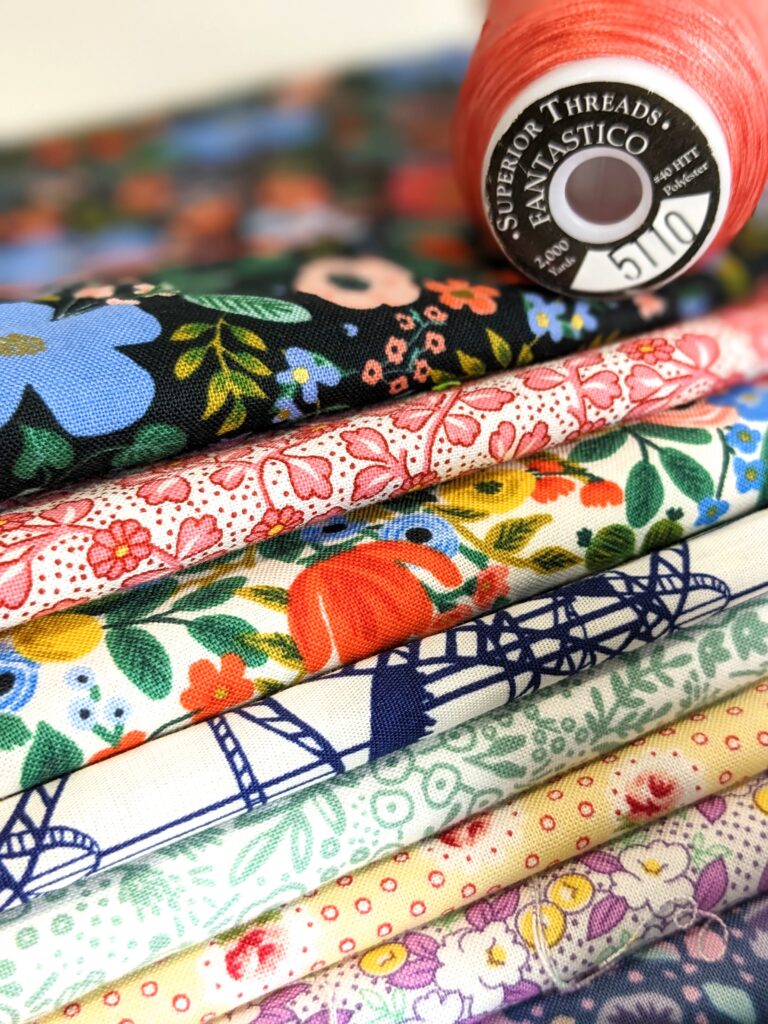
- Pretty fabric – I used pretty florals and retro fabrics.
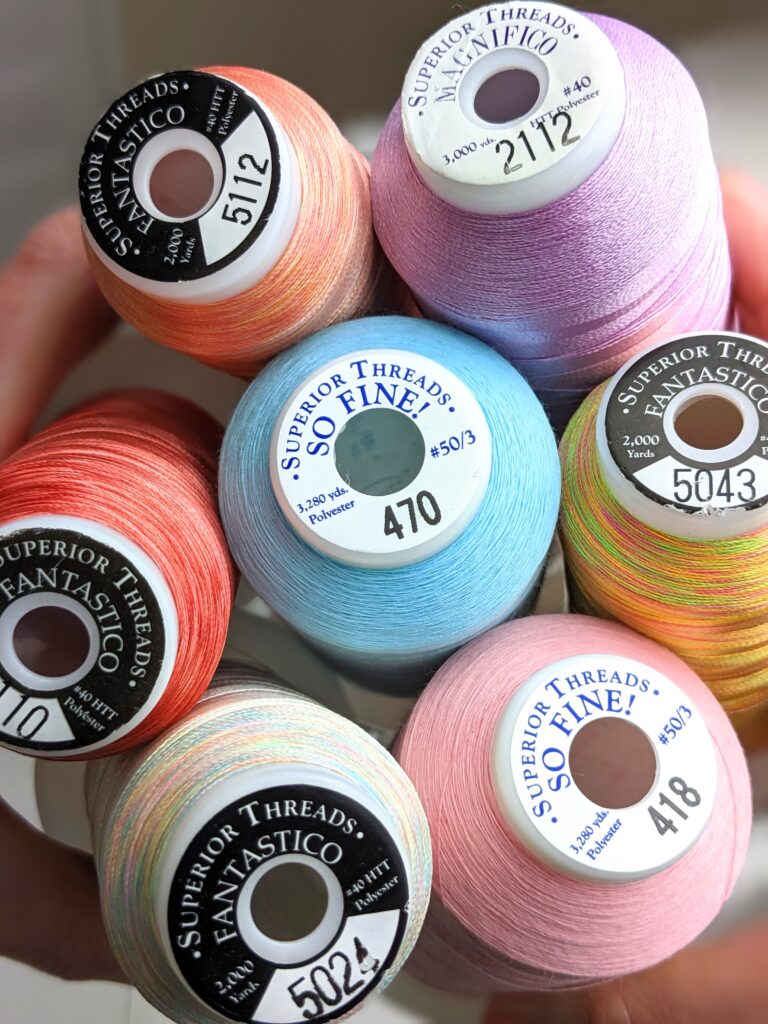
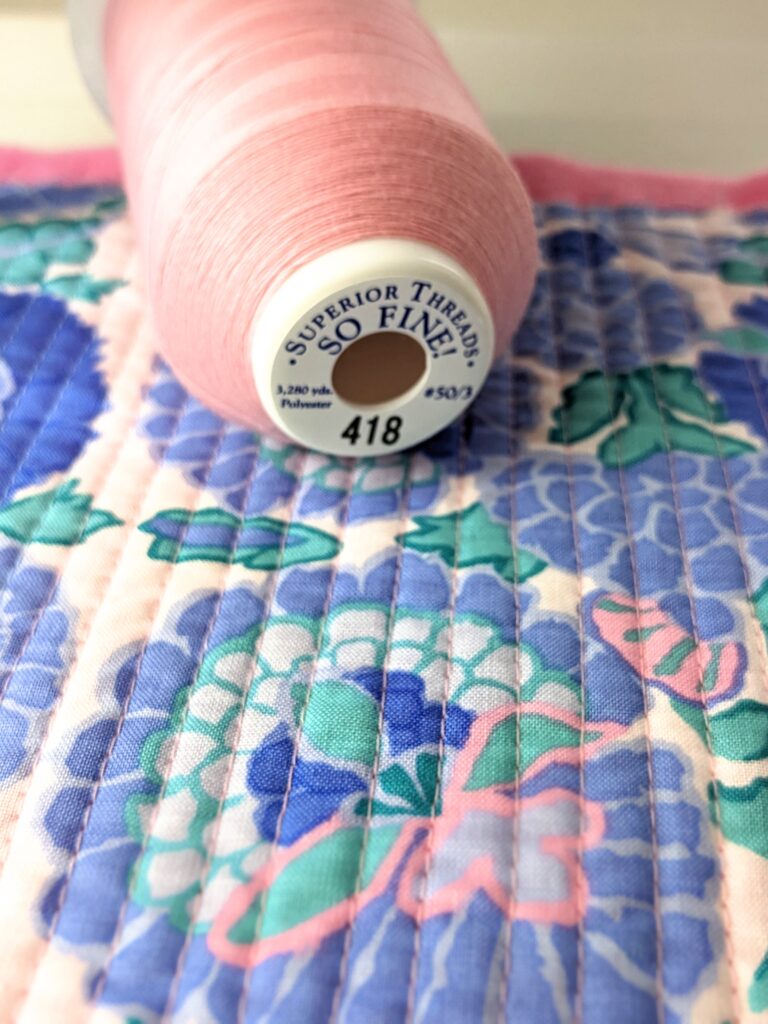
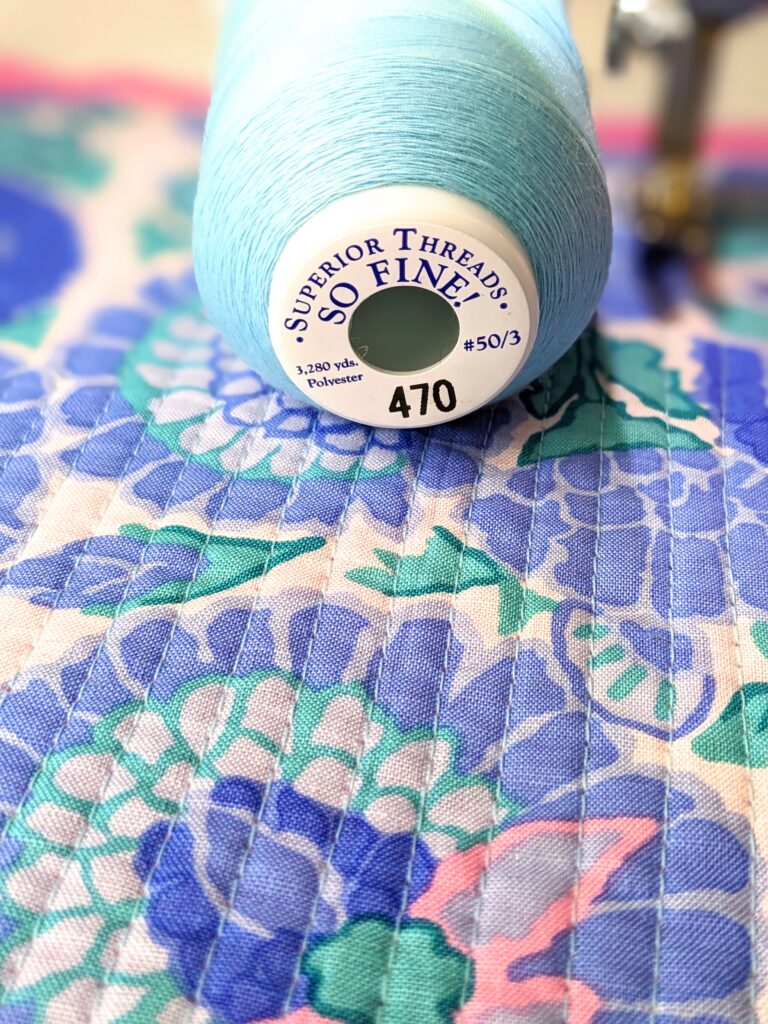
- Fun thread – Audition the threads first against your fabrics and see what you like best. My favourites are Superior Threads available here in the UK from Barnyarns
- 100/16 Titanium coated Topstitch needle – you can thank me later
- fleece, felt or wadding
- Photo Fabric – available from Amazon. It’s a paper-backed cloth that you can use with your computer printer.
- card postcard backings – there’s a nice selection of postcard backing at the Free Stuff section on the Machine Quilter website.
- a sewing machine that does a straight stitch and a zigzag
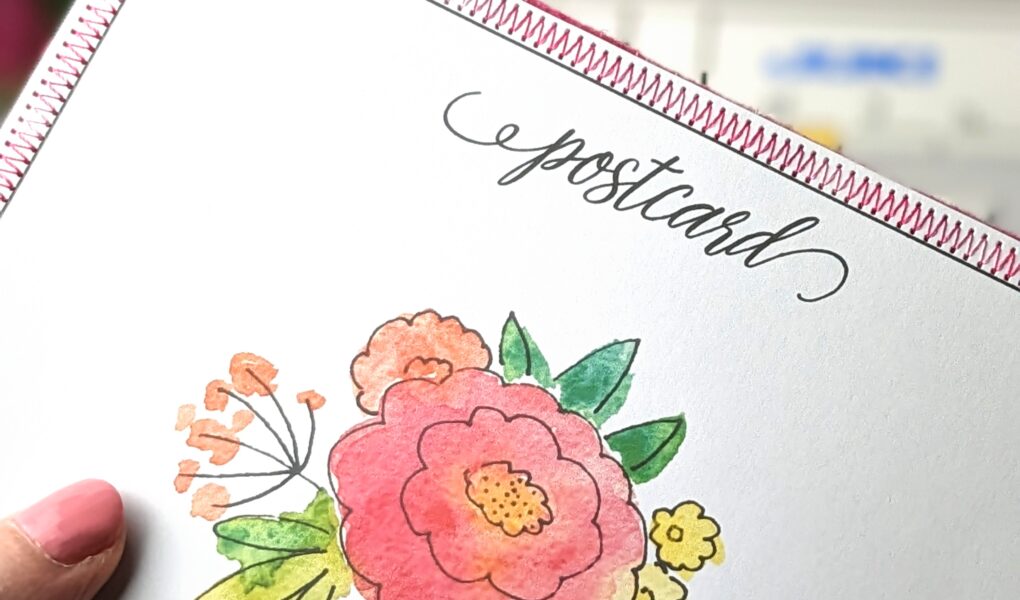
- Pretty stamps

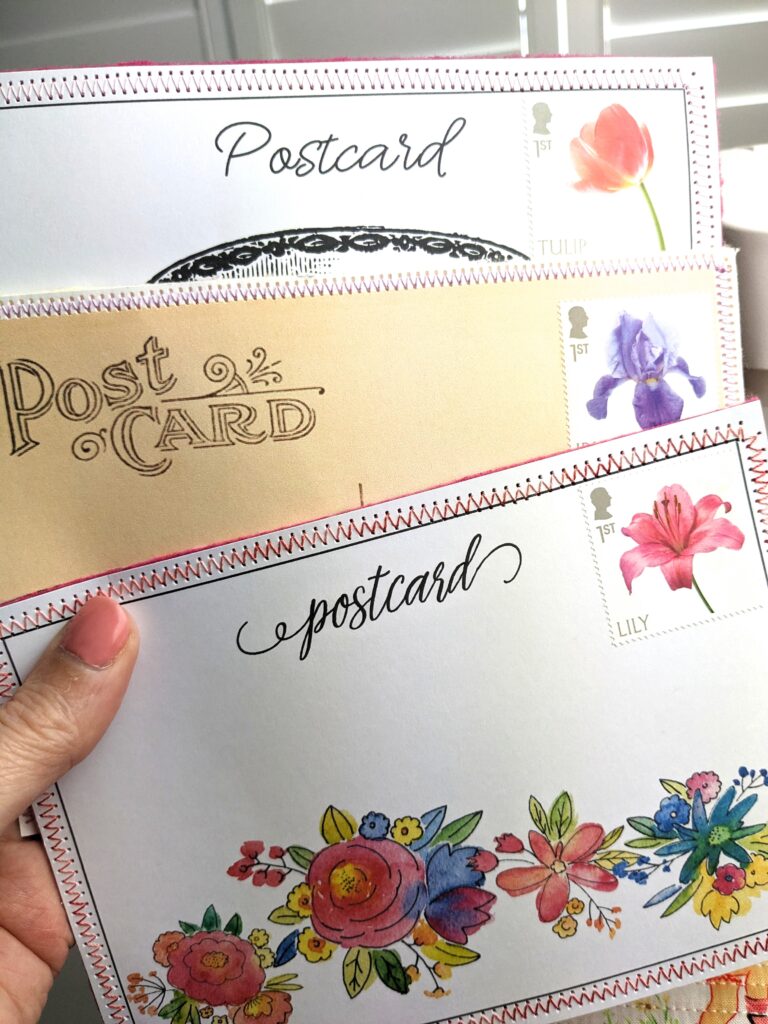
Download the postcard template
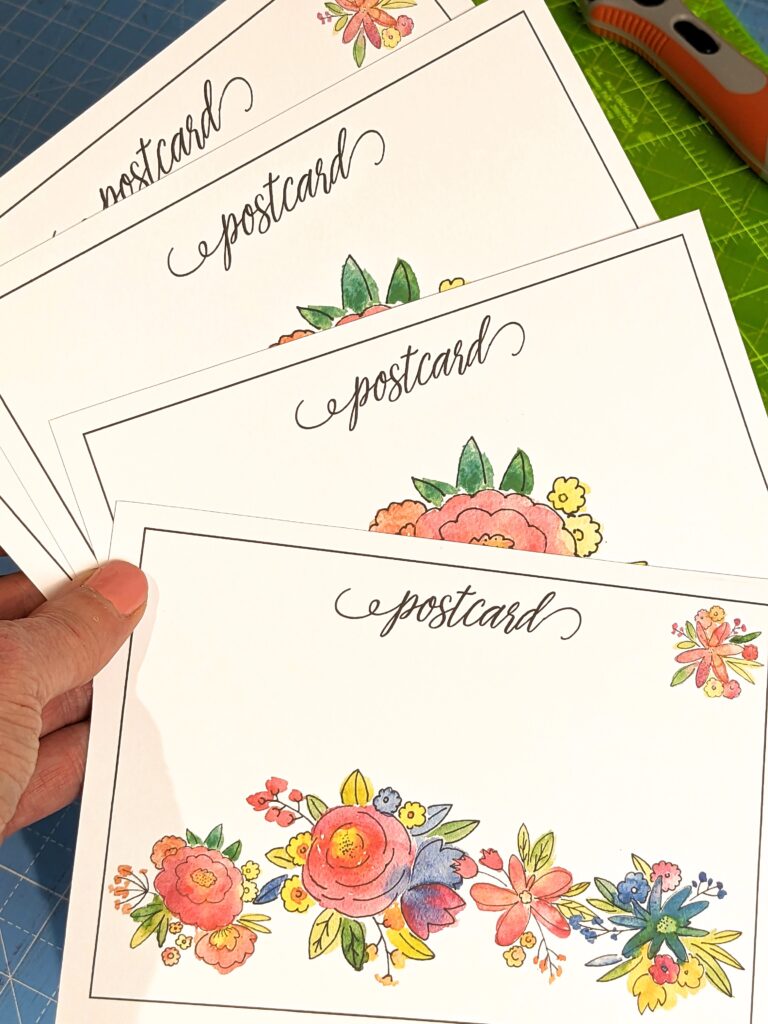
Begin with the postcard backing. You are going to use this as a template. You can make your own postcard backing out of card. Or you can hop over to the Free Stuff section on the Machine Quilter website and download pretty free-to-use postcards to your home computer. Get some white card stock and print them out. Avoid the glossy photo paper because it’s hard to write on. Use a mid weight matt card around 250 gsm.

Be sure to print them actual size. Then you can cut them out. A rotary cutter and ruler works beautifully. Leave about a quarter of an inch around the outside of the black line. That will be just enough space for zig zagging later.
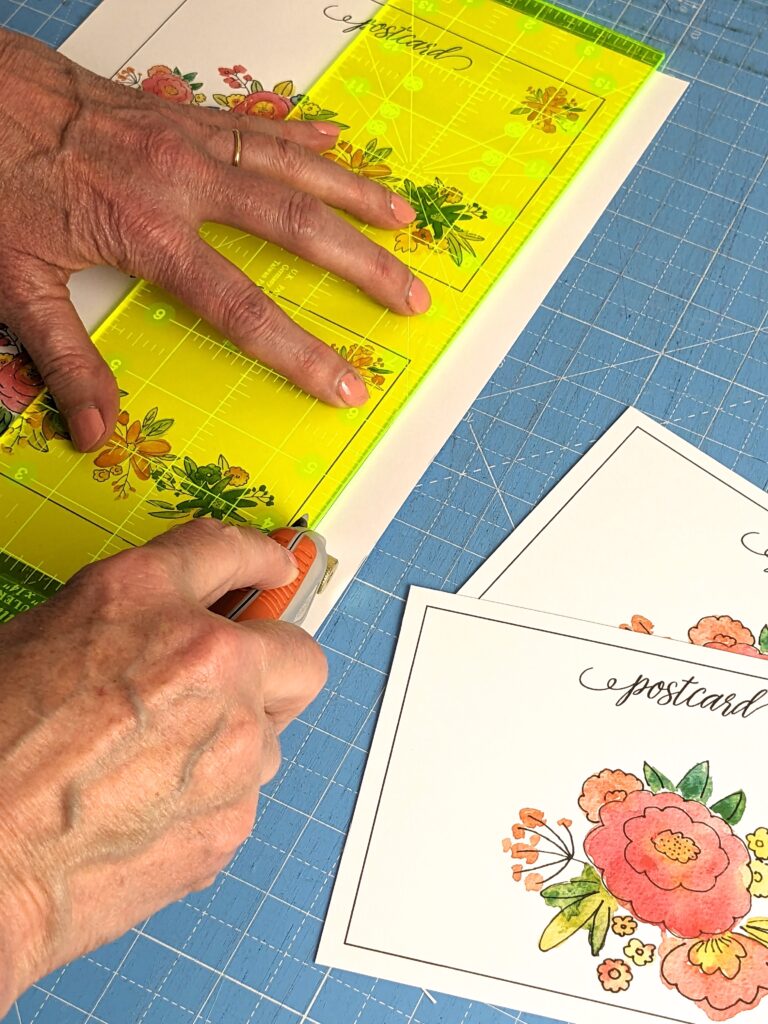
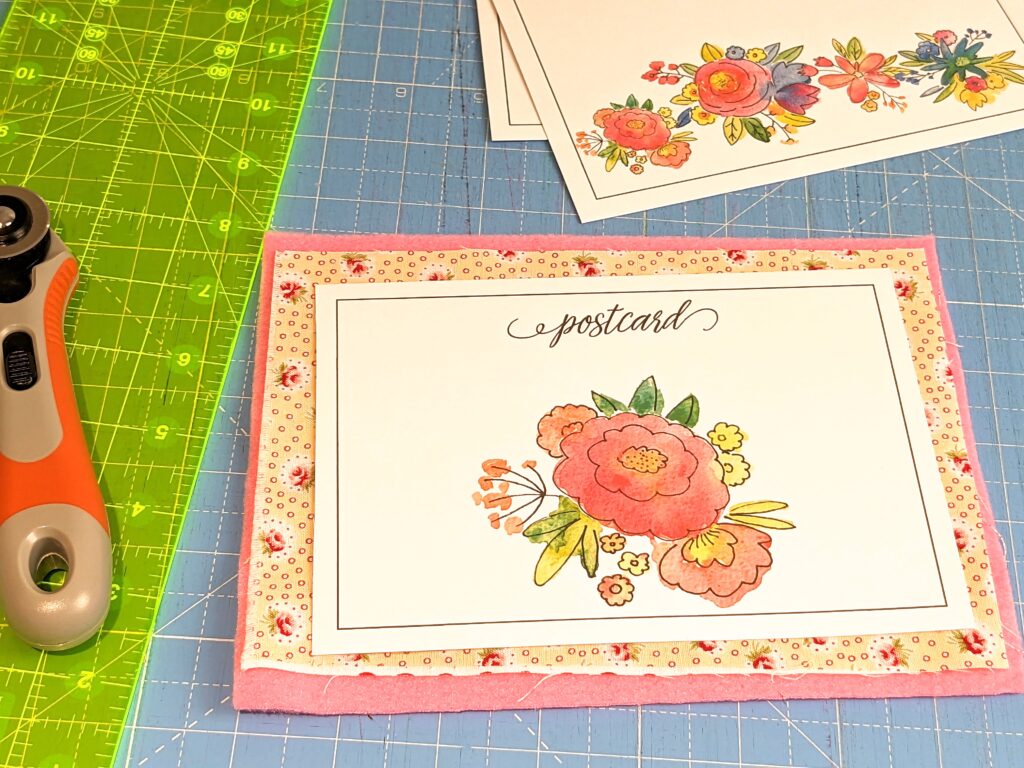
Once you’ve cut out your postcard backing you can use it as a template. Cut out your pretty fabric and the fleece or just a bit taller and wider than the postcard template. I prefer fleece or felt for this job as it doesn’t ravel.
Straight line quilting
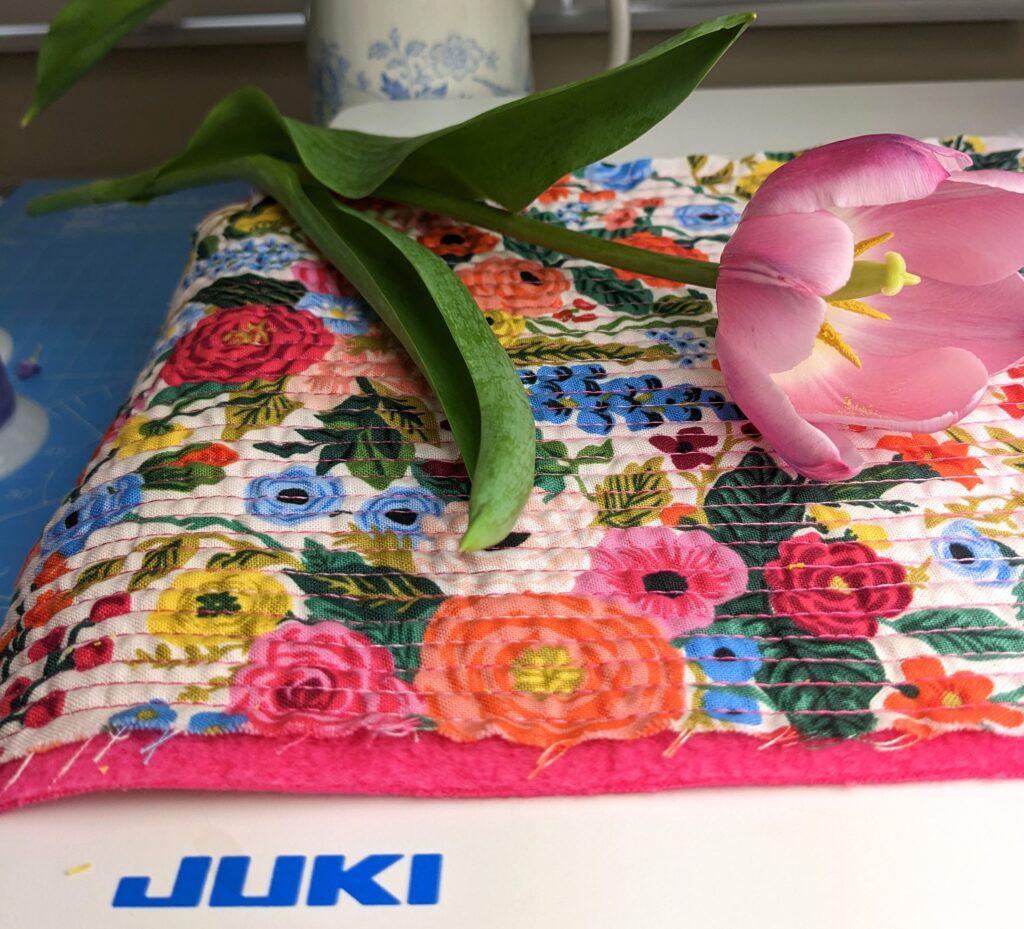
True confession. I absolutely love the look of straight line quilting. It adds a folk modern touch to any project and it can be accomplished on any sewing machine. I would struggle do it on a whole quilt. But on a little project like a postcard it’s PERFECT!
Auditioning thread
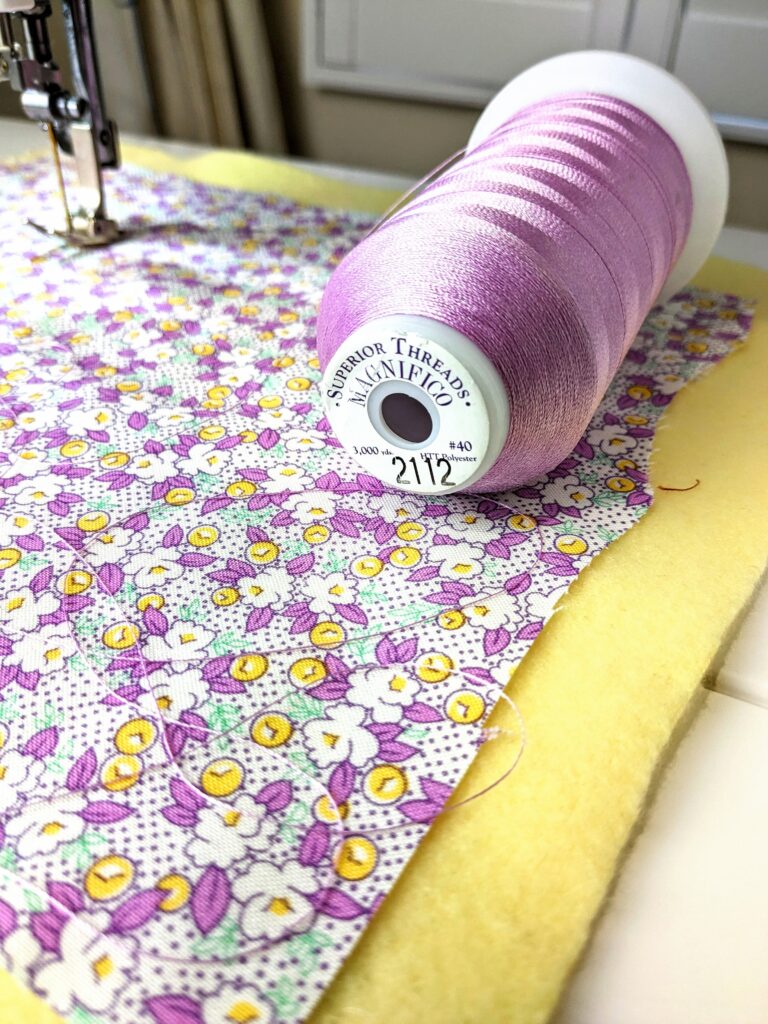

Once you’ve used the card postcard backing as a template, put it to one side. Bring your fabric and fleece rectangle to the sewing machine. Choose your thread. Take a bit of time with this. Audition the threads by laying a single thread against your fabric. Choose one that makes you happy.

Auditioning threads is one of my favourite parts of quilting. Notice how different thread does make a subtle difference.
Getting Ready
Set up the sewing machine
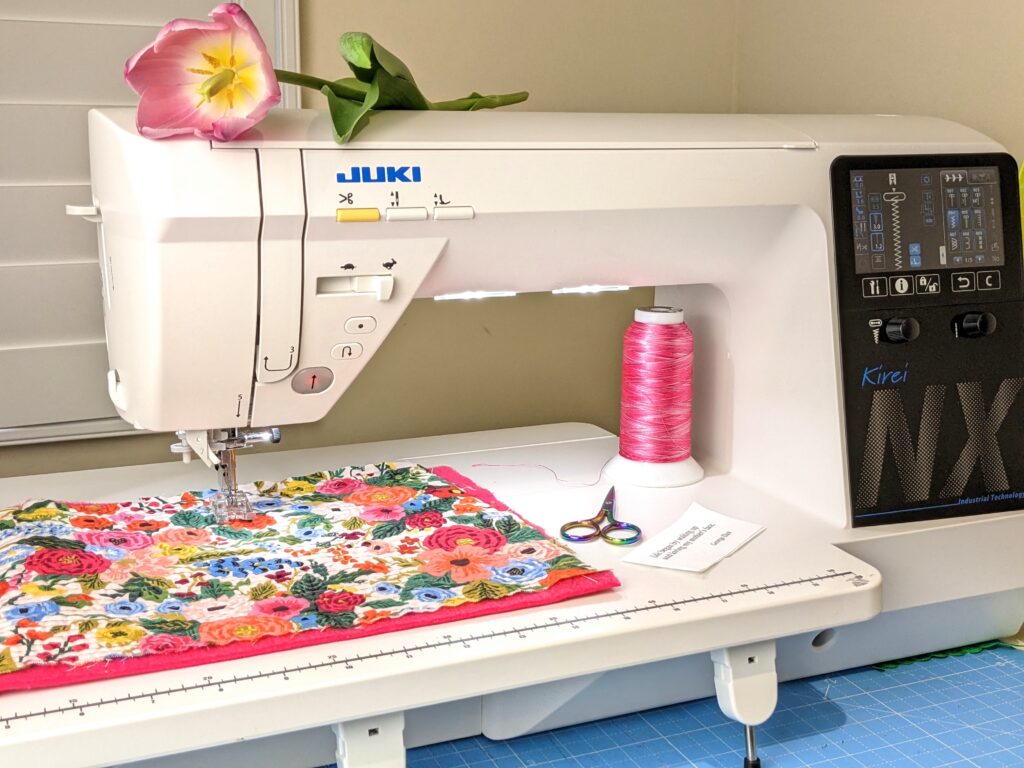
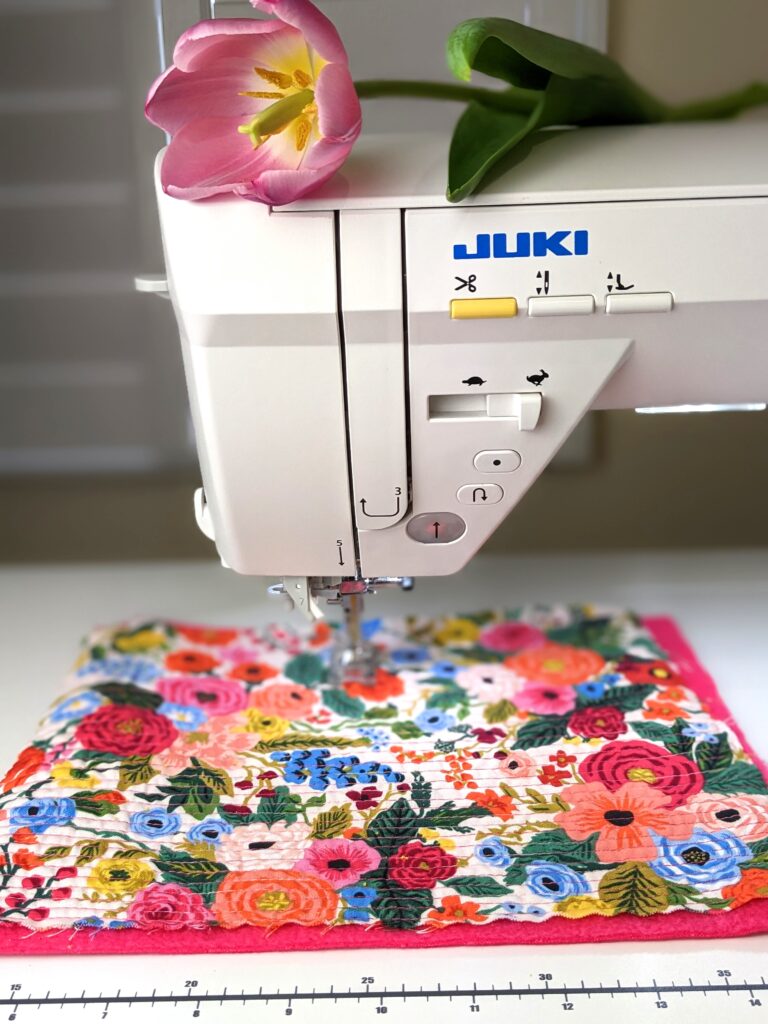
I’m using the Juki NX7 for this project. But the Juki TL QVP Mini would also be brilliant.
- First give it a good clean especially the bobbin area.
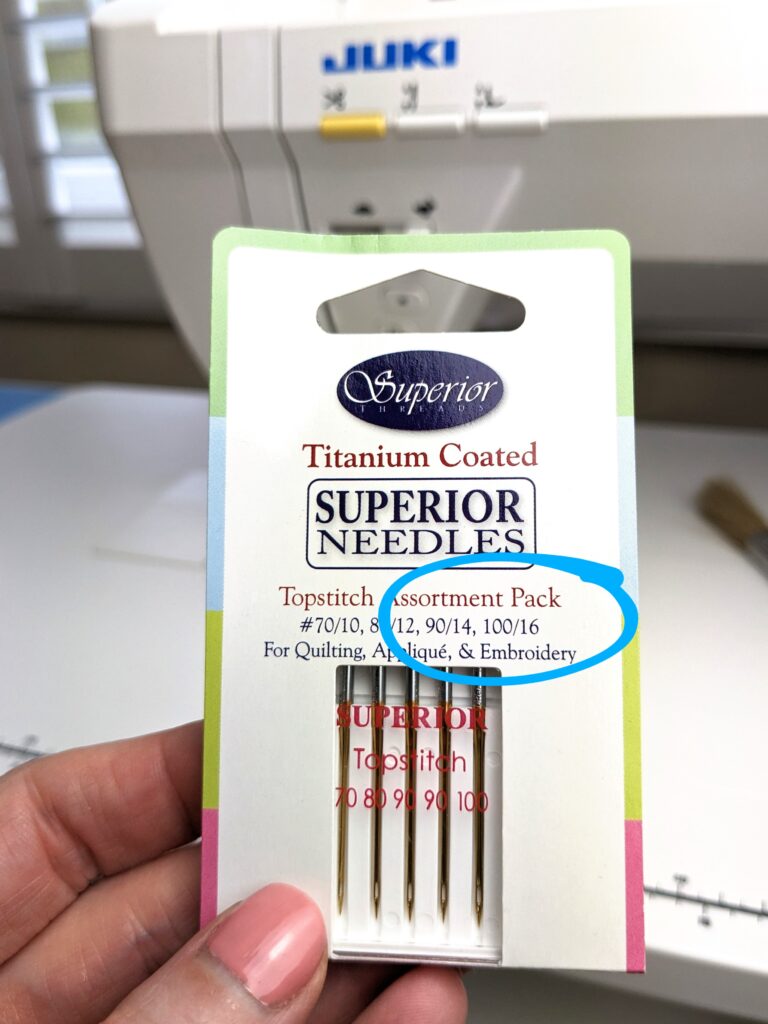
- Change the needle. I’m using a titanium coated 100/16 Topstitch needle by Superior Threads, available here in the UK from Barnyarns. The 100/16 Topstitch needle is THE ideal needle for quilting because it has a bigger eye than any other needle. This allows the thread to move smoothly through the needle. This makes all the difference specially when you’re sewing at high speeds. The titanium coating keeps the needle sharper for longer.
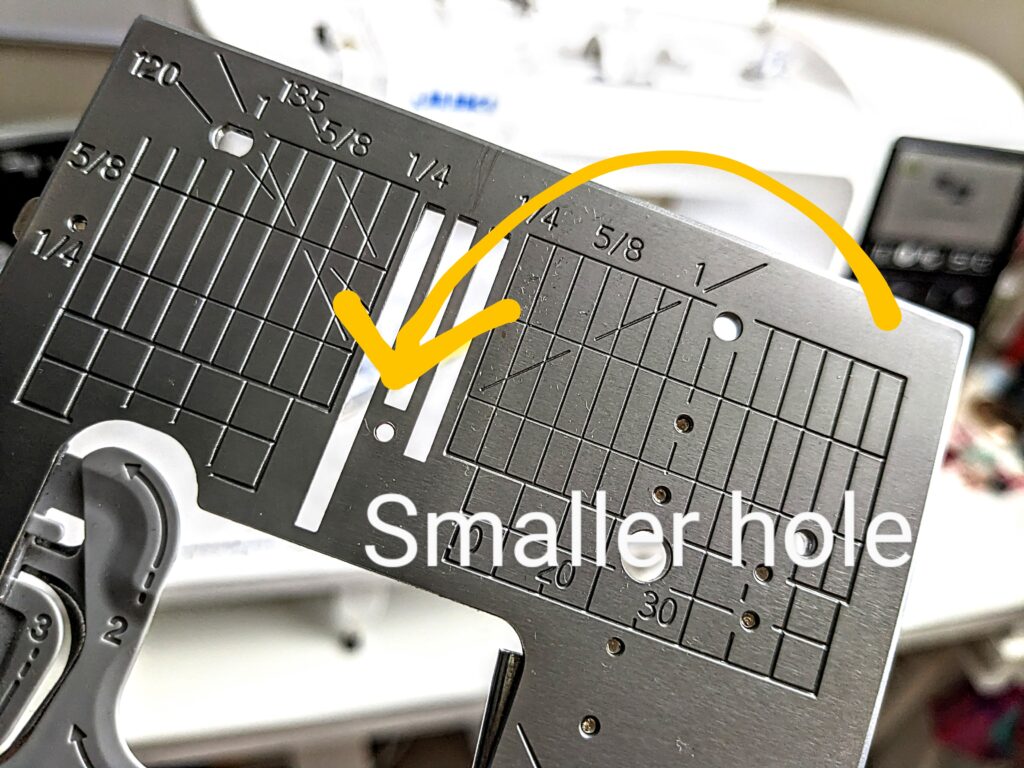
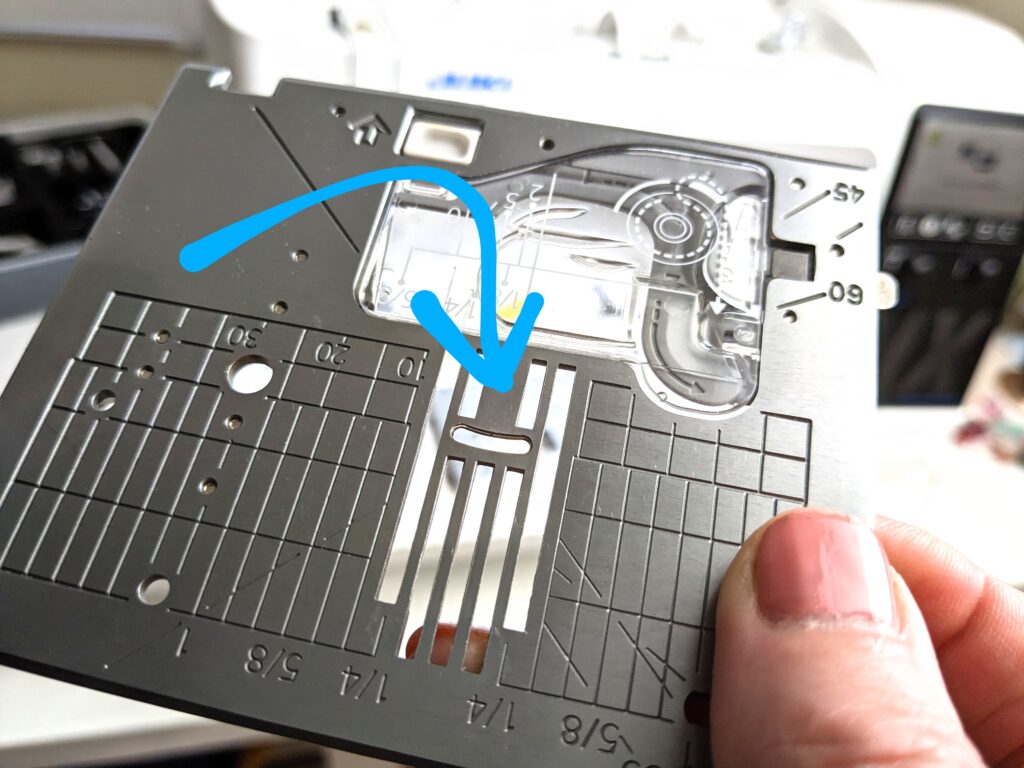
- Use the straight stitch needle plate and corresponding feed dogs. One of the really brilliant features of the JUKI NX7 is the exchangeable needle plate and feed dogs. The straight stitch option has a small hole perfect for any straight stitch project. The other option has a wider aperture to allow room for zigzag and decorative stitches.
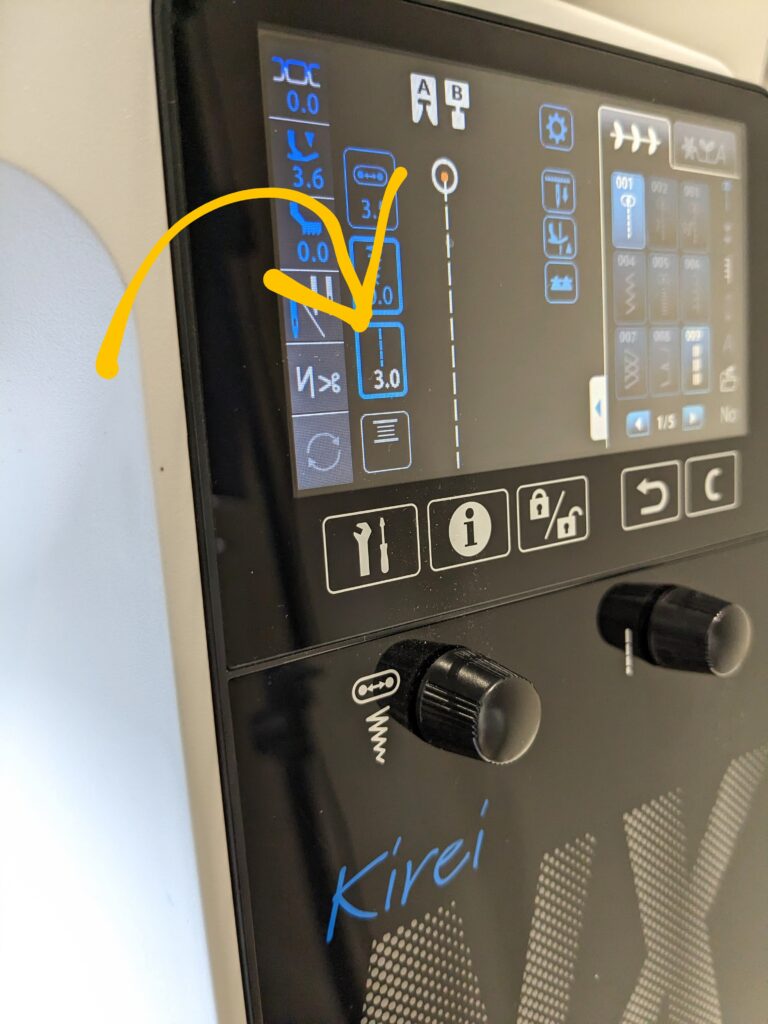
- Set the stitch length for longer. I generally go up to 3. A longer stitch length is better for faster stitching. It shows off the thread and helps to stop puckering.
Straight Line Quilting
Once the the machine is clean, threaded and set up, we’re ready to go. My method of straight line quilting has evolved over the years. There are lots of good ways to do it. This is just my way.
I use the clear presser foot on the NX7. Decide whether to quilt across the length or width of the postcard. Then begin stitching at one side. Stitch all the way to the other side. Instead of cutting the thread, I pivot, make 3 stitches and pivot again so I’m coming back the other way. I aim for the middle ‘bumper’ of the presser foot.
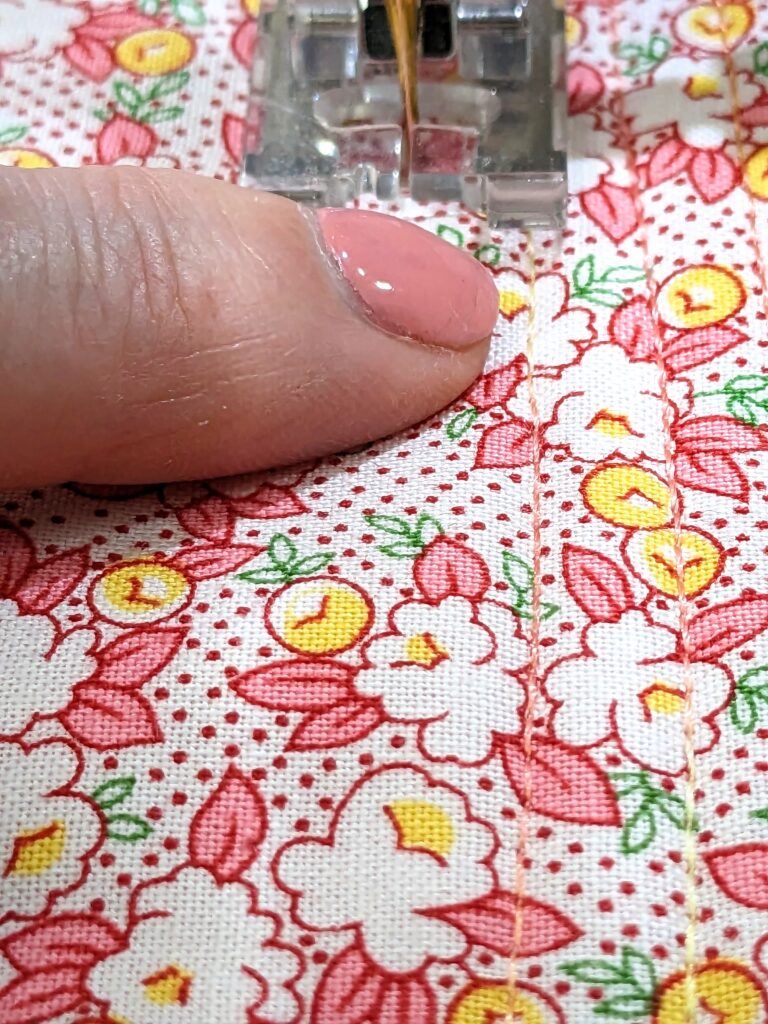

It’s not exact. And sometimes my lines go a bit wobbly, but overall I think it adds to the charm. I save a lot of time by not cutting the thread and the 3 stitches brings me back to the middle bit of the presser foot that I’m aiming for. I find that straight line quilting is very forgiving. The repetitive lines are so satisfying and really do create a lovely texture.
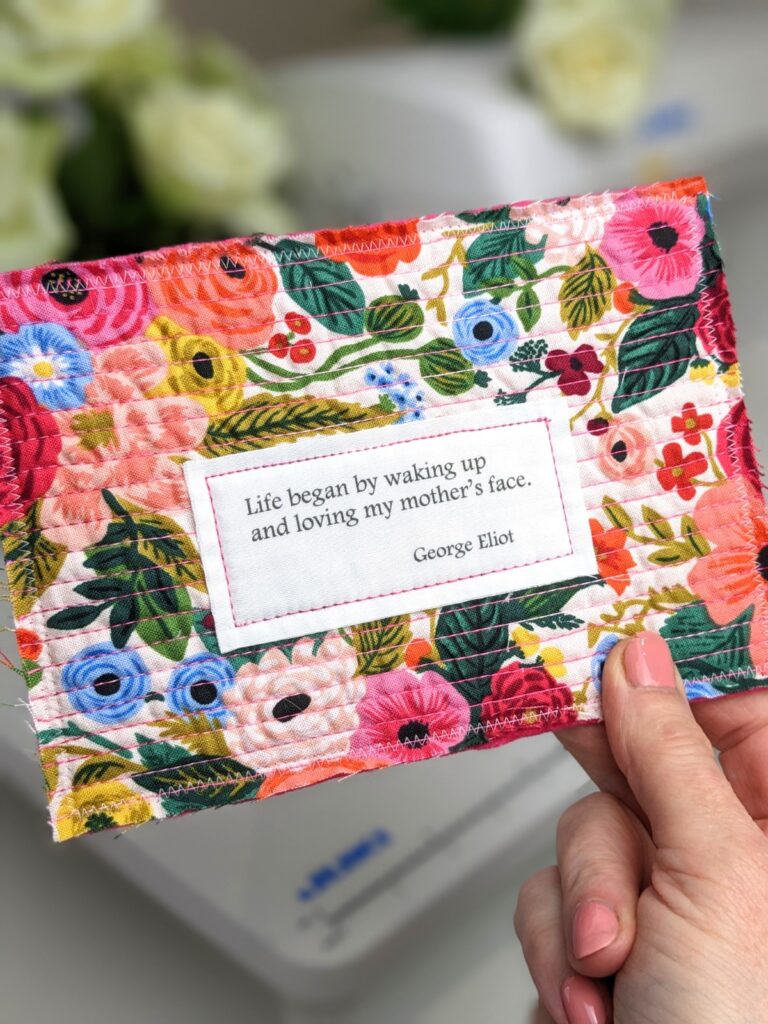
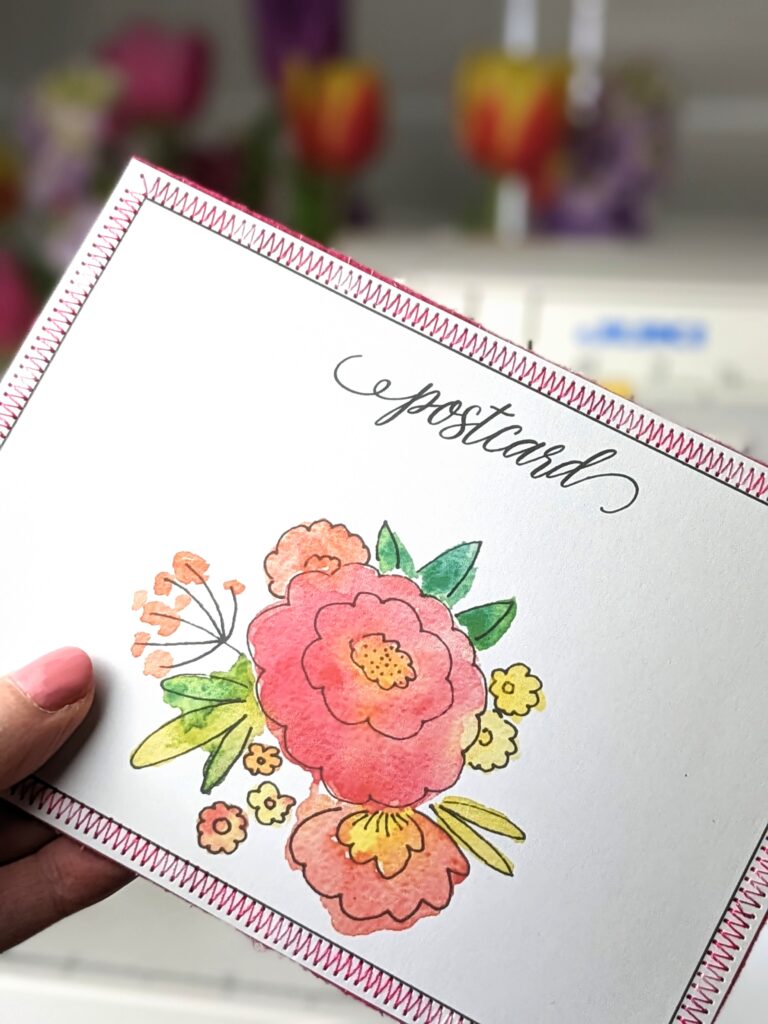
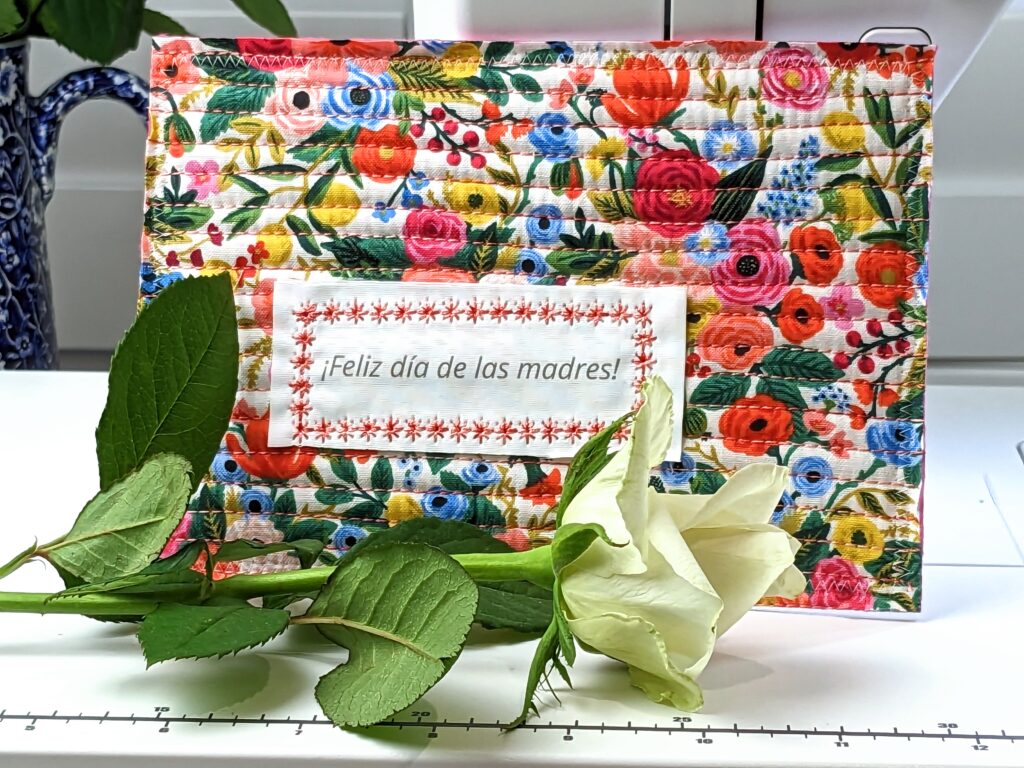
Adding your own message
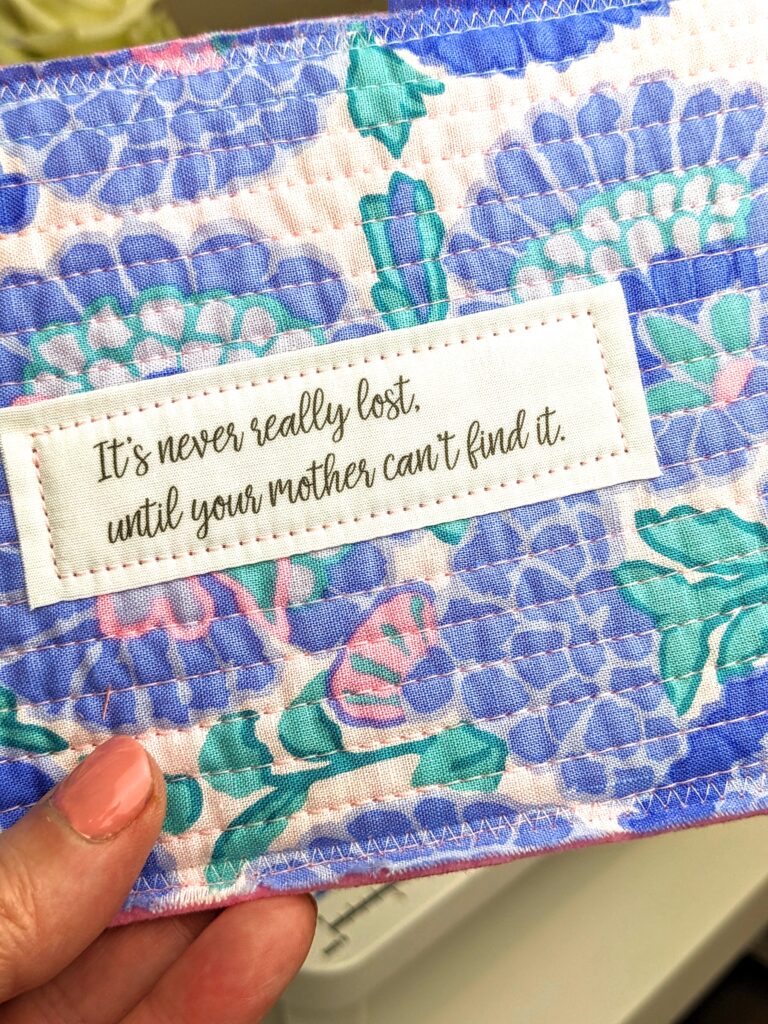
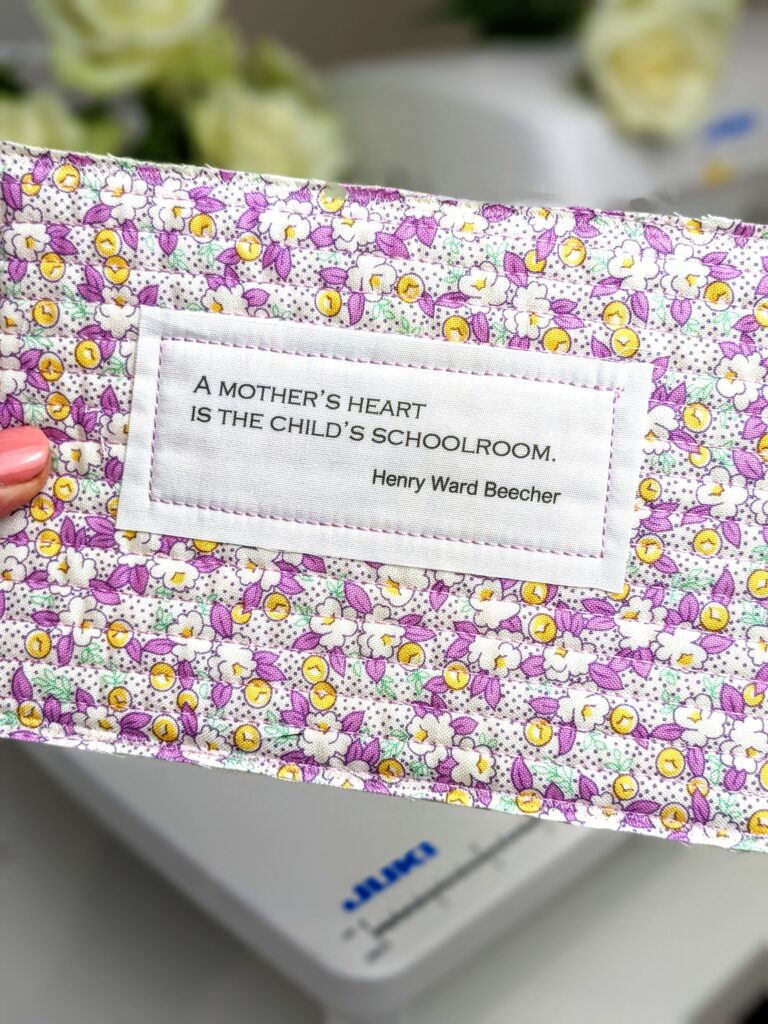
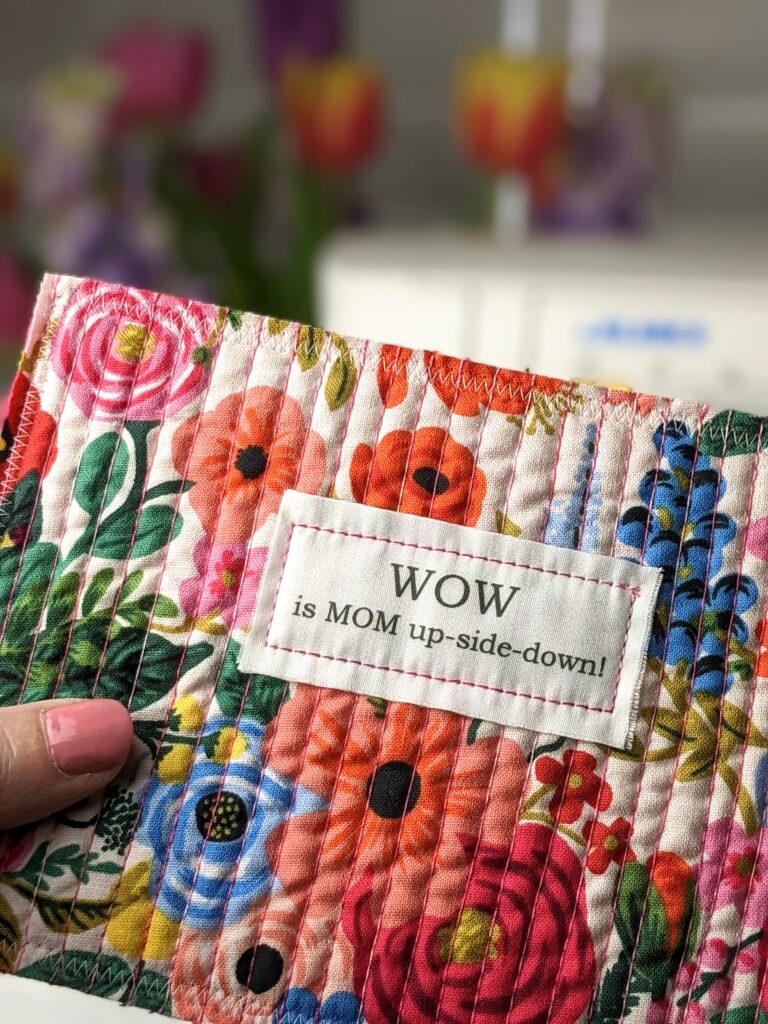
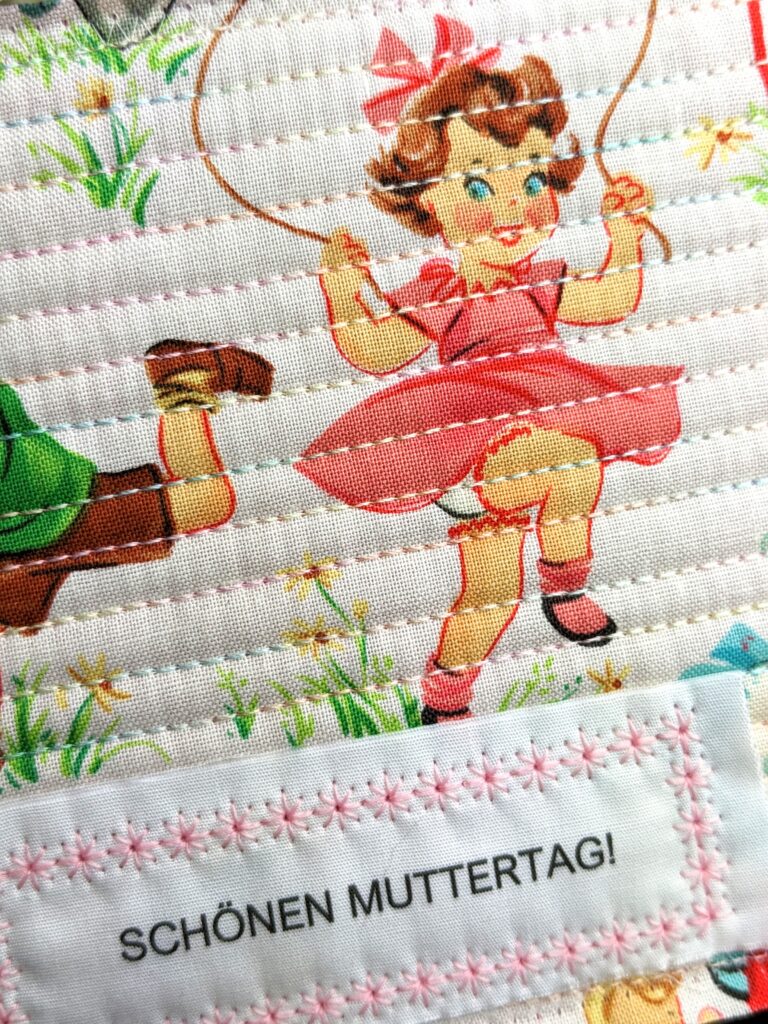
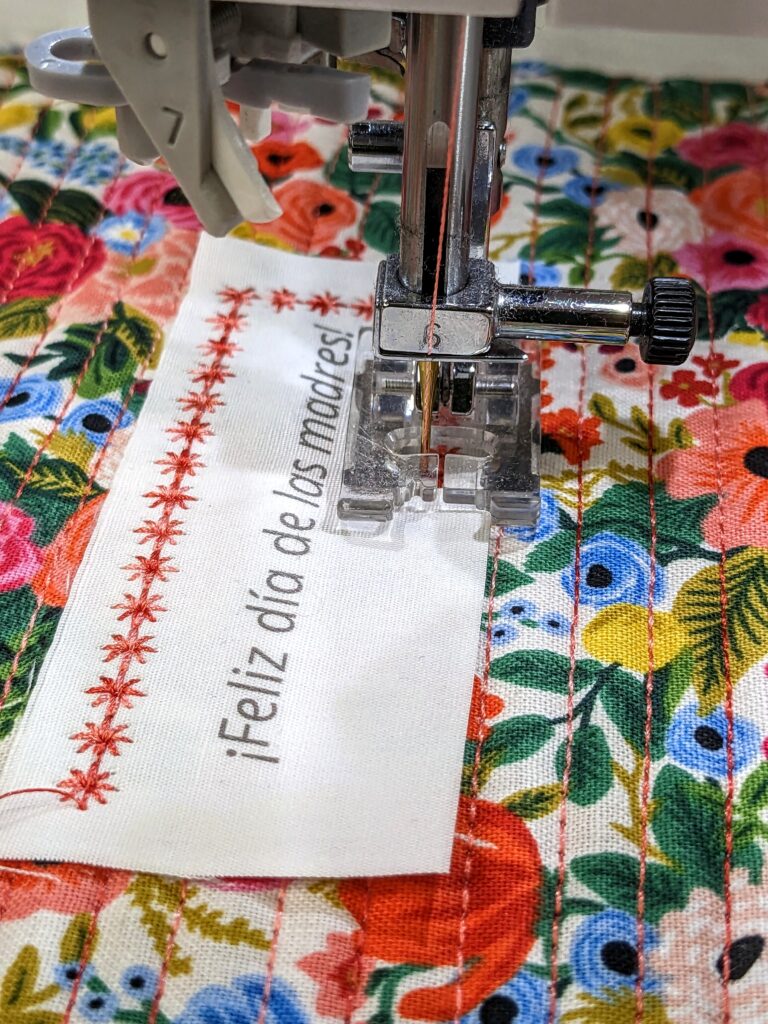
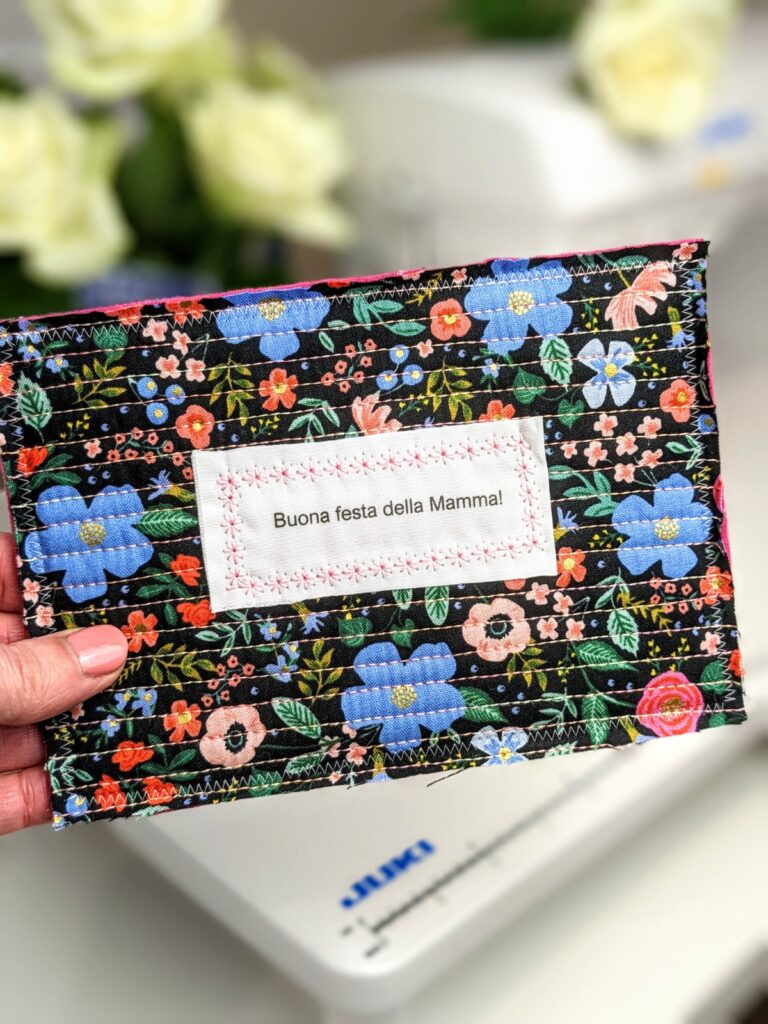
Once the straight line quilting is finished we’re ready to add a message. You can make Mother’s Day postcards even more special by adding your own messages or using quotes. We’ve kept it simple with Happy Mother’s Day in a variety of languages and a few quotes about mothers in English. I’m using a product called Photo Fabric that I picked up on Amazon.
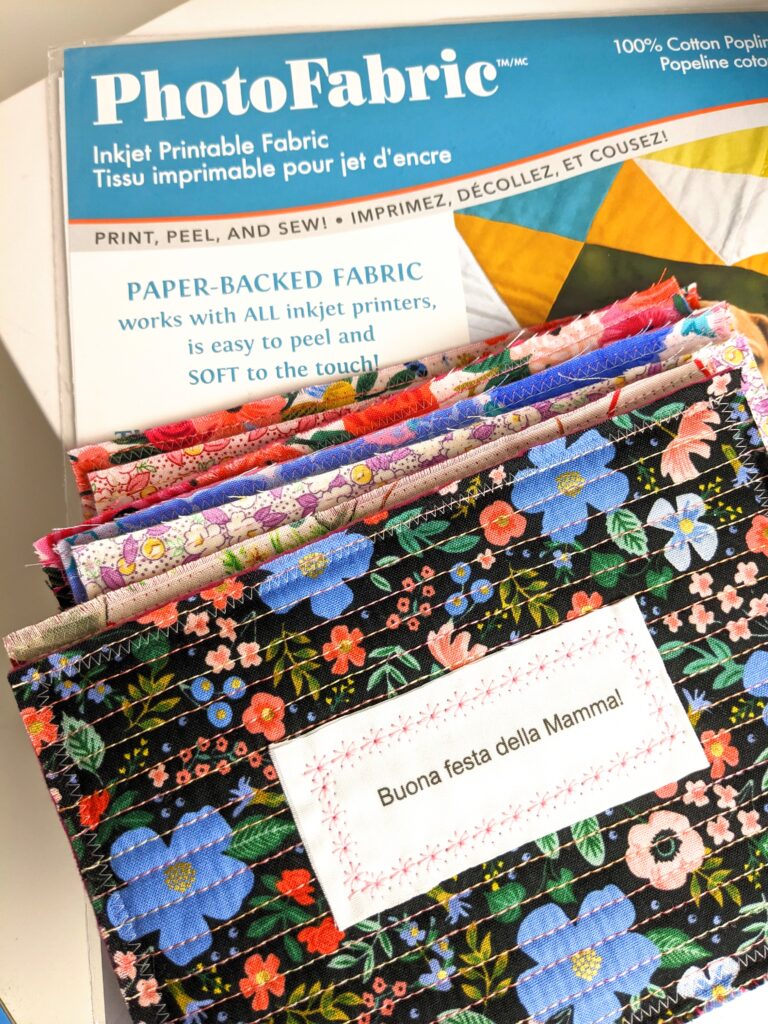
It’s a paper backed cotton poplin fabric that works in all inkjet printers. Simply create a word document with your messages and quotes. Load your printer with a piece of the photo fabric and print. Let it dry. Peel the paper backing off. Rinse in cold water. Let dry and press. I use a pressing cloth to protect the fabric.
Print. Dry. Rinse. Dry. Press. That it! Then you can cut out your messages. I double the fabric under the message to make it stand out a bit more. Then I simply sew it onto the straight line quilted piece. It looks nice using a straight stitch.
If you’re feeling adventurous, try some decorative stitches! This is No 139 on the Juki NX7.
Finishing up
Now go back and grab that postcard template that you printed out in card. Centre it on the other side of the fabric part of the postcard. You want a little bit of the fabric postcard to stick out over all the edges of the paper postcard.
Next set your machine to a zigzag stitch. Play with the length and wuth of the stitches until the zigzag fits nicely into the space between the black line and the edge of the postcard. Zigzag all the way around. i like to pivot at the corners.
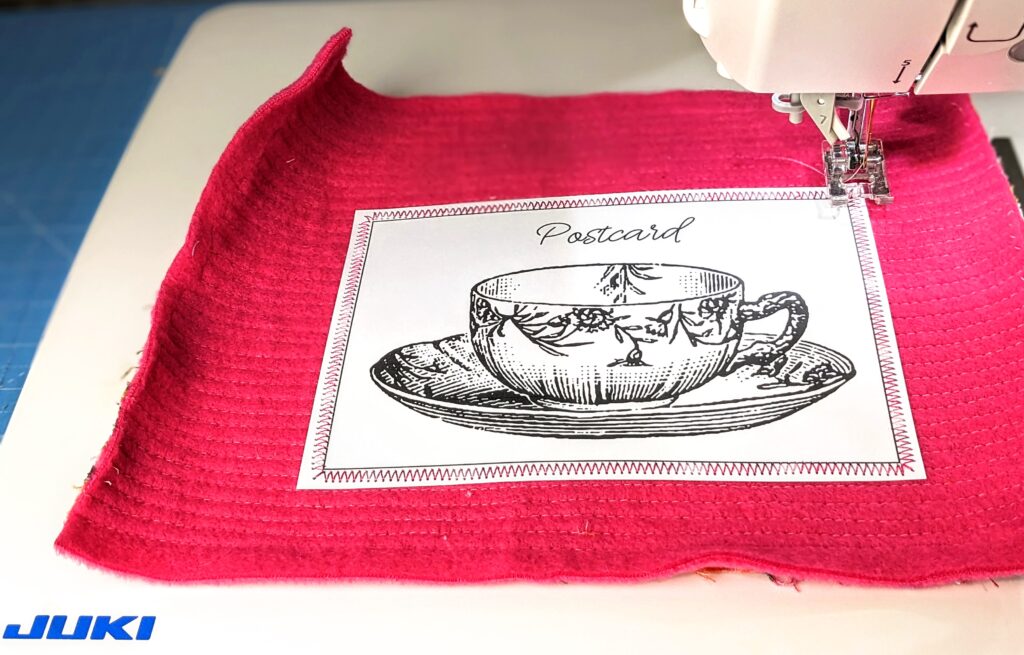
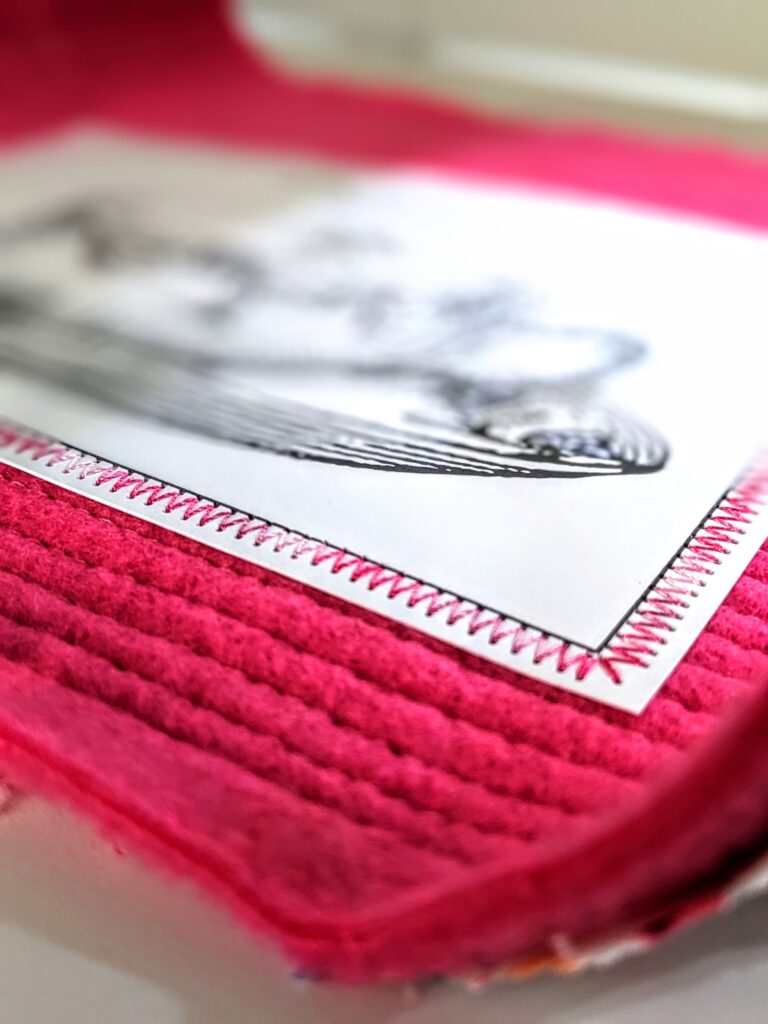
Lastly take a pair of sharp scissors. Holding the postcard paper side up, cut off the extra fleece and fabric hanging over the edge.
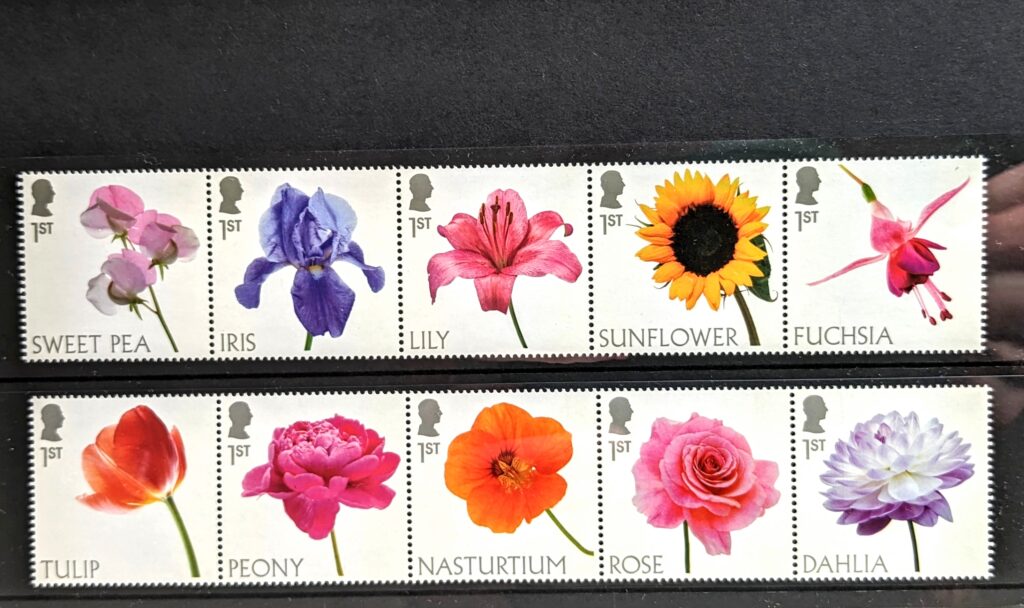
That’s everything you need to make Mother’s Day postcards. Enjoy sending some love through the post. And while you’re at it check out these pretty new stamps!!
Happy Mother’s Day to all Mother’s EVERYWHERE!
Brilliant ideas!. Your posts are always inspiring colourful and lift the spirits. Thank you. 😊