We’ve been stitching bunny baskets. It all started with Jen’s super cute bunnies for mini stitchers. I made a bunch of bunnies and thought that they needed a little basket to keep them from hopping away. Then I thought that the basket could be a hidden-in-plain-sight surprise on the back of a child’s quilt.
These Bunny Baskets are a quick and easy project to add a bit of fun to the back of your quilts. I have to start by saying that I have a thing about quilt backs. I think that the back of a quilt is a hugely UNDER-USED space. A quilt back is 50 % of your project. They can hold so much more than a label! What could be more fun than a surprise bunny basket pocket?
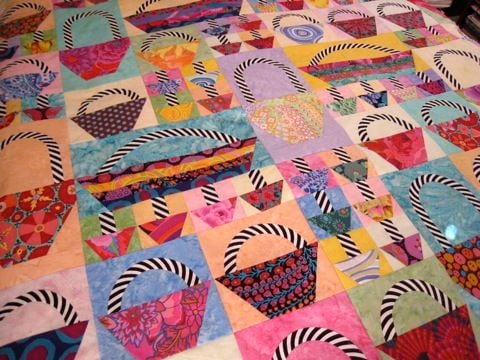
The idea comes from my Easter board on Pinterest. I used this Wonky Baskets Tutorial by Elizabeth Eastmond. My development on the idea was to turn the basket into a pocket for the back of a quilt. Like many of us, I have lots of quilts. My first task was to decide which ones to use. I had ideas for a bunch of baskets but I narrowed it down to just two.
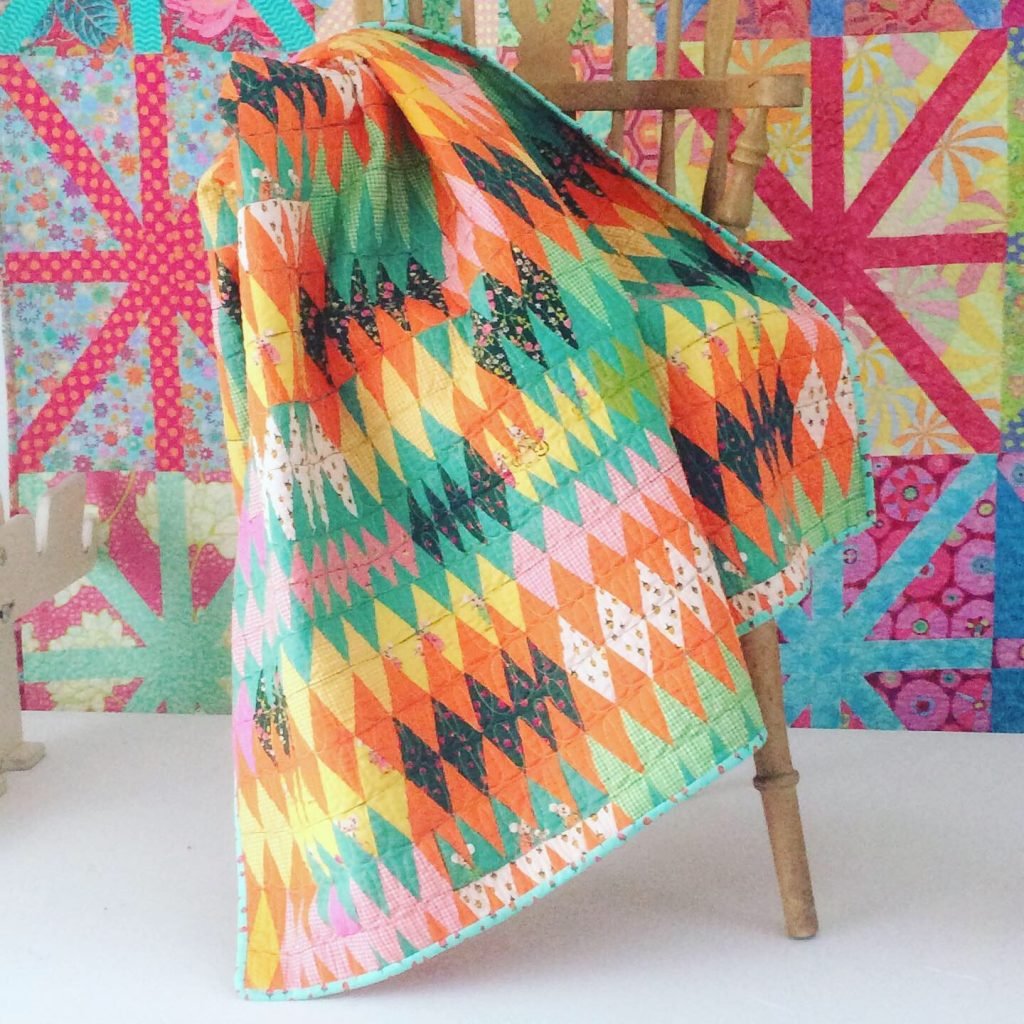
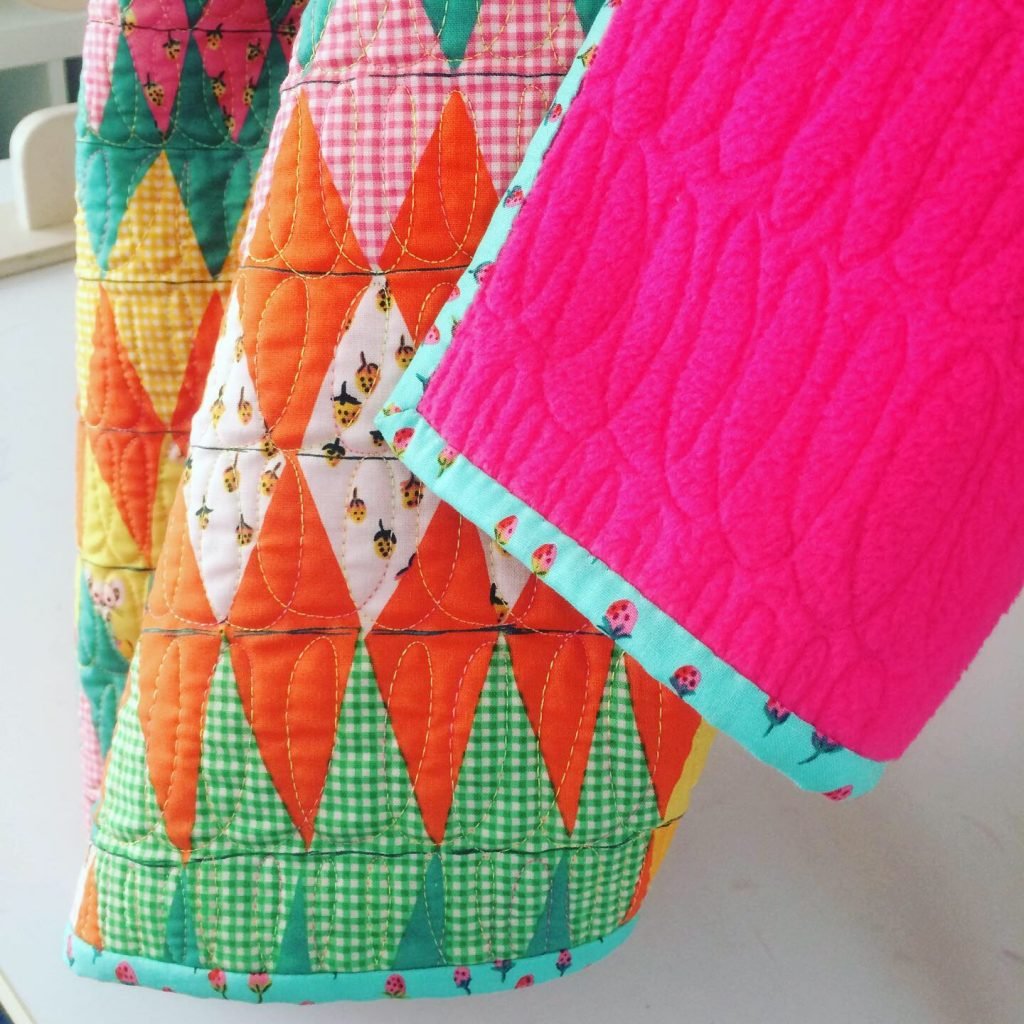
The first quilt I chose was this Wonky Triangle Wholecloth Quilt using Heather Ross fabric. This was a fast and easy baby wholecloth quilt and I thought that the bunny basket would look pretty on the fleece backing.
Making the Basket
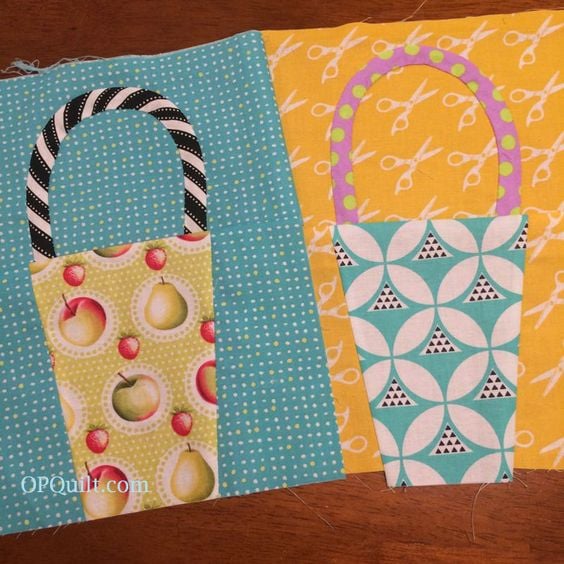
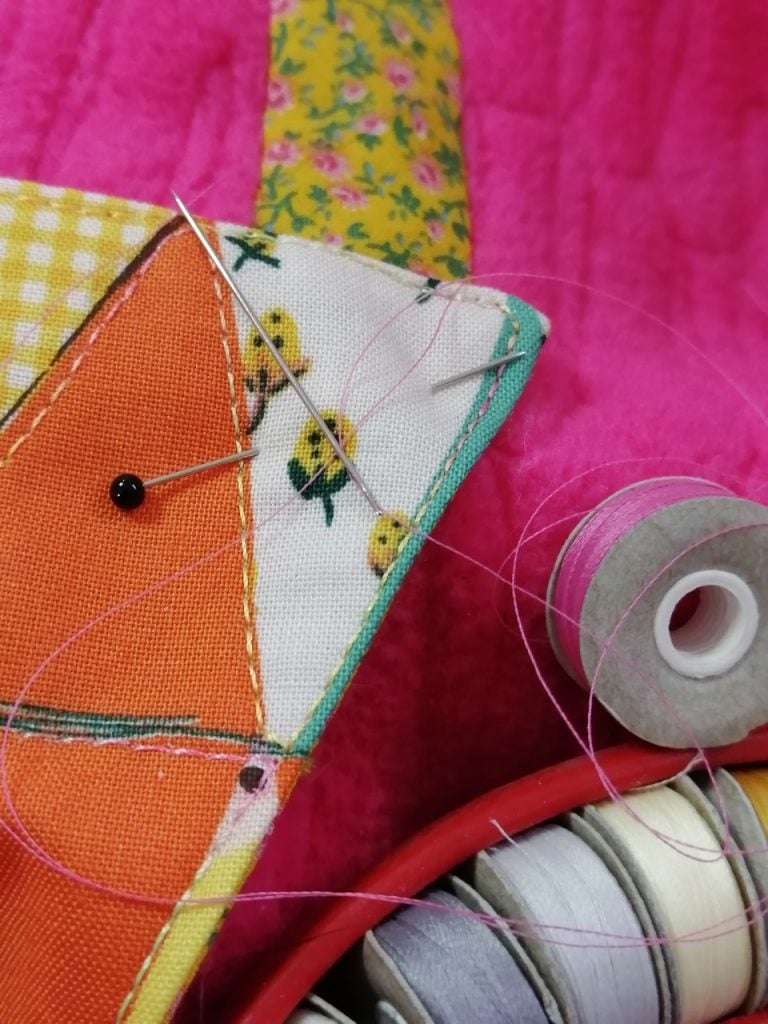
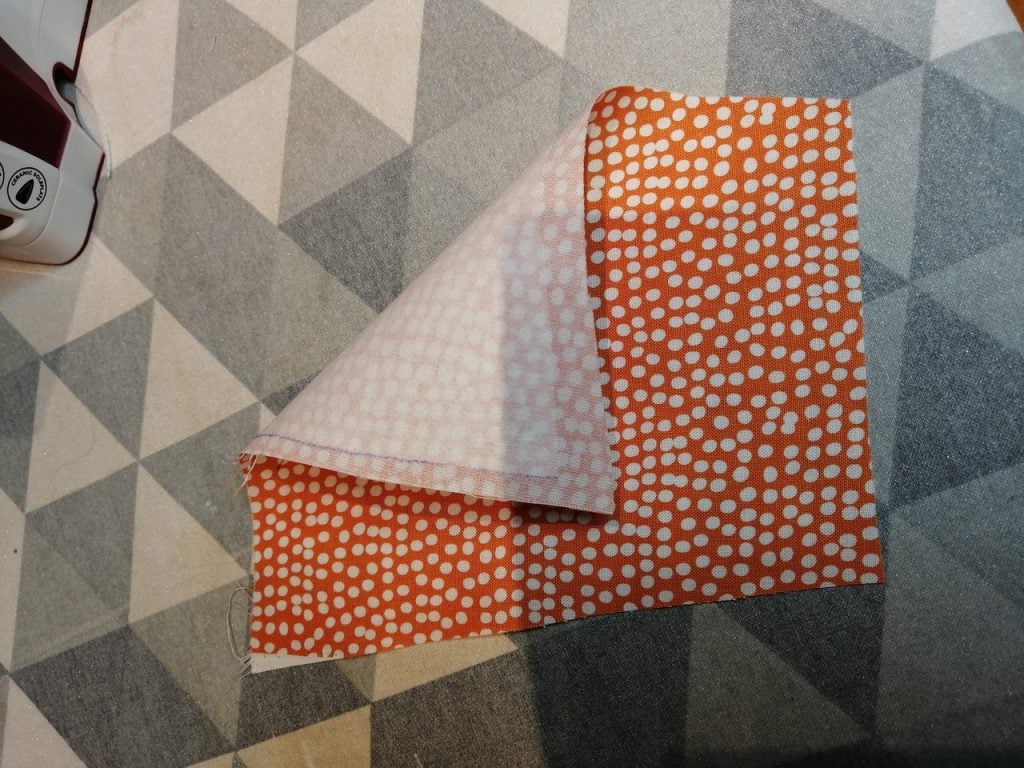
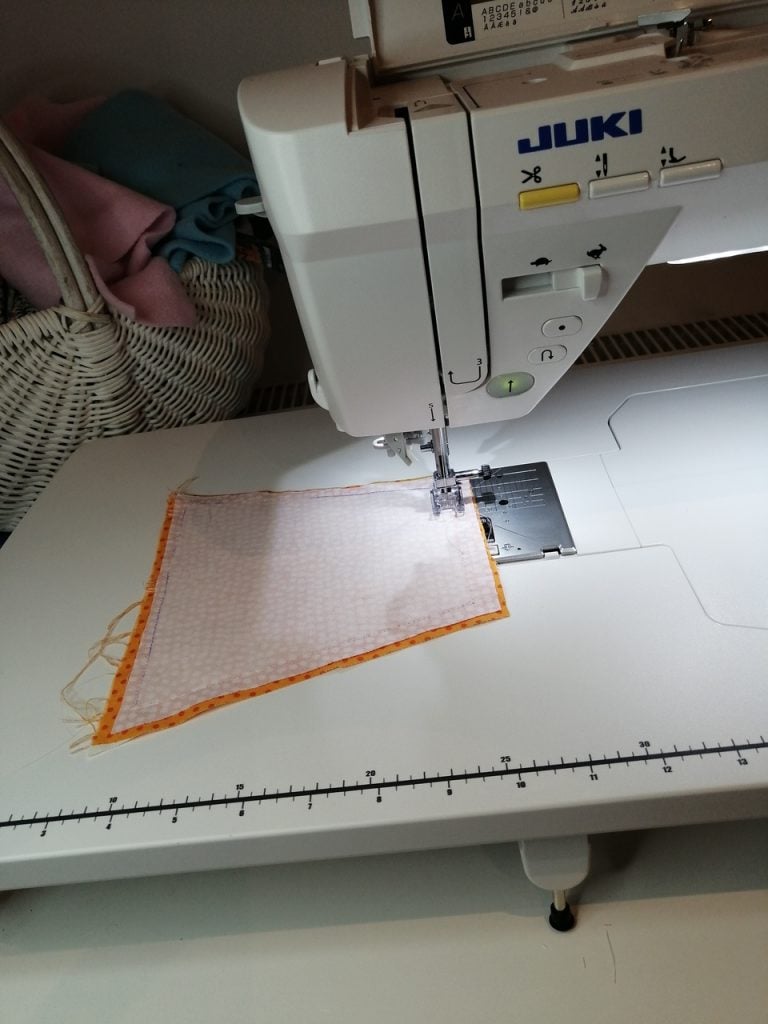
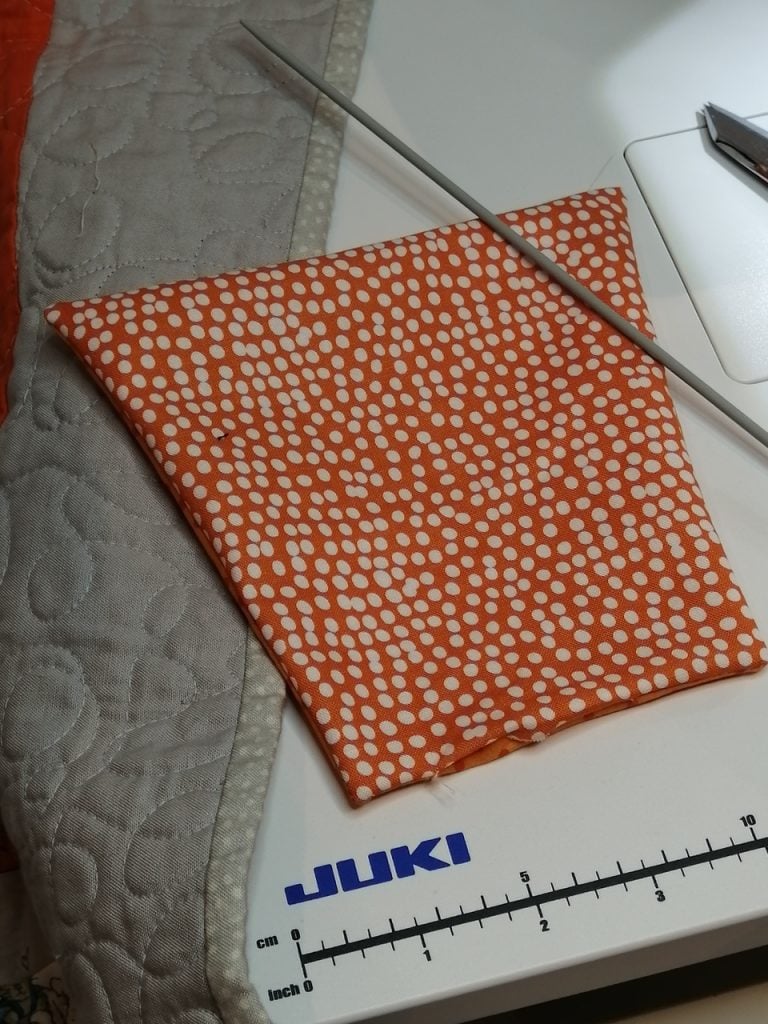
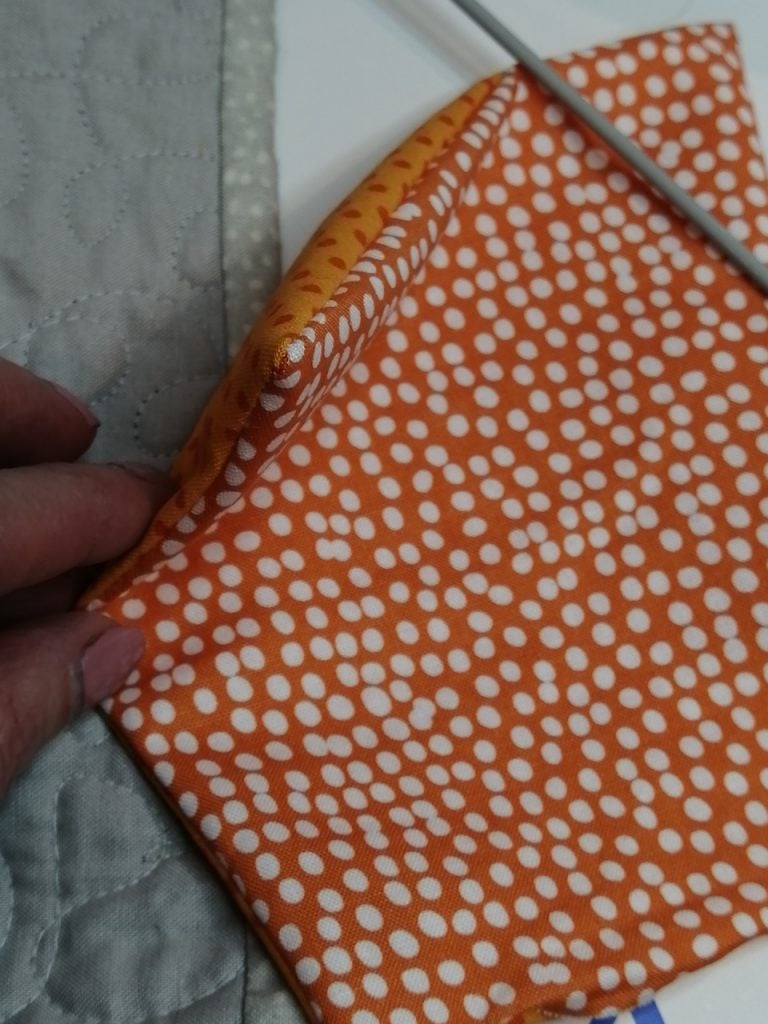
The lower basket shape is made from 3 layers. The outside of the basket, the inside of the basket and some iron on Vilene to give the shape some added structure. I cut out a pleasing basket shape from some of the Trixie scraps and ironed some vilene to the back. Then I cut another basket shape out of pretty fabric for the inside. Putting the right sides together I stitched most of the way around, leaving a gap so that I could turn it inside out. Then I stitched around the edges to finish it off and close the gap. I also stitched around the wonky triangles.
Making the handle
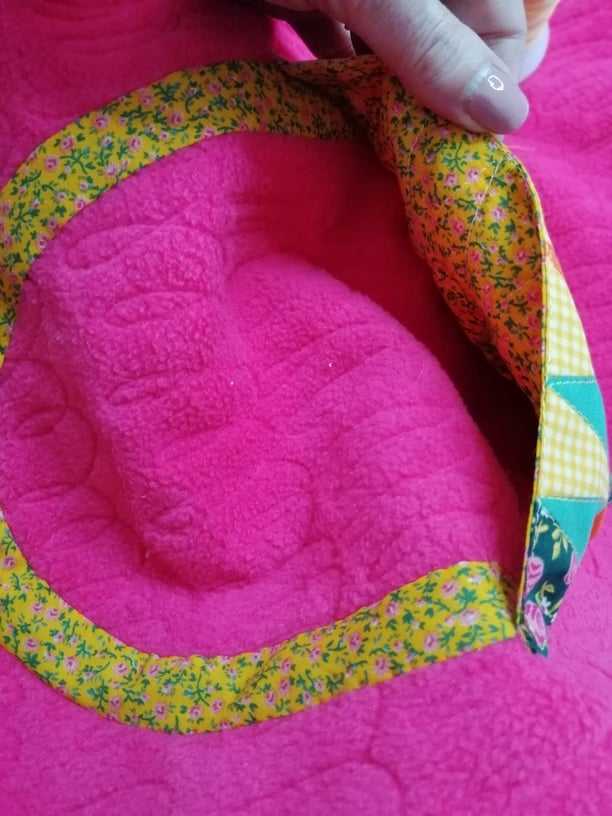
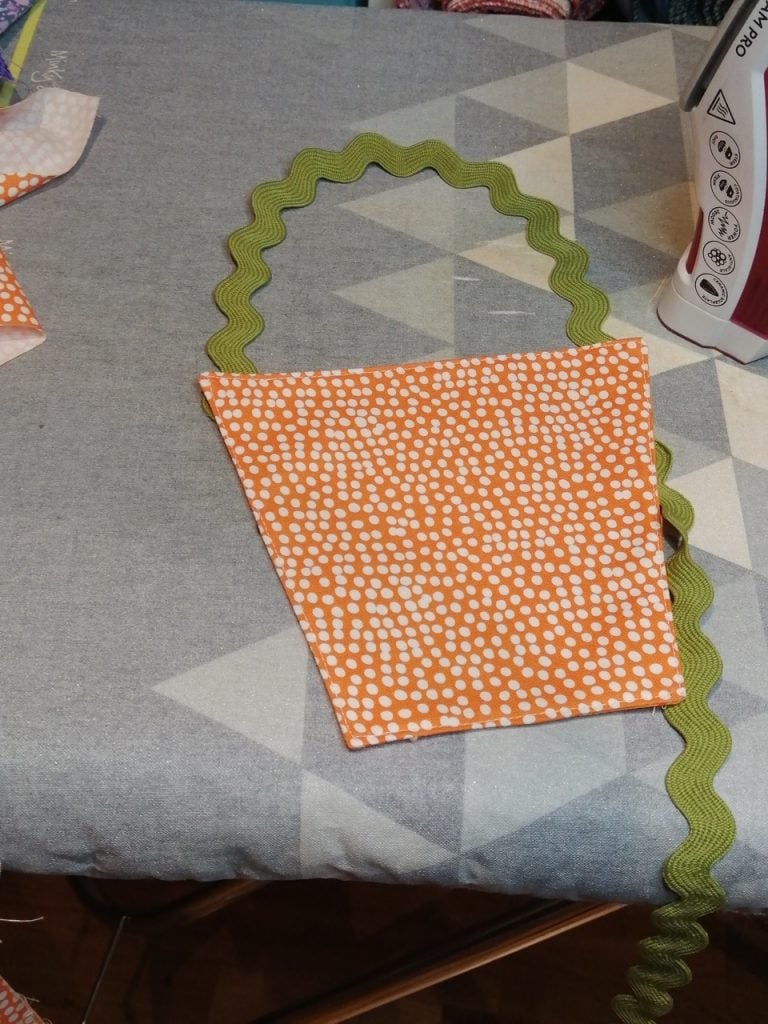
Looking at the baskets, I could see that the handle would be the tricky part. Elizabeth does a great tutorial about making the basket handle. Essentially, I just followed her directions. First I cut the fabric on the diagonal bias. Put the wrong sides together and stitched a scant 1/8 inch seam.
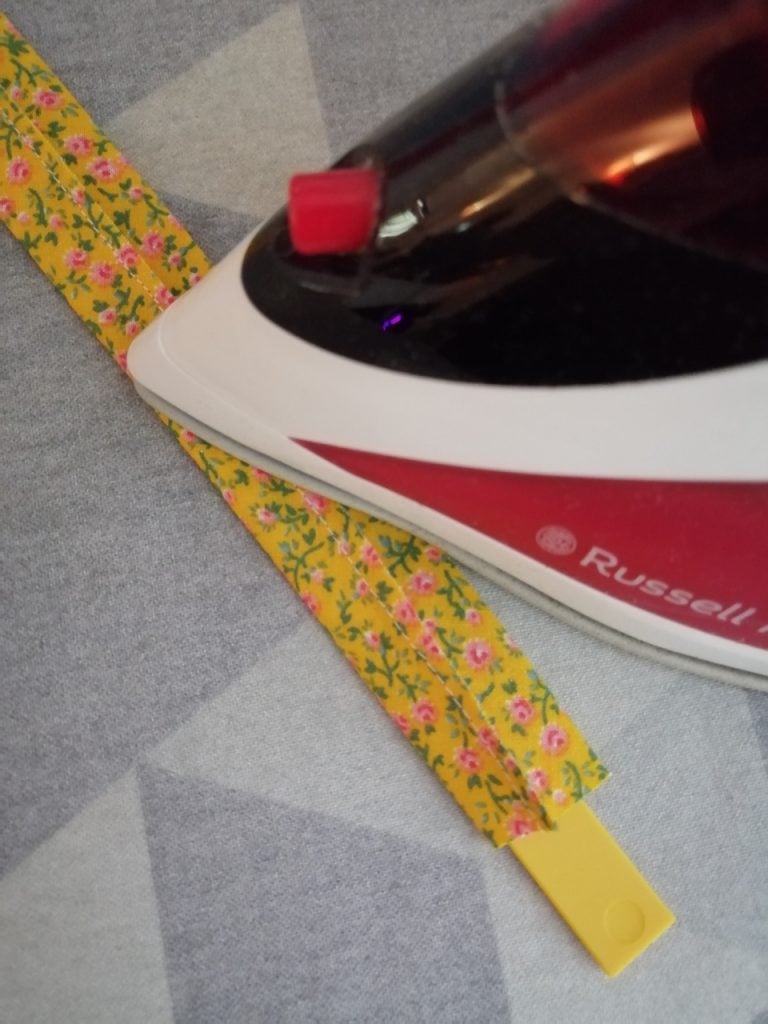
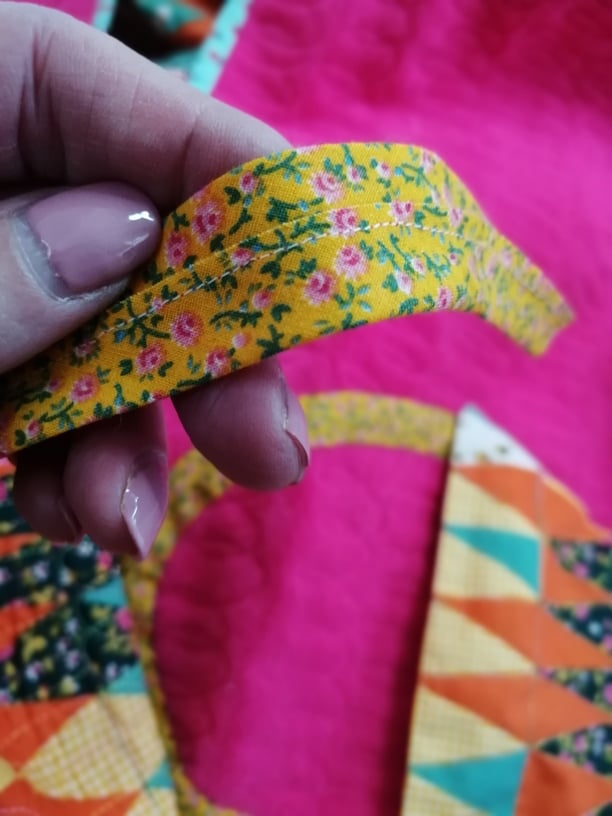
I ordered these Prym Bias Bars from Amazon to iron the handle with the seam in the centre. But couldn’t wait. So I just wiggled the seam to the centre and ironed. The bias bars came by post today just in time for the photo. Once I had my basket prepared, I could finish the handle. Using the steam setting, I ironed the handle to the shape to fit the basket. Now I was ready to applique.
Doing the applique
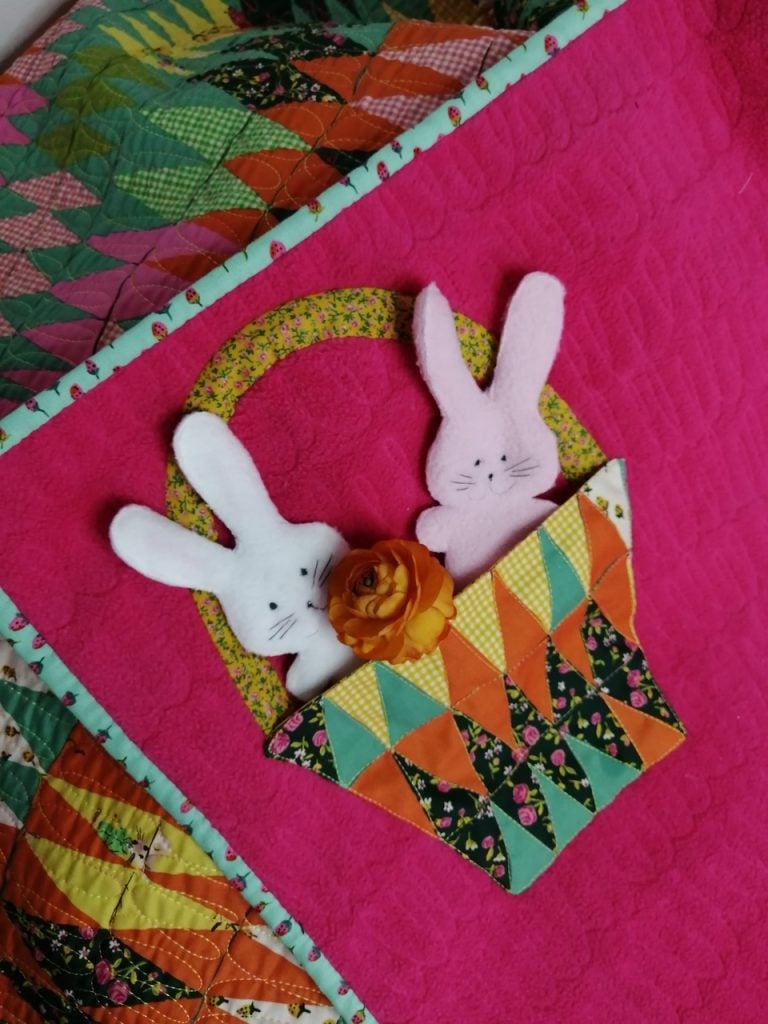
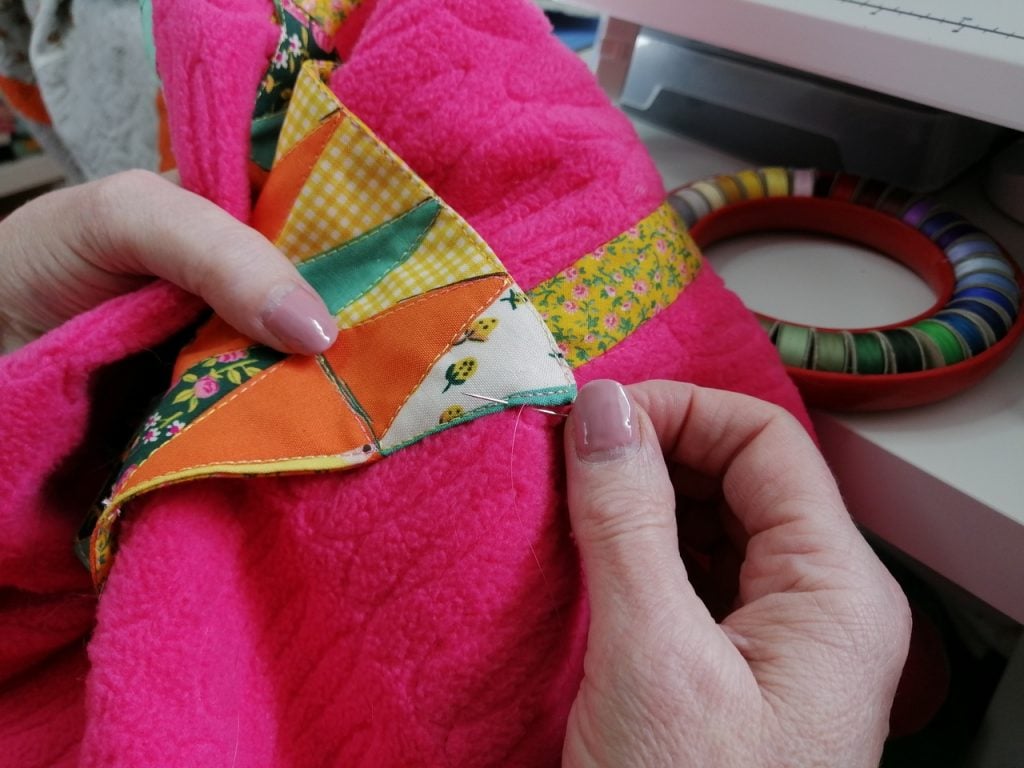
For the applique, I started on the inside of the handle. I like to use Bottom Line for applique. It’s a thread designed for the bobbin and it’s great for hand and machine applique too. I have a pre-wound bobbin donut that’s perfect for hand applique. I chose a yellow to match the handle and hand appliqued it to the back of the quilt. First the underside of the handle, then the top, easing the fabric to get the curve. I took care to keep my stitches from going through to the front of the quilt.
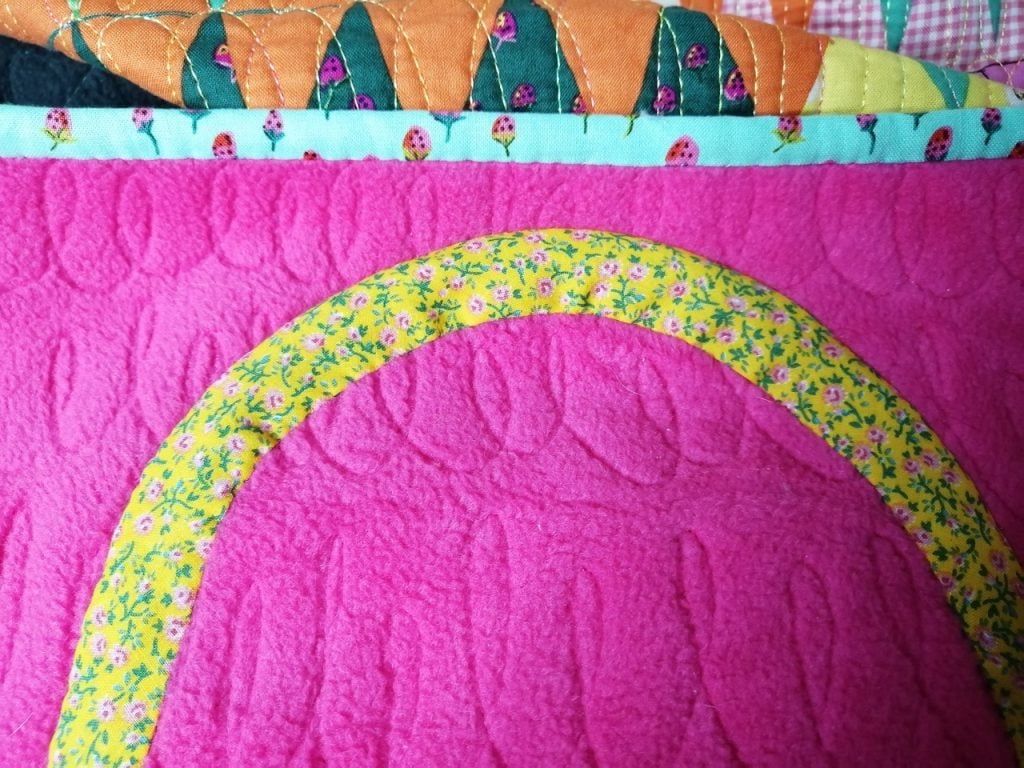
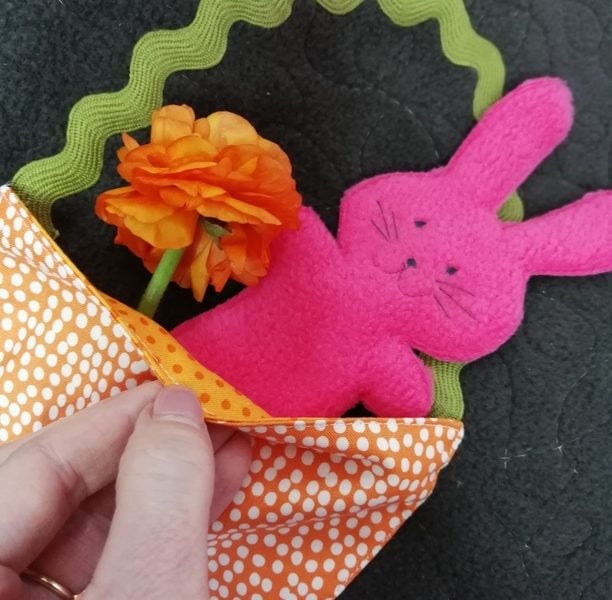
Once the handle was hand appliqued, I moved on to the basket. First pinning it into position, then hand stitching it down. This time I chose a pink thread from the bobbin donut that matched the fleece background.
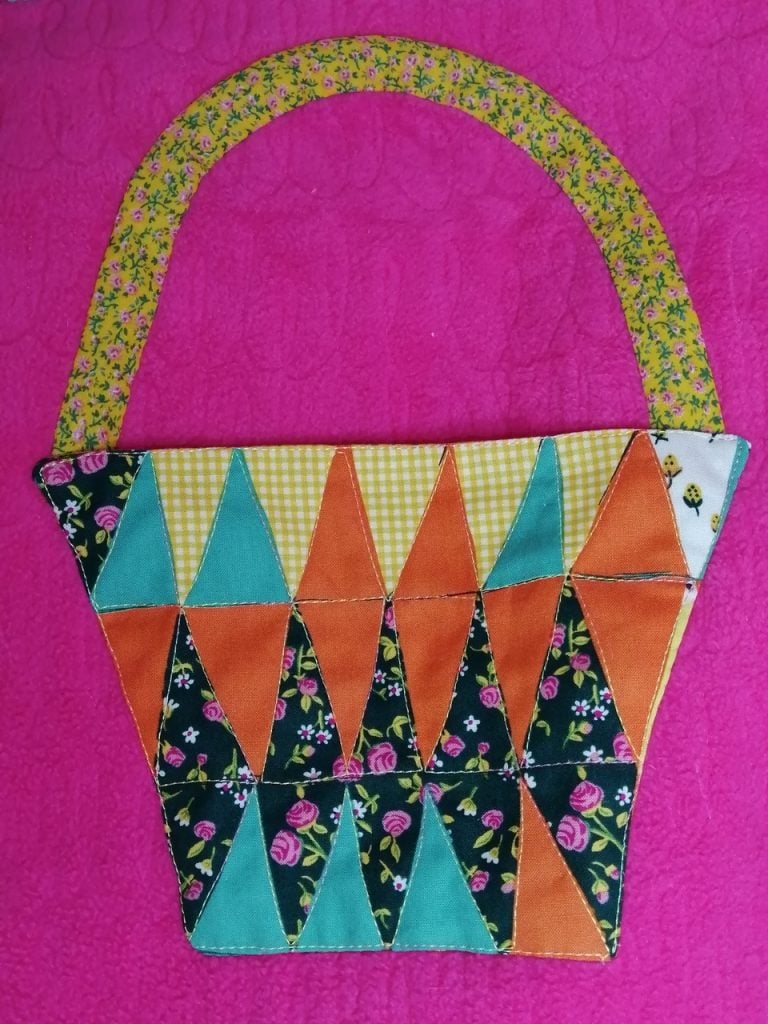
I stitched all the was around the sides and bottom but left the top open for a pocket.
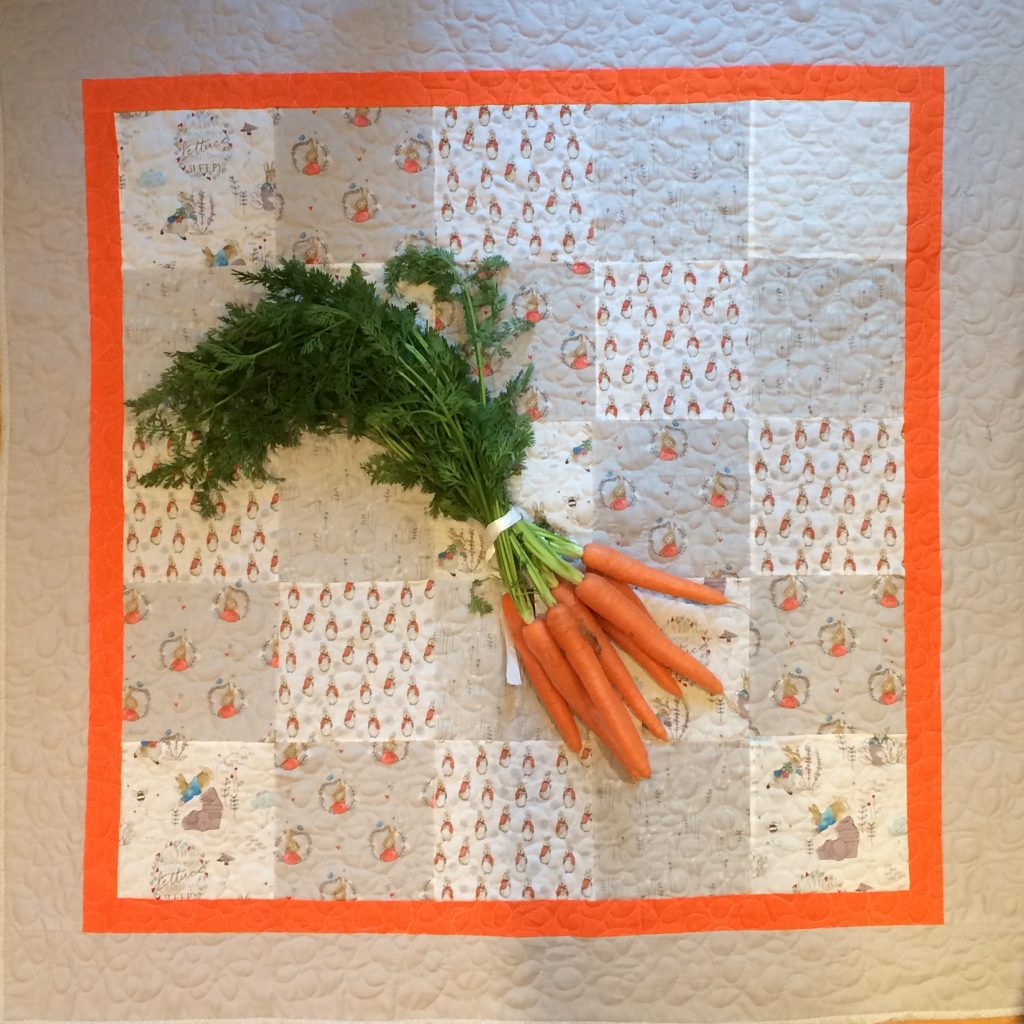
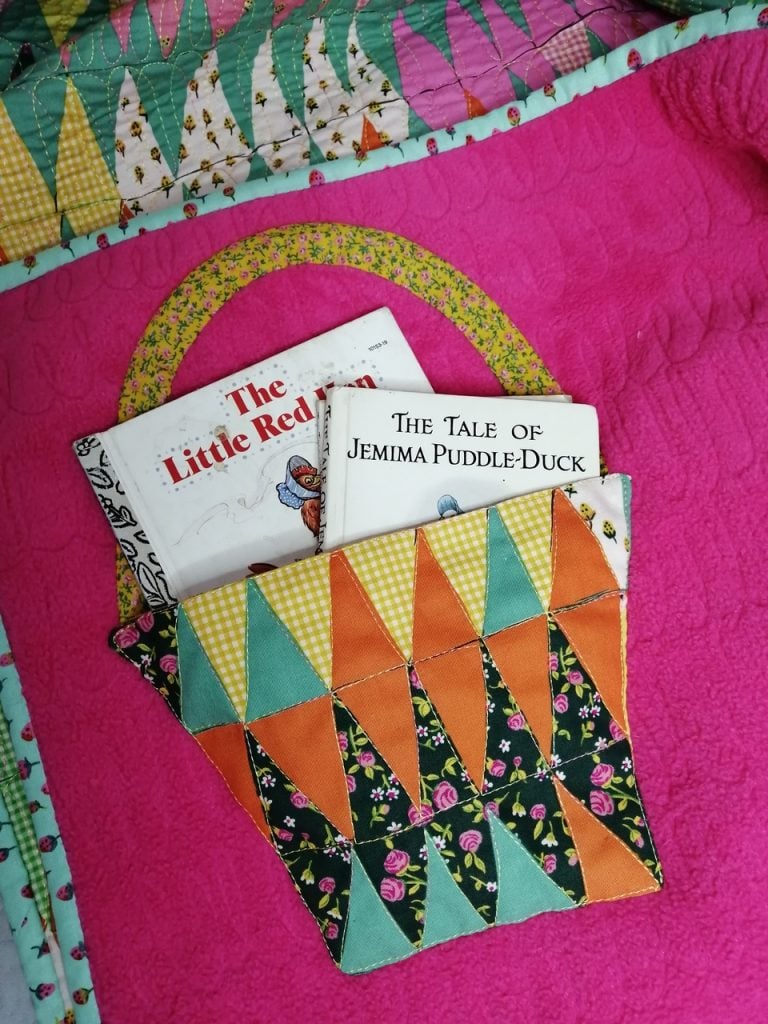
Making the basket pocket was so fun that I wanted to do lots more, but I forced myself to choose just one. This Peter rabbit quilt created by Emily @brickdustandglitter was perfect.
Once more with a twist
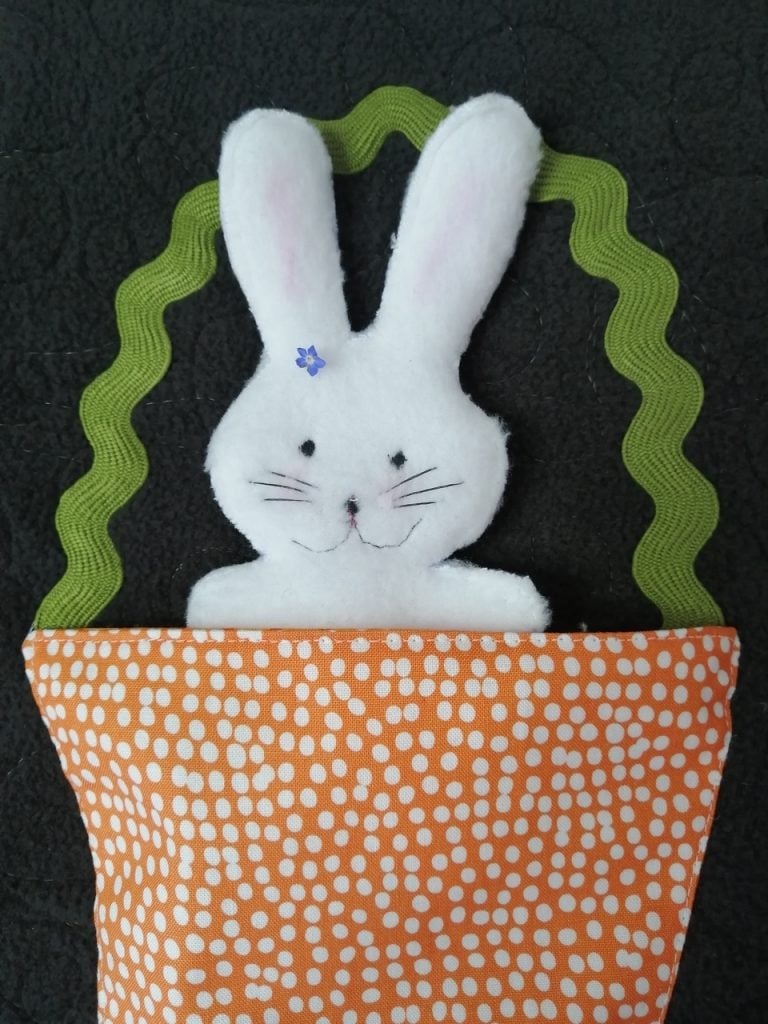
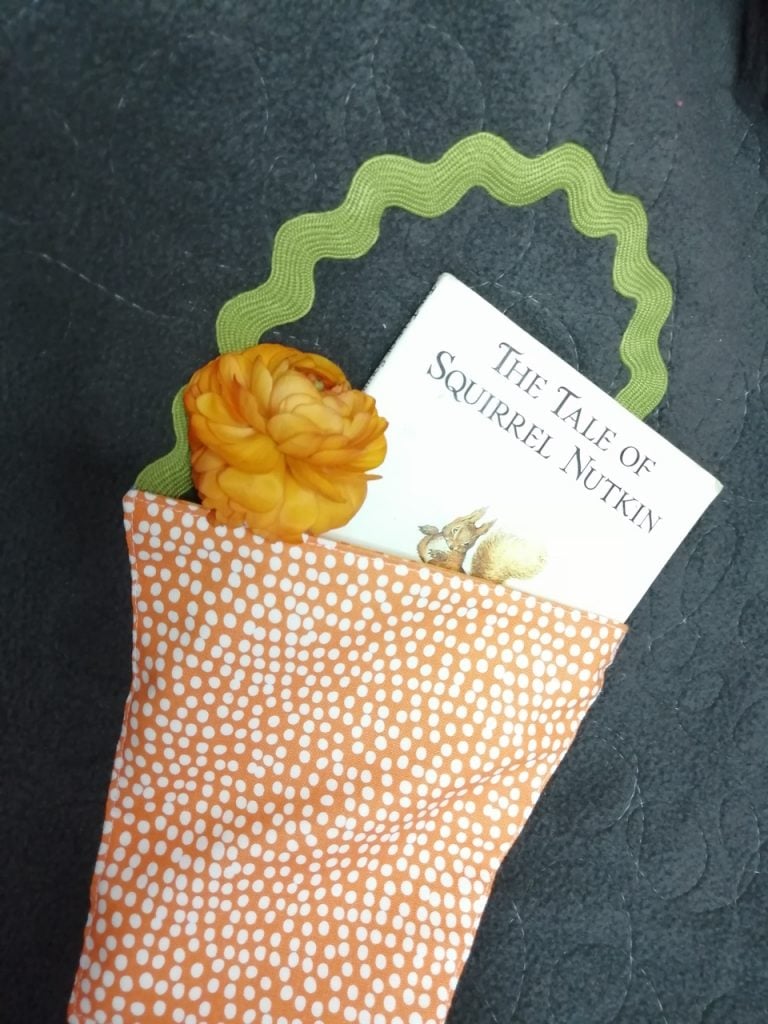
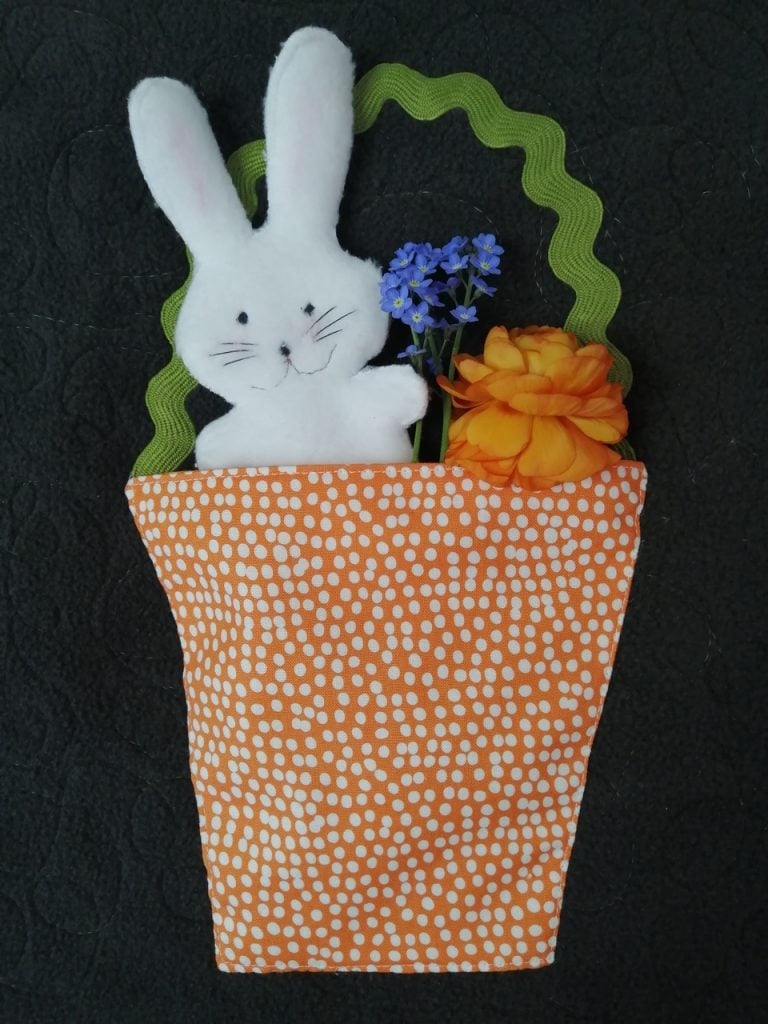
This time I decided to use some rick rack for the handle. I chose two fabrics and cut out a basket shape, backed it in vilene, put right sides together and stitched round it leaving a gap. The knitting needle helped me to get the corners turned out.
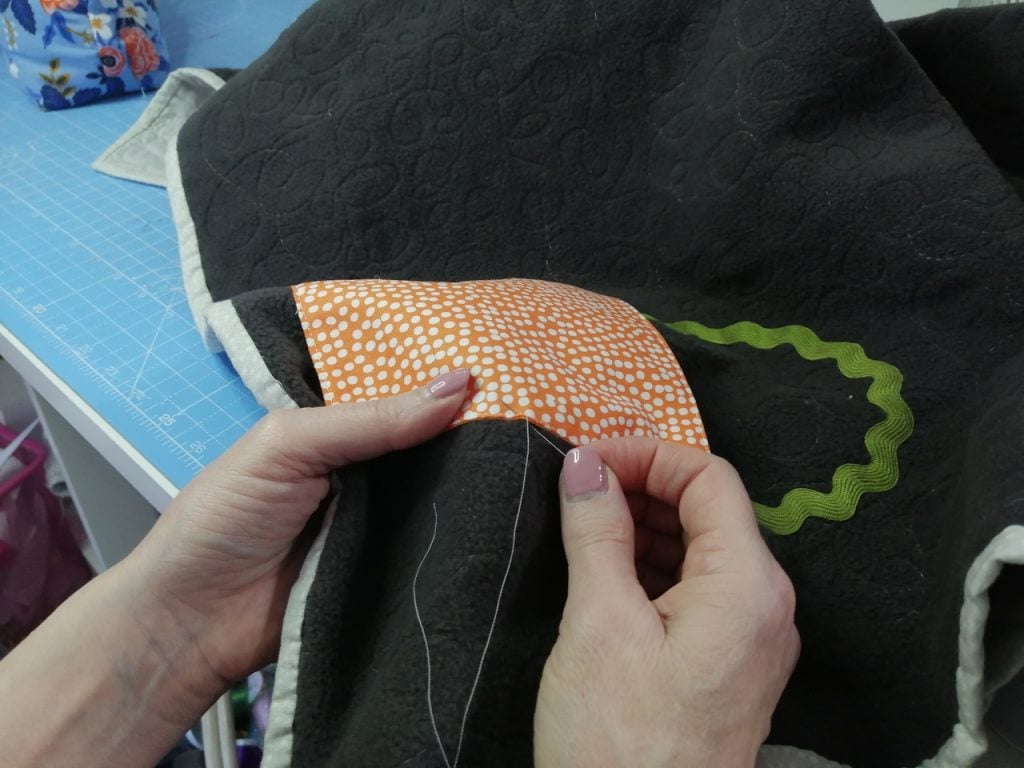
Now I was ready for the handle. Rick Rack was lots easier. I measured the rick rack to fit the basket shape and steam pressed it on the ironing board to get the shape. Then I hand appliqued it to the back of the quilt, beginning on the underside of the handle and then stitching the top. Once again, I chose a Bottom Line thread that blended with the colour of the rick rack to keep the stitches invisible.

Once the handle was appliqued in place, I began stitching the basket, down one side, across the bottom and up the other side, leaving the top open to form the pocket.
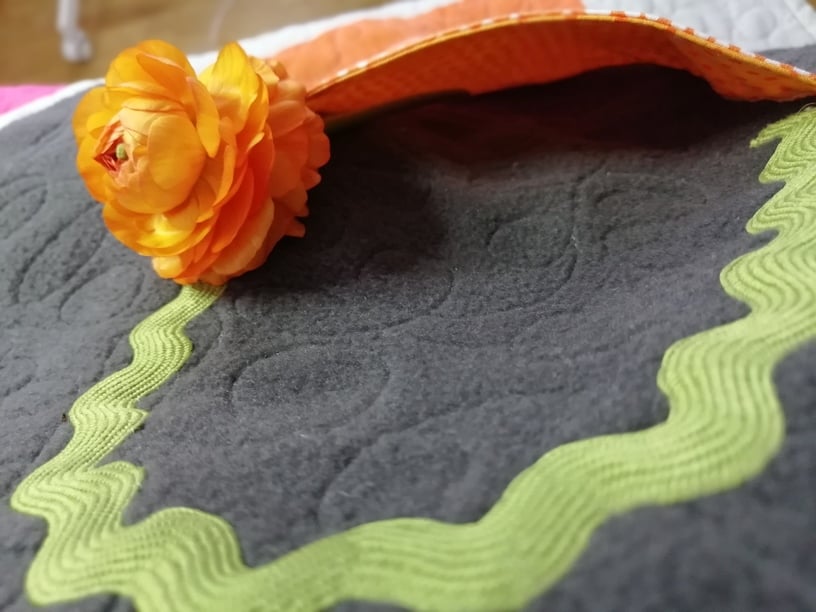
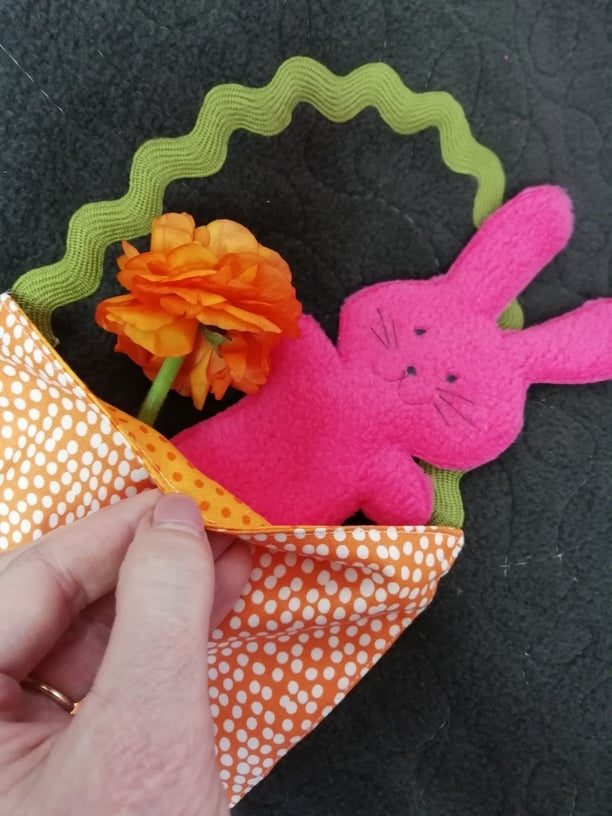
It turned out so cute! Just right for one little bunny. But it could be for anything, a little note, sweets, a flashlight or a tiny book.
There you have it, a little Easter bunny basket. It’s a lovely Easter surprise hidden in plain sight on the back of a child’s quilt. It’s a bit of fun that will make someone smile all year long.
Have fun stitching bunny baskets. Happy Easter!