Juki have a variety of EXTRA feet available for the NX7 machine. Sounds great. But WHAT DO THEY DO? Jen Hogg @jenerates takes us on a quick Show & Tell tour of the extra feet available for the Juki NX7.
Seam guide foot, cording foot, pearl foot, button foot, applique foot, binding foot, free motion quilting foot, invisible zip foot, shank adapter
The samples show the first time I used each foot – no practising – so it’s an honest assessment of my experience. Also my thoughts are from the point of view of a garment-maker. And yes, I write reference notes on my samples with a permanent pen. It keeps everything in one place!
Seam Guide foot (any stitch)
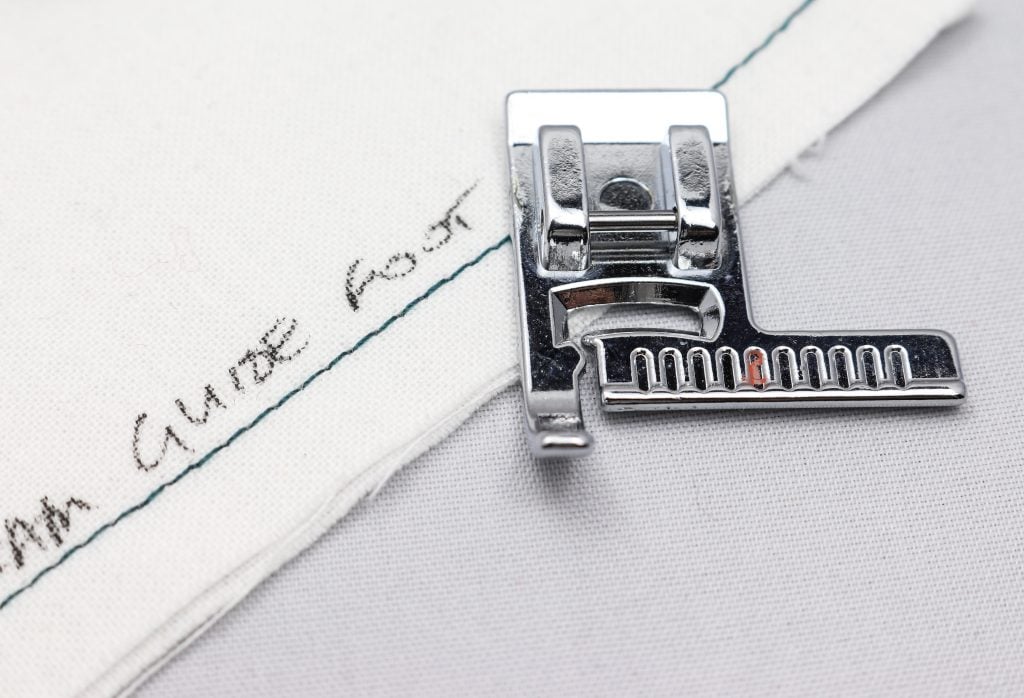
This one does exactly what you’d expect – it’s like a regular foot but with an extra guide at one side. My tip is that once you position the fabric under the foot and identify which groove you’re going to line up with, you can mark that groove with a little ink from a non-permanent felt tip pen, to keep you on track.
I have to say that I’ve seen this foot before but always thought the guides on the stitch plate would be enough. However, I only realised when I tried this foot out the whole point is that it puts the guide over the fabric and not under it. That’s so useful!
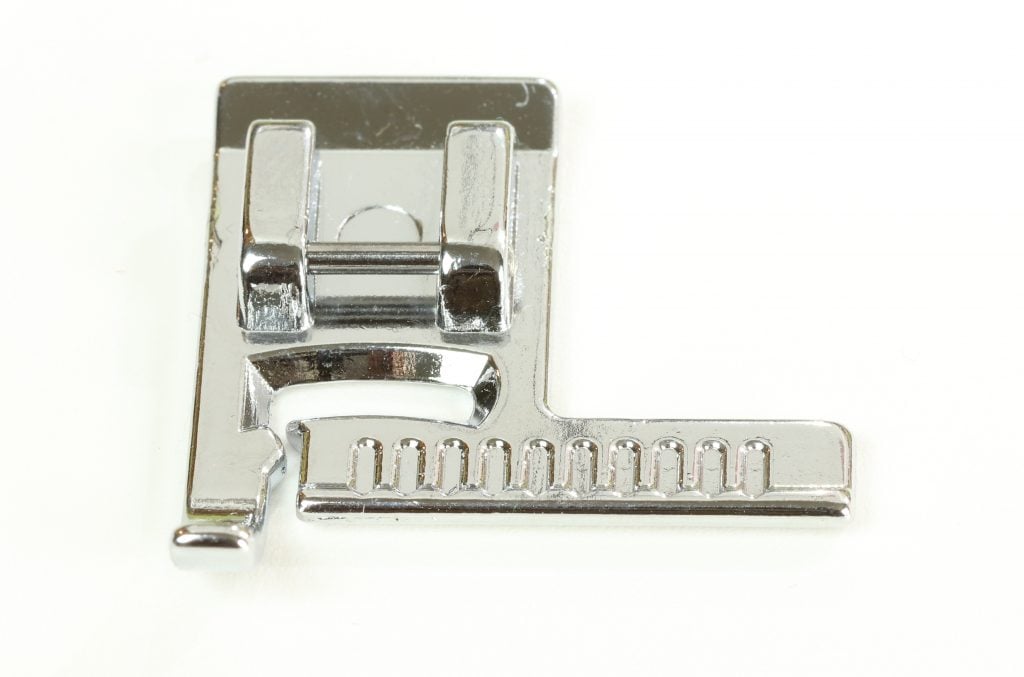
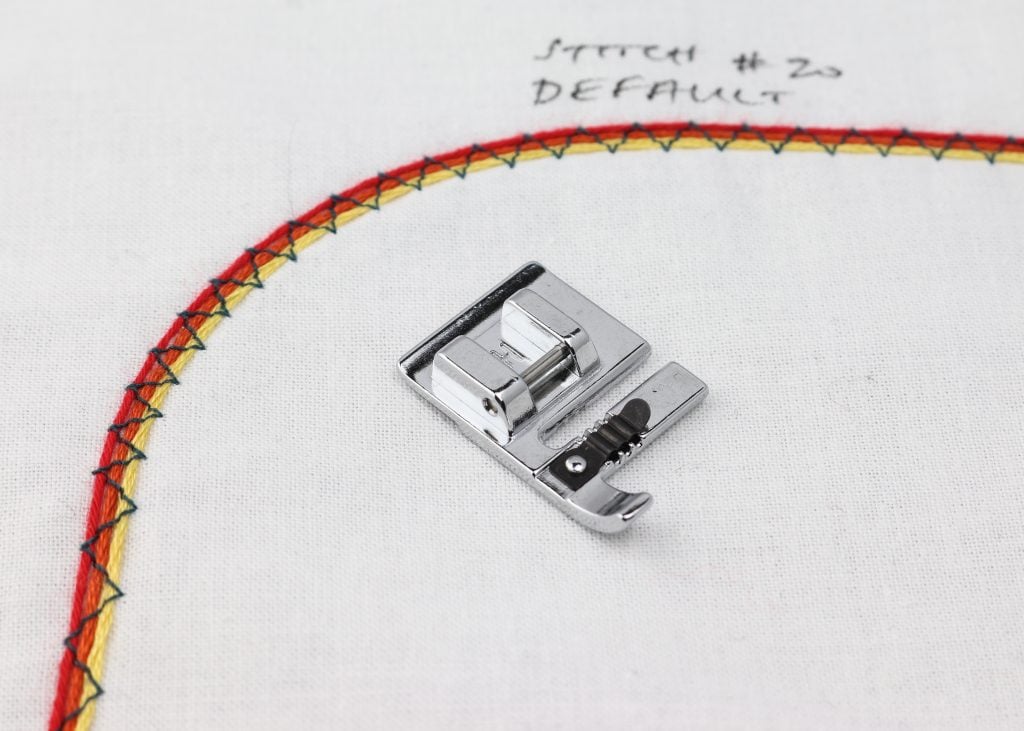
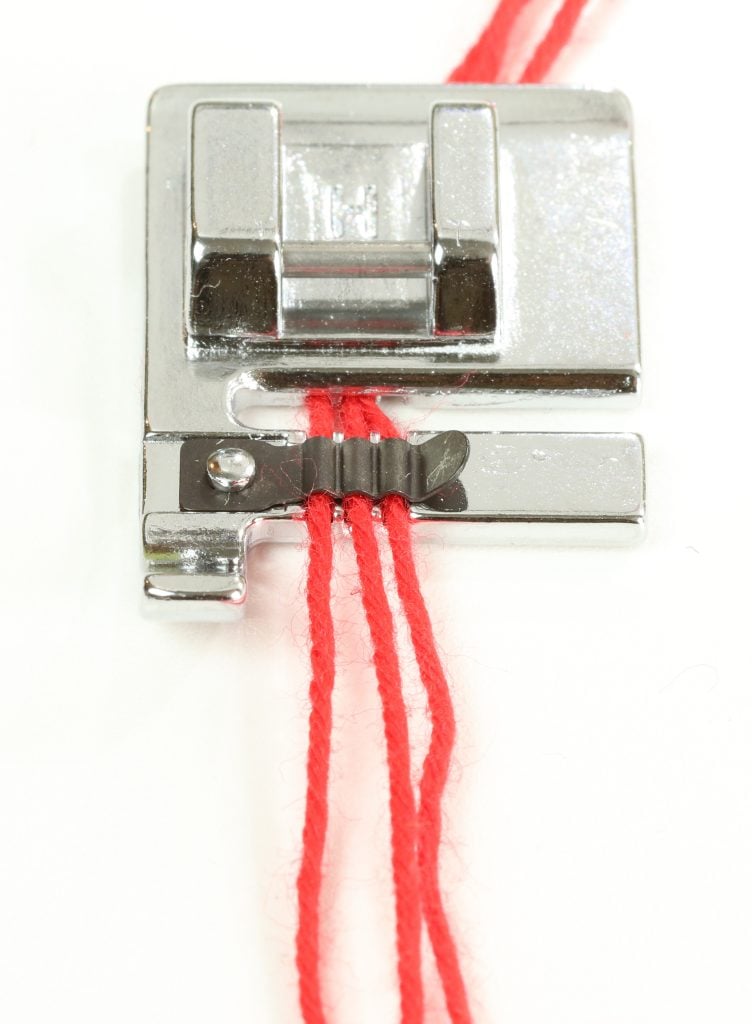
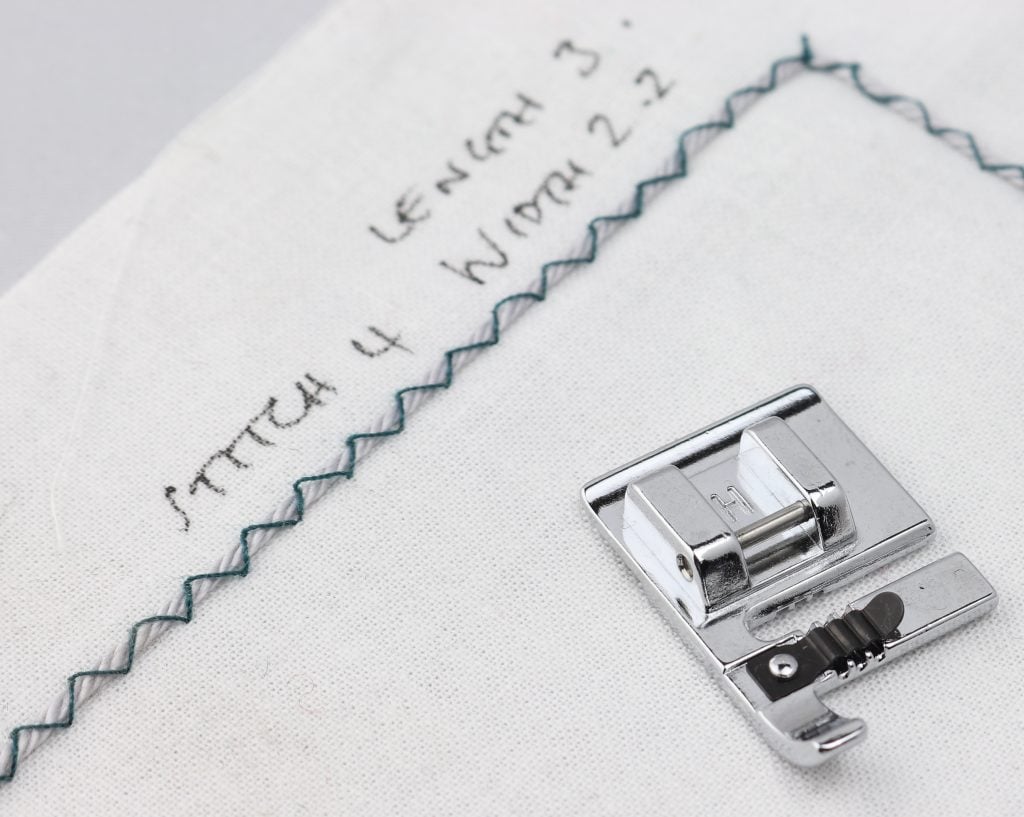
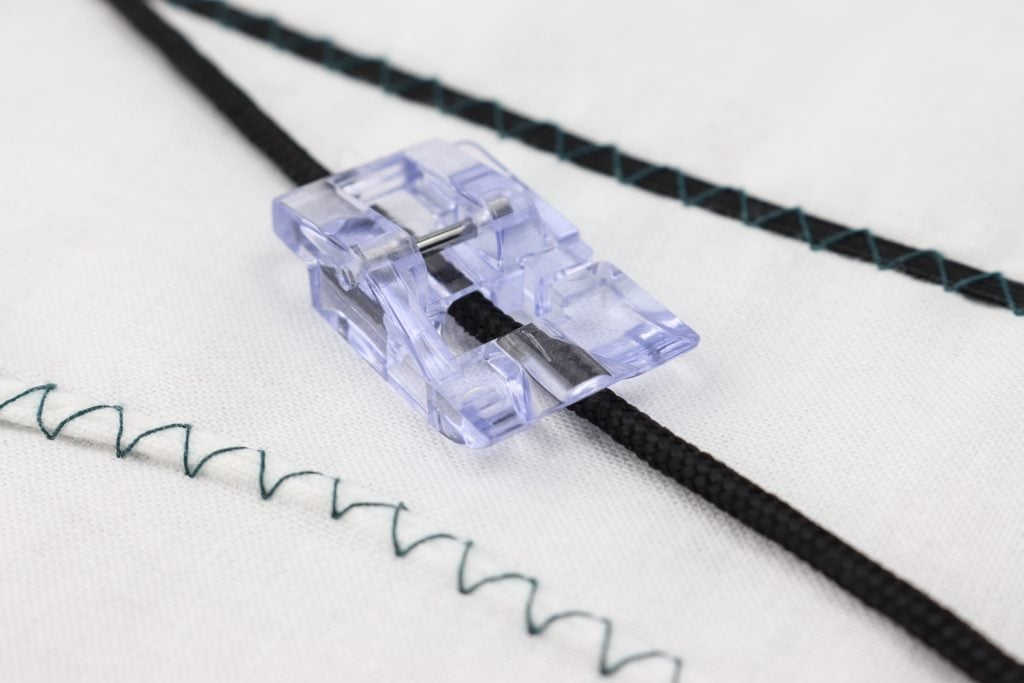
Cording foot (stitch 20, default settings)
cording foot
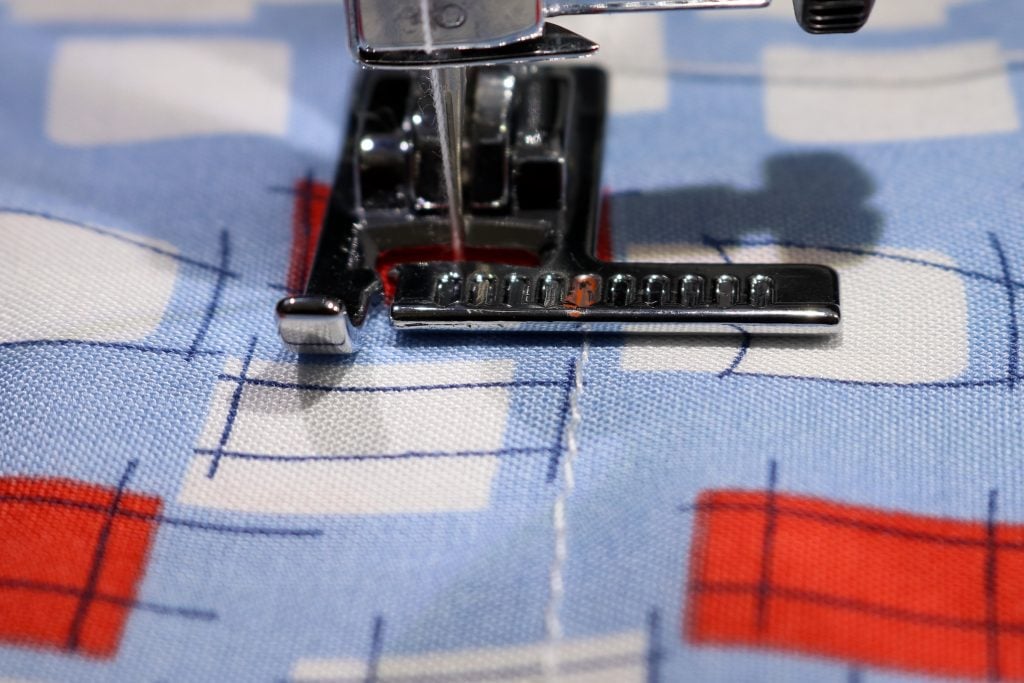
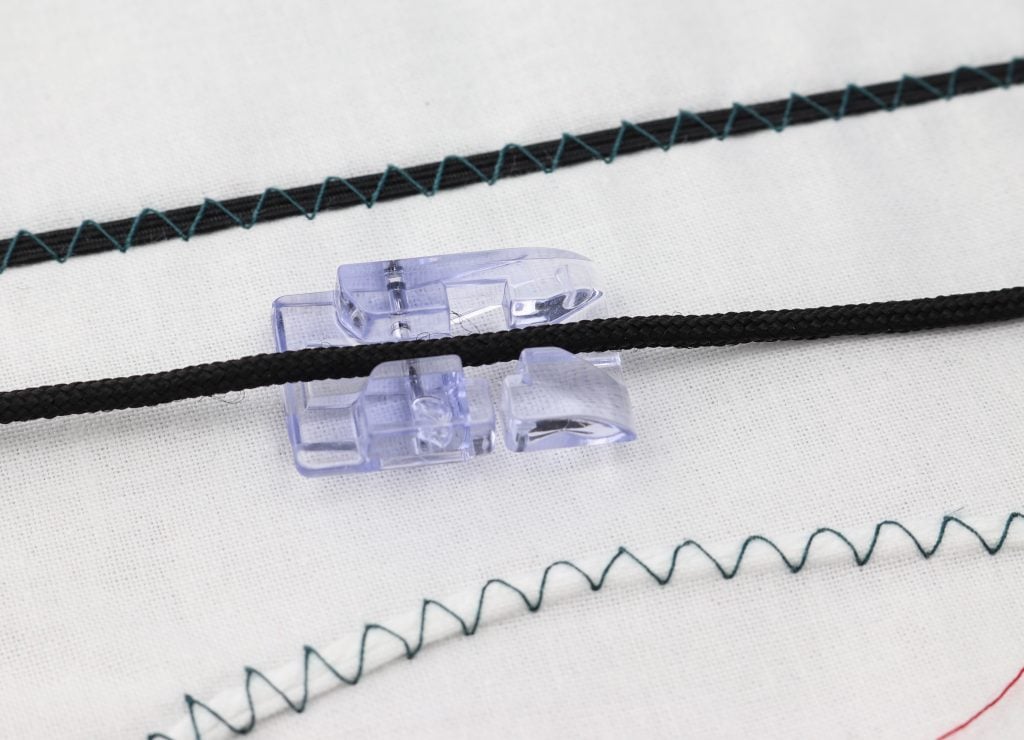
This foot can be used to attach one, two or 3 cords to your fabric. There are 3 small grooves to hold the cords in place. I tried it with three colours of ordinary embroidery thread. The suggested stitch for 3 cords is the stepped zigzag, stitch no. 20 and it works perfectly on the default settings. The instructions suggest moving the needle position to the left but I didn’t need to.
I found it helped to hold the ends of the cords together with a quilting clip when starting to sew, to stop pulling them out of the foot by mistake when positioning the fabric. And be careful not to tug on the cords when you sew, or you might pucker the fabric. The foot keeps the cords at a good tension so you don’t need to pull them straight as they go through.
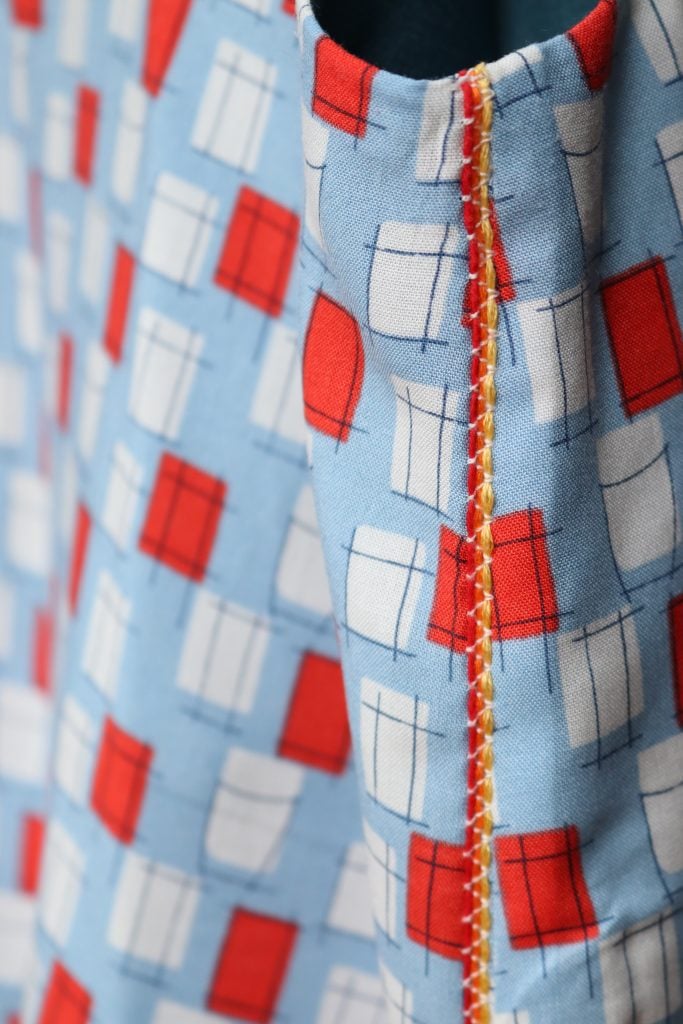
I’ve already used this foot in my sewing, the photos show an Ogden Cami with cording at one side seam.
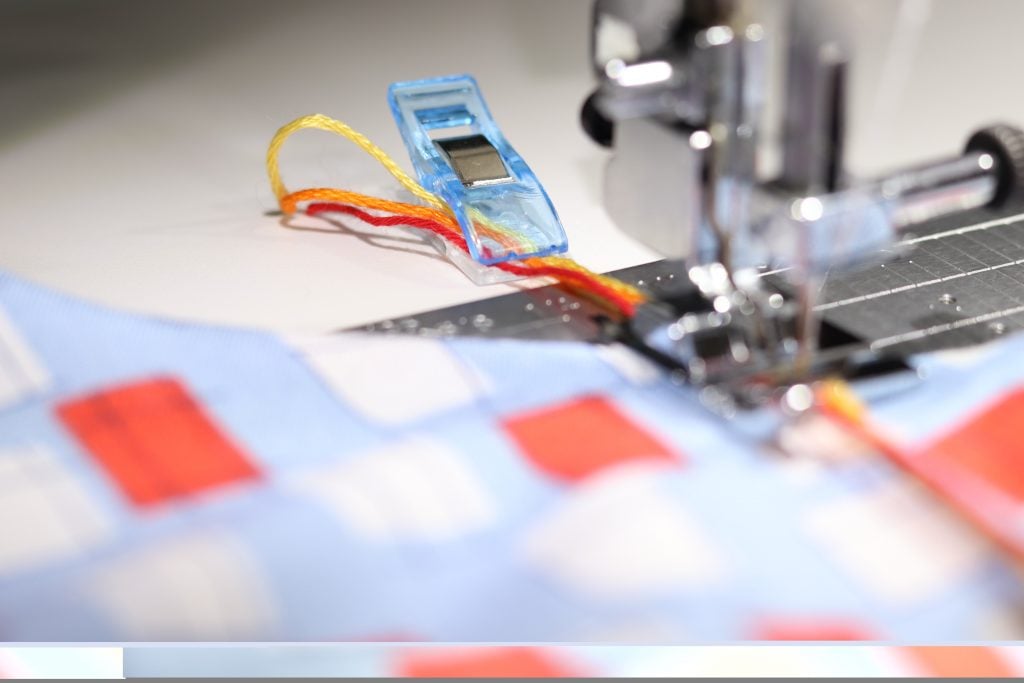
using a clip to hold the threads steady with the cording foot
I also tried this foot with one cord, slightly thicker this time, and a plain zigzag stitch (no. 4). Again the default settings for the stitch were best. It also worked when I lengthened the stitch, but I wasn’t so happy with a narrower stitch. The thickness of the cord will come into play here.
Pearl foot (Stitch 4, 6mm or 7mm wide)
This has a deep channel underneath to feed the cord through, in the photos you can see the foot the right way up, but also upside down to give a clearer view of the depth of the channel. I tried it with piping cord, using a plain zigzag (stitch no. 4) set to 6mm width.
That worked well, and got me thinking about trying it with elastic. In the video you can see it worked perfectly with both round and flat elastic, in effect creating a casing for the elastic. Nifty!
Incidentally, if I’m adding covered piping, round the edge of a pocket for example, I prefer to use a plain zipper foot. It lets you get close to the edge of the cord, and you can see exactly what you’re doing. That, and an awl or the sharp point of a quick unpick, to hold the fabric in exactly the right place.
Braiding foot (stitch 1 or 4)
The braiding foot works like the piping foot
This works much the same way as the piping foot, but has a flat channel for braid up to 5mm wide. It helps to use a zigzag stitch if the braid is shaped round corners or curves.
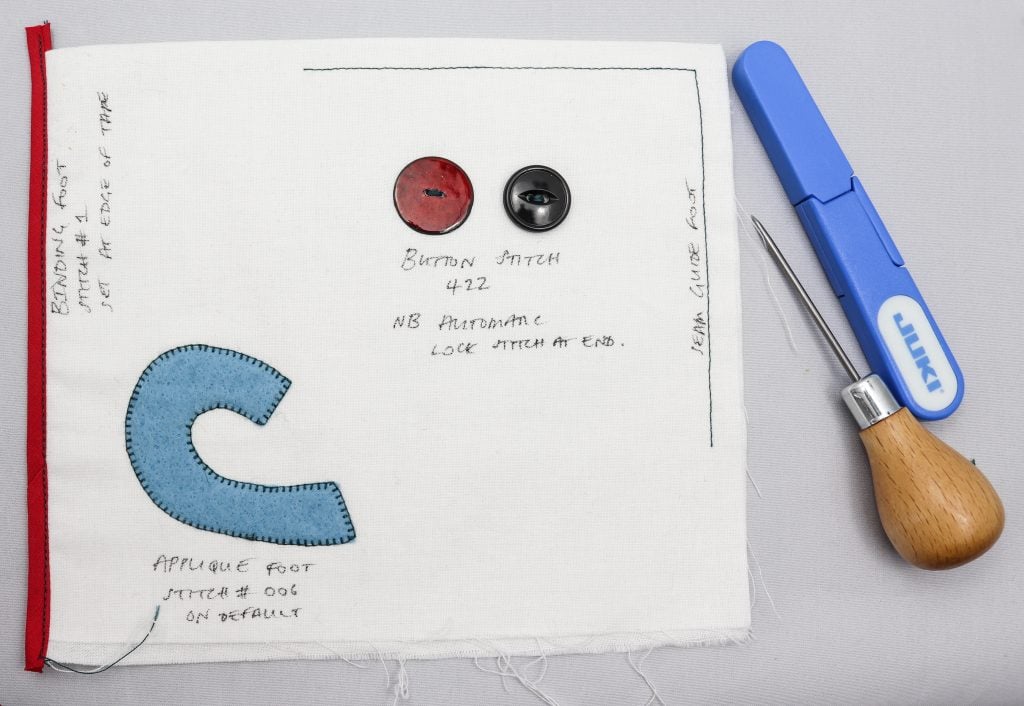
Button foot (stitch 422, default settings)
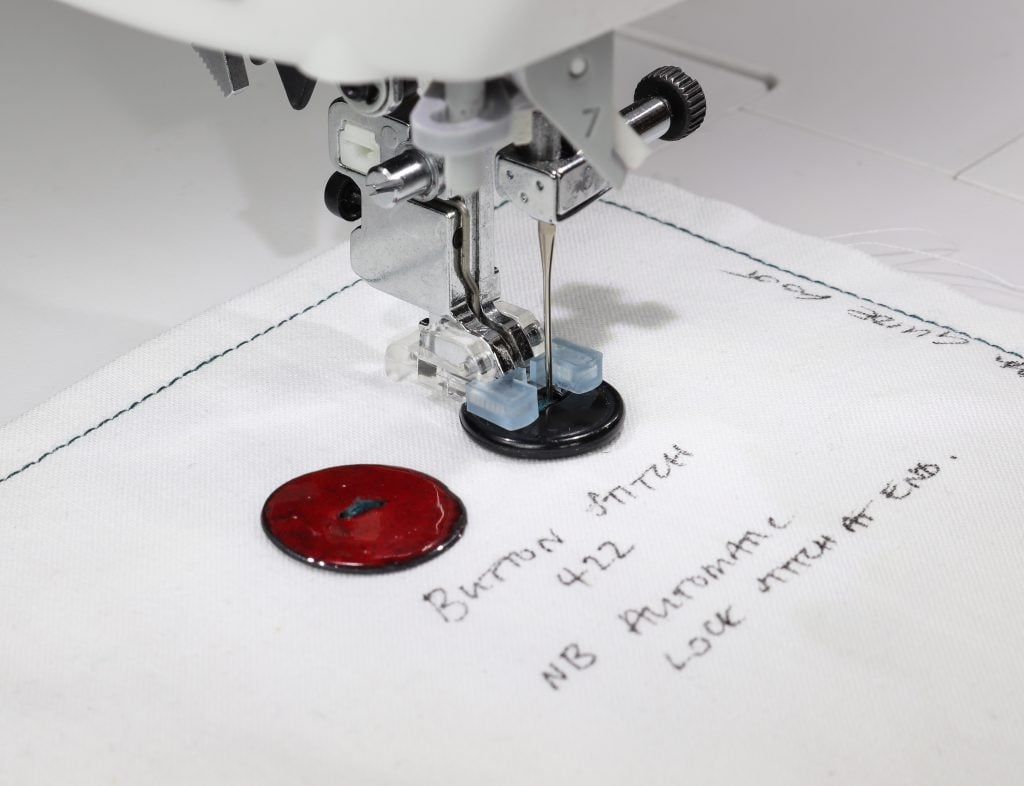
I’ve seen these, never tried one, but what a joy. The foot holds the button in place, you check the width of the zigzag stitch by turning the wheel on the side of the machine to check very slowly where the needle will go in on both sides of the zigzag. Once you’re happy that the needle is lined up with the buttonholes, off you go. The button stitch (no. 422) will do a few zigzags on the spot, followed by a lockstitch to finish. Wish I’d known about this one before I made a shirt dress recently! It worked equally well on a normal plastic button and a very flat enamelled button. Also, although I used two-hole buttons for my test, you could attach 4 hole buttons with this foot. Just think of the holes in pairs and line the stitching up accordingly.
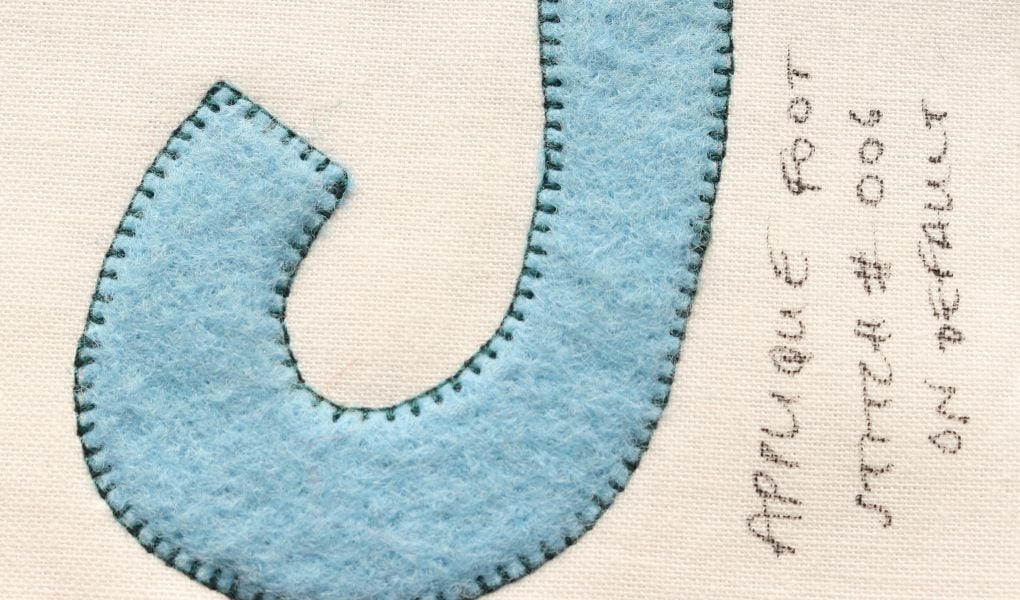
Applique foot (stitch 6 or 4, default settings)
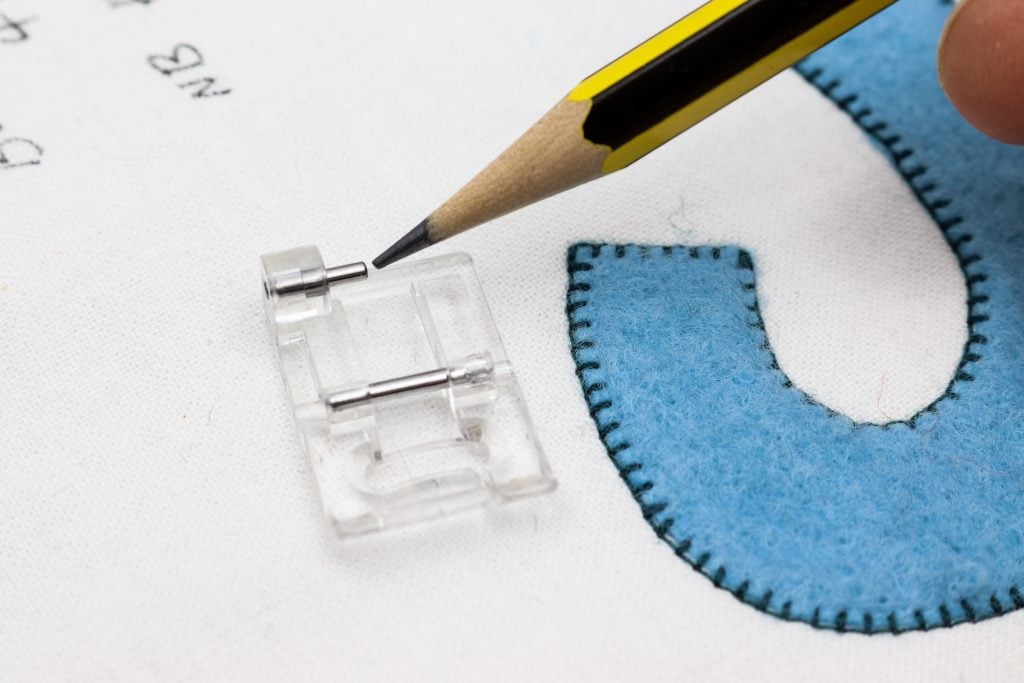
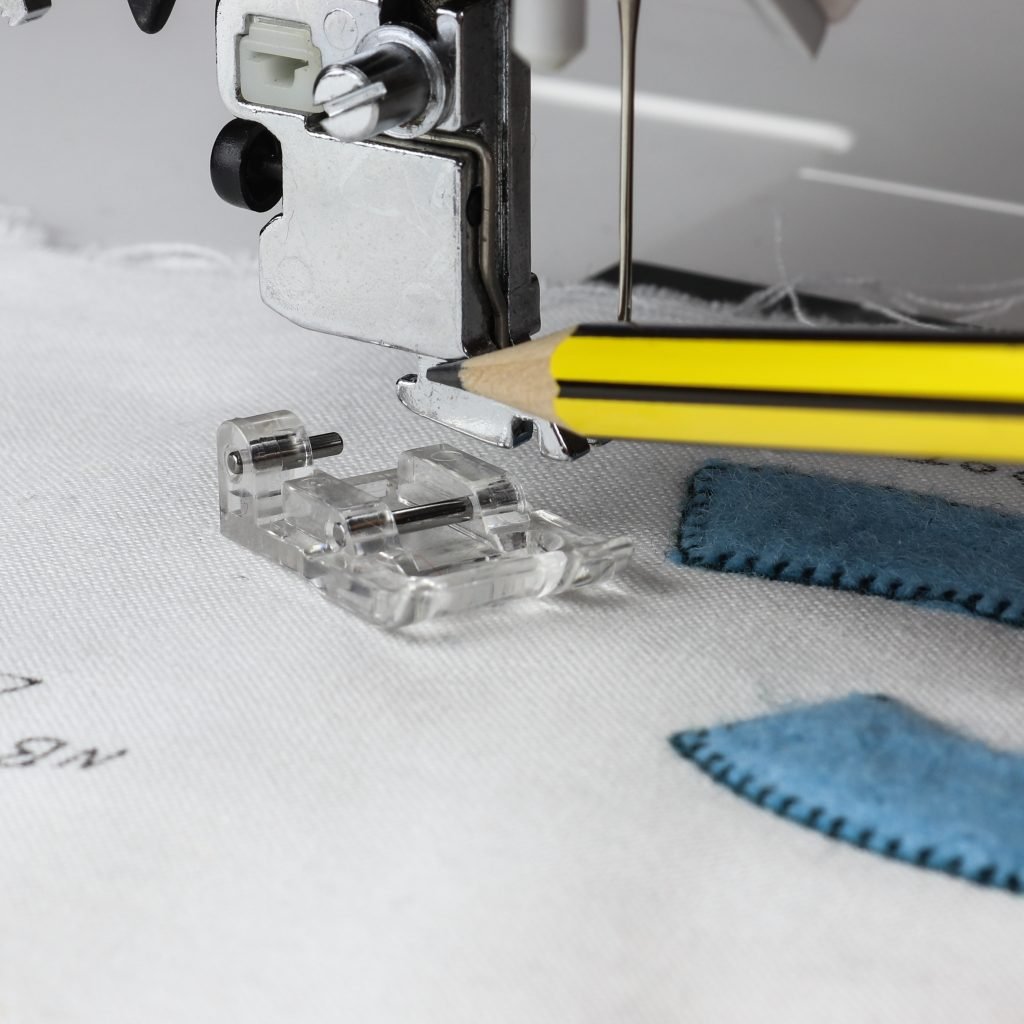
Now, this was fun. I cut out a letter in felt and used a little 505 spray glue to hold it in place on my background fabric. The applique foot has a wee peg which fits into a groove on the back of the machine shank (pointed out in the photos with my not-so-high tech pointing out tool). I used the blanket stitch 006 on its default settings and I love it! It looks like a Varsity letter, the kind you get on American college sweatshirts.
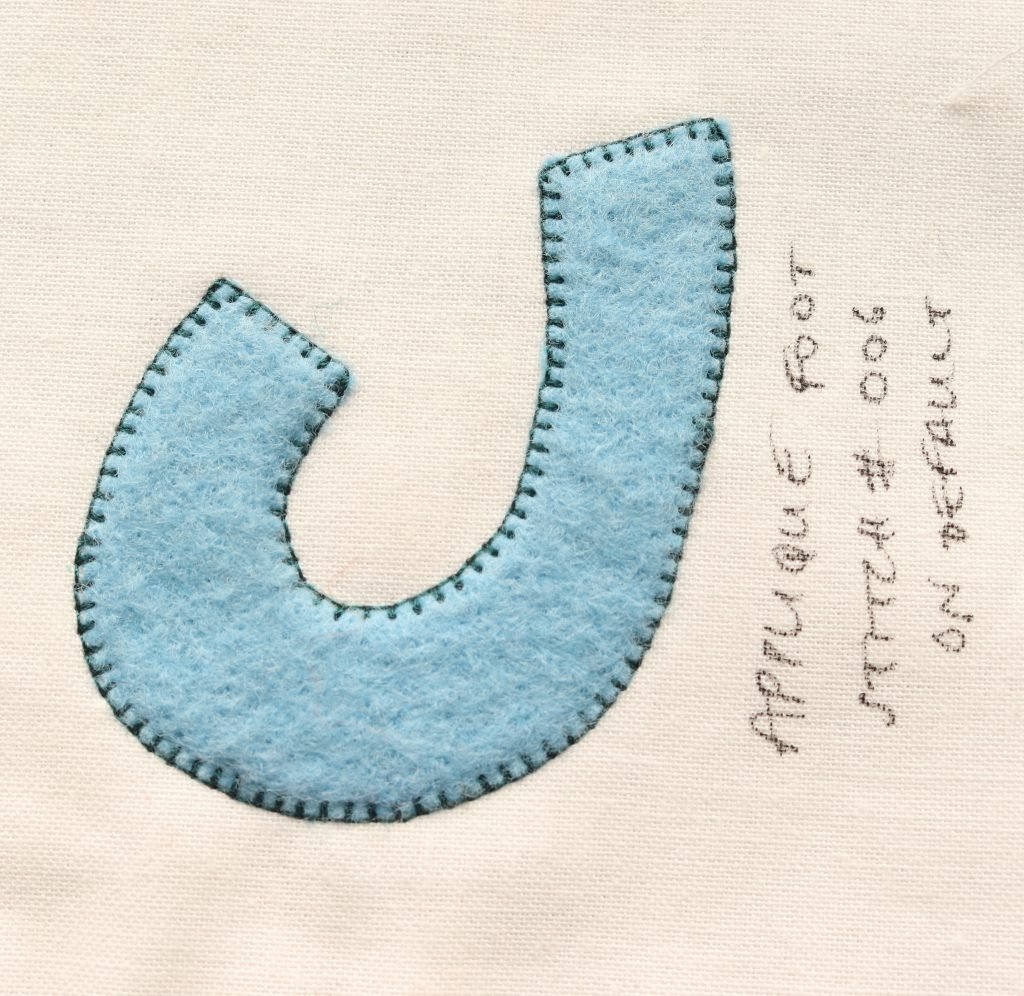
The blanket stitch comes forward, then a left – right. I did take care to pivot on the stitch coming forward rather than on the short stitches to the side, to make sure that I didn’t open up those side stitches by mistake (creating < instead of =).
Binding foot (stitch 1, positioned to suit)

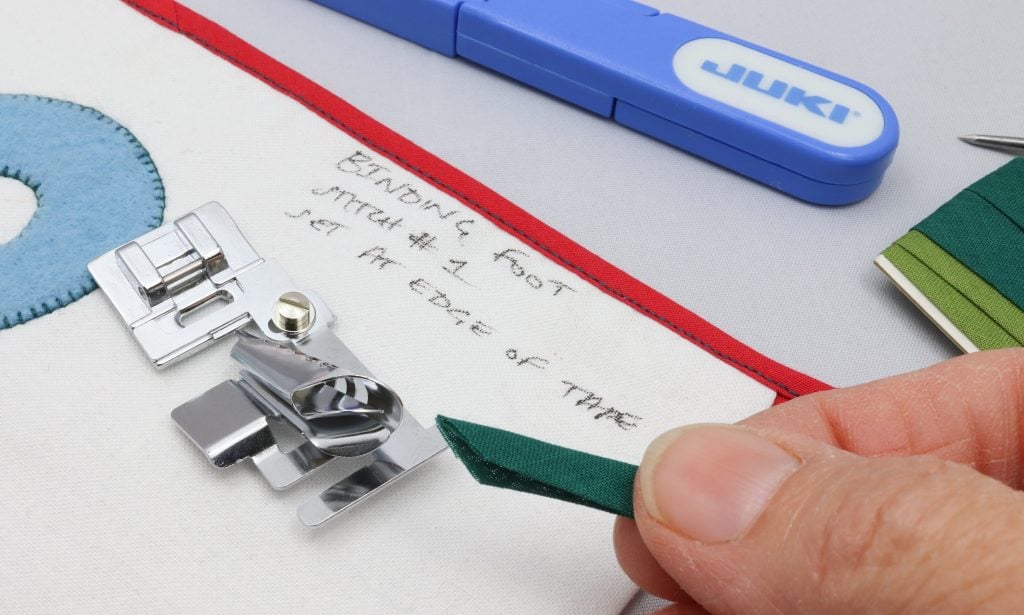
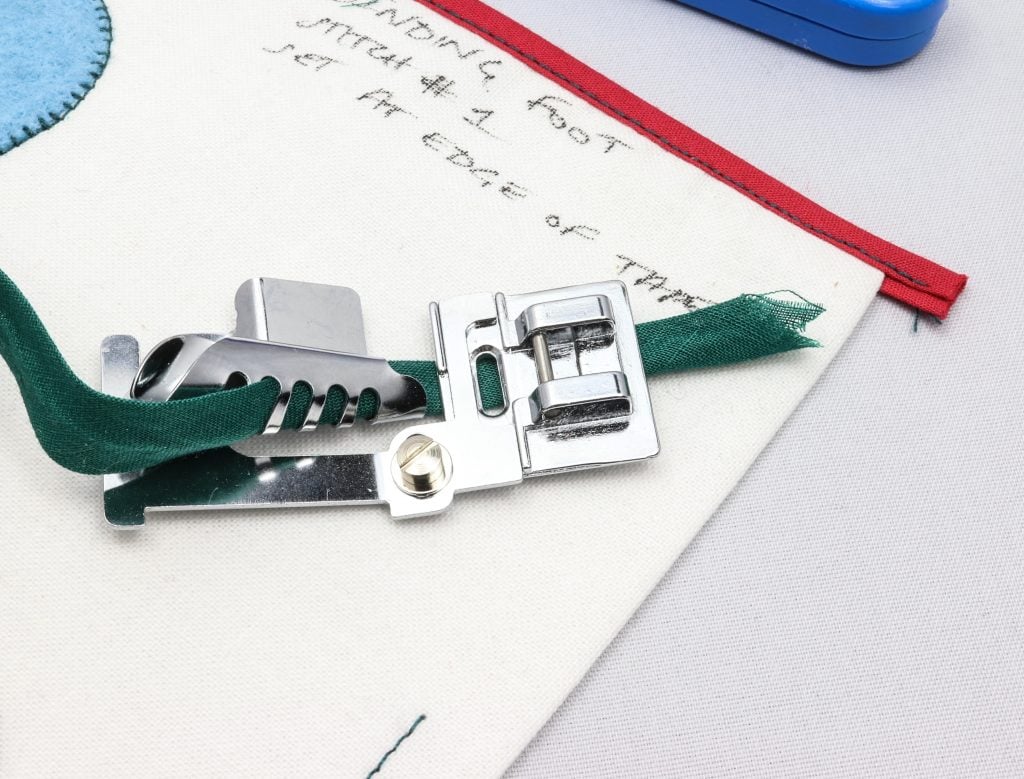
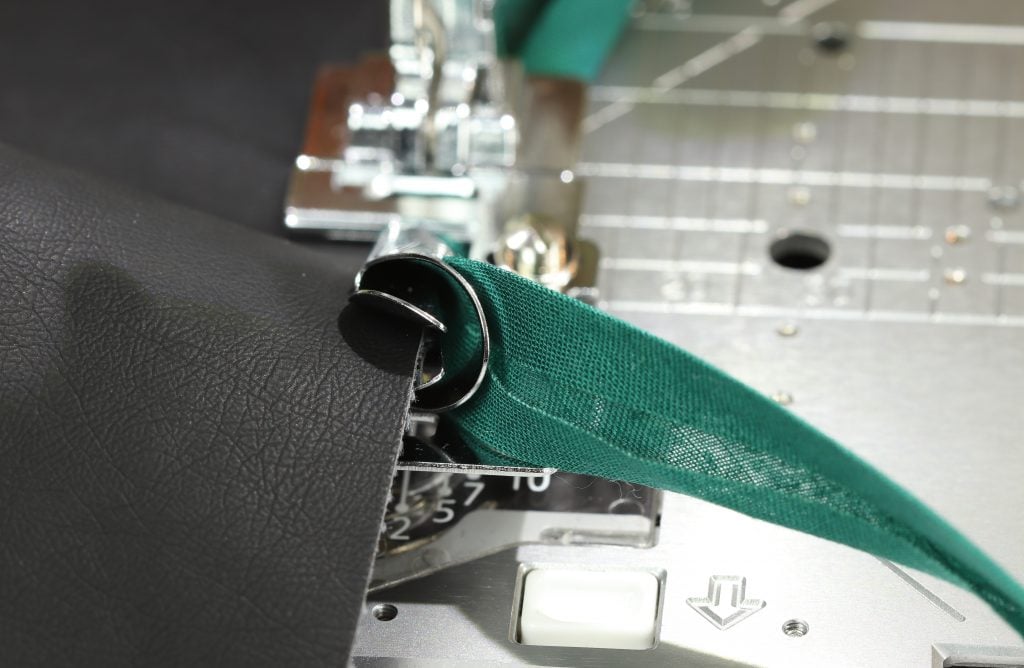
The binding foot
I’ve been wanting to try one of these for a while. Start with bias binding which already has the seam allowance folded in, like the shop-bought ones. Fold it in half and cut the binding to a sharp point. Then pull it through the foot.
If it’s a wider binding, you can pull it through from the top. If it’s narrower, use one of the slots in the side of the foot. It’s a bit fiddly to pull the binding through the foot, but poking it with an awl or the sharp point of a quick unpick does the trick.
Then attach the foot to the machine, slot the fabric into the middle groove, set the needle to catch the binding at the left hand side and that’s it.
This would be great to use for Hong Kong seams inside an unlined coat or jacket. It also handled a join in my binding without any problem.
Quilting foot and shank adapter (stitch 1)
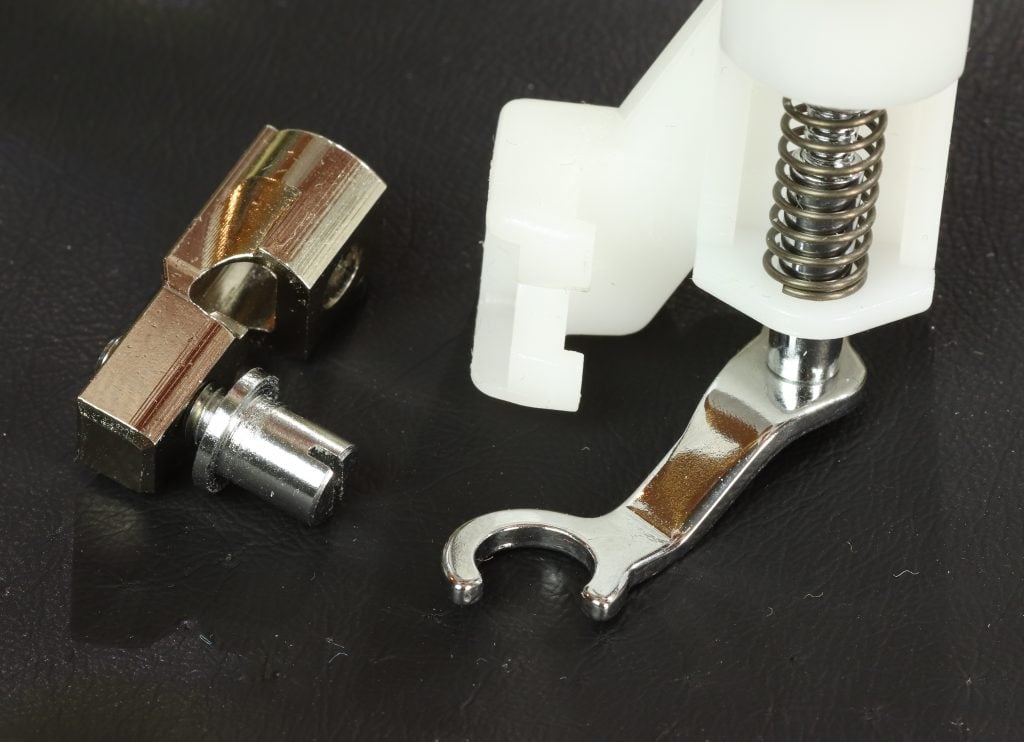
Quilting foot and shank adapter
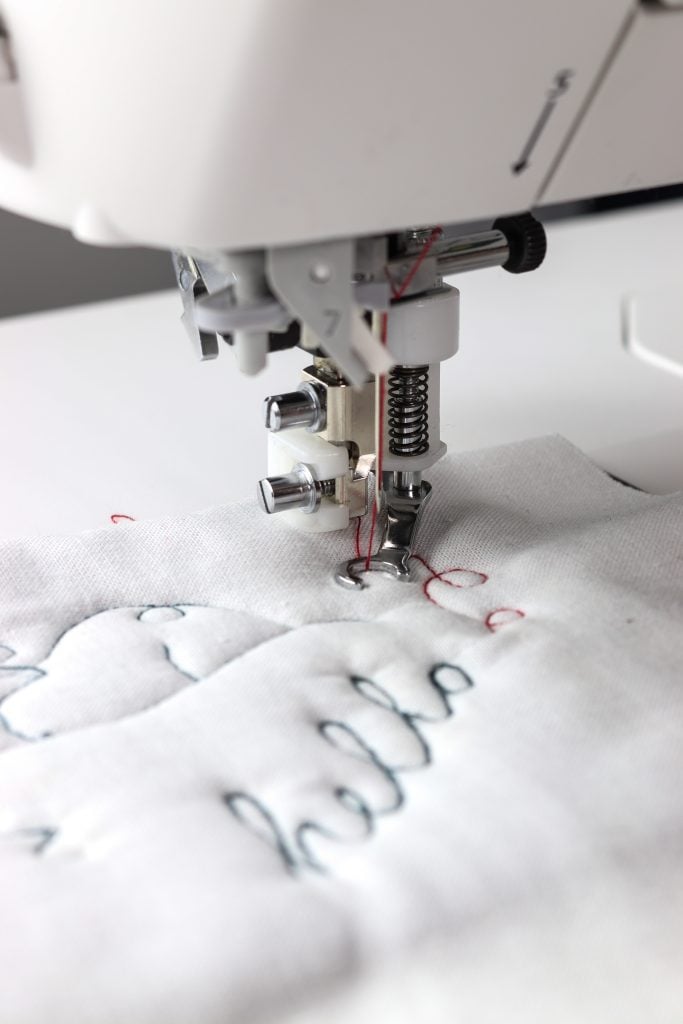
The kit comes with a shank adapter which you need for the quilting foot. It’s simple to change, and to fit the quilting foot onto. There’s a spring on the quilting foot which you adjust so that when it’s down the foot just skims the surface of the fabric. Also retract the feed dogs – this is an on/off setting on the home screen. And off you go!
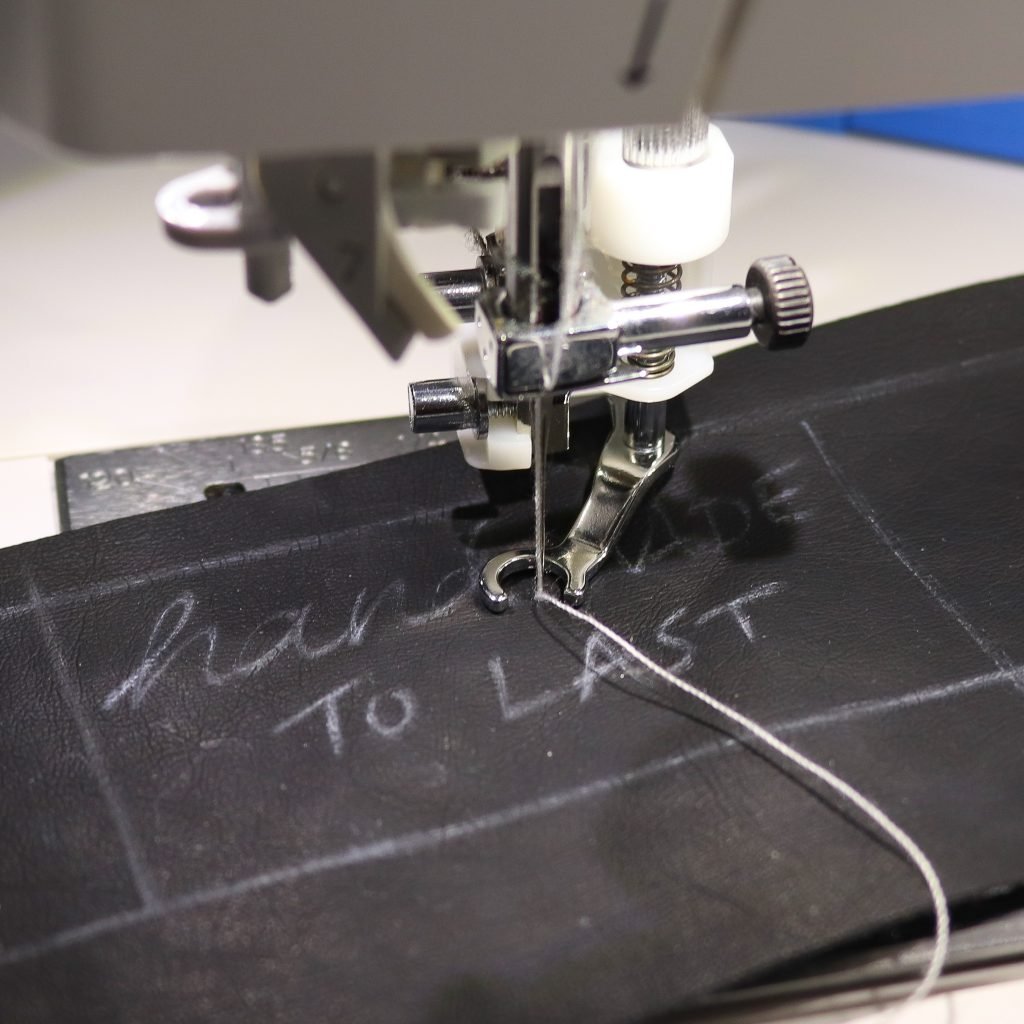
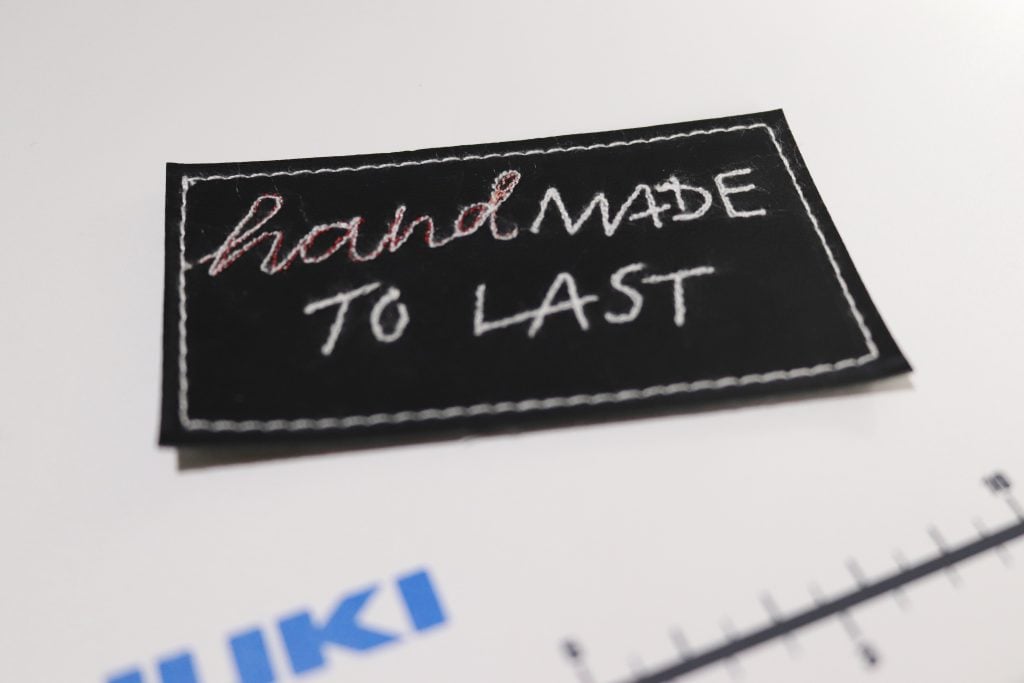
This is a huge improvement on quilting feet I’ve used in the past. Because it doesn’t bounce as you sew, it’s much easier to use. You can see I tried it out with some padded cotton, and I love the freehand “drawing with stitches” effect. But as I said I’m a garment-maker, so I’m thinking of applications for clothing. In the photos you can see a faux-leather patch I might use on the waistband of my next pair of jeans. My top tip is to sketch your design with an iron-off Frixion pen on fabric, or in chalk on the faux leather.
Invisible zip foot (stitch 1, centre position)
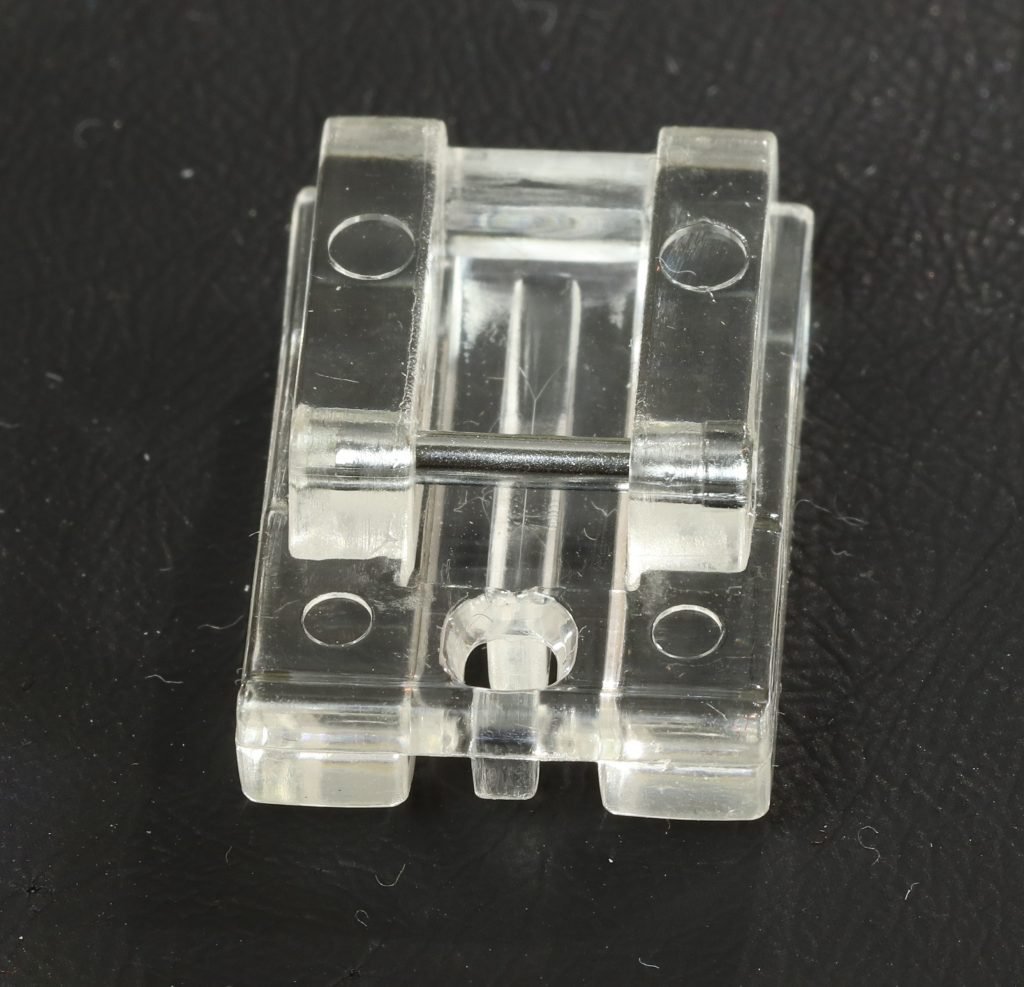
Invisible zip foot
Having used lots of different types on invisible zip feet, I reckon this one is a beauty. The channels for the zipper teeth to run through are very defined and quite deep, so the teeth won’t jump out of the channel, when you go over a seam, for example.
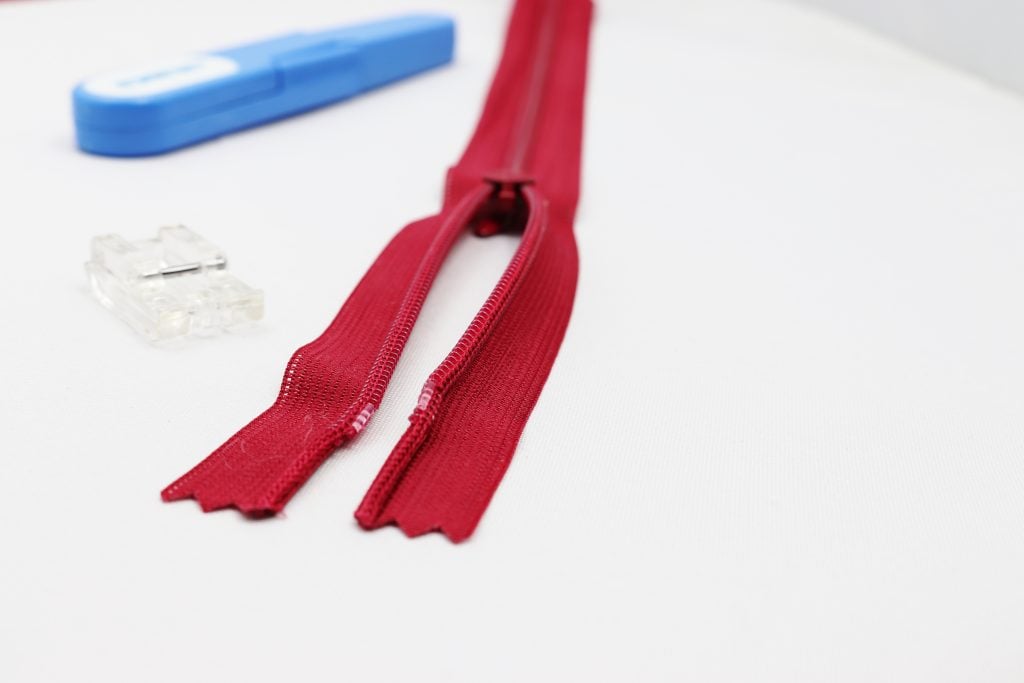
I always press the teeth of the zip with a warm (not hot!) iron to uncurl them a little. In these photos you can see the zip before pressing, and after. Once they’re pressed they slot into that groove on the foot much more comfortably. I’m using a pin to show the needle position once you have the foot on the machine. The needle goes in right beside the teeth, as close as you can get without actually catching the teeth. That’s the trick to making the zip invisible. Remember, if you stitch the zip down and decide it’s not invisible enough, you can add another line of stitching closer to the teeth without unpicking the first line.

If you want to use invisible zips, an invisible zip foot is essential and it’s worth investing in one that’s well made.
That’s it, our guide to the extra feet available in the Juki NX7. Happy sewing!
Jen
Jen Hogg lives in Glasgow with her husband and dog, and has two children at university. A former solicitor, she reached the semi-final of The Great British Sewing Bee Series 5 (2019). Life for Jen now revolves around sewing: writing, teaching and recently bringing the Jenerates Sewing Ruler to market. She also enjoys knitting and many other textile crafts, as well as silversmithing and photography, woodwork, wrought iron, stained glass, pottery and generally making things. You can follow her on Instagram and Facebook @jenerates, and at www.jenhogg.co.uk, and you can read our Juki Club introduction here.