Home stitched fabric postcards are like sending a hug through the post. It’s one of my favourite ways of connecting with family and friends. This post shows how to make fabric postcards free motion quilted on a long arm or quilting frame. Longarm quilting your postcards, allows you to quilt all the Christmas cards on you list in one go.
Next month, we’ll post about a straight line quilting technique for stitching Christmas postcards on your regular sewing machine.
Stitching Christmas postcards is easy. We’ll show you how. All you need are some festive Christmas fabrics, pretty thread and fleece or wadding. These postcards can be stitched on a quilting frame, or a long arm. They can also be straight line or free motion quilted while sitting at your sewing machine. To save time we’ll be making the postcards in batches. We’ll stitch a practice piece first and free motion quilt it with pretty threads. Then we’ll cut this up later into postcard sized shapes.
What you need
- festive fabrics
- fleece or wadding
- pretty thread
- ribbons and ric rack
- pom poms, sequins or buttons
- printed postcards – you can get them here for free
First find some festive fabric
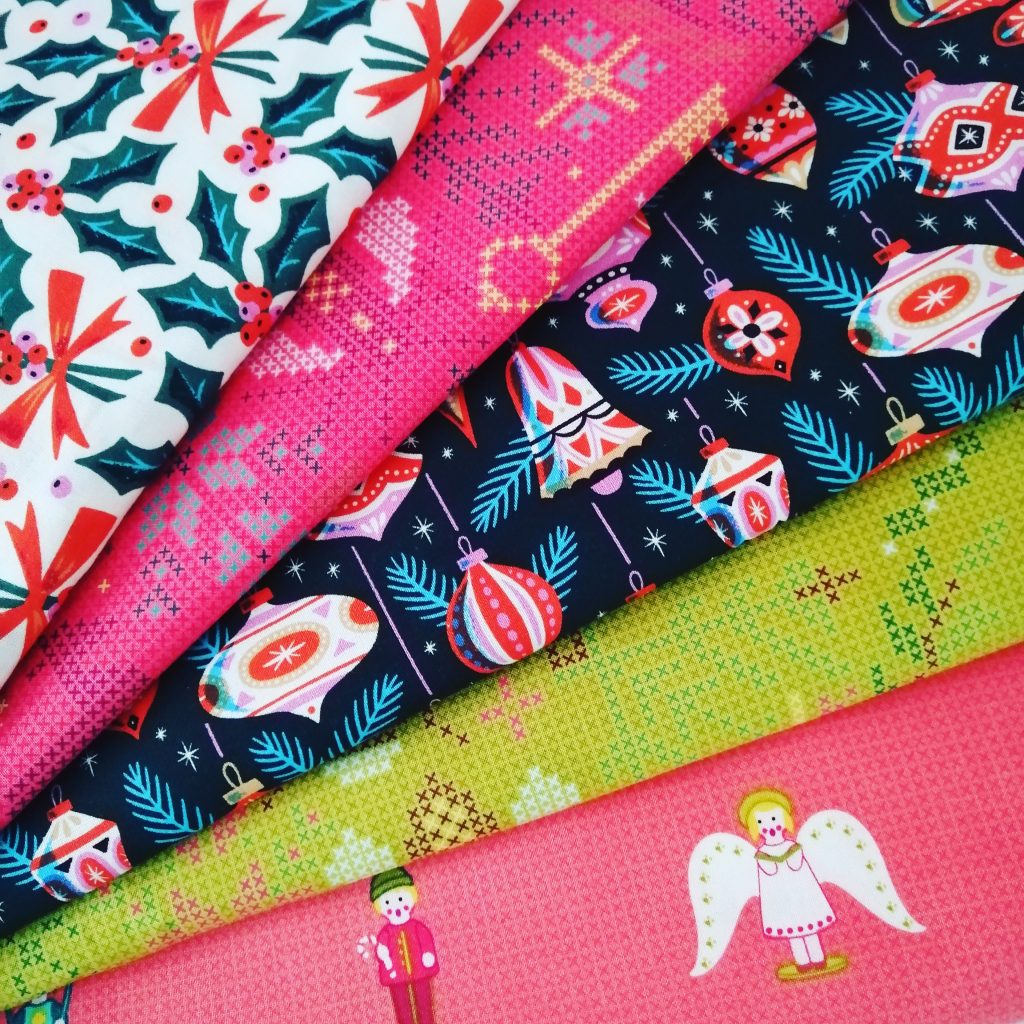
Festive fabrics by Alison Glass from my stash
If you’re anything like me, you have a stash of festive fabric from years gone by. Even so, you still might be tempted to grab some of the new lines that just came out.

Fabrics and embellishments
My practice piece is a combination of old and new fabrics. I’ve pieced these simply together into strips. Next add a layer of fleece or you could choose wadding and backing layers. I like to use fleece.

Stitching fabrics on the Juki DX7
Doing the quilting
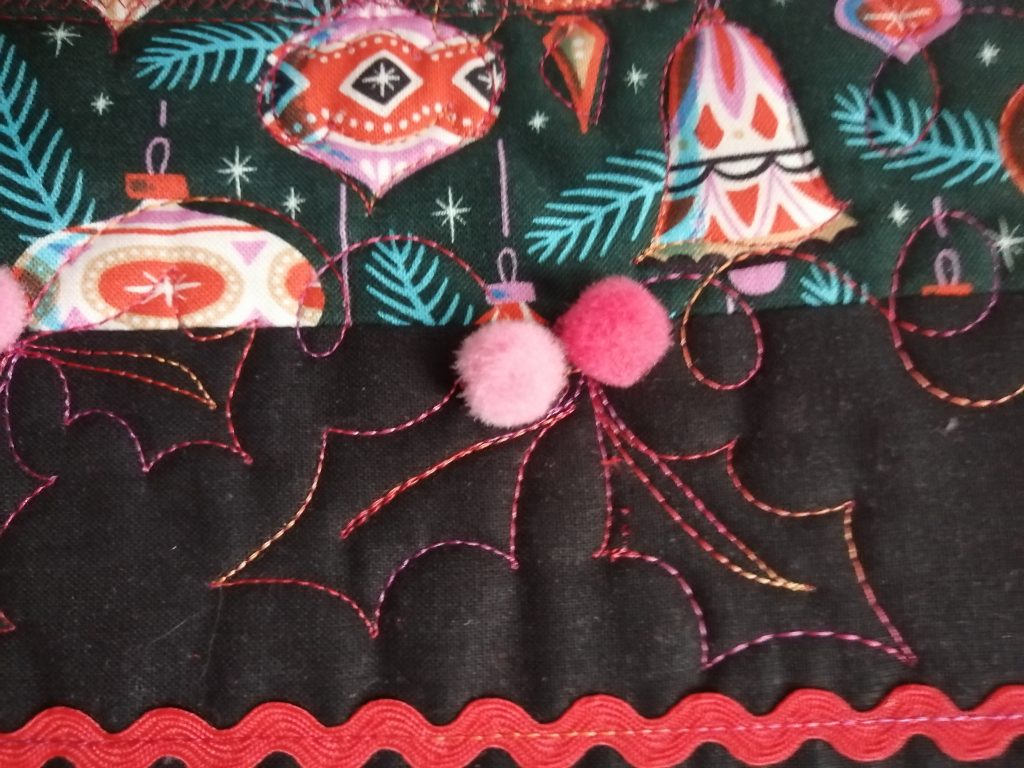
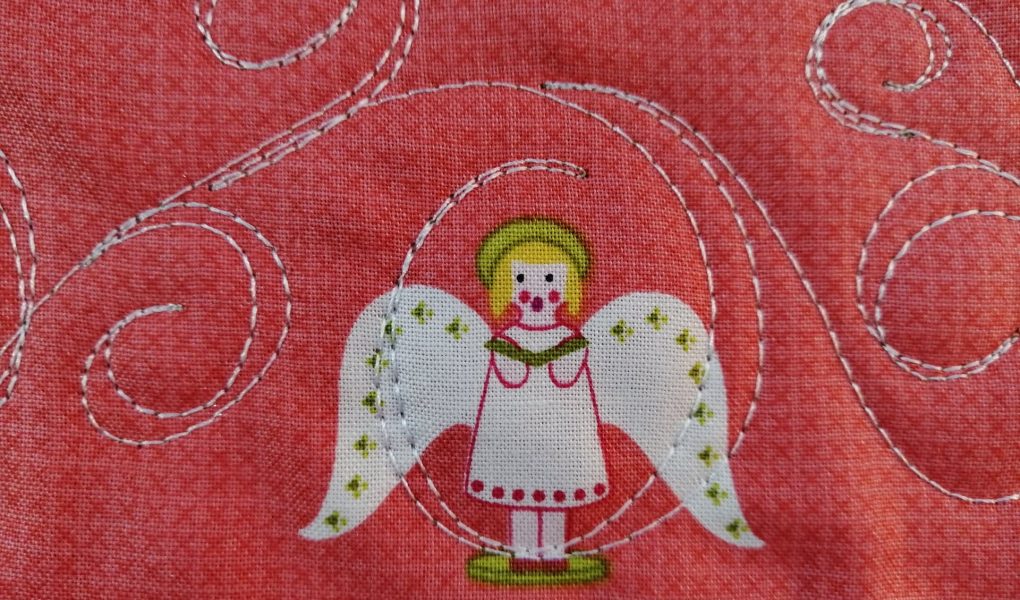
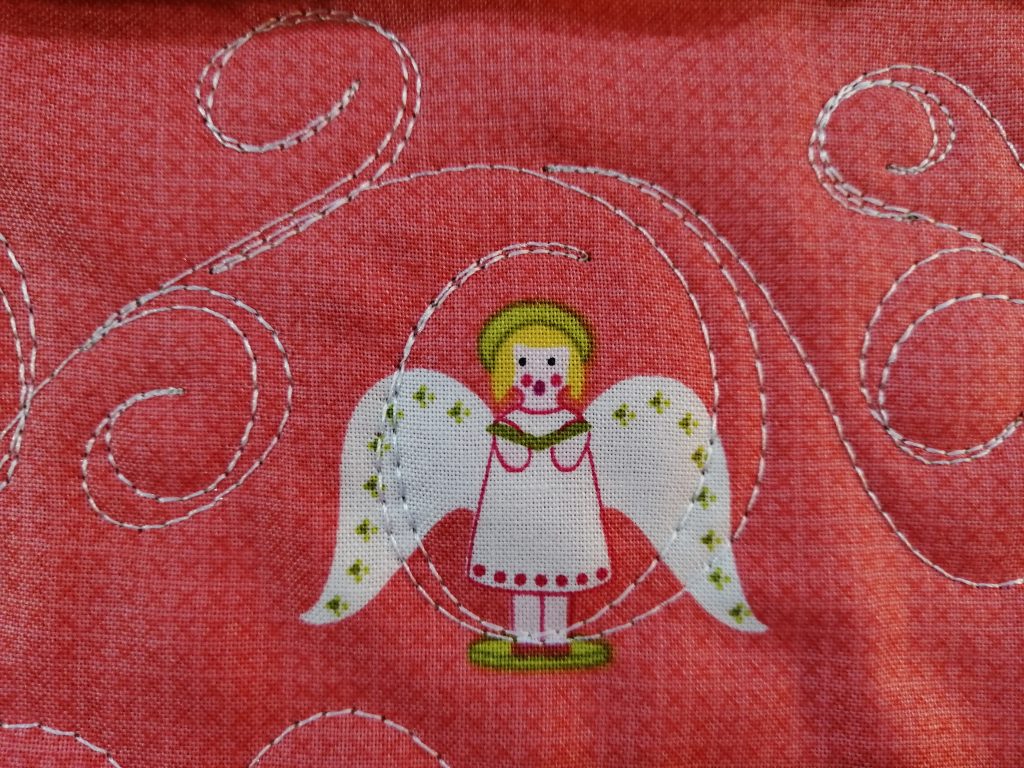
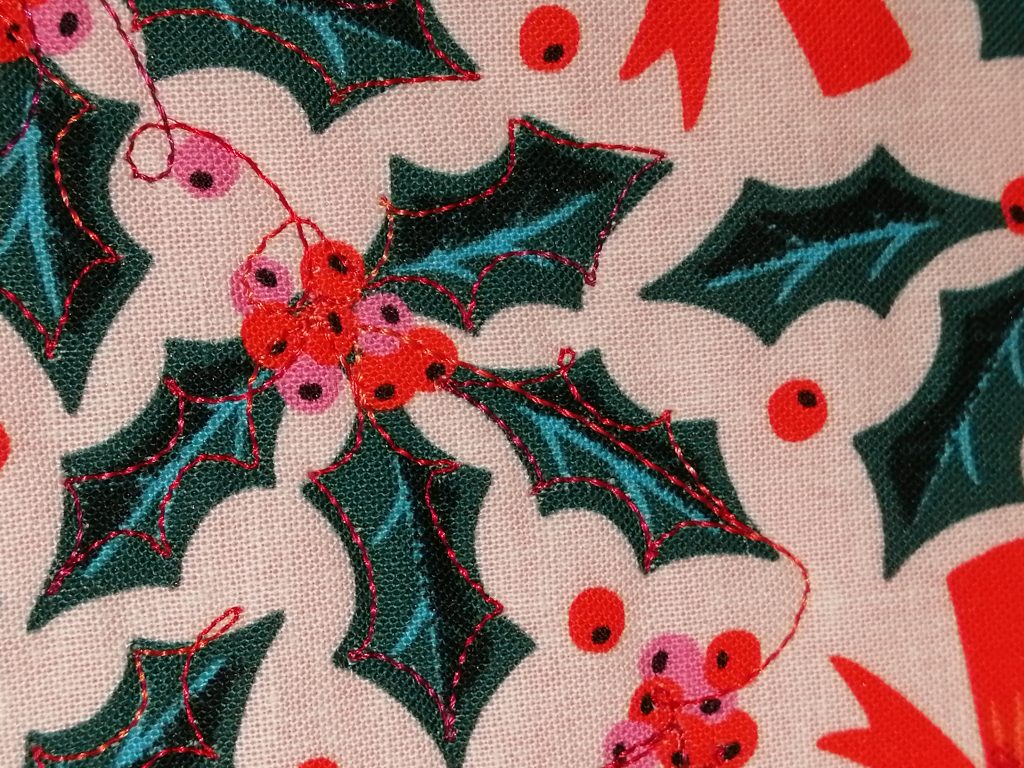
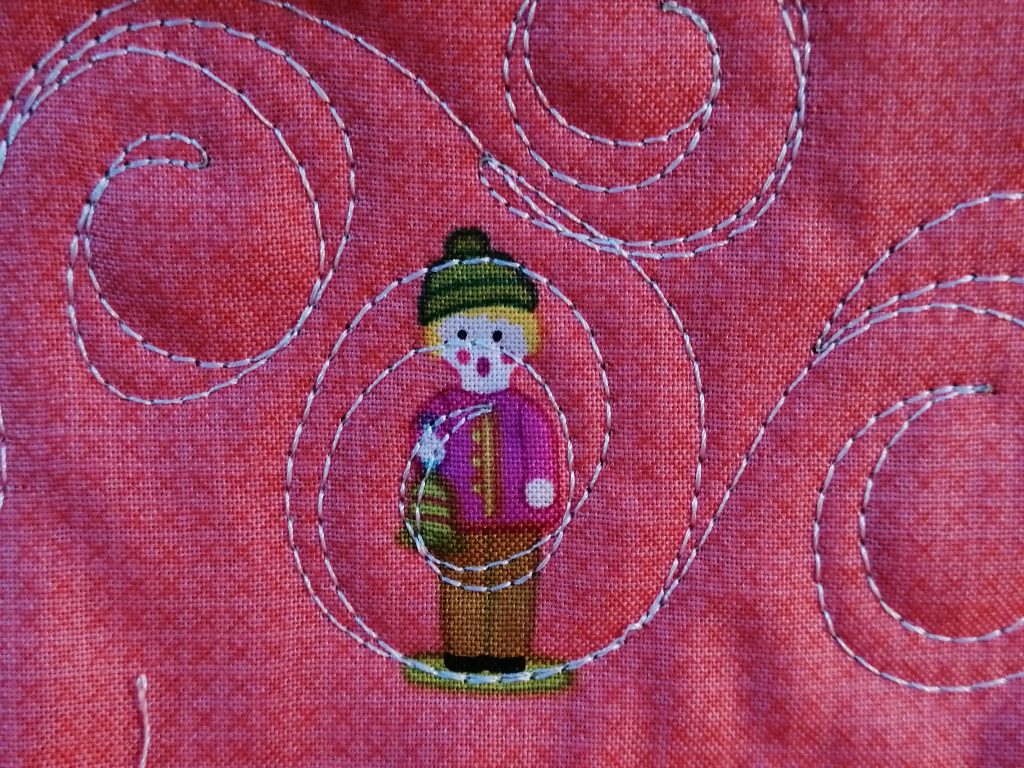
Next comes the quilting part. You can do this in a variety of ways. I use a quilting frame for free motion quilting. The video clips shows the practice piece loaded on a frame and then quilted with the Juki TL QVP Mini straight stitch. But you could also baste your layers together and quilt your practice piece sitting down at your machine. Straight line quilting looks fabulous and so does free motion quilting. However you choose to do the quilting, the main point is to do the quilting part all at once on a big practice piece. Play with pretty thread and holiday designs.
I tend to play with quilting patterns often inspired by the actual fabric. The holly shape looked great against the black. I’m using the Juki TL QVP Mini straight stitch on the 6-foot Machine Quilter frame. In the short video clip you can see me just playing with the bauble designs in the fabric. The idea is to be playful and have fun with the quilting. Mistakes don’t matter because you’re going to choose the best parts of your practice piece for your postcards later.
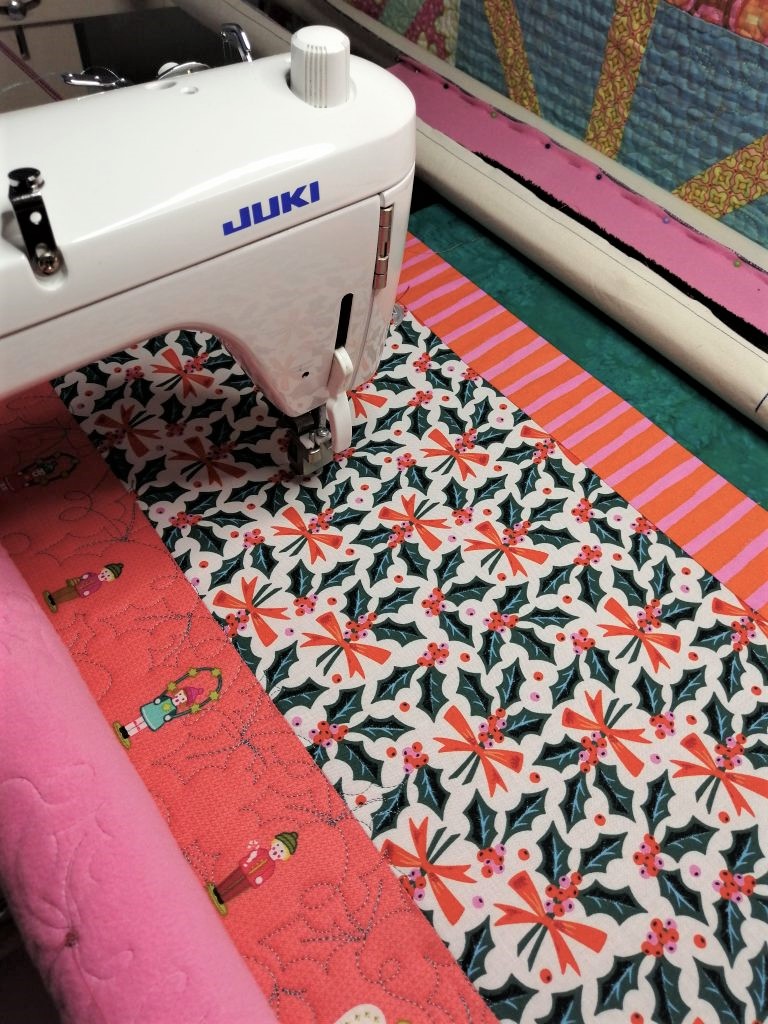
Free motion quilting with the Juki TL QVP Mini straight stitch
Print your postcards
When you’ve finished quilting take your practice piece off the frame. Now you’ll need postcards. You can print your own postcards on your computer printer. Get some A4 card that will fit in your computer. Try Amazon. You can get 50 sheets of white A4 card for £5.99 via Amazon Prime. Avoid glossy photo paper because it’s hard to write on. Use a mid-weight matt card around 250 gsm.
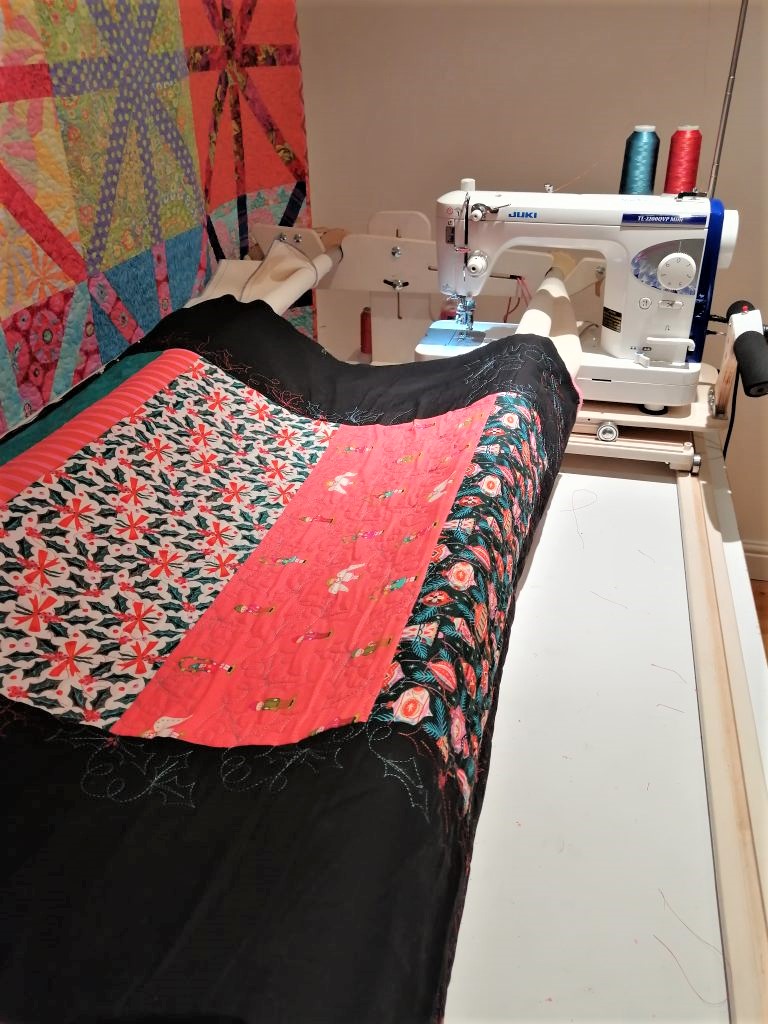
Taking the fabric practice piece off the frame
Once you have your card, follow this link Follow this link to the Machine Quilter Blog to get FREE holiday postcard artwork. You can download this and then print it on your computer printer. Finally, I use a dull rotary cutter with my ruler and mat to cut out the postcard shapes.
Cut out the postcard shapes
Now use your paper postcards as templates. Find your favourite bits on your practice piece. Use the paper postcards as a template and cut around them. Your fabric postcard shapes should be a bit longer and wider than the paper postcards. You’ll trim them later.
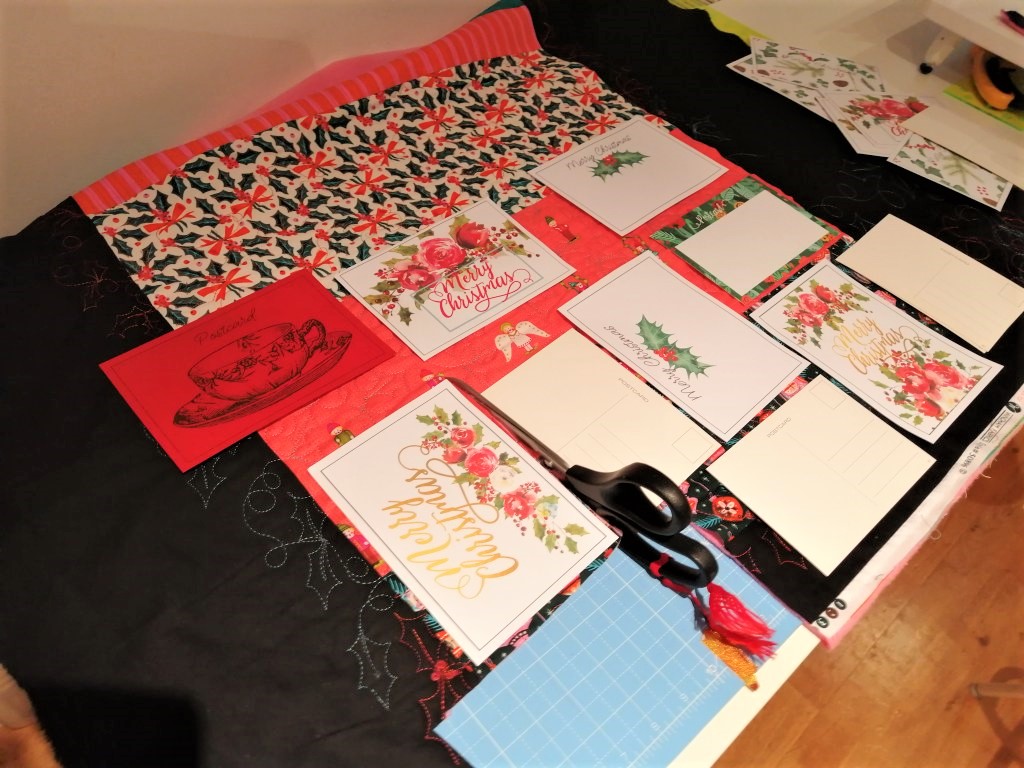
Using the paper postcards as cutting templates
Do some embellishing
Now, before you stitch the fabric to the paper postcards, it’s time to embellish the postcards by hand or machine. I’ve added ribbon and ric rack and pom poms and buttons. This is a fun way to make each postcard a bit different.

Stitching on the fabric side of the postcard
Stitch the ‘little quilts’ to the postcard backing
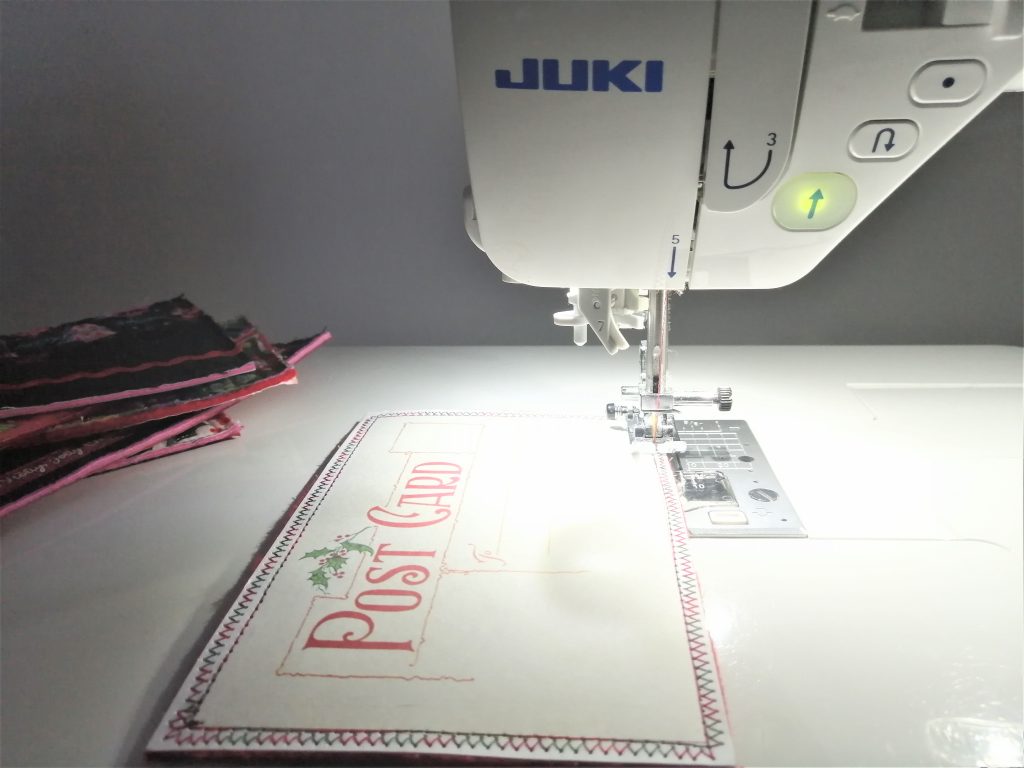
The final step is to stitch the quilted fabric cut-outs to the postcard backing. I’m using the Juki DX7 sewing machine to do this part of the project. First I changed the needle to a titanium coated 100/16 Topstitch needle. The extra strong titanium coating keeps the needle sharp so it can stitch through the card and fabric layers.
Meeting at the start of the stitching
Thread your machine with some pretty thread that looks good with your fabric postcards. I used red and green variegated thread here. I’m sewing with the card side up. Be sure that the right side of the postcard is facing up and the right side of the practice piece cut-out is facing down. Check that you can see a bit of the fabric sticking out all the way around the paper postcard.
Stitching on the postcard backing
Now stitch along the inside line all the way around the postcard. I’ve set the stitch length to 3 on the dial. Once you’ve stitched all the way round, change to a zig-zag stitch and adjust the width to 2.6 on the dial. Now zig zag all the way around the card again, this time filling in the space between the straight line of stitching and the edge of the card. Make sure that the zig-zag stitching doesn’t go over the edge.

Final trim
Finally, trim the excess fabric with a good pair of sharp scissors. Use the edge of the postcard as a guide. Turn it over, trim off any bits of threads and voila; you have a gorgeous little postcard quilt. Soon you’ll have a whole stack. Simply write your message, address it, pop on a stamp and post it to someone you love.
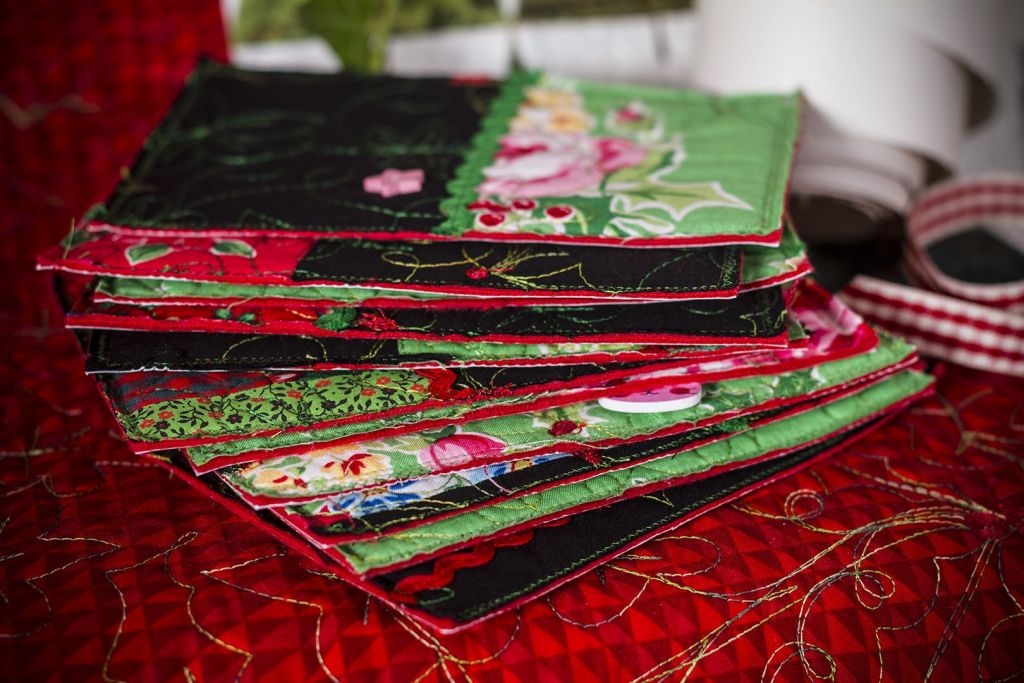
There you have it. Stitching homemade fabric postcards is a way to make your Christmas cards unique and special. It’s like sending a hug through the post. And this year, we could all use a hug!
We hope you give it a try, and if you do please send us a photo and we’ll feature your Christmas postcards in our Instagram Stories.