I held off making masks for a while. But when my daughter, who just moved from Paris to San Francisco, rang to say that they were required to wear masks but not allowed to buy them, I caved. I did a bit of research. There are so many online options. I was looking for a fitted facemask that was comfortable and washable. I wanted it to do a good job too. No homemade mask is perfect. But making masks is one way we can help to limit the spread of the virus.
Getting the pattern
There are lots of free patterns available online. I’ve tried a bunch and found them hugely helpful. In the end, I made my own, mainly so that it would be easy for you to download. The pattern comes in a medium adult and a medium child size. We’ve made an A4 version that serves the UK, Europe and most of the world. We’ve also drafted an American/Canadian version that fits the paper sizes over there. Adjusting the pattern to fit other sizes is easy. We’ll show you how later in the post.


Click these blue buttons if you live in the UK or Europe (or most of the world) to get the pattern that fits the A4 paper we use.

Click the pink buttons if you live in America or Canada to get the pattern that fits your State-side paper size.

- Medium Adult – A4 paper size that works in the UK, Europe and most countries – set your printer settings to A4 100% (210 X 297 mm)
- Medium Child – A4 paper size that works in the UK, Europe and most countries – set your printer settings to A4 100% (210 X 297mm)
- Medium Adult – to fit American and Canadian paper sizes – set your printer to letter size (8.5 X 11 inches)
- Medium Child – to fit American and Canadian paper sizes – set your printer to letter size (8.5 X 11 inches)
A word about computer printers. Printers vary. We have 2 computer printers in our house and they print the exact same PDF file in slightly different sizes. By slight, I mean that it varies by 1mm or 1/16 of an inch. A slight variation in size will not matter. Close is good enough.
This is not a quick mask to make, but it is designed to last. I’m not making hundreds, just enough for family and friends, so I was able to spend the time to make them efficient, pretty and washable.
The Juki Club face mask
Things that I like about this mask
- it’s fitted
- there are adult and child sizes
- it has a pocket for an optional filter
- there is a pocket for a nose wire
- it uses interfacing on each layer to make it less permeable
- it’s washable
- there are lots of ways to attach it to your head
Materials for making
To create an effective barrier, choose a fabric with a tight weave. Quilters cotton is good. Cotton Lawn, batiks, cotton shirting and high thread count sheets are also good. If in doubt, hold your fabric up to the light. Avoid fabrics with a loose weave, where you can easily see through the weave. Better quality fabrics tend to have a higher thread count and tighter weave.
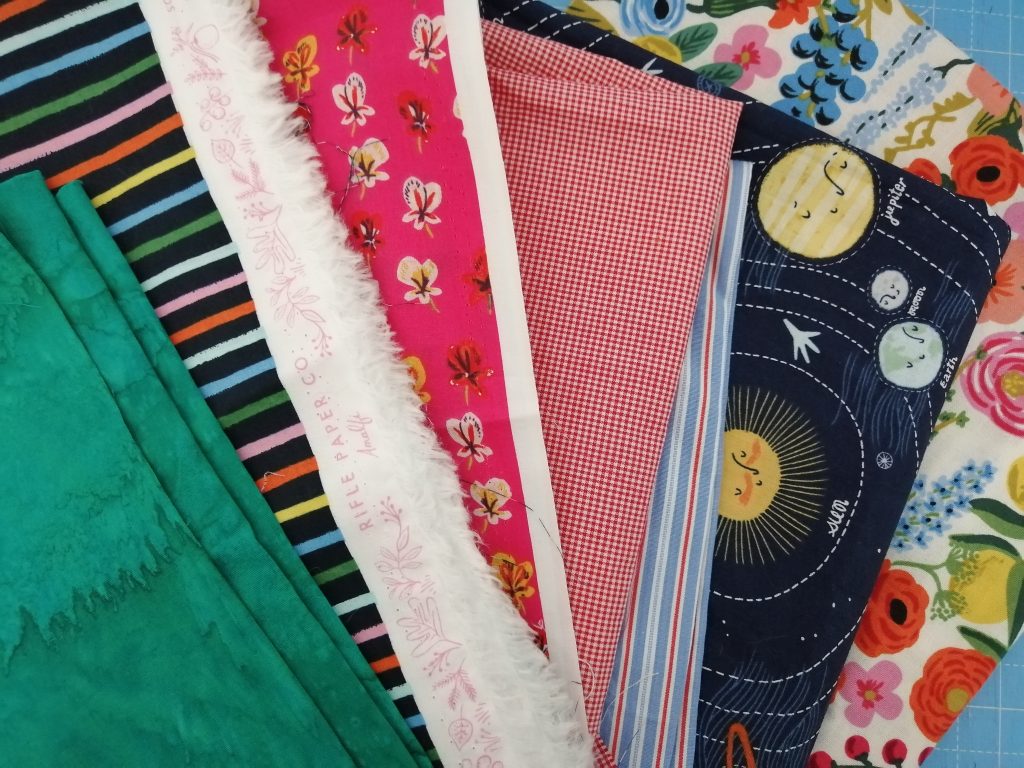
Good quality cotton fabrics with a higher thread count and a tighter weave work best.
Different kinds of fabrics work well together. Cotton fabrics are woven, like a grid. Interfacing is a non-woven fabric. The spaces between the fibres in the interfacing won’t match the spaces in the weave of the cotton fabric. Using interfacing in your mask will help stop the droplets in your breath from getting through your mask.
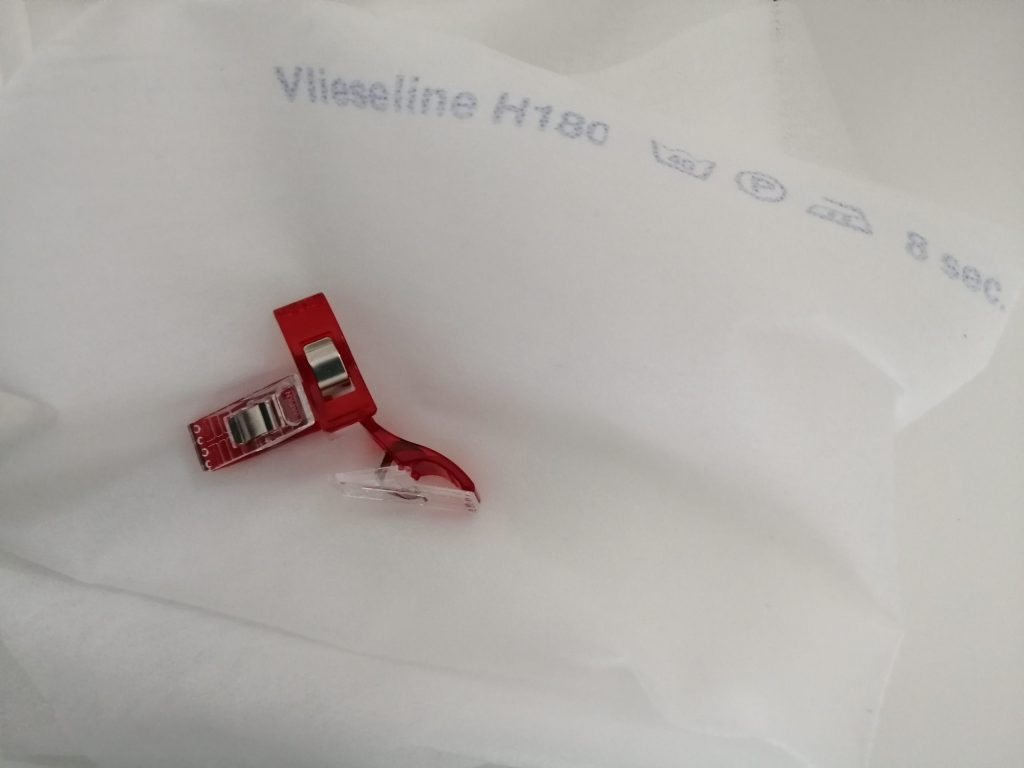
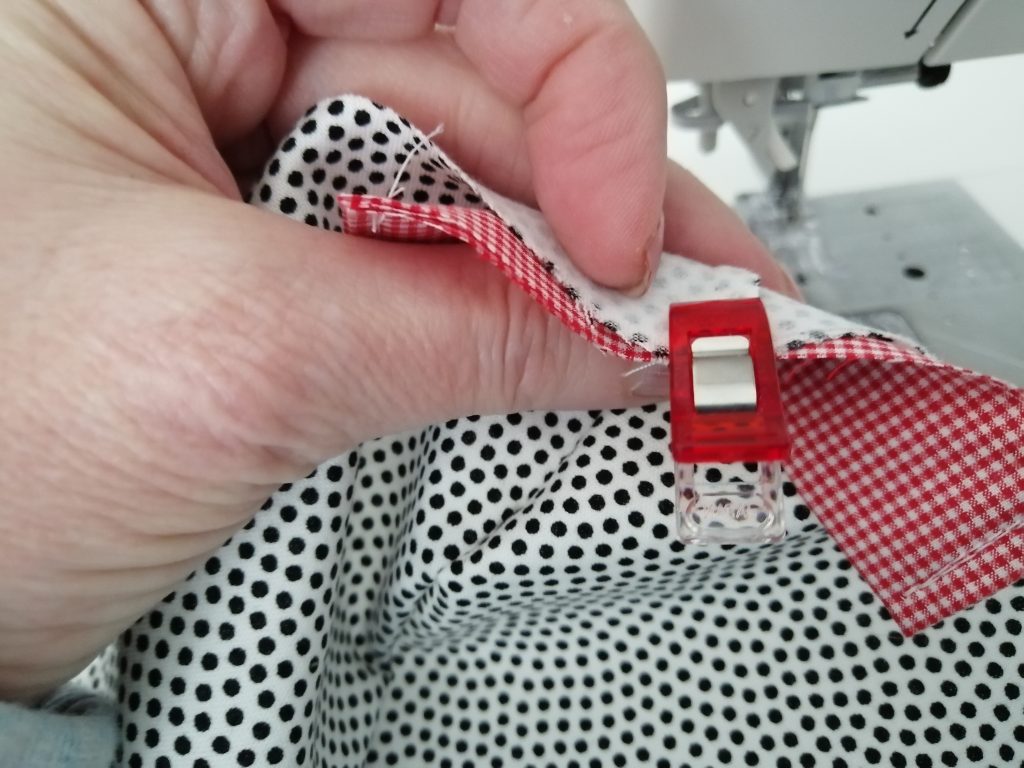
Use sewing clips instead of pins 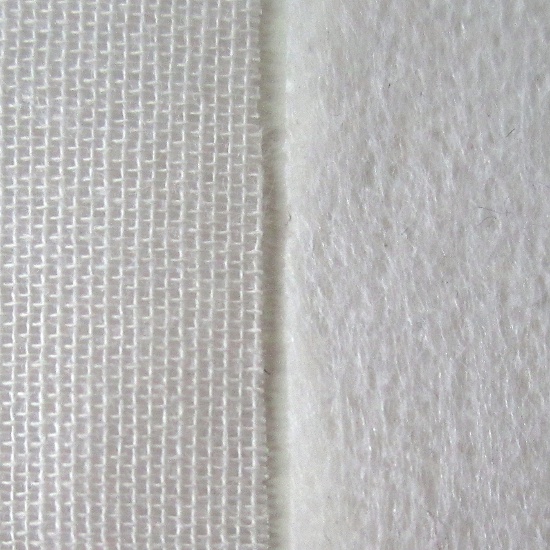
woven vs non-woven
Use non-woven interfacing
As you make the mask, remember that the goal is to capture the droplets in breath. If you poke holes in the fabric and especially the interfacing, the droplets will have an easier time getting through. Avoid using pins. Use clips instead.
Since most of us are staying home, we’re limited to what we have on hand. Look online for different options for materials. There’s a good chance that you’ll find something suitable at home.
- cotton fabric – quilters cotton, batiks, cotton lawn, shirting cotton, high thread count sheets
- iron on interfacing – non-woven fusible interfacing – I used Vilene 180 a light weight fusible interfacing available from many online sewing shops
- ties – I used bungee cord and coat toggles to get an ajustable fit. T-Shirt yarn ties are a brilliant option too. We’ll show you how.
- some kind of wire for the nose pocket.
Cutting out the pattern pieces
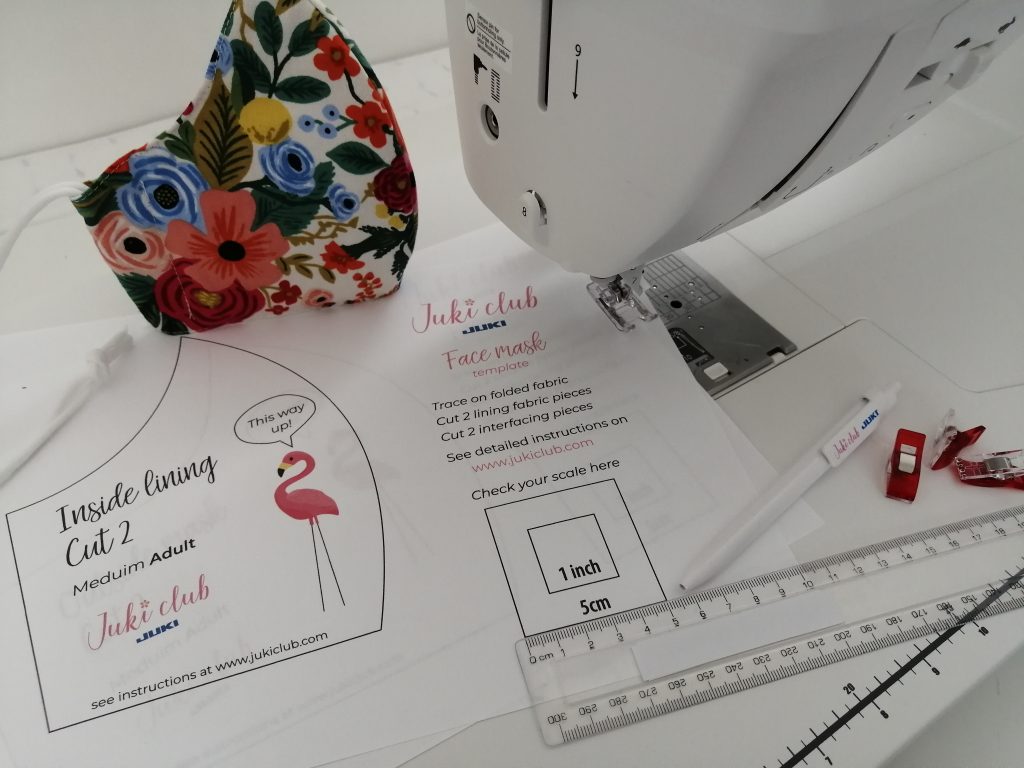
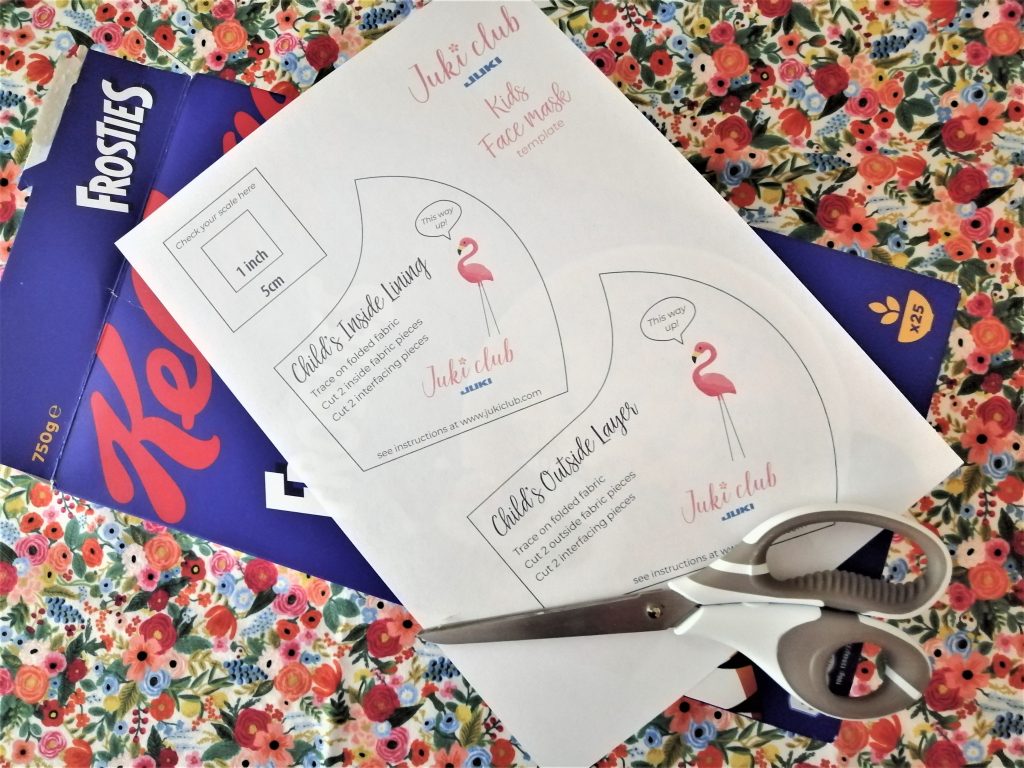
After printing the pattern, check your scale with a ruler.
Choose a face mask pattern and print it out. Check the scale with a ruler to make sure that your printer was on the correct settings. If you are making a few masks, glue the paper pattern to card or plastic first. This will give you a better edge for tracing.
Glue the pattern to card 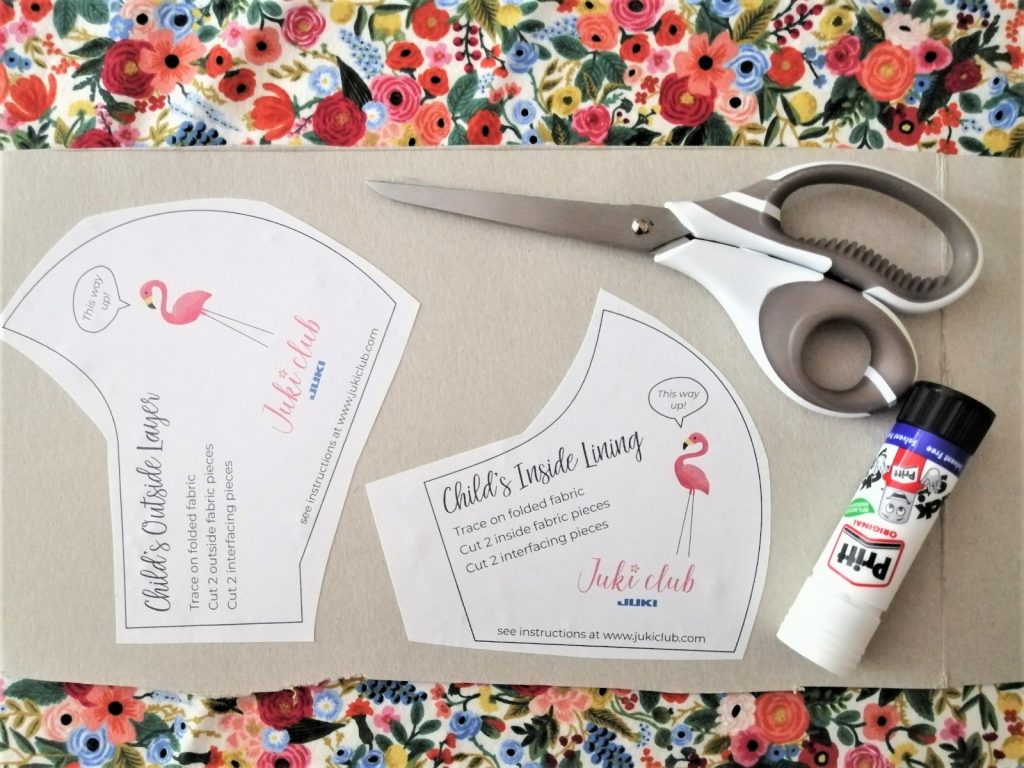
Cereal boxes work great
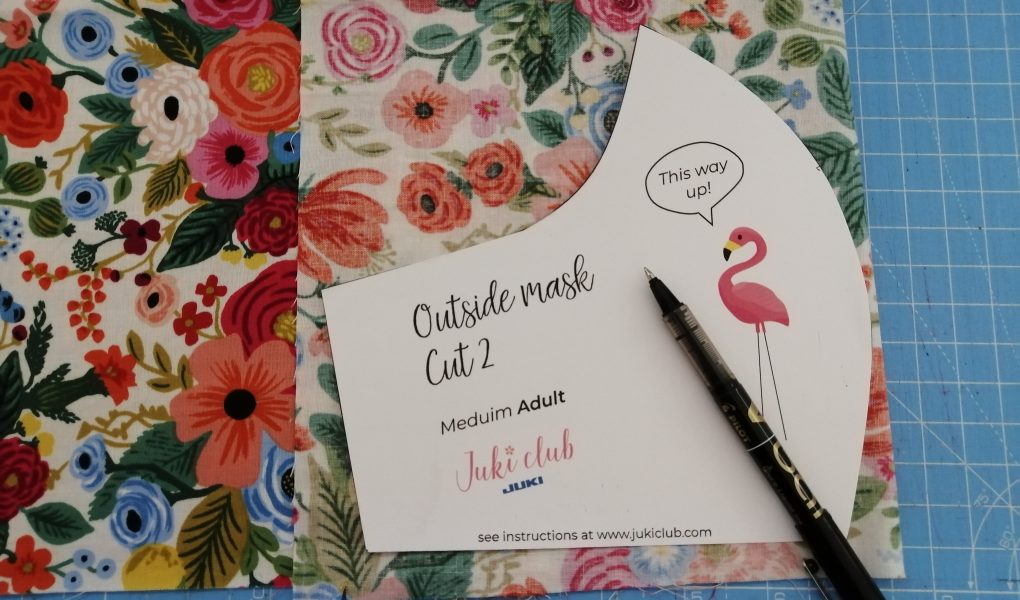
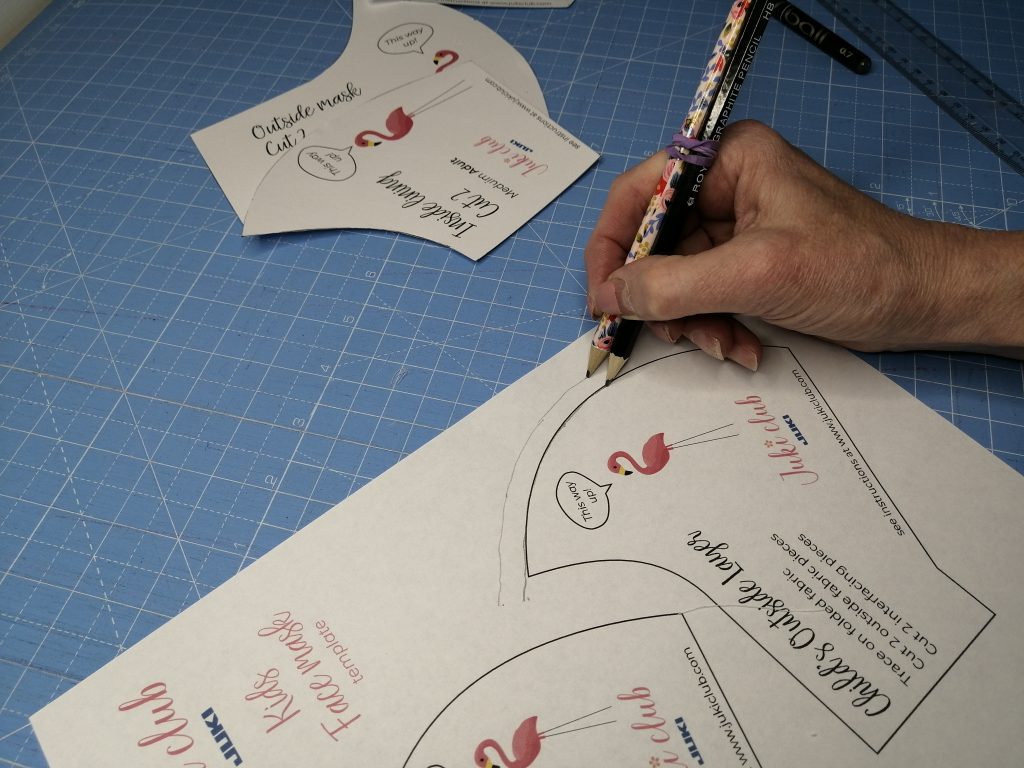
Choose your outside fabric, fold in half and trace your pattern. If your fabric is a directional print, match your fabric with the flamingo on your pattern so that they are both the right way up. Again, avoid pinning. Use clips or simply hold the pattern to your fabric with your hand for tracing.
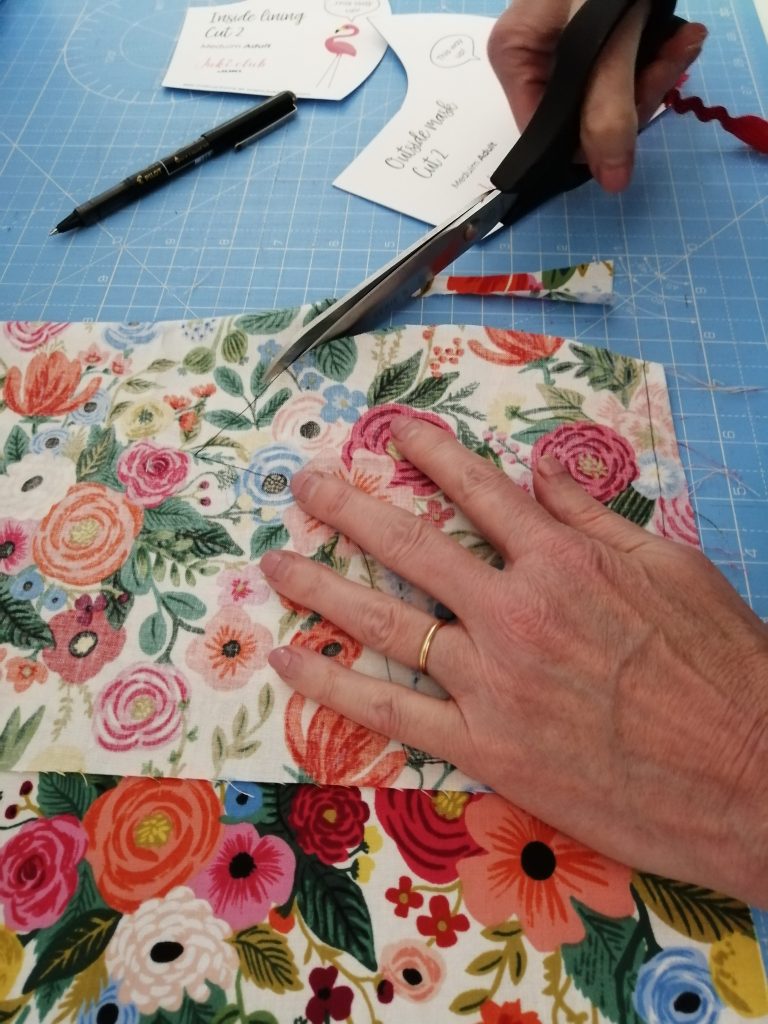
Hold the folded fabric steady with your hand and cut out along the traced line. You will have 2 pieces of outside fabric.
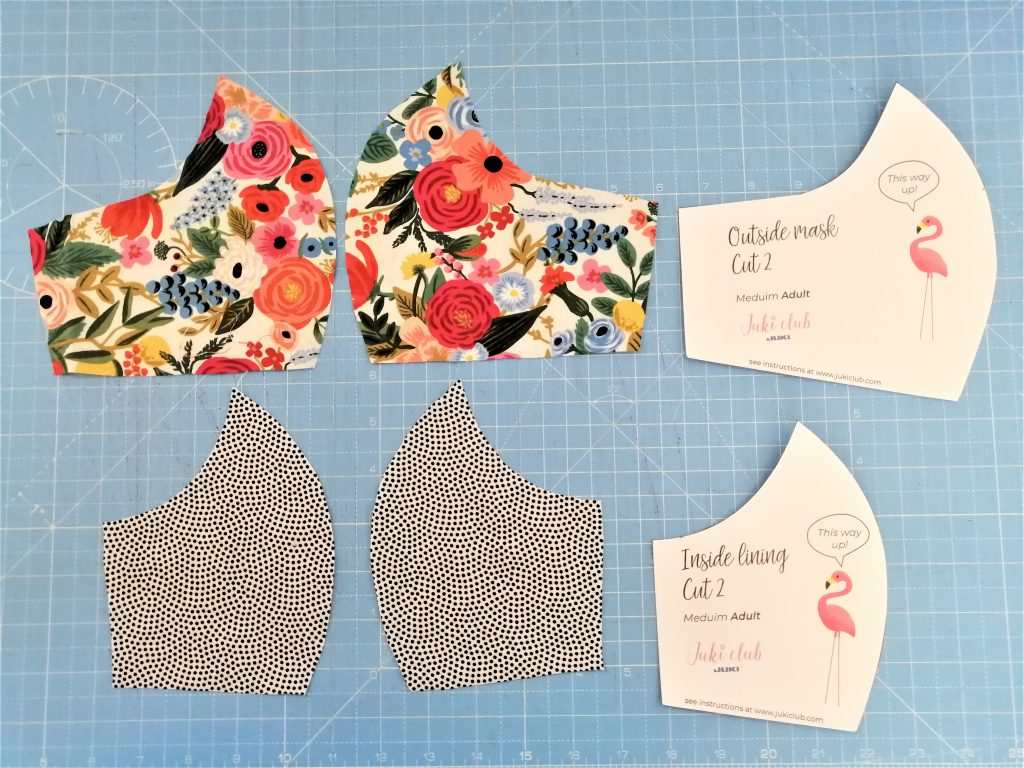
Do the same again for the inside pattern piece. Fold, trace and cut out along the traced line. You will have 2 pieces of inside fabric.
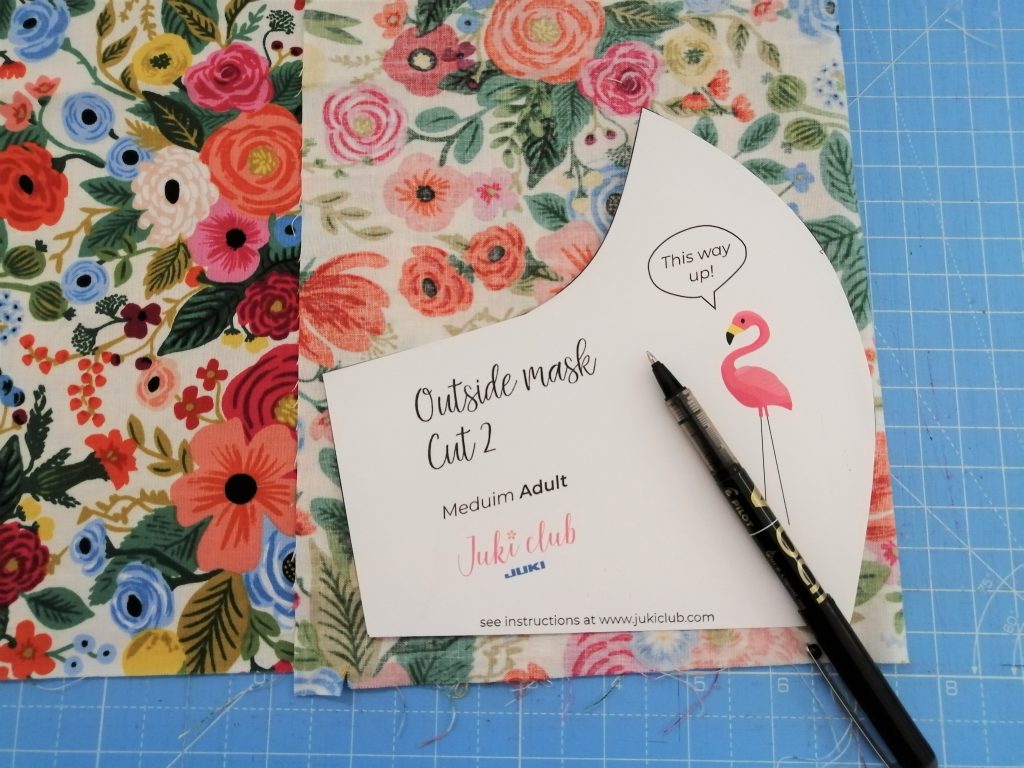
tracing on the outside fabric 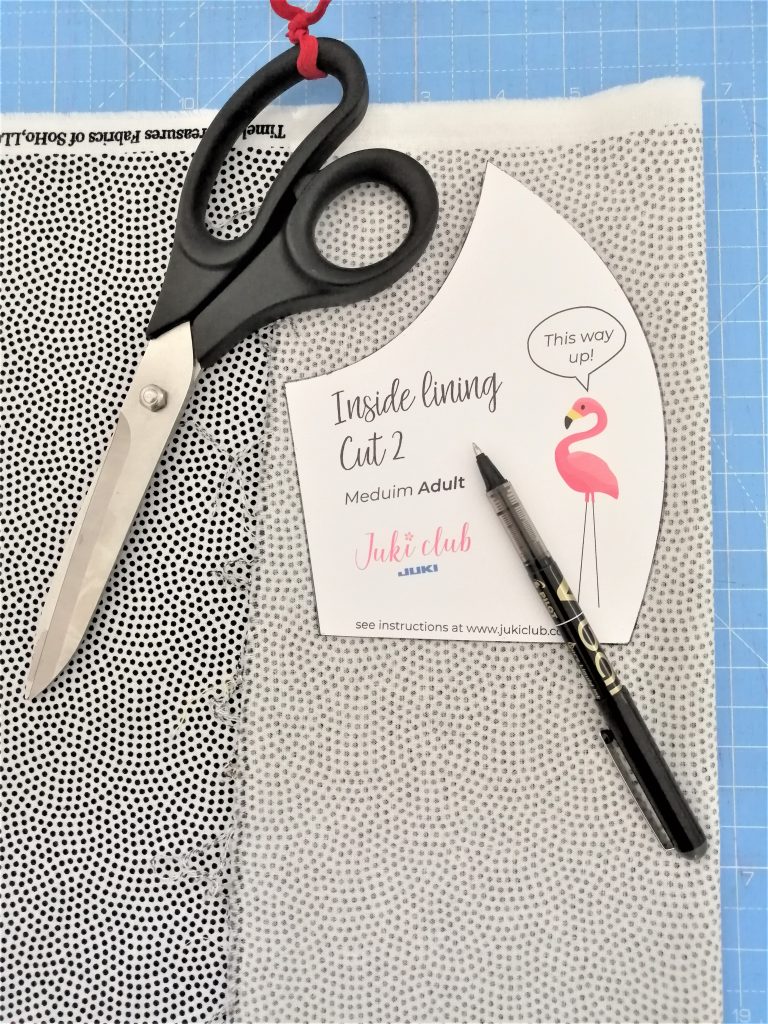
tracing on the inside fabric 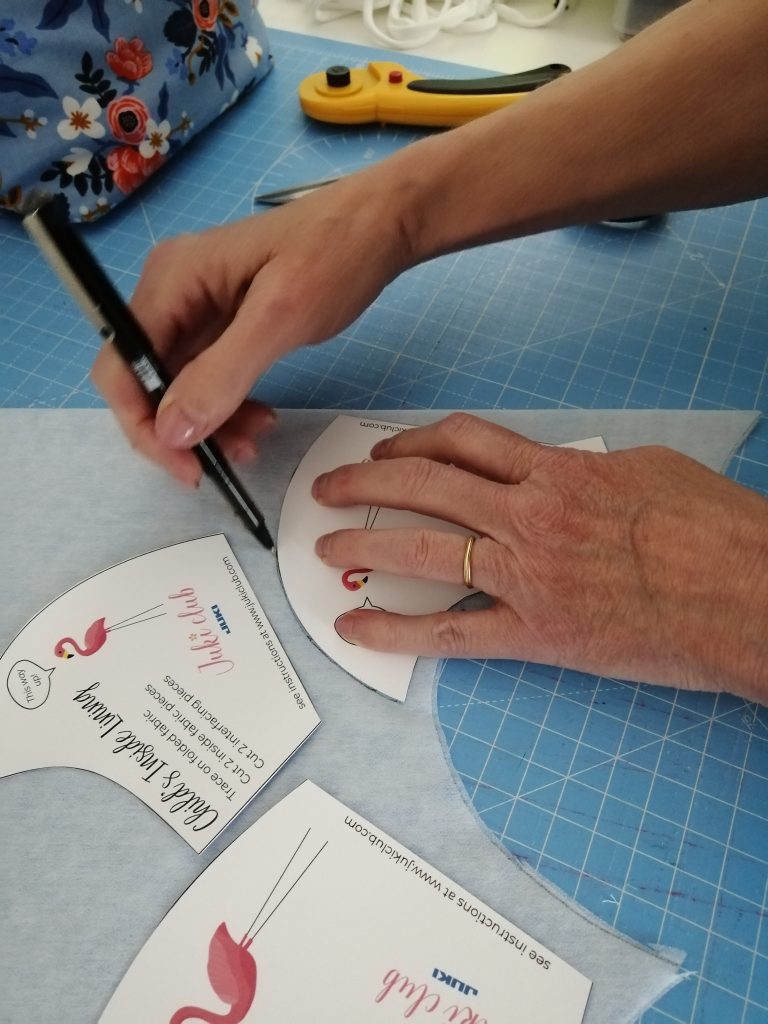
tracing on the Vilene interfacing
Fold, trace and cut the interfacing in the same way. When you fold the interfacing, have the bubbly bit on the inside of the fold and the smooth side facing out. The smooth side is much easier to trace on. Avoid using pins. Hold the fabric steady with one hand and cut along the traced line with the other. You will need 2 pieces of interfacing for the outside fabric and 2 pieces of interfacing for the inside lining fabric.
Don’t use pins 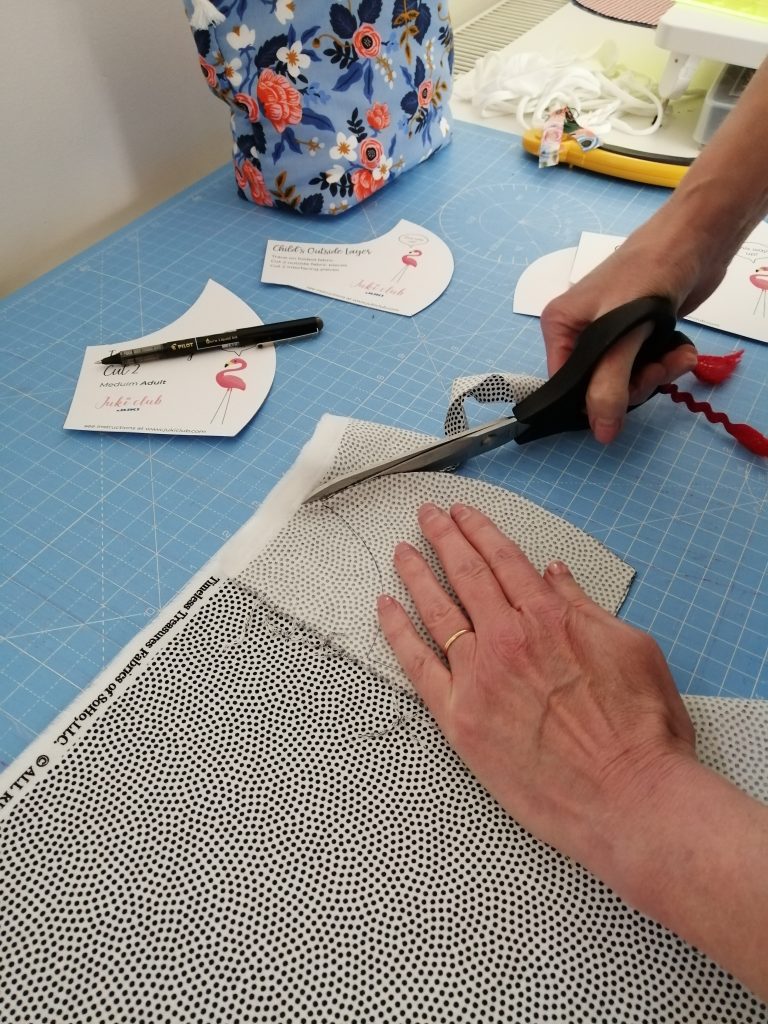
Hold the fabric steady with your hand
Cutting the folded fabric gives you 2 pieces facing the right direction
Ironing the interfacing
Non-woven interfacing creates a good barrier because it helps to keep your breath from going through the mask. It’s fiddly to have to do this step, but it does make the mask perform better. It helps it to hold together for washing too. I decided it was worth it. Light weight fusible interlining is available from many online fabric shops. If you can’t manage the interfacing step, just add a filter to the pocket at the end.
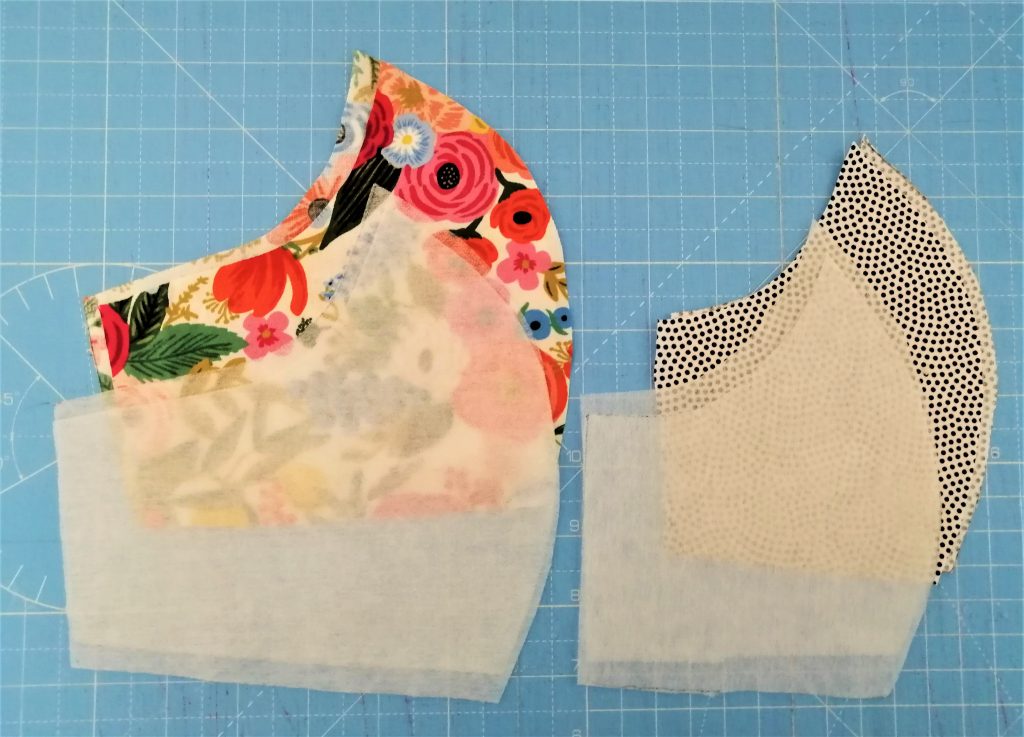
All the face mask pieces
Now you are going to iron the interfacing to the wrong side of the fabric pieces. The interfacing will have a smooth side and a bubbly side. Lay your fabric pattern pieces wrong side up on your ironing board. Match the interfacing shapes to the fabric shapes. Follow the directions for ironing your interfacing.

using scrap fabric keeps the iron 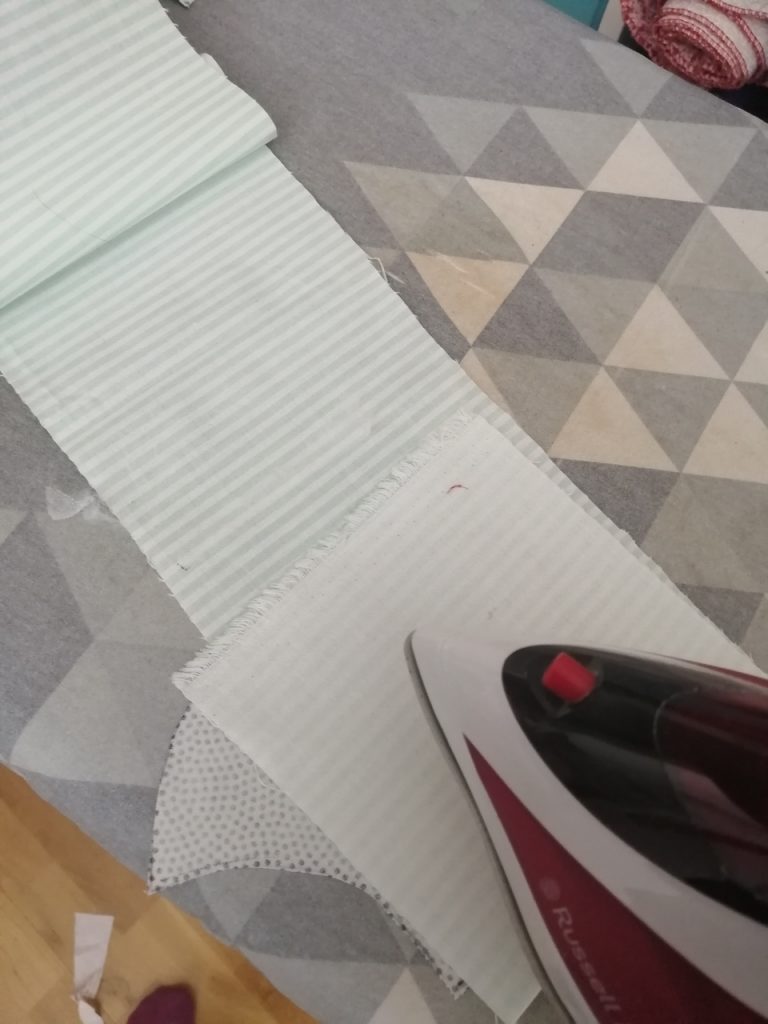
from scorching the interfacing
Place the bubbly side down on the wrong side of your fabric pieces. Cover with some scrap fabric and iron in place. The scrap fabric helps to keep the iron from scorching or melting the interfacing.
Stitching the face mask together
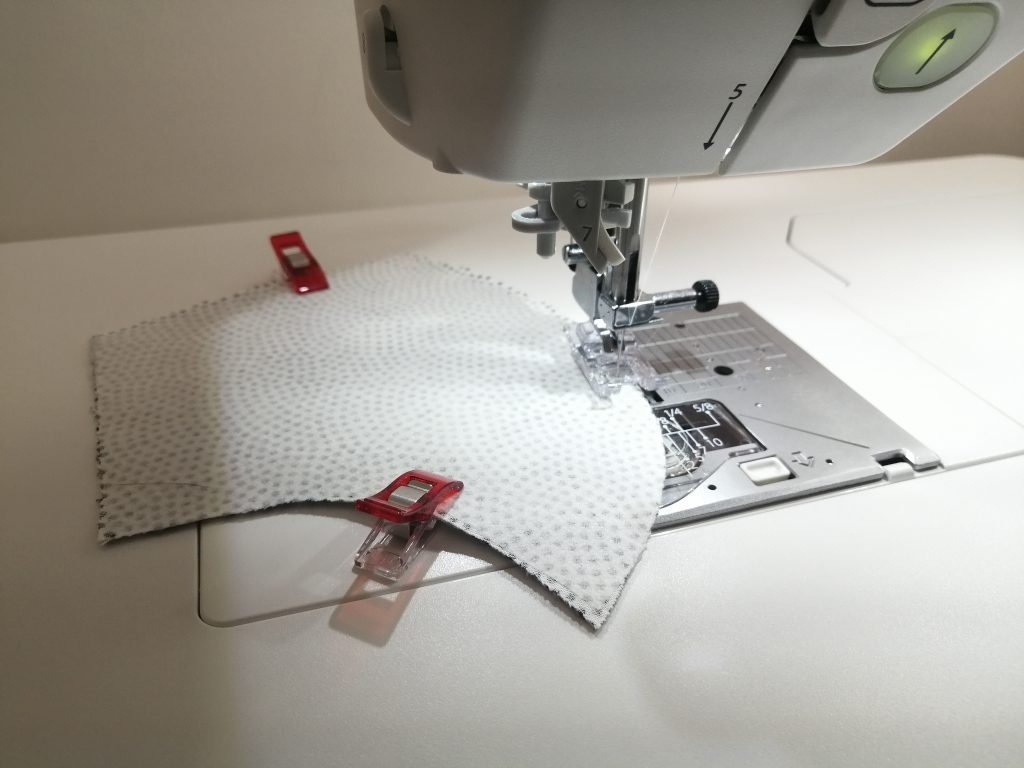
Begin by sewing down the curved front of the outside fabric. Put right sides together, clip in place and stitch down the curved side that will become the centre of your mask. Back stitch at the start and the finish of the seam. Use a narrow seam allowance. To strengthen the seam for multiple washings, sew it again just a little to the inside of your first line of stitching.
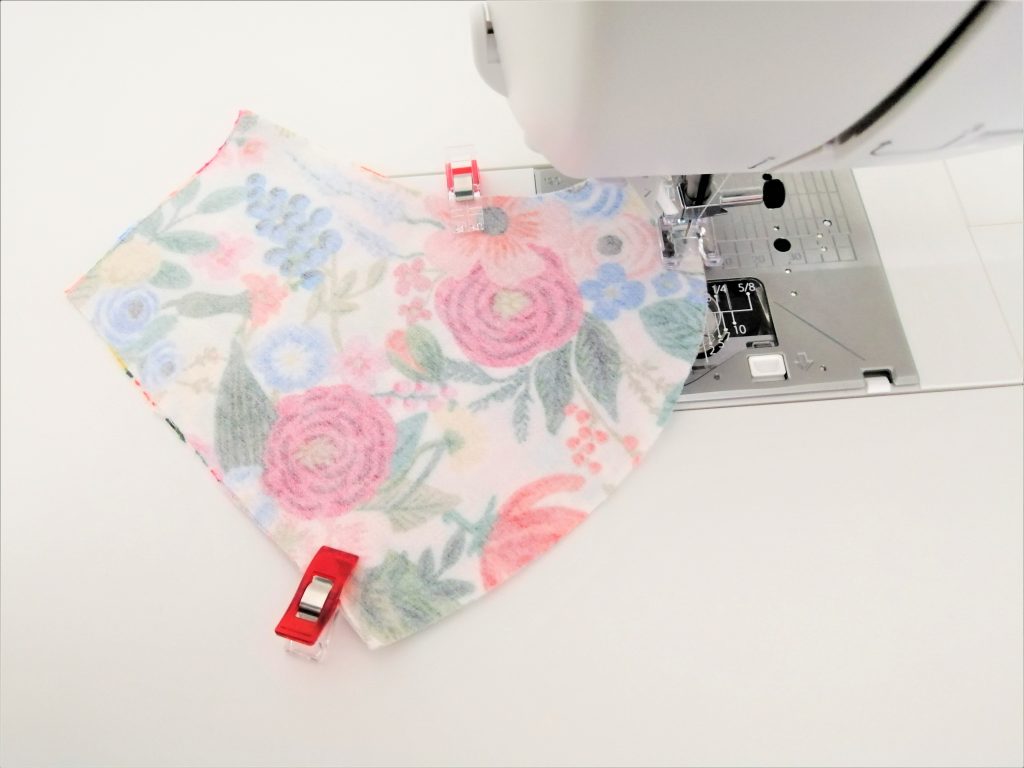
stitching the outside pieces together 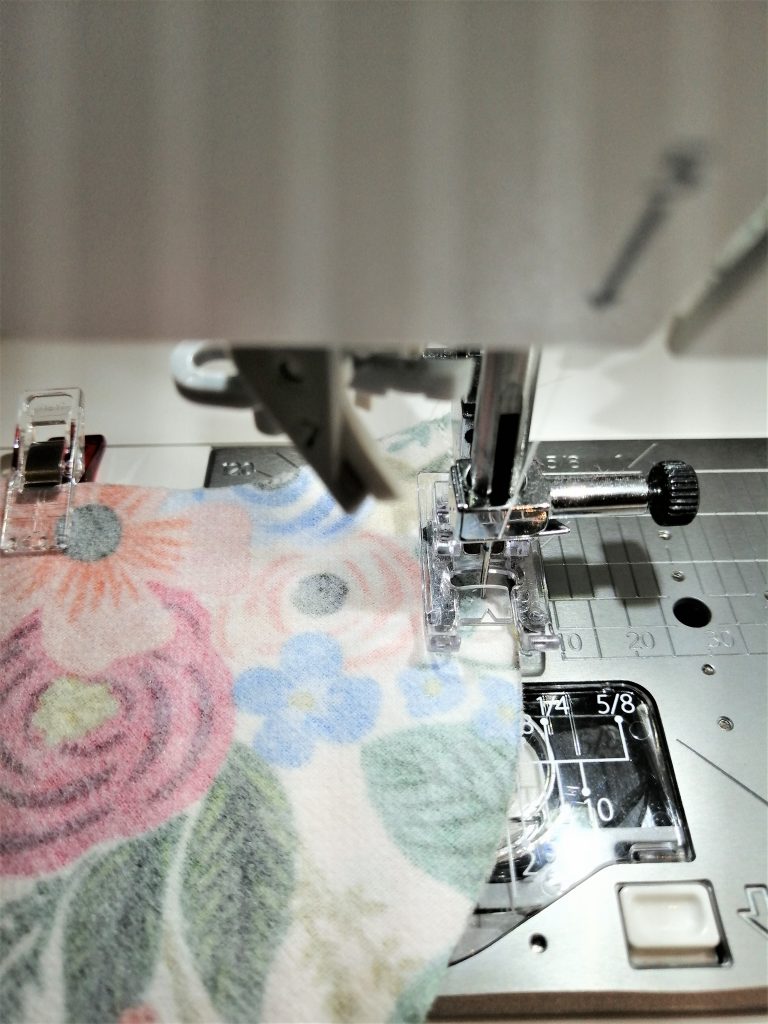
using a narrow seam
I’m using the Juki NX7 and I really enjoyed the float function which raises the presser foot slightly each time I stop stitching. This leaves my hands free to easily guide the fabric under the needle, so I can follow the curve.
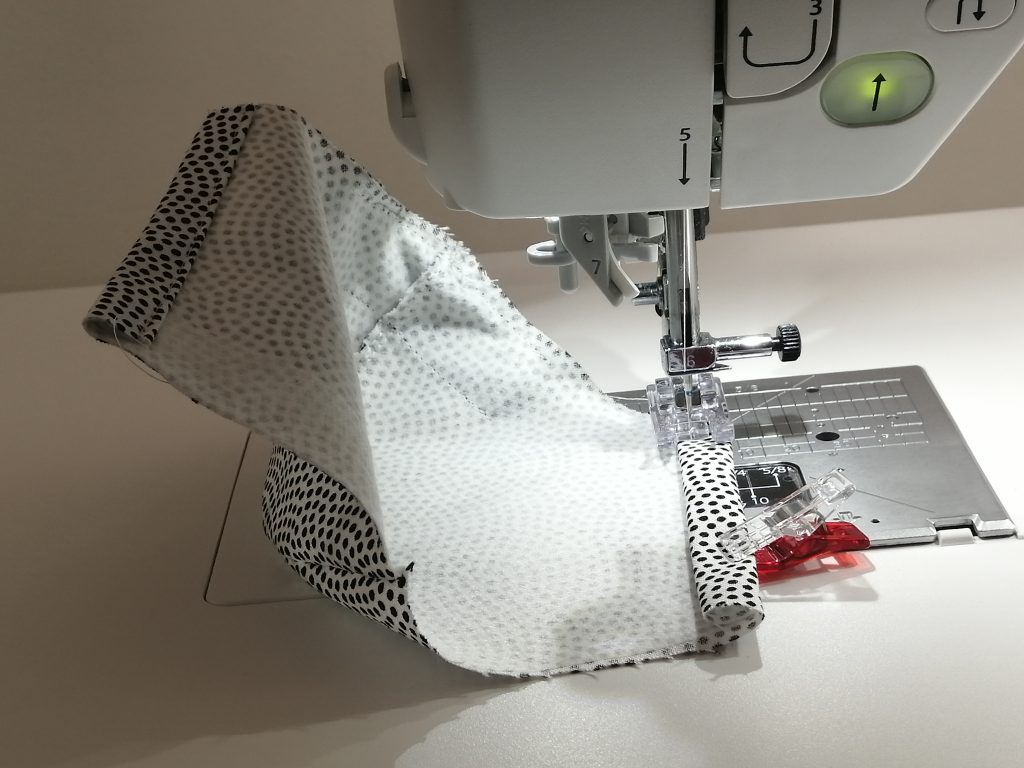
Stitching the inside lining piece together down the centre, stitching the seam again.
Preparing the inside of the mask
Now take your inside lining fabric pieces, put right sides together, clip in place and stitch down the curved centre. Back stitch to secure at the start and finish. Sew another line of stitching to the inside of your first seam, back stitching again at the start and finish.
Fold over and stitch down the side edges of your inner fabric lining
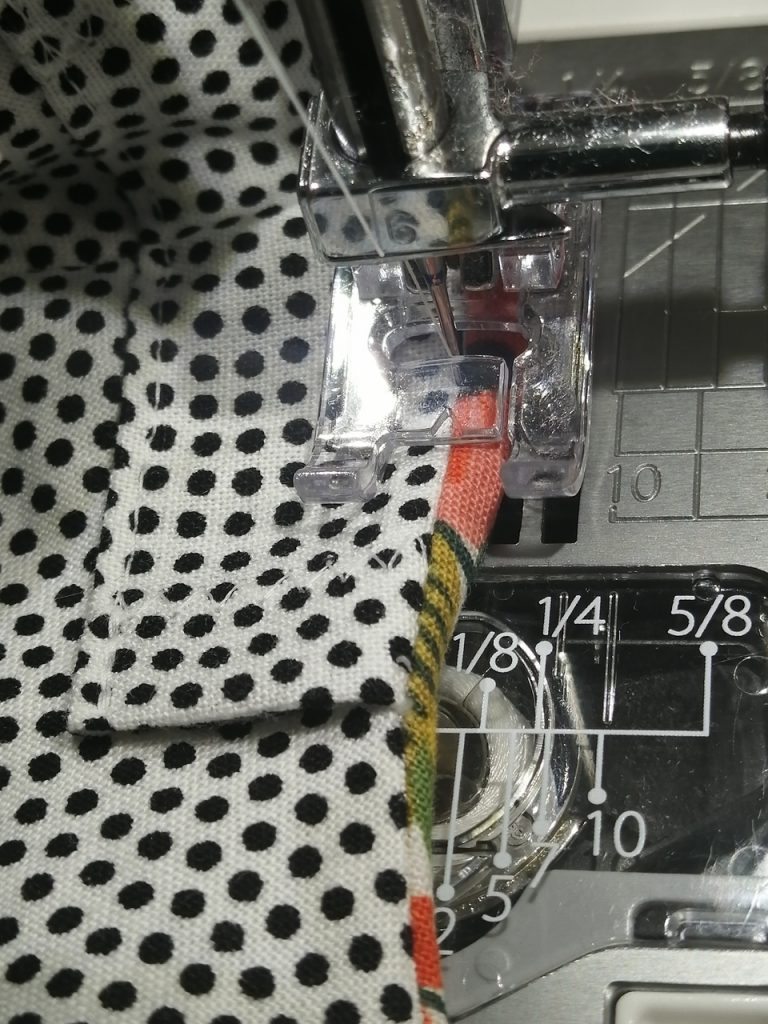
Now, finger fold side edges of your inside fabric, and fold again. Stitch this down close to the fold. Repeat the process on the other side. All ready for the nose pocket.
Adding the nose pocket
Cut a 1 3/4 inch by 7-inch (4.5 cm X 18 cm) piece of fabric for your nose pocket. Fold it in half and stitch the edges together. Turn it inside out, so the seam is on the inside of the loop. Iron it down then fold it and iron again. You will stitch this nose pocket to the right side of your lining fabric.
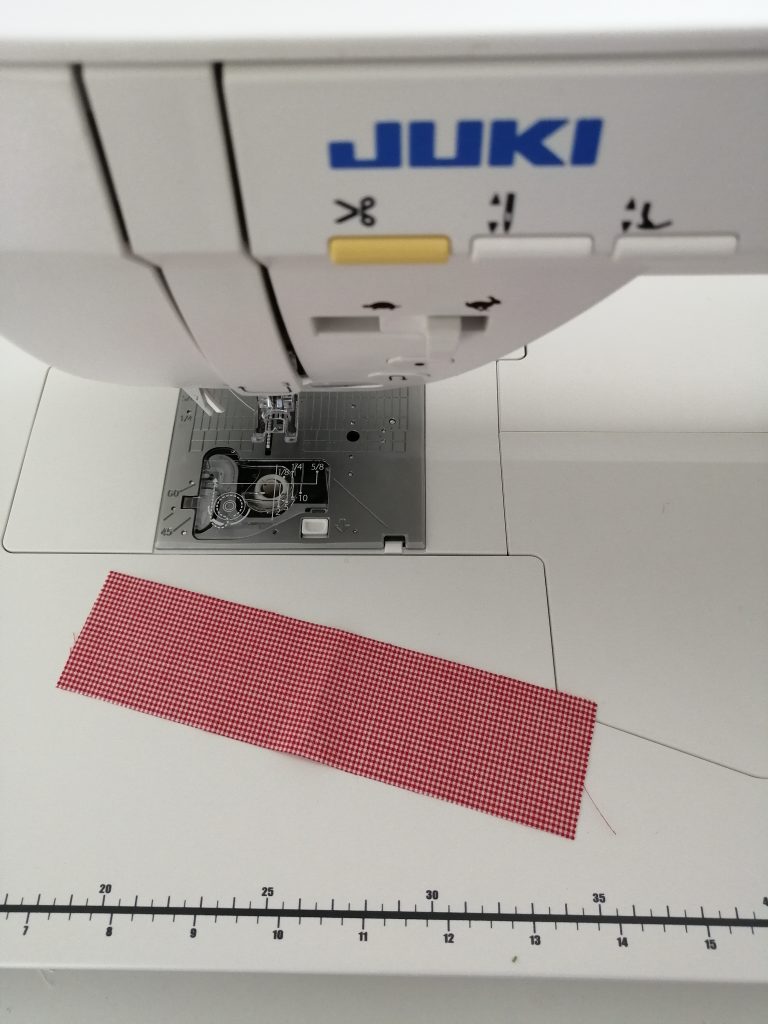
cut the strip 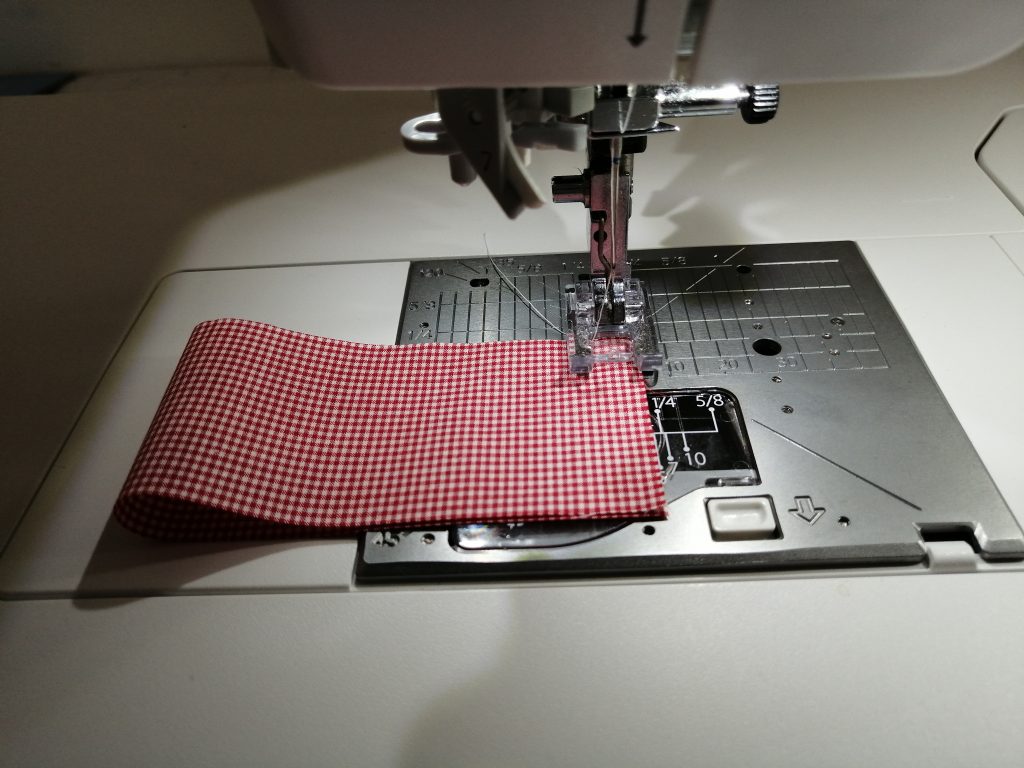
fold and stitch the ends 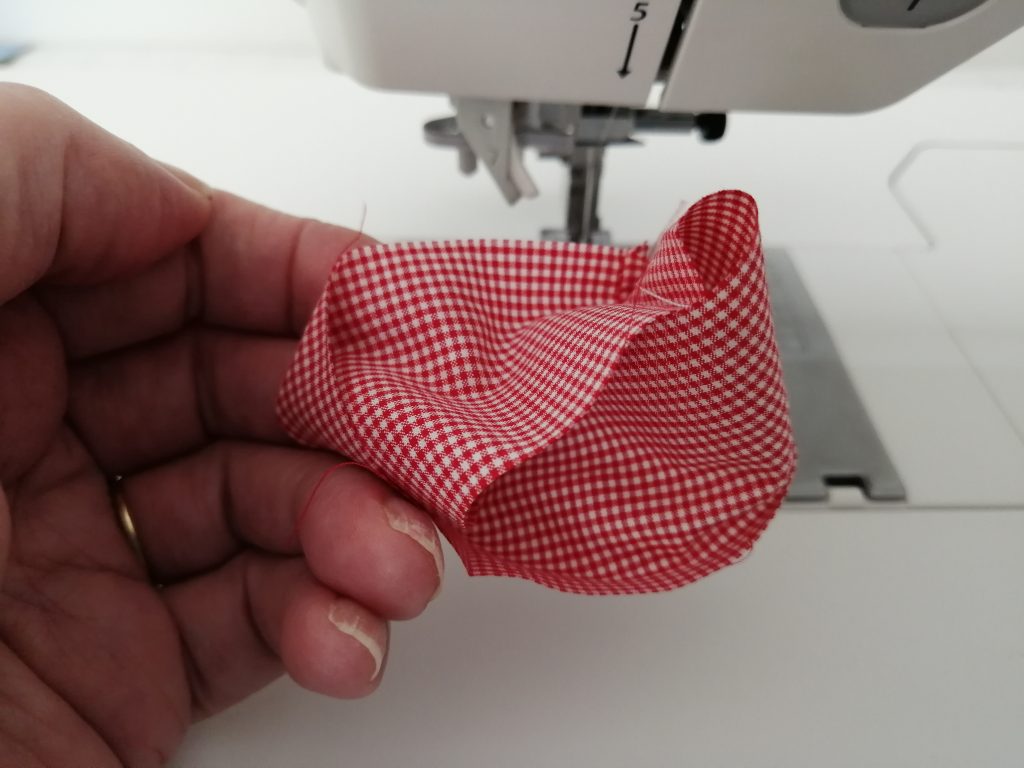
turn inside out 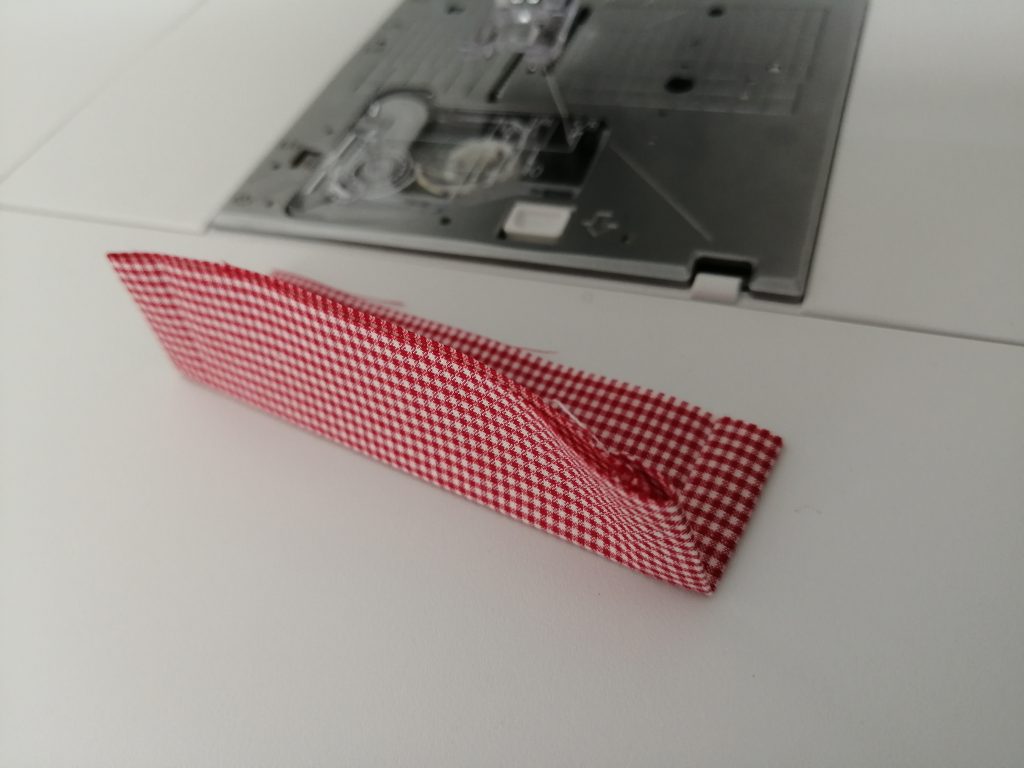
iron flat, fold and iron again
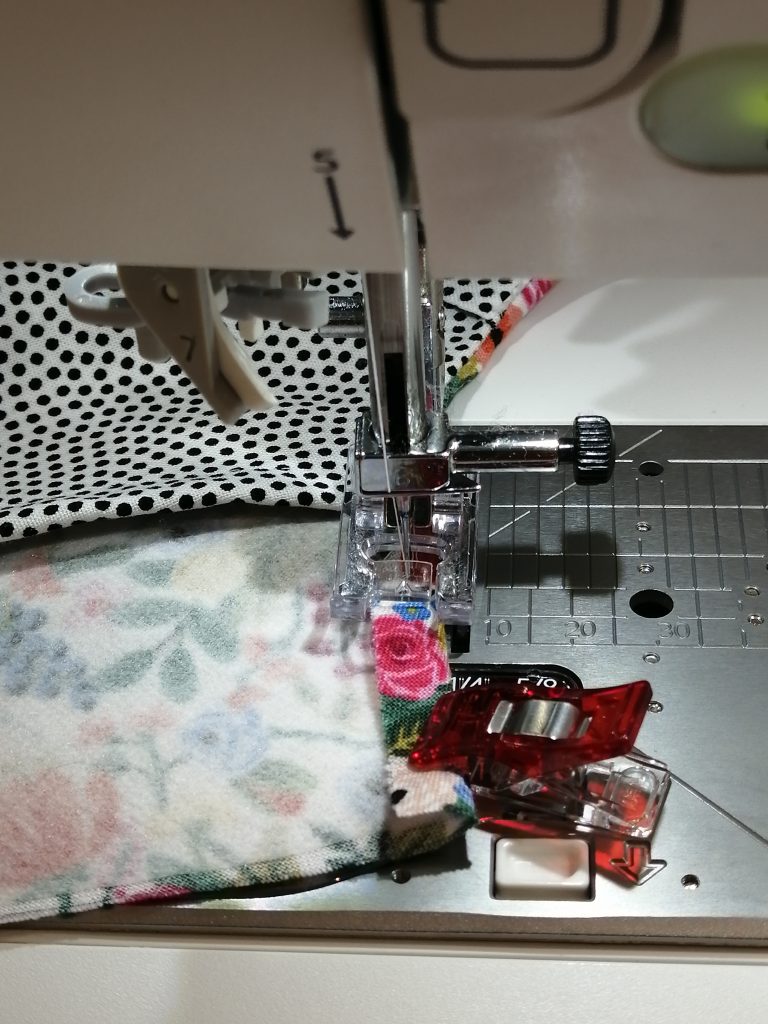
Hold your nose pocket with the raw edges facing upwards. Fold it in half and finger press it to find the centre. You are going to match the centre of the nose pocket fabric, to the centre of the right side of your lining fabric. Clip in place.
The challenge is going around the curve. Initially I am stitching the middle of the nose pocket to the centre curve of the lining. This is to anchor them together. At this point the straight nose pocket does NOT match the curve of the lining piece. Start stitching from the middle and back stitch to anchor the two pieces together. Once the middle is backstitched I’ll manipulate the straight nose piece fabric to match the curve of the lining, and stitch to the end of the pocket.
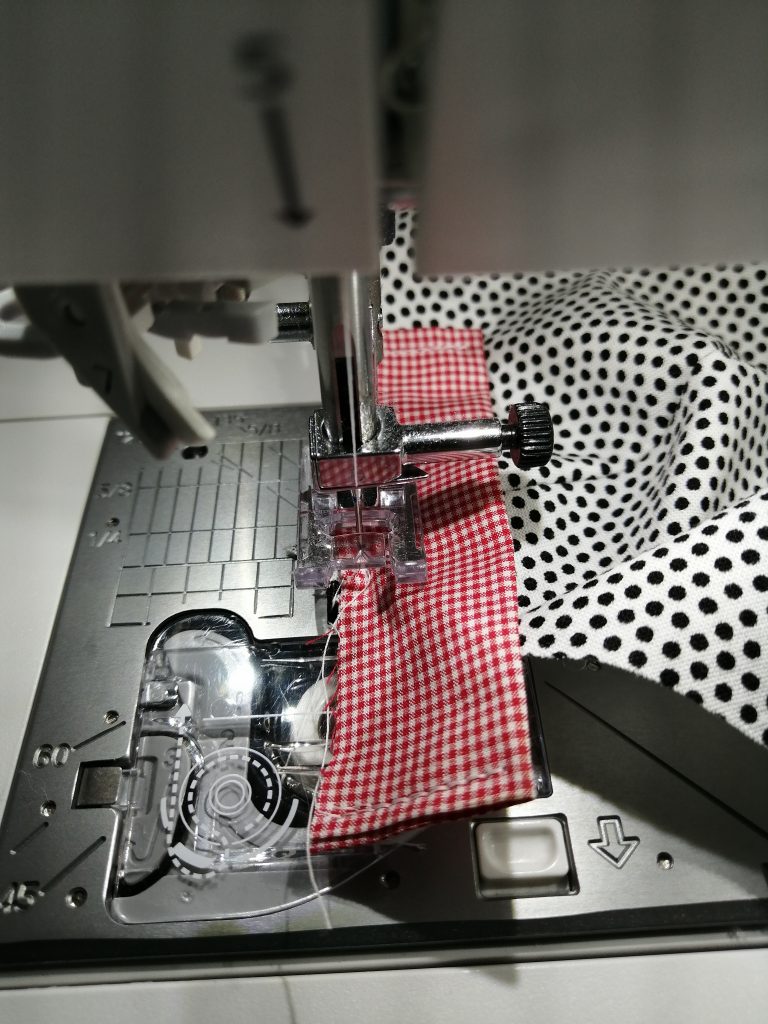
start stitching in the middle, backstitch 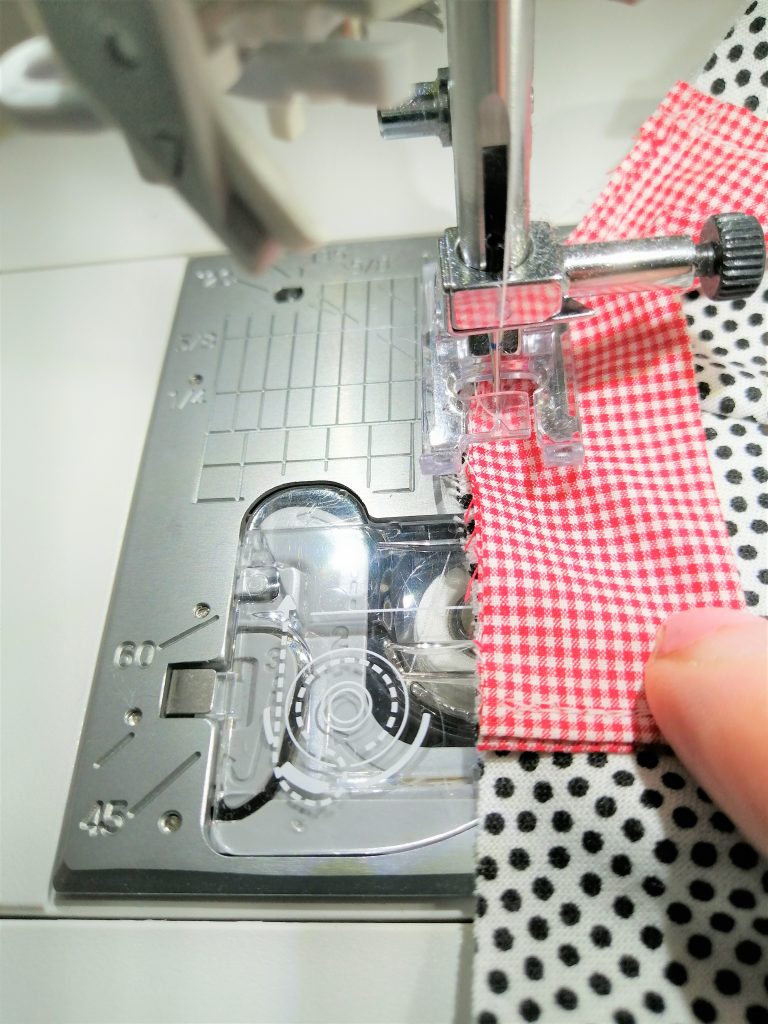
stitch to the end, pivot the fabric
Leave your needle in, raise your presser foot, flip it around and follow the stitched line back to the centre. Now I’m going to do the same thing to the other side. I pause with my needle down and the presser foot up and adjust the fabric pieces, so that the straight nose piece lines up with the curve of the lining. Then stitch to the other end. Pausing in the centre gives me the chance to realign the fabric so that I can follow the curve.
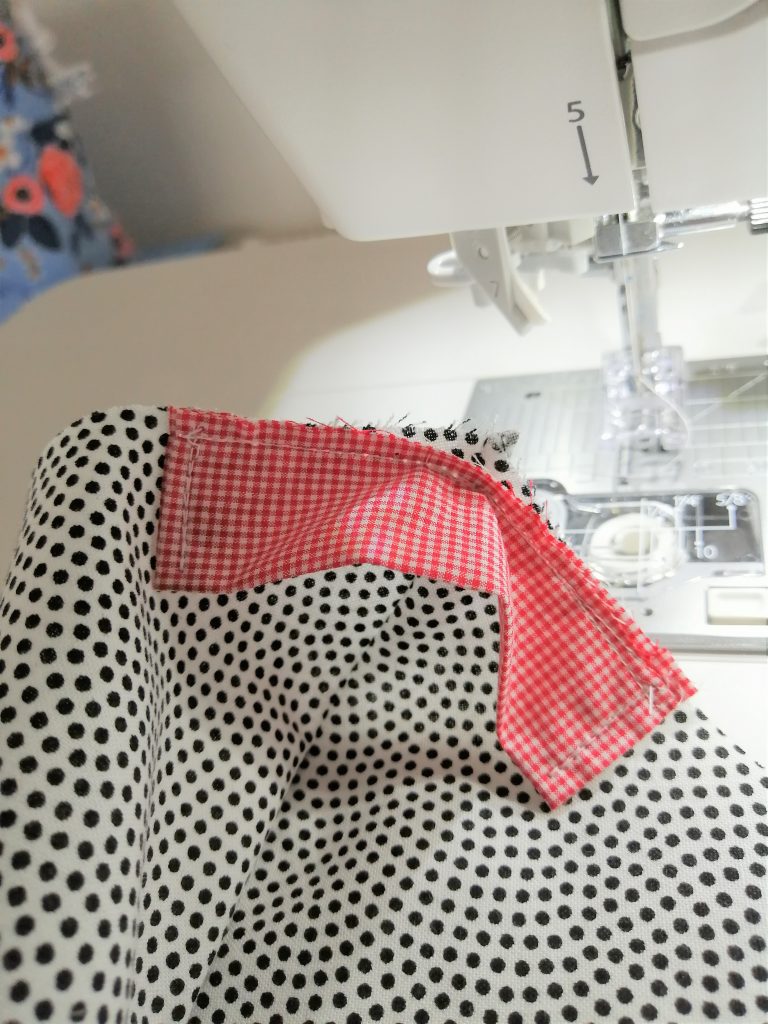
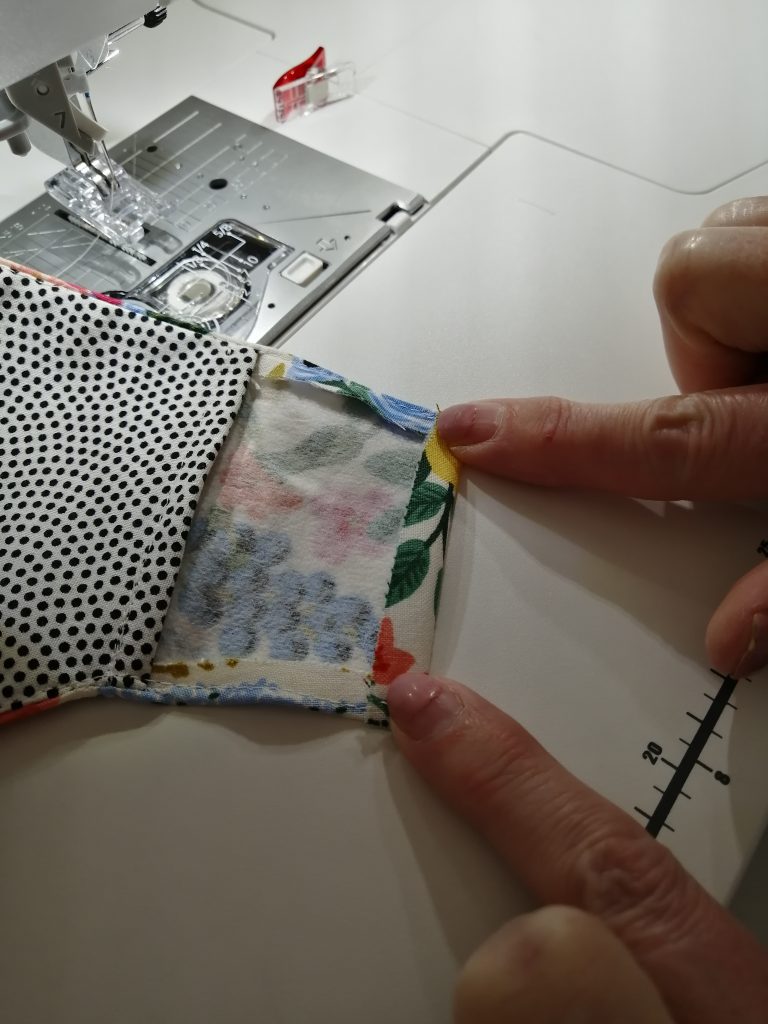
The top of the nose pocket stitched to the lining
Next stitch the bottom side of the nose pocket to the lining fabric. Back stitch at the start and end. Stitch to the centre, pause with your needle down and presser foot up to realign your fabric and then stitch to the end.
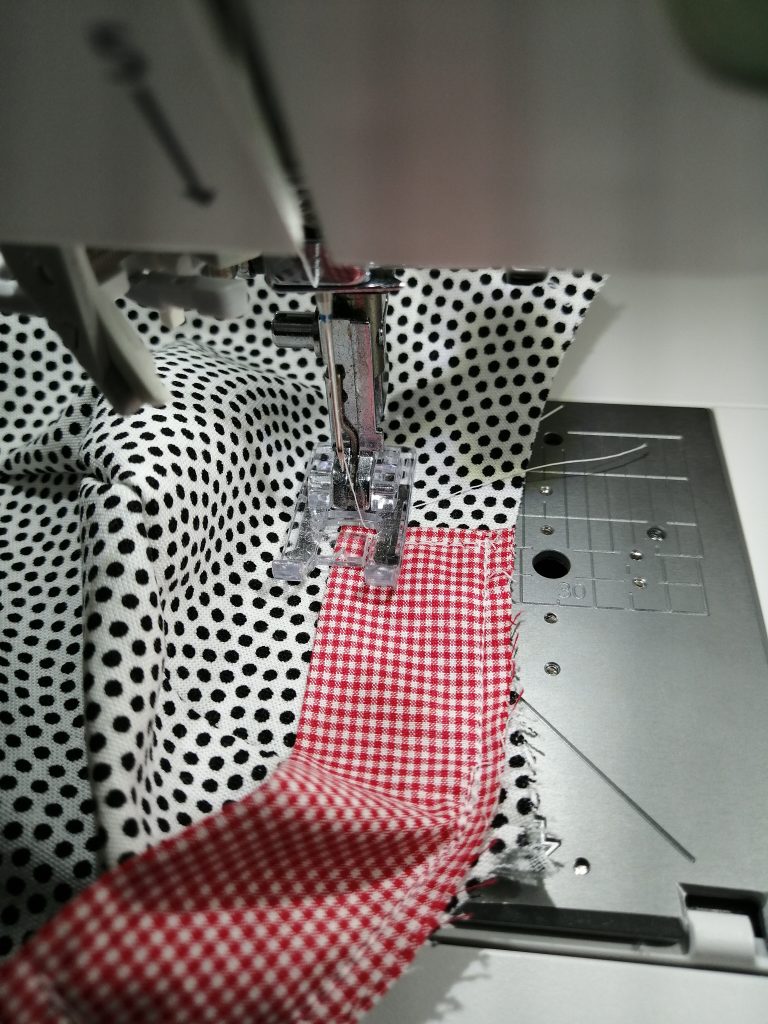
stitch to the centre and stop 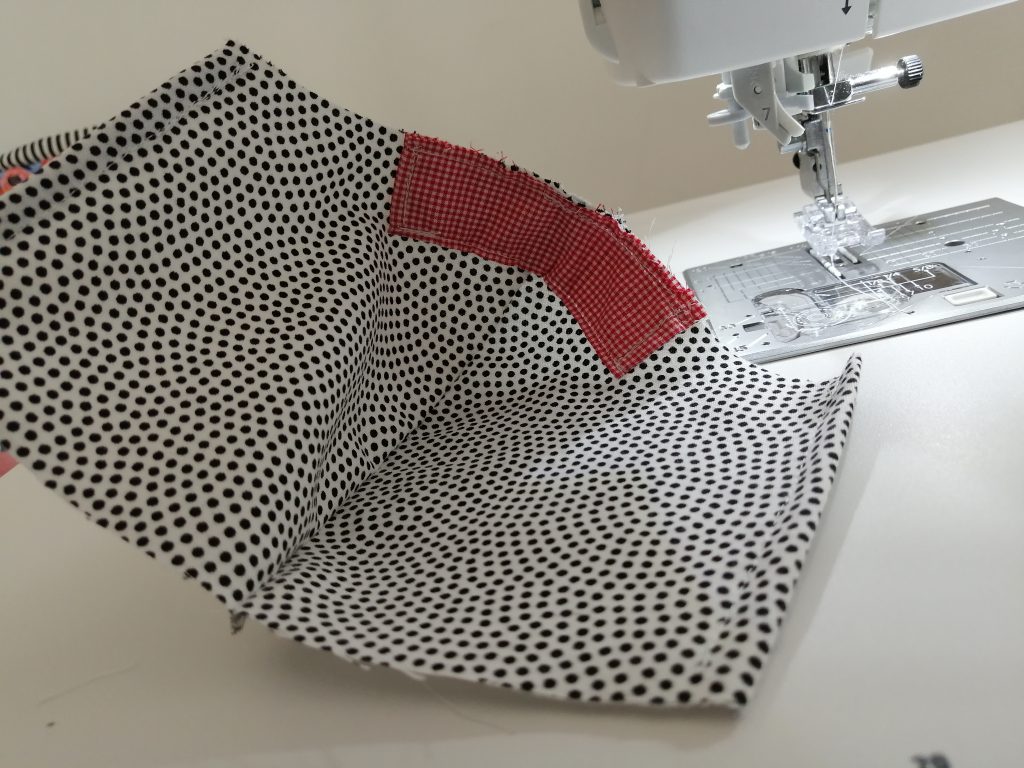
realign your fabric then stitch to the end
Now your nose pocket is attached to the right side of your lining. You are ready to stitch the two sides of your mask together.
Stitching the inside to the outside
Put the right sides of your mask together, match the centre seams and clip in place. Have the smaller lining layer of your mask facing up. Stitch from the outside to the centre. Adjust the fabric, and stitch from the centre to the end. Flip it over and stitch the top seam again. Double stitching the seams will help it hold together better during laundering.
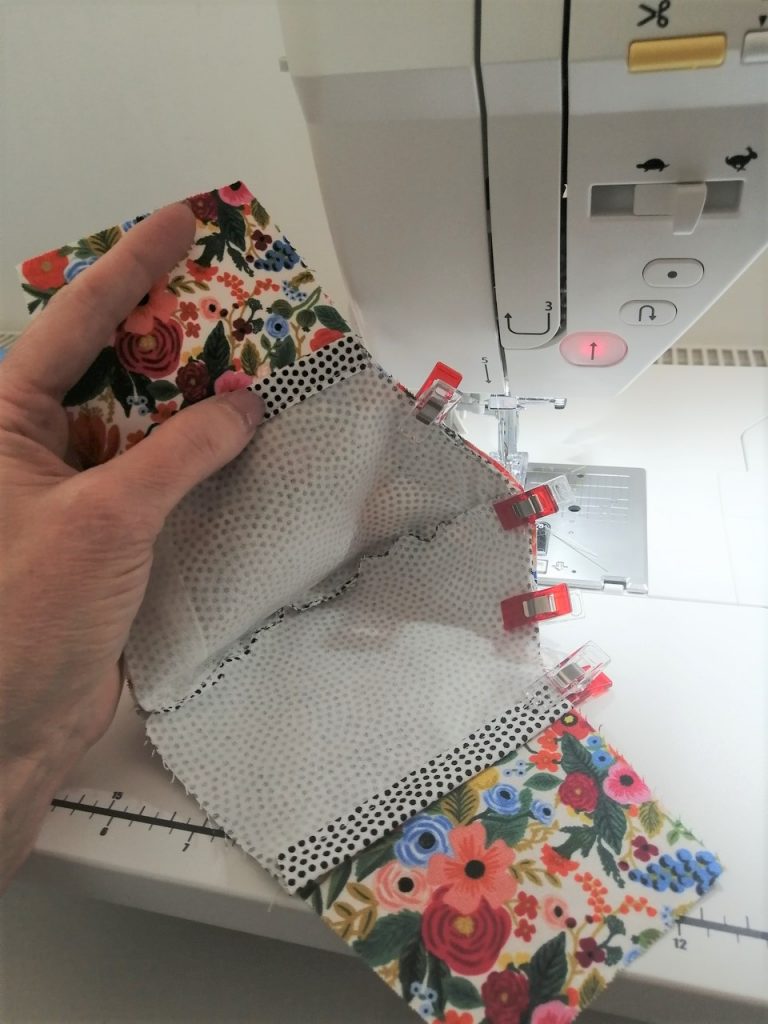
Stitching both sides together
I’ve got the inside facing up for this. Then I’ll flip it over and stitch again with the outside up. Remember to back stitch at the start and finish.
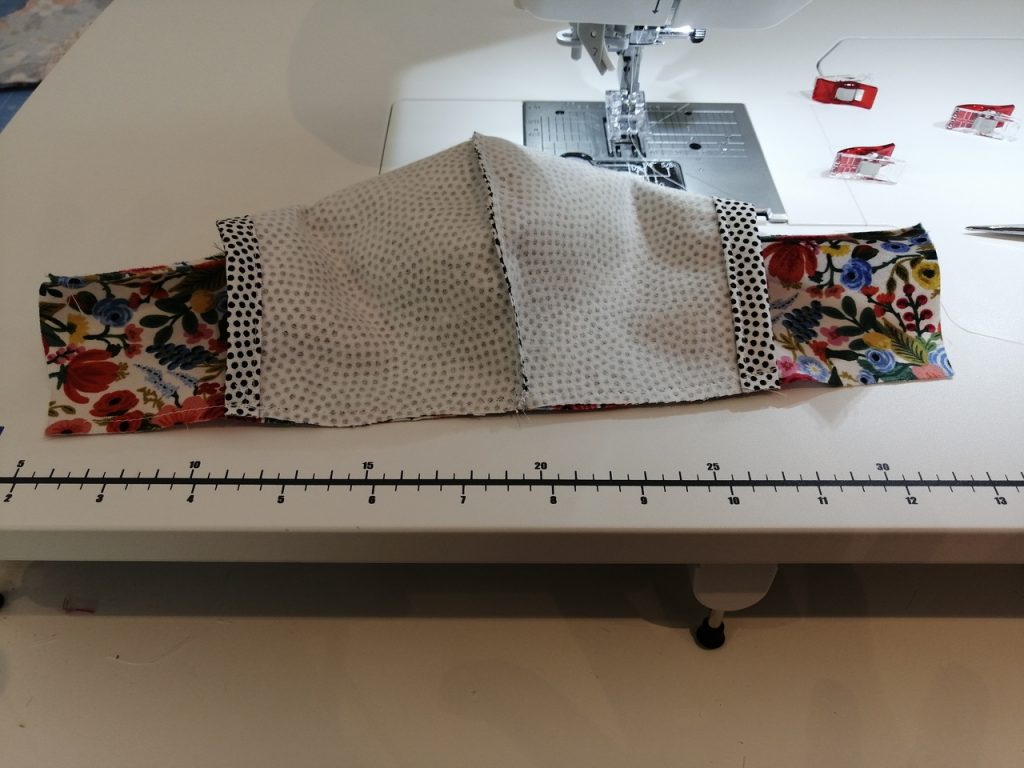
stitching the bottom together 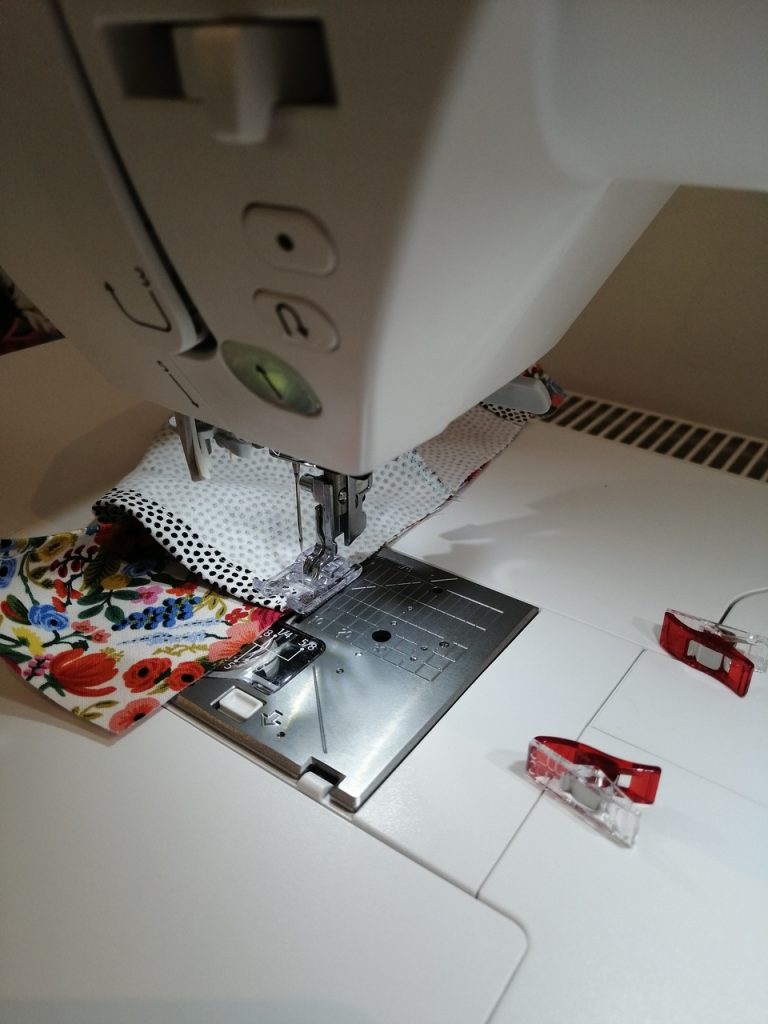
remember to backstitch
Now match the centre seams on the bottom of your mask together in the centre. Clip in place and stitch from the end to the centre, pausing to adjust your fabric, then stitching to the end. Flip it and sew the seam again.
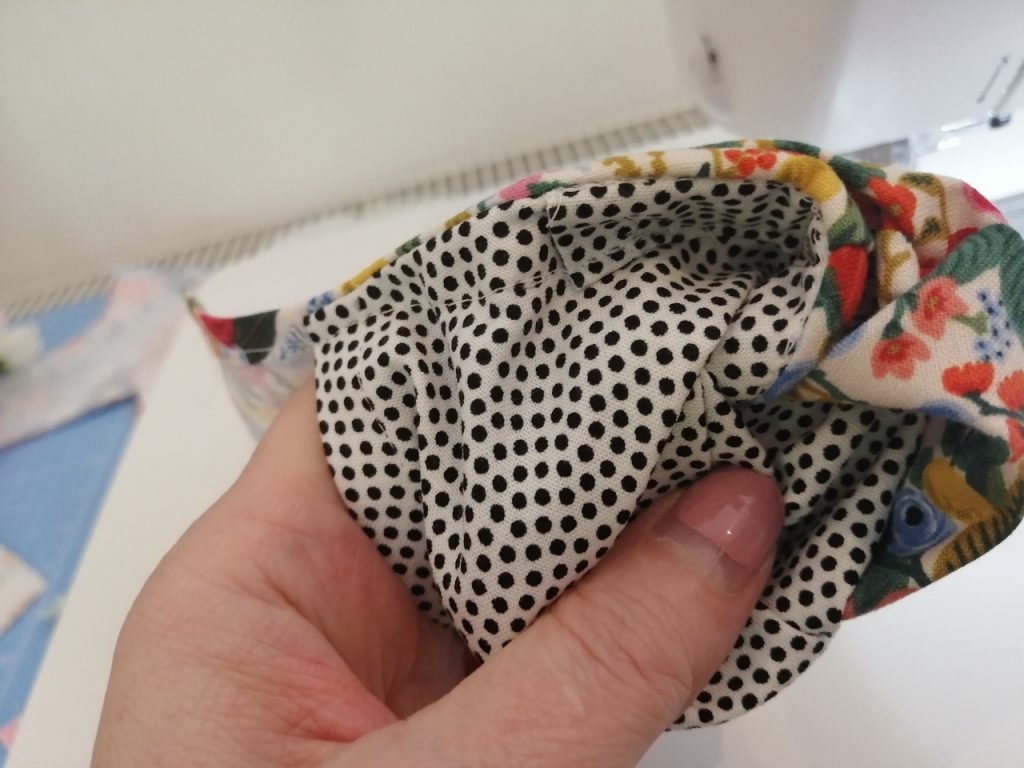
turn inside out 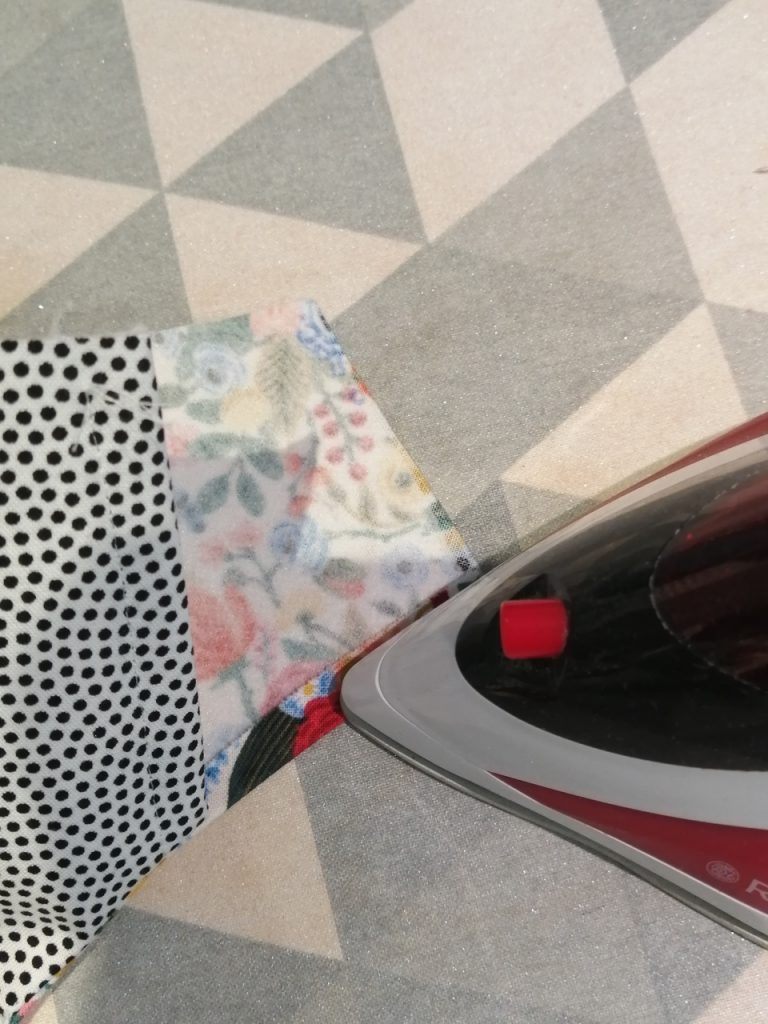
iron the edges in place
Topstitching to set the seams
Now, turn it inside out so the right sides are facing out. Twiddle the seams so they lay nicely and iron them down. Then adjust the stitch length to 3 and topstitch the top seam. Slow down as you come to the curvy center and align your fabrics as you go along. The Juki NX7 goes through all these layers of fabric and interfacing beautifully!
Topstitching the mask helps it keep its shape and reinforces the seam
Now do the same for the bottom of the mask. Topstitch from the side to the centre, pause to re-align and pivot your fabric, then stitch to the end. You are now almost finished your mask.
Topstitching the bottom of the face mask.
Finishing off the side seams
This is how to finish your face mask if you are threading elastic, fabric ties or T-shirt yarn through your mask. First finger fold the edge of your mask. Then fold it again so that it meets the edge of the lining. Finally stitch it down near the fold. Remember to back stitch at the start and finish.
finger fold 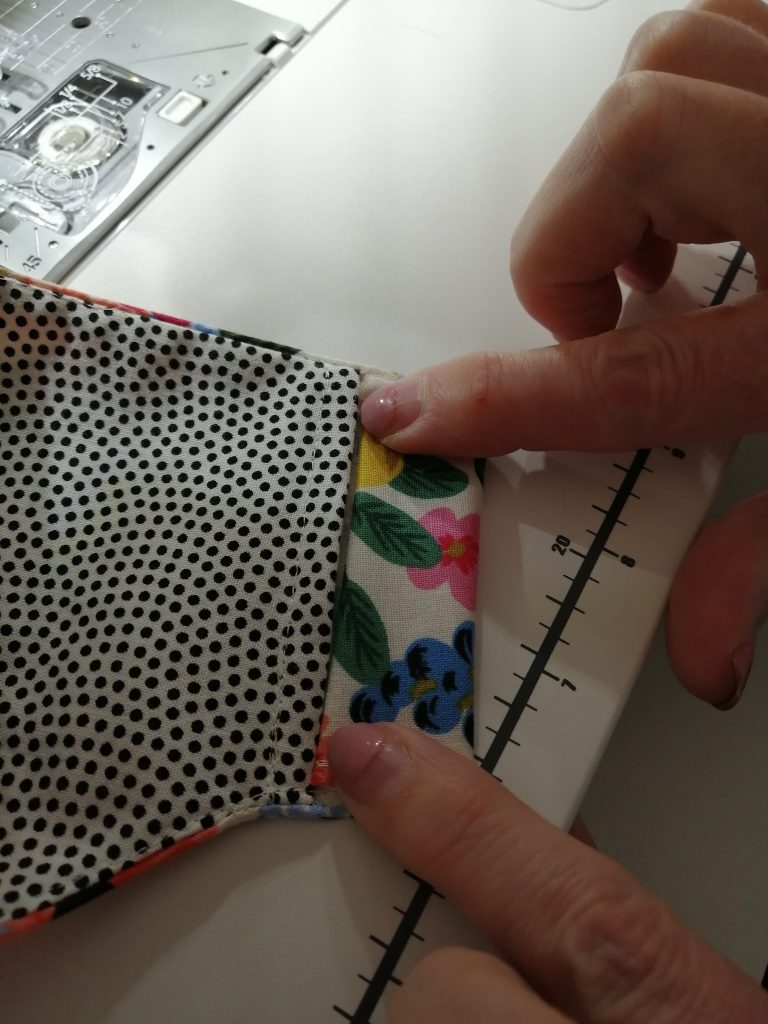
fold again 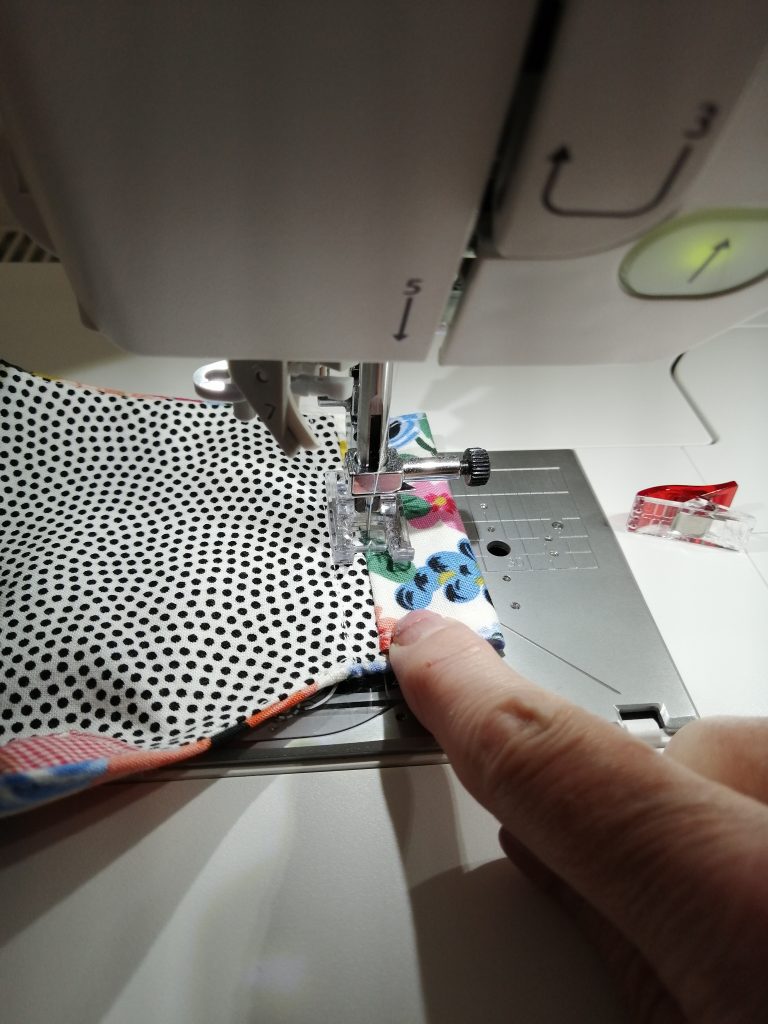
stitch in place
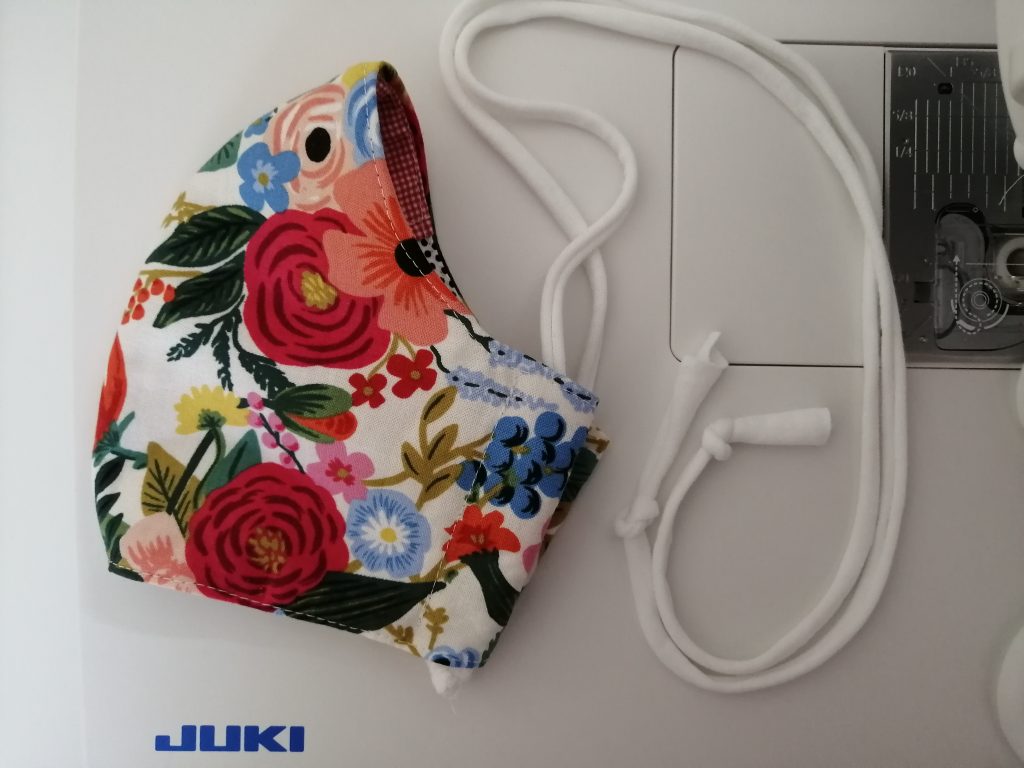
Adding the ties
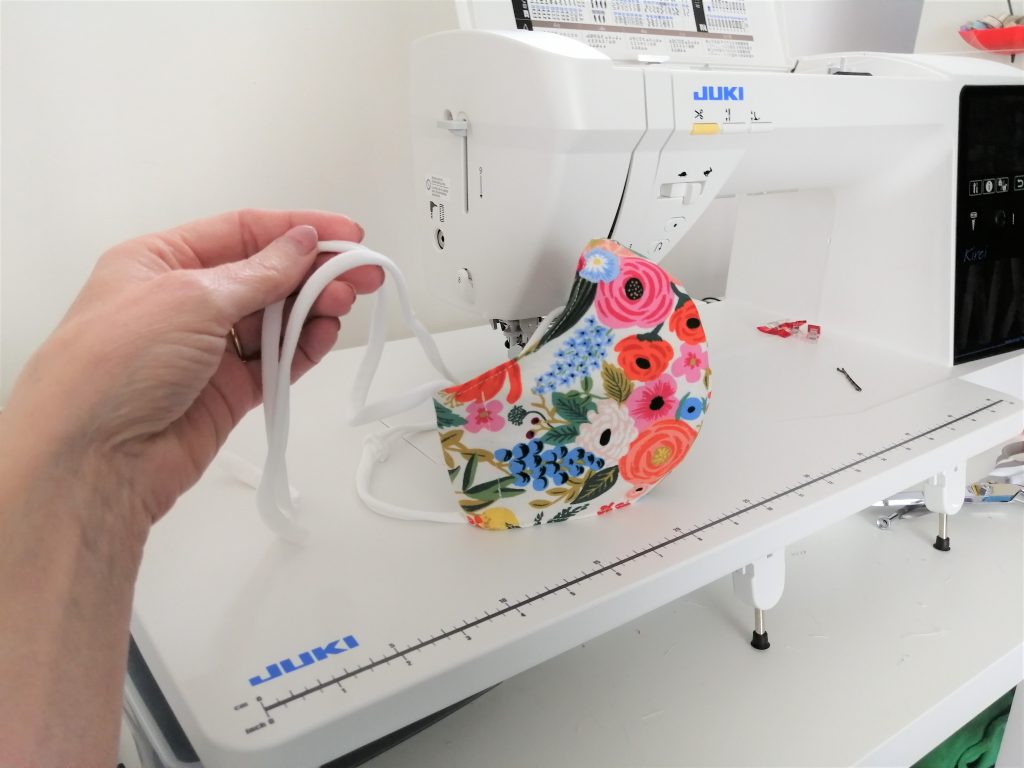
There are lots of ways to attach the mask to your head. Here I’m using t-shirt yarn. It’s soft, stretchy and easy to make. You can find out how to make t-shirt yarn here. I’m using a hair pin as a needle to thread it through the side pockets on the mask.
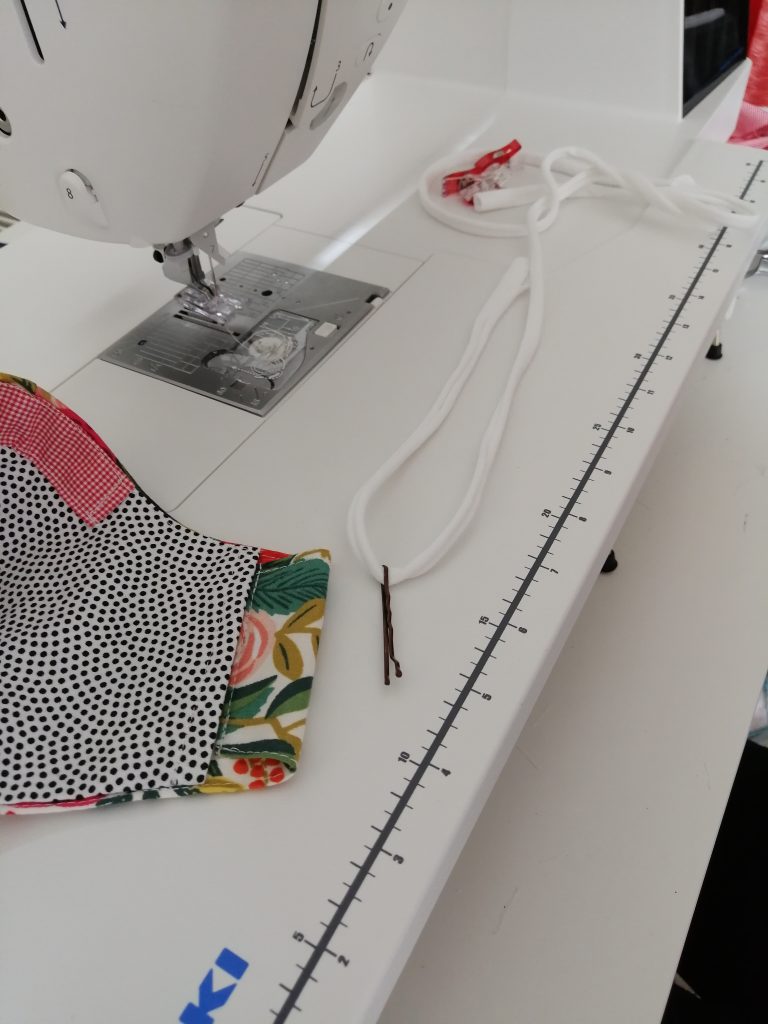
use a hair pin for a needle 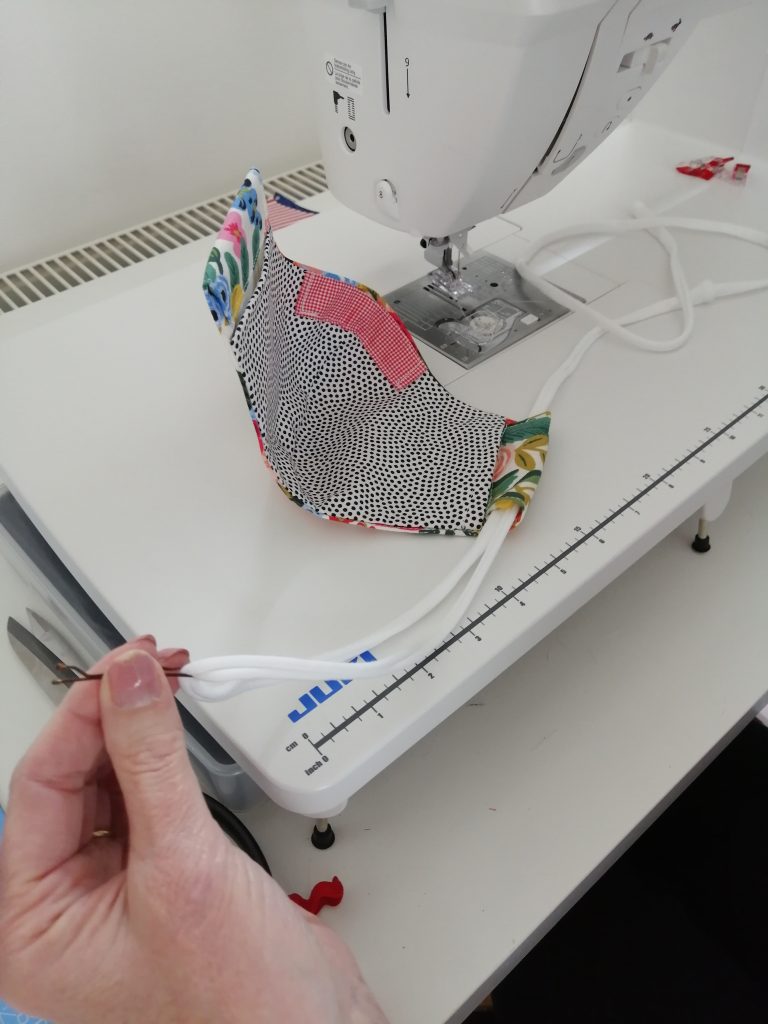
thread down one side 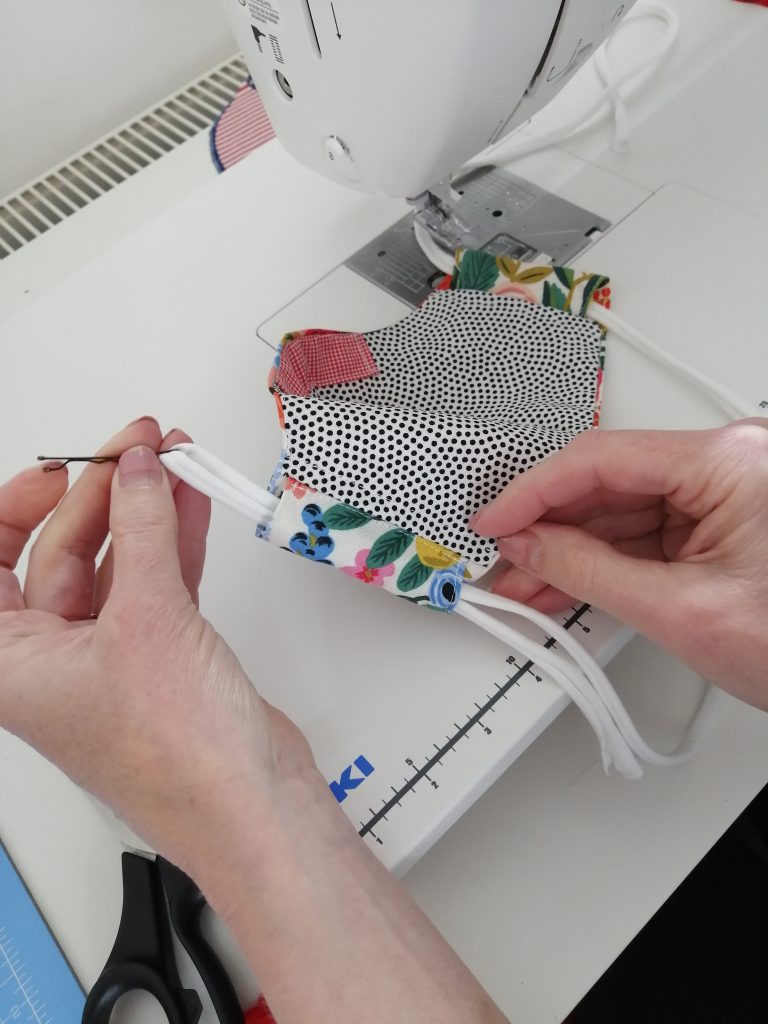
and up the other
Start at the top of one side, thread it down. Go to the other side, begin at the bottom and thread the yarn upwards. This way you tie your mask in place at the top. Tying at the top helps it to hug your face better. Also, if you need to take your mask off, it will just hang around your neck until you’re ready to slip it on again.
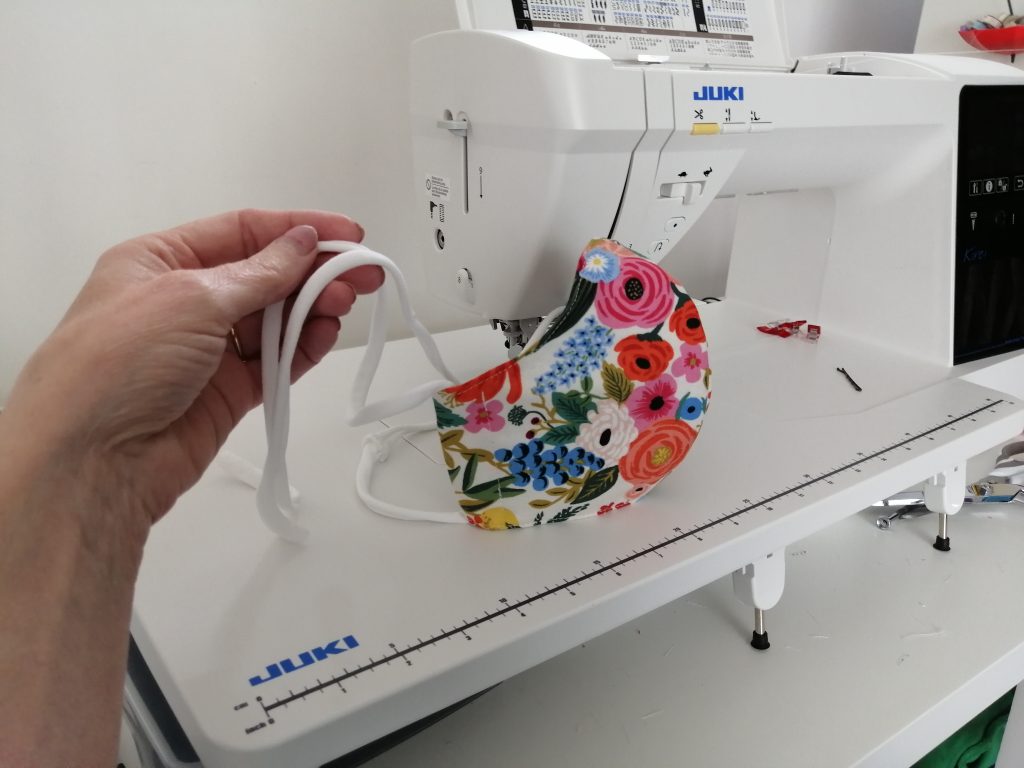
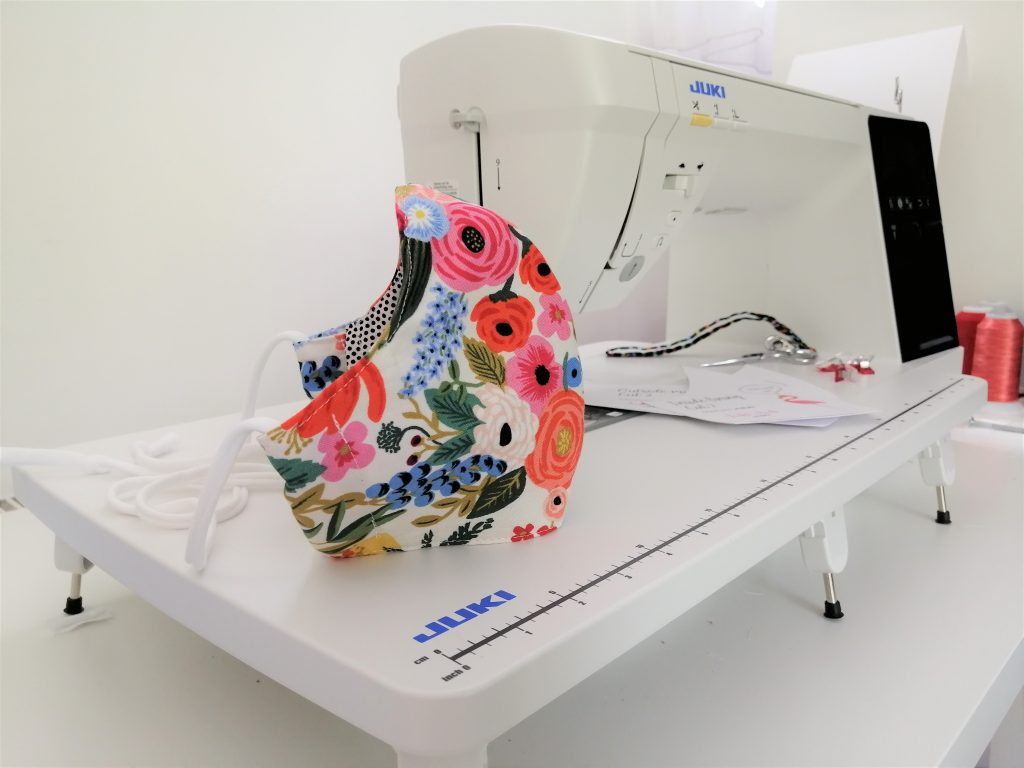
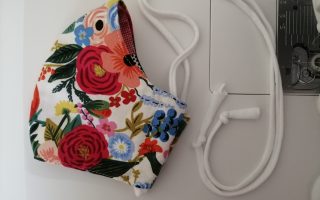
The Juki Club face mask all ready to wear
Adding the nose wire
The very very last step is to insert some wire into the nose pocket. I ended up using floral wire that I snipped off a bunch of artificial daisies. I bent them back on the ends. Or just wrapped the ends in washi tape to keep the wire from pricking. These can be taken out of the pocket prior to washing.
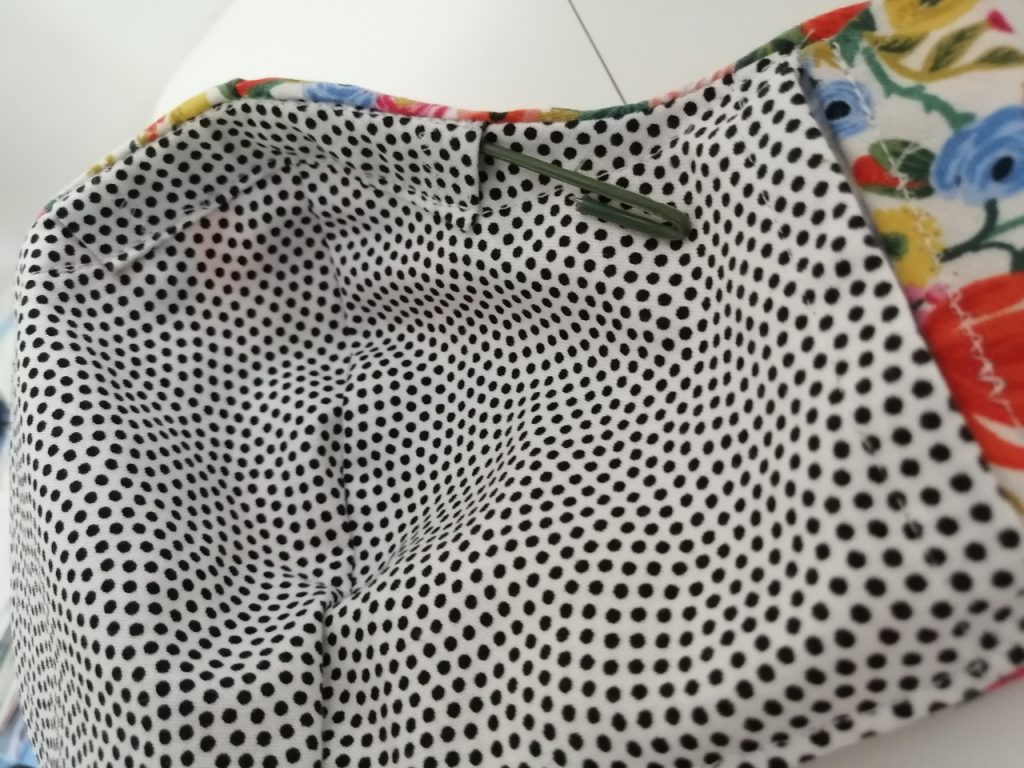
inserting the nose wire
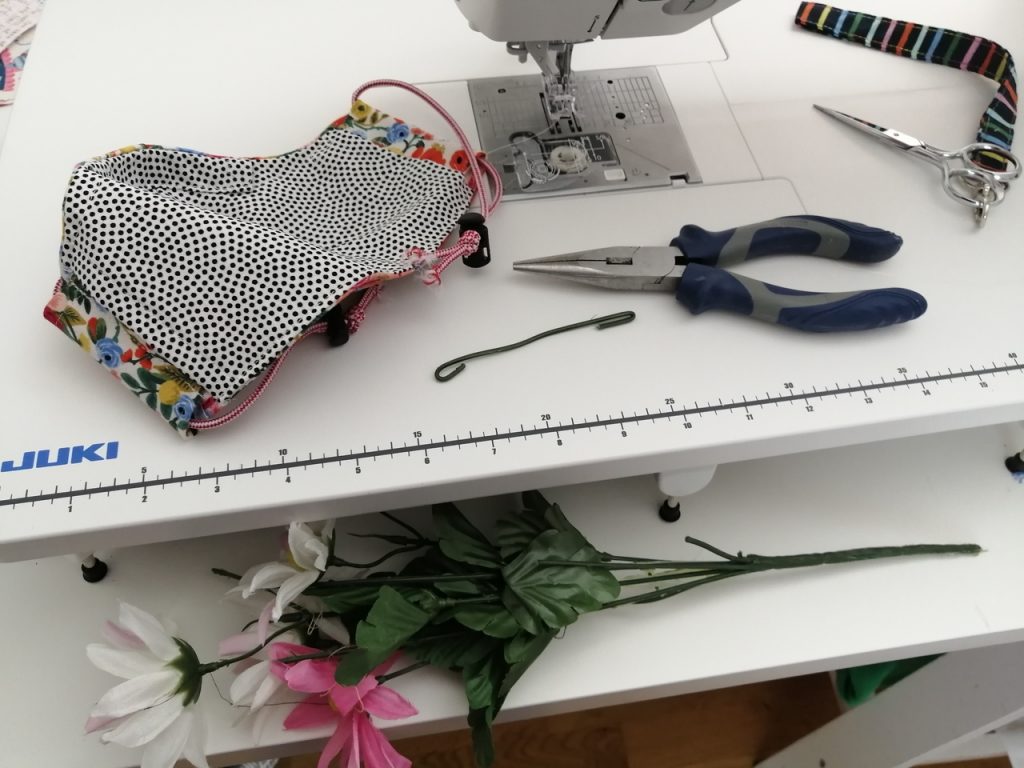
I used florist wire from a bunch of artificial daisies.
Other options for nose wire are
- pipe cleaners
- twistie ties
- ties from coffee bags
- florist wire
That’s it. Your face mask is now finished! You can add a filter to the filter pocket. Some people use disposable masks. Others just add a piece of paper towel. We have extra information below about other tie options and ways to adapt the size of your face mask.
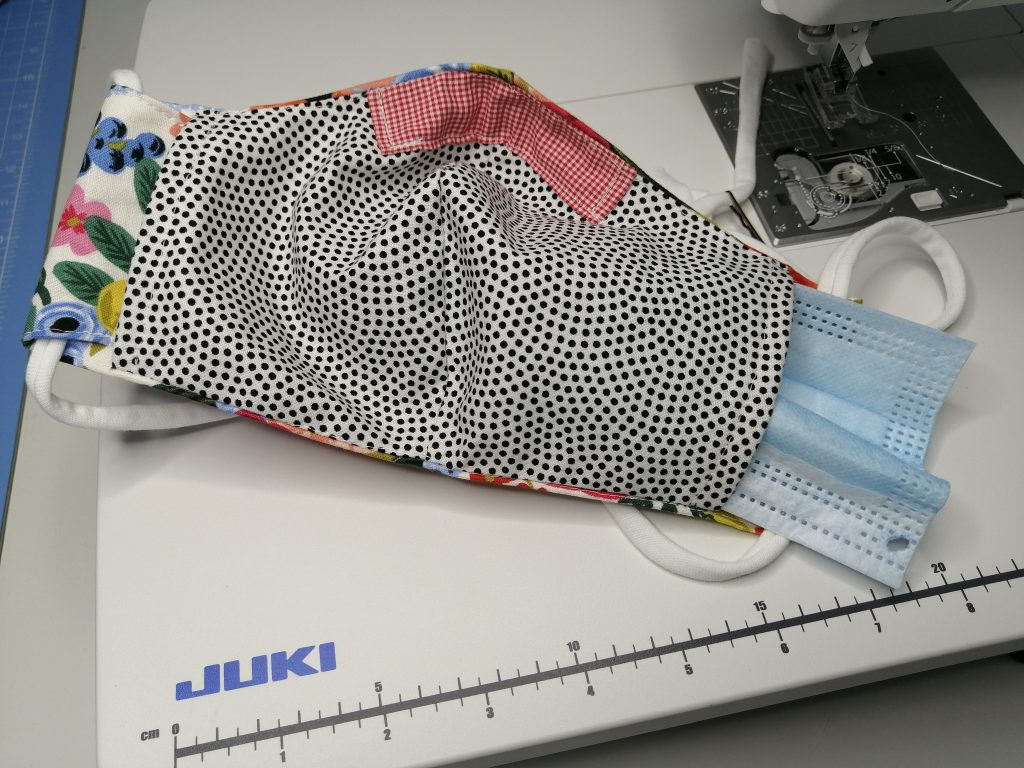
Adding a filter to the filter pocket
Using t-shirt yarn
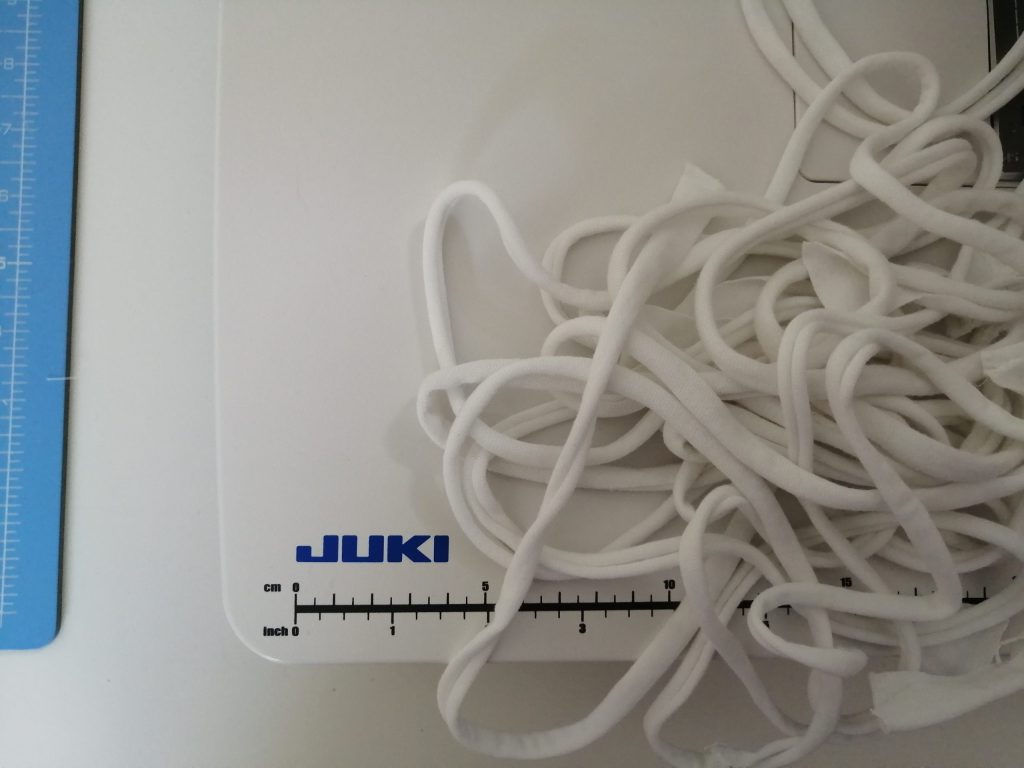
T-shirt yarn is a fast fun NO-sew way to make fabric ties for face masks. We’ve just made a new blog post to show you how to make face mask fabric ties from t-shirt yarn. The directions for these masks work with all kinds of fabric ties.
Using hair ties or bungee cord & toggles
If you are using hair ties or bungee cord and toggles you will need to finish your mask slightly differently. You will need to add the hair tie or bungee tie and toggle AS you are stitching the side pockets. Initally I cut the bungee cord to go around each ear. But for people with sore ears, the bungee cord could also be threaded through the mask just like the T shirt yarn above. The directions below show how to add bungee cord or hair ties for each ear.
First I cut a bit over 12 inches of the bungee cord, folded it in half and pushed the folded bit of cord through the opening in the coat toggle. This is a bit tricky because you have to squeeze the toggle to get the hole to open.
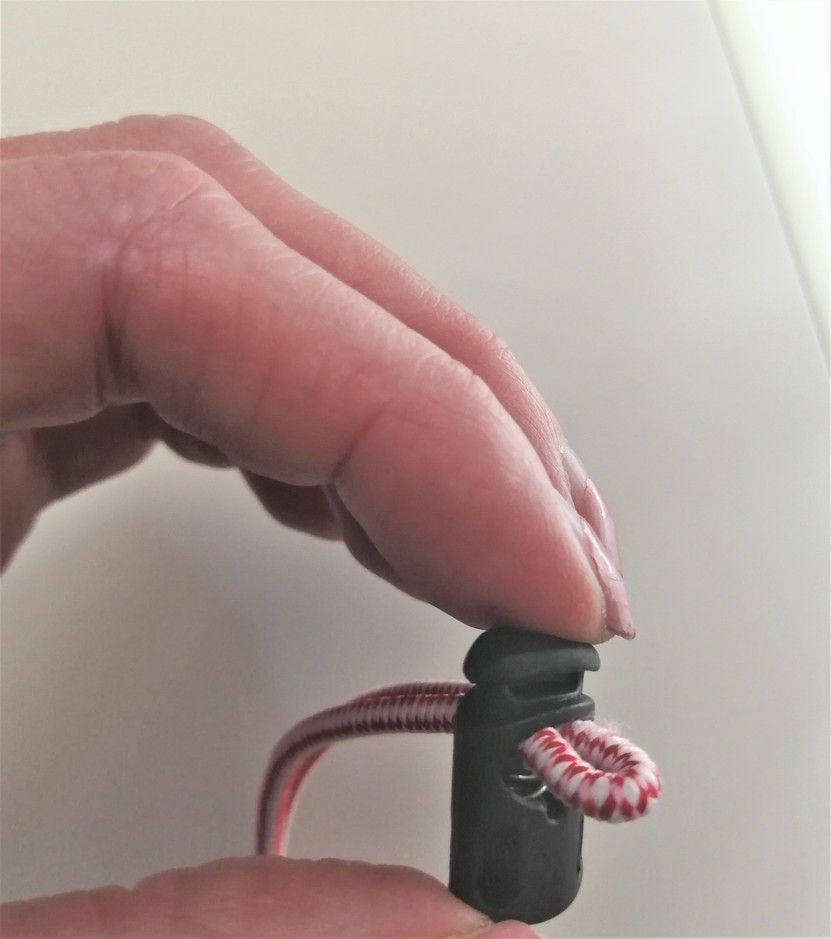
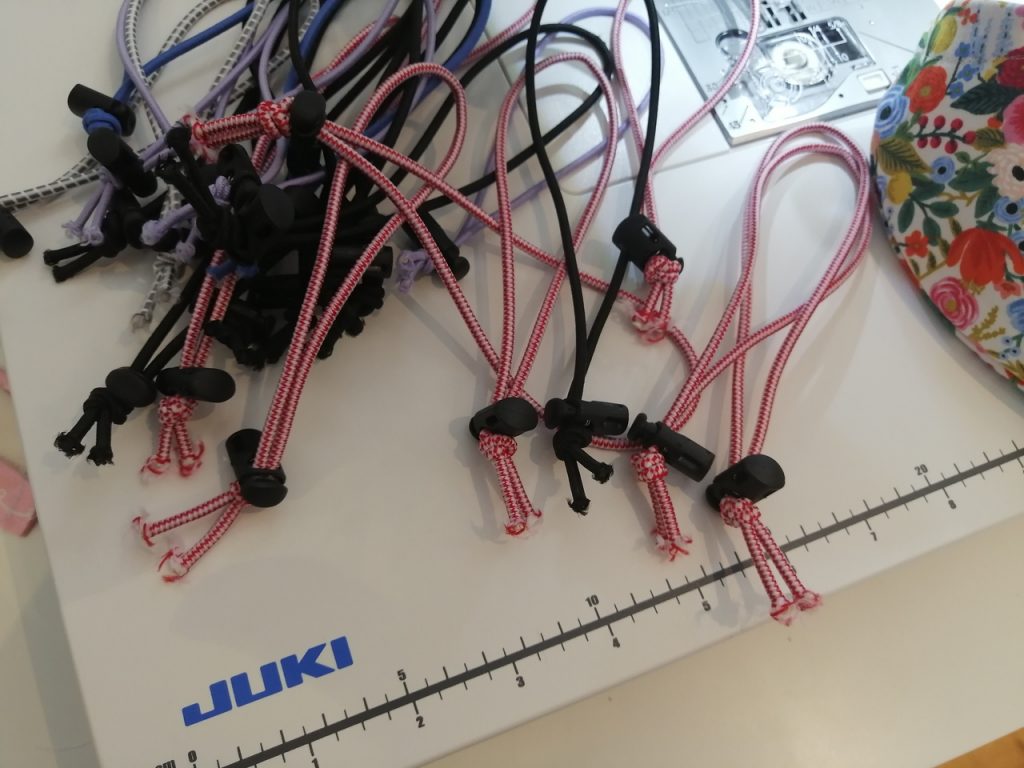
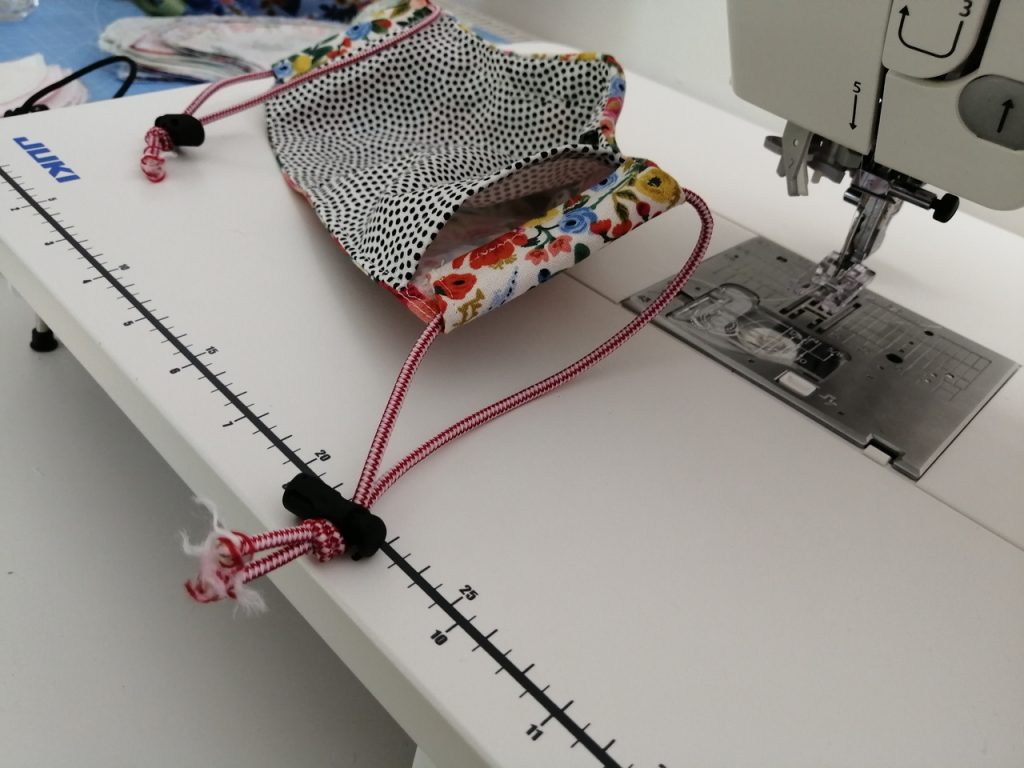
Then I pull the two ends of the bungee cord through the hole and make a knot in the end so it won’t pull back through. This gives me an elastic ear piece that is adjustable so it can comfortably fit different sized heads. You’ll need 2 for each mask. I made a bunch.
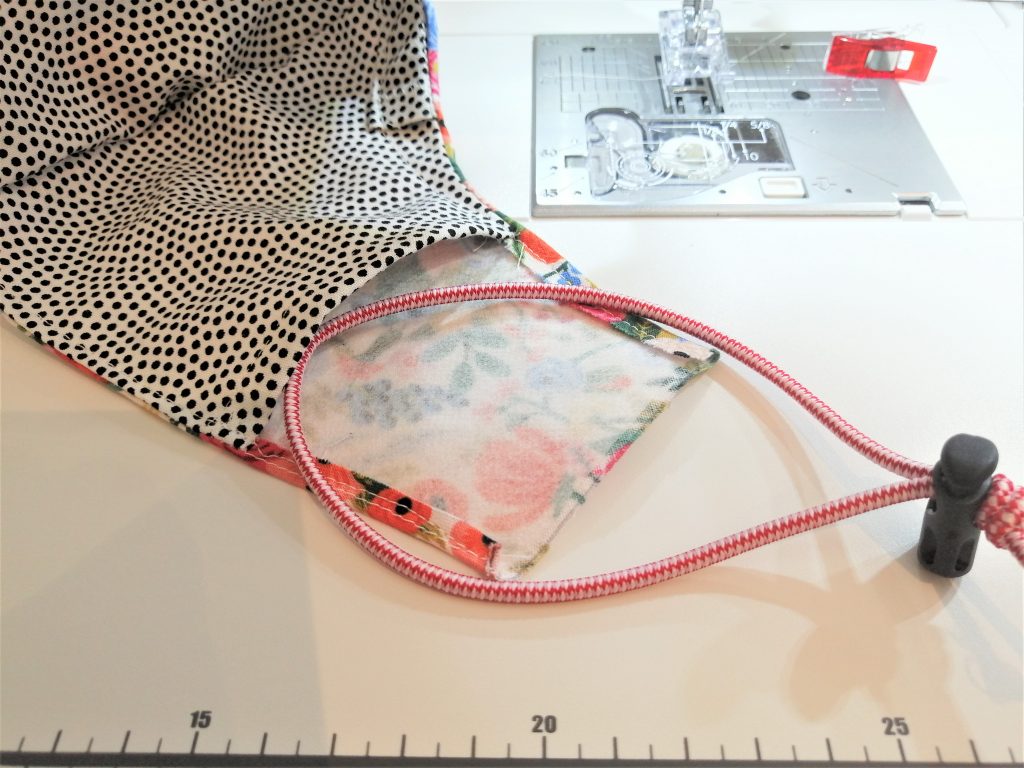
Now to add the adjustable bungee cord ear pieces to the mask. Lay the mask front side down on your sewing machine. Place the circle of the bungee cord like this on your mask.
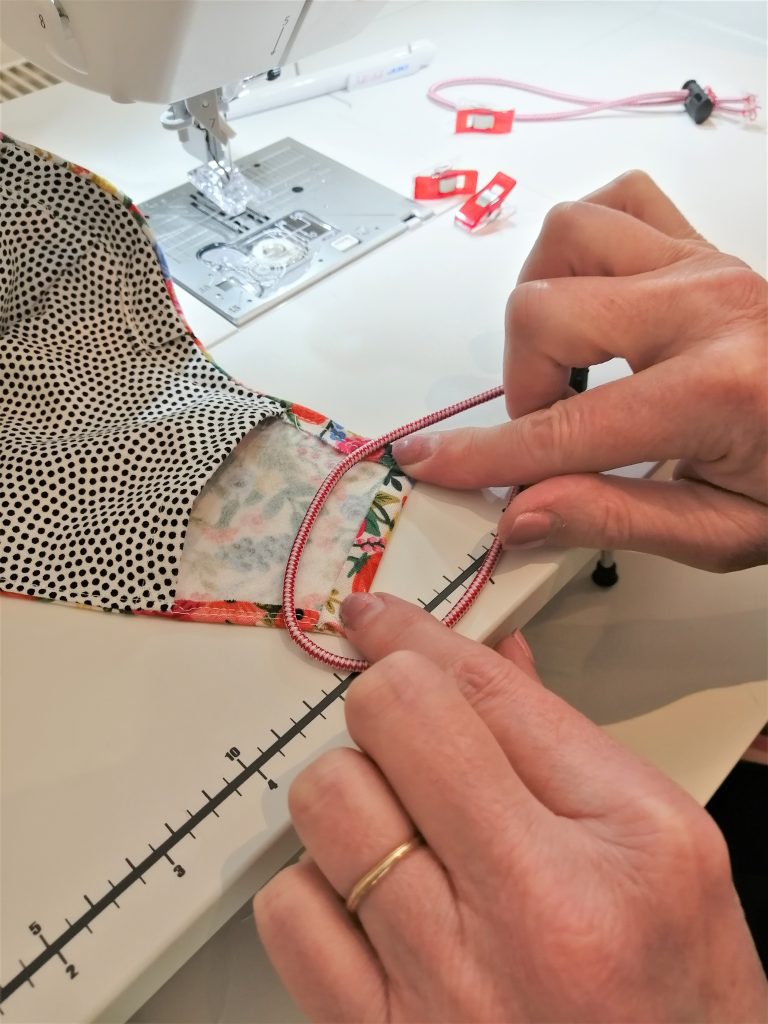
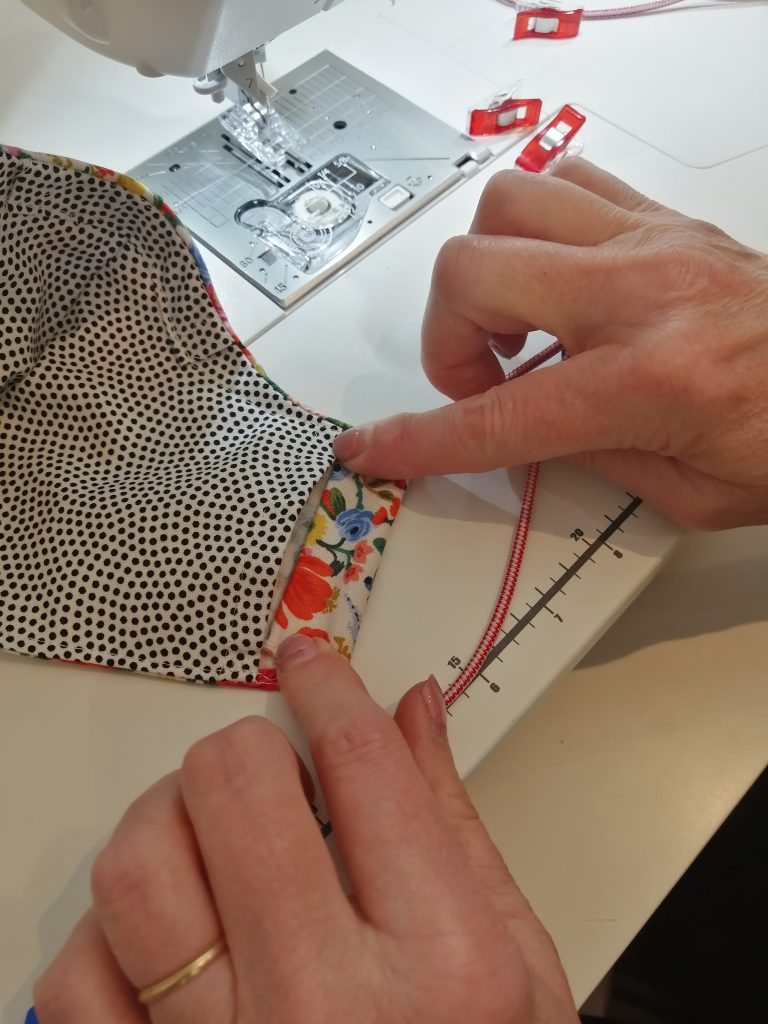
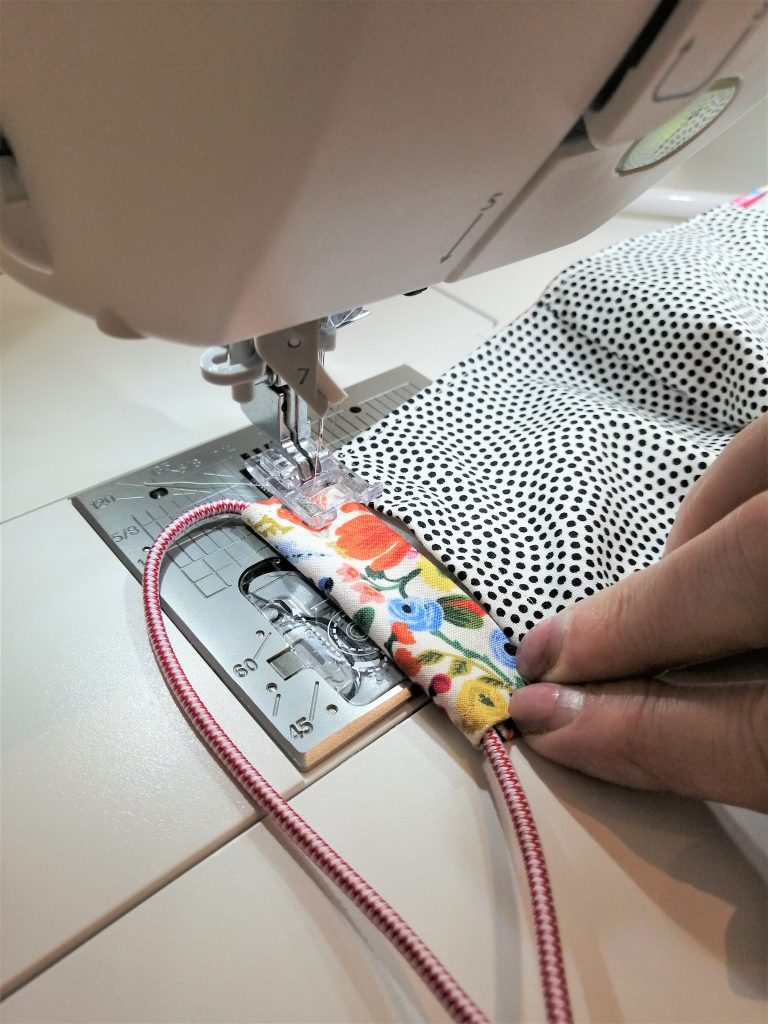
Lastly, stitch over the edge of the final fold, anchoring your stitches at each end. Notice that the bungee cord is well out of the way, to the left of the stitching. Do it again on the other side and you are finished. Almost.
Almost finished. Here’s a good view of the filter pocket.
The final touch is to tidy up the bungee cord ends. I use this Prym Fray Check stuff that I got off Amazon originally to tidy the corners on my overlocker napkins. It worked great on the bungee cord too. I just snipped off the messy bit, added a drop of the Prym Fray Check on each end and waited for it to dry.
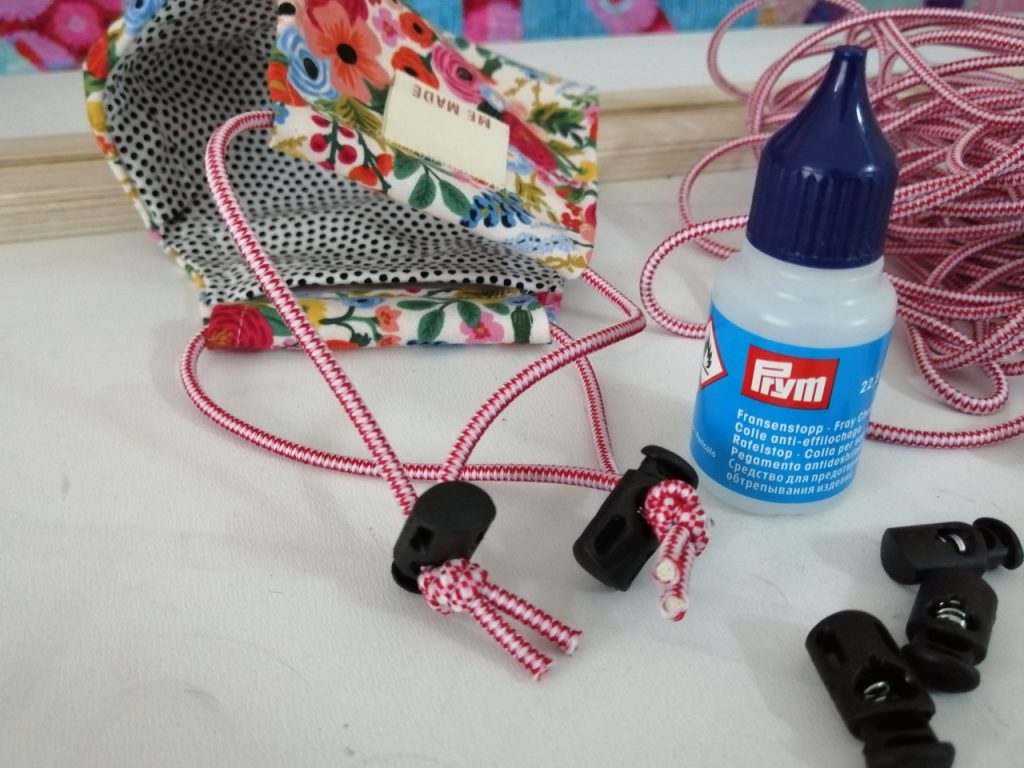
Making the ends tidy with Prym Fray Check
As I said in the beginning these face masks are not super fast to make. But I love how they turned out. It was fun to make each one special for the people I love.
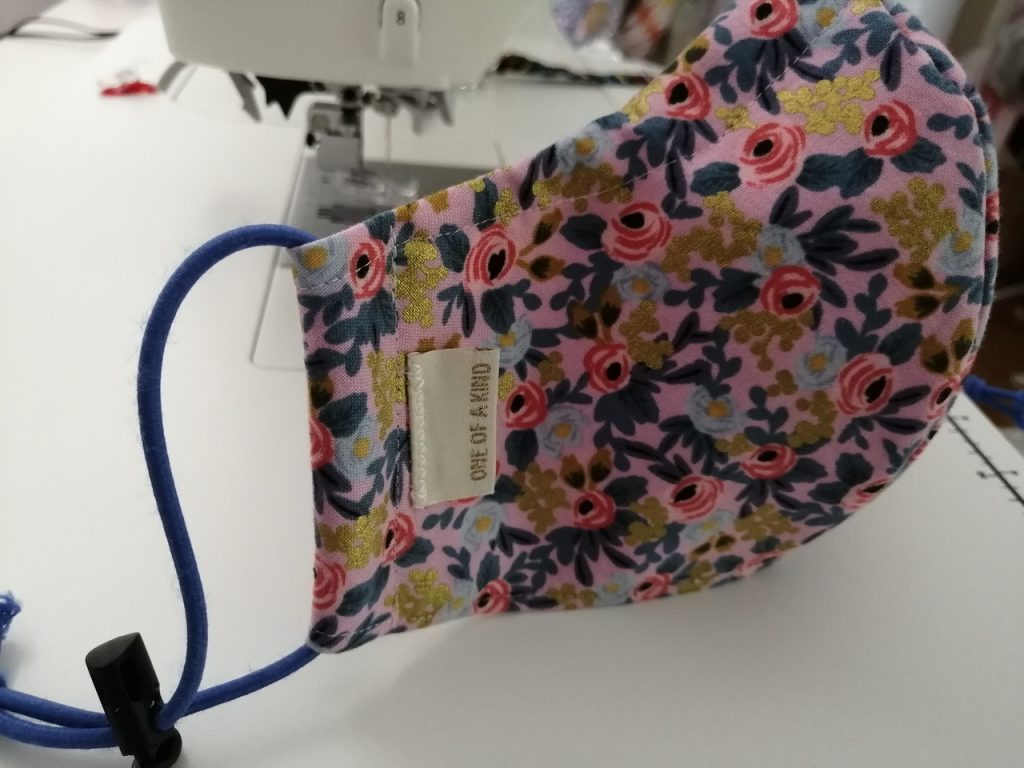
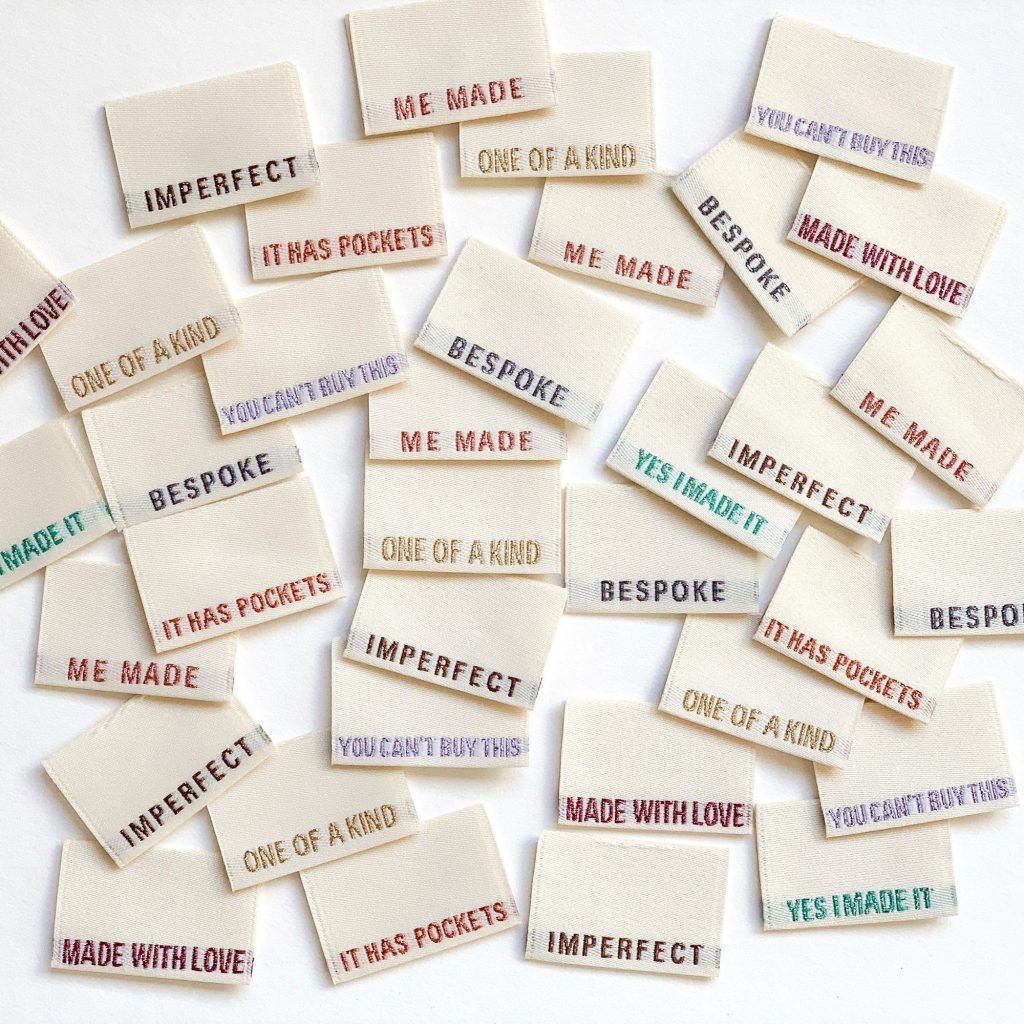
The very very last thing … is that sometimes I add a label.
I had some fun stitching on these labels from Kylie and the Machine.
Adapting the mask to fit
People come in all different shapes and sizes. This simple mask shape can be easily adapted to fit the people you love. For a larger size just add 1/4 inch. For a smaller size just subtract 1/4 inch. There’s an easy way to do this with 2 pencils and a rubber band, which works like a pantograph.
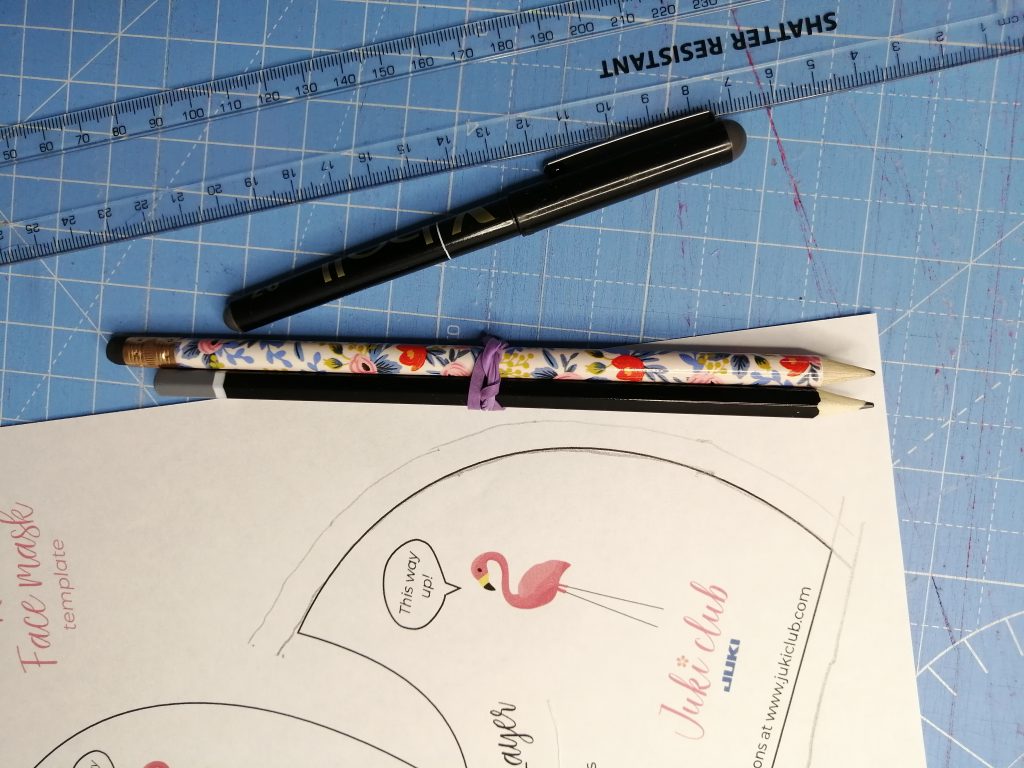
You could also just use a ruler and connect the dots on the curvy bits. This is trial and error, but by slightly tweaking the pattern, you can get a better fit.
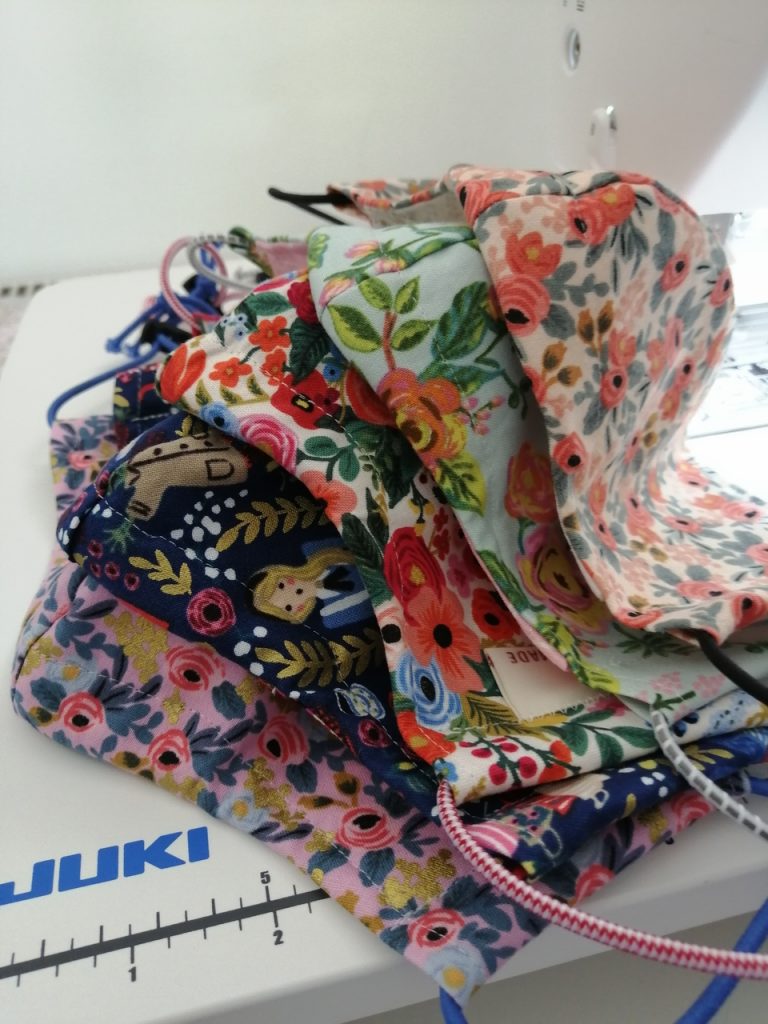
This is not a quick mask to make, but it is designed to last. I’m not making hundreds, just enough for family and friends, so I was able to spend the time to make them efficient, pretty and washable.
As you can see, I made a bunch. I’ve got kids in lock down in San Francisco, London, York, and Lincoln. And they have friends…

Martha Milne works for Juki Club here in the UK. When not making masks, she creates social media content and teaches free motion quilting. Martha lives in Lincolnshire and has 6 grown up children. During lock down she is living with her husband, cat and 2 kids home from University.

The Gang


Thank you very much.
[…] yarn as a super fast way to make comfortable face mask ties. We refer to t-shirt yarn in our Making Masks Update blog post so we wanted to go into more detail here. We’ll show how to make t-shirt yarn for mask ties. […]
Thanks for a very informative post. I have just made 25 assorted masks, lots of different designs, and I like your design best. I have modified and simplified it to make a quicker production.
I only put interfacing on the outside part, but used a slightly heavier Vlieseline H200 and I omitted the nose wire channel altogether.
I found your instructions very comprehensive, indeed almost too detailed as I found myself skimming them to get to the end quicker, but I am an experienced stitcher. I think they are the ultimate hand holding for a beginner, although I feel a beginner may naturally opt for a more simple design. The ones I make for myself and my immediate family will get the full monty however. I thoroughly enjoyed using my Juki DX7 and the various features that made the sewing of all my face coverings a more pleasant experience.
Really good pattern and instructions. I also used the t-shirt yarn for ties which worked really well – thank you 🙂