
I’m reposting this for Christmas in July. Making DIY fabric envelopes is fun any time of year. I want to play with this @jweckerfrisch All about Christmas fabric for Riley Blake Designs. It’s five months until Christmas today. Here’s to a bit of a head start.
I do have a soft spot for Valentines Day. Maybe it’s the colours and maybe it’s just a great excuse to spread some love around. I like to go beyond romantic relationships and include family and friends, sewing buddies, co-workers, teachers, even the post mistress! Valentine fabric envelopes are one way to show gratefulness to the people in my life. But why limit it to just one day. Any day is a good time to spread some love.
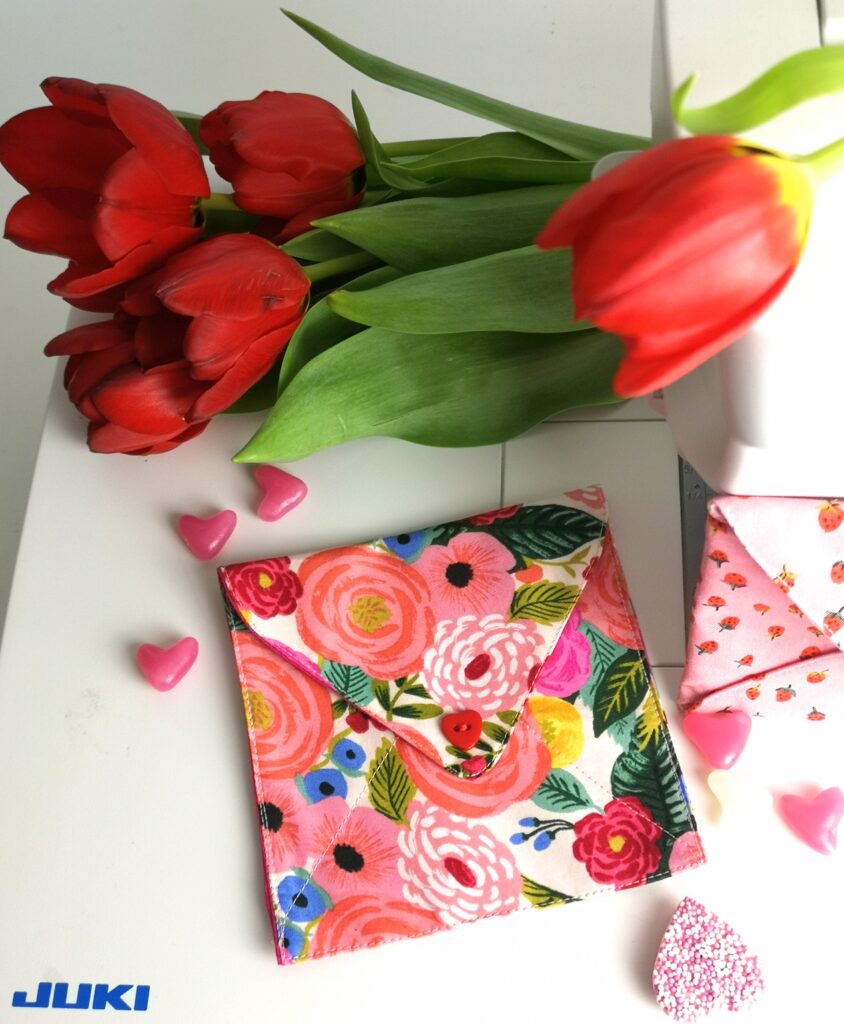
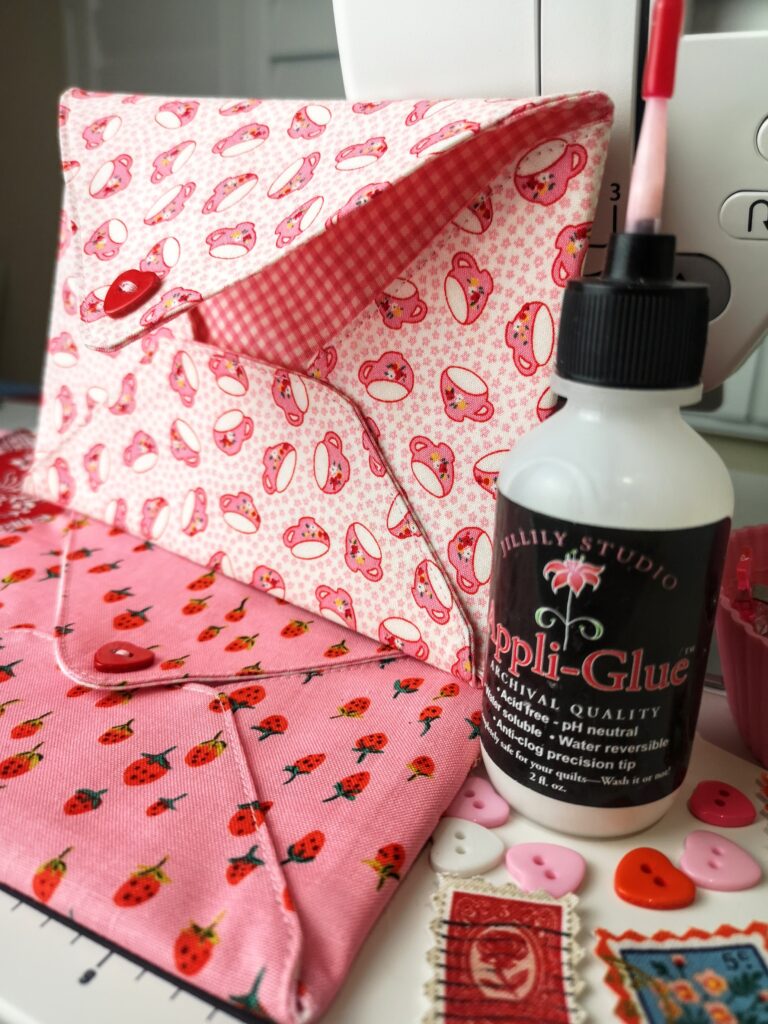
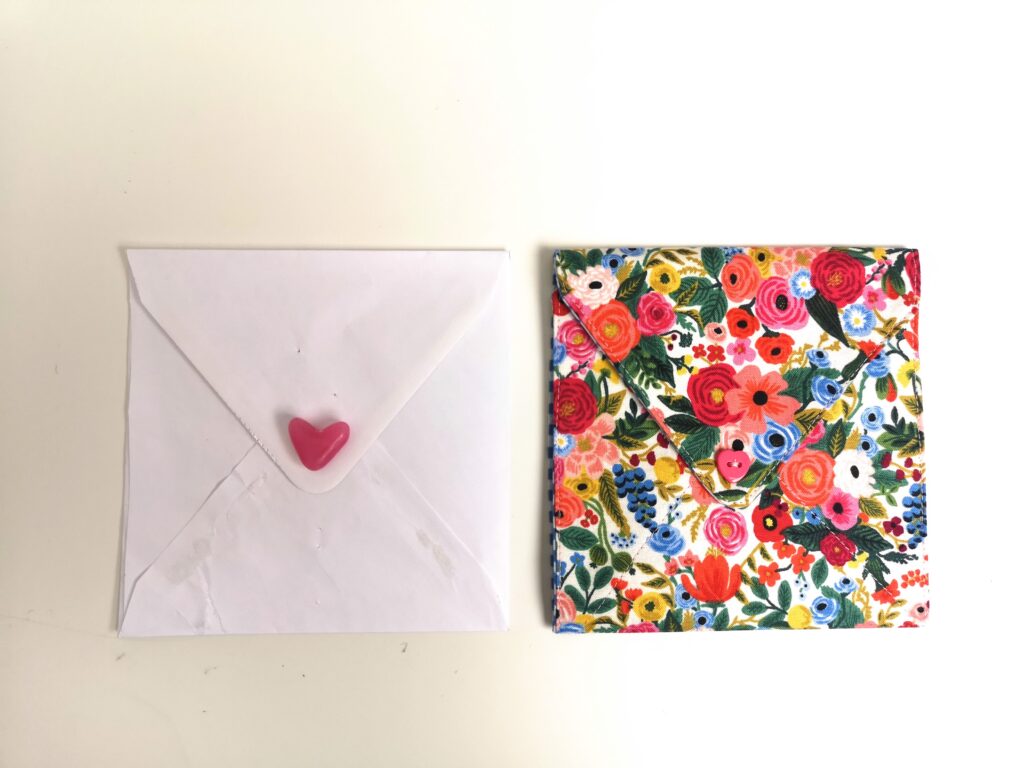
In the past I’ve sent Valentine fabric postcards but this year I wanted to try making DIY fabric envelopes. This post shows you how to use favourite fabrics to make Valentine fabric envelopes that can be used again and again. The envelopes can be filled with a little heart note, or a paper valentine and maybe some sweets or chocolates.
Materials
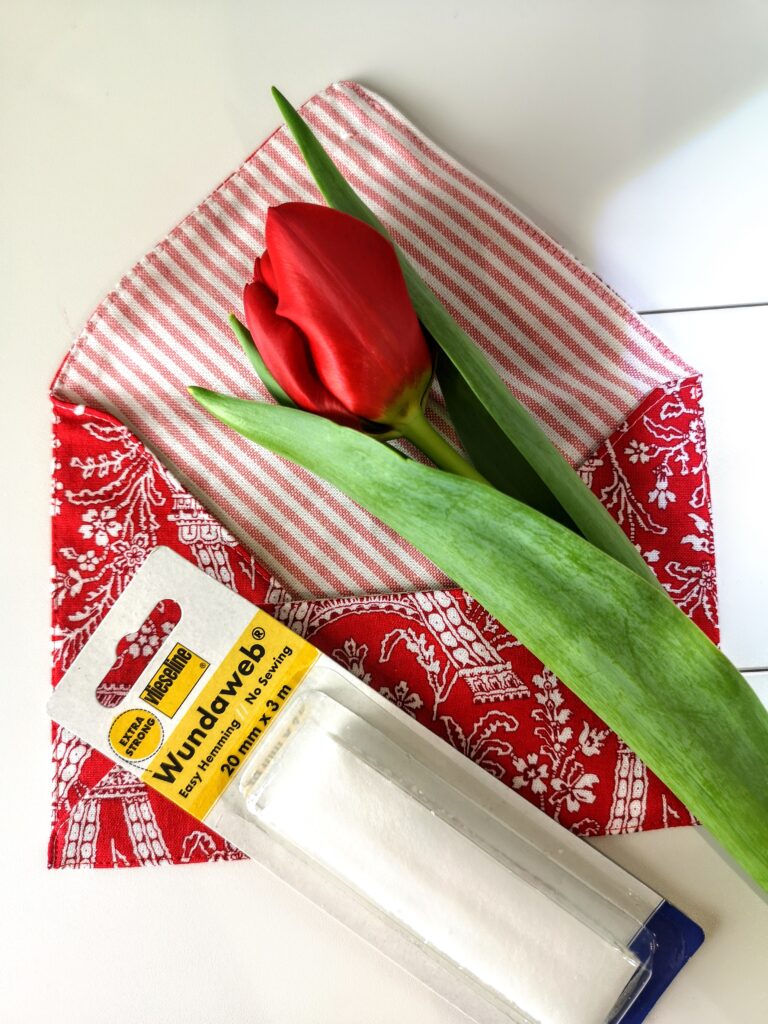
- Favourite fabrics – each envelope needs 2 fabrics
- real paper envelopes of various sizes to use as templates
- template card or plastic
- iron on interfacing – a stiffer type works best
- pretty threads
- optional buttons or Velcro for closure
- fabric glue or glue stick
- goodies for inside
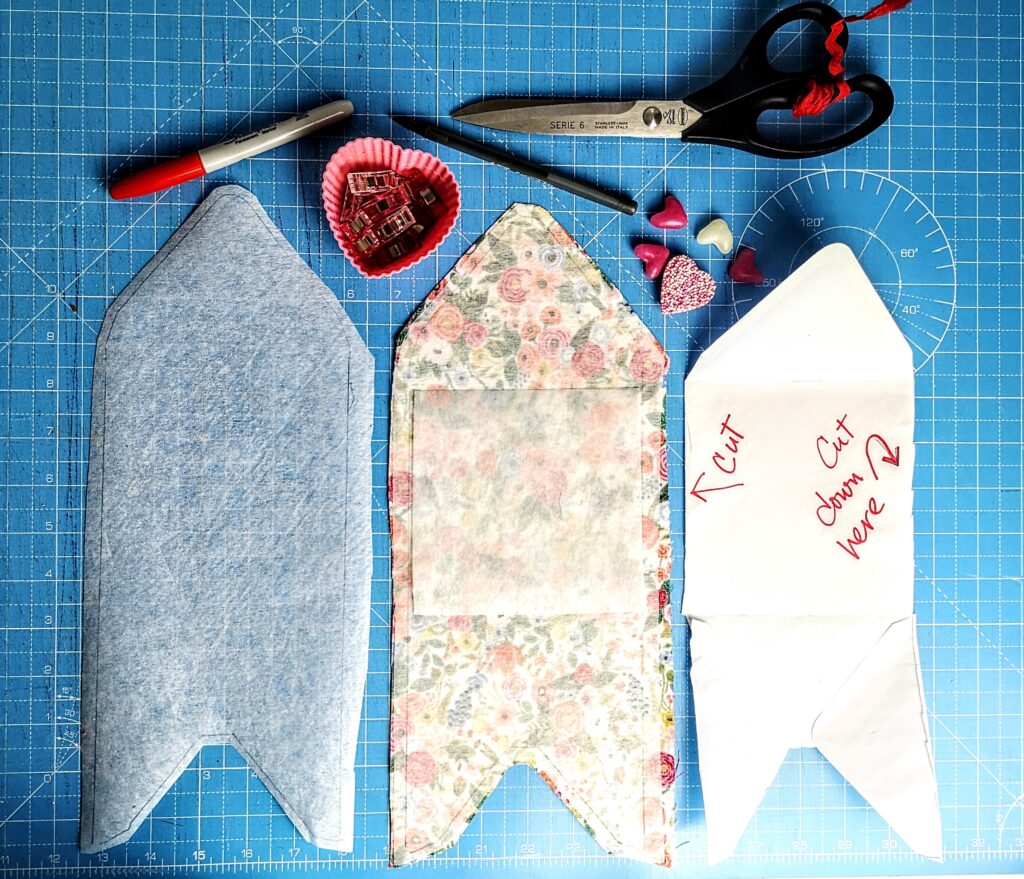
Making the templates – there are two!
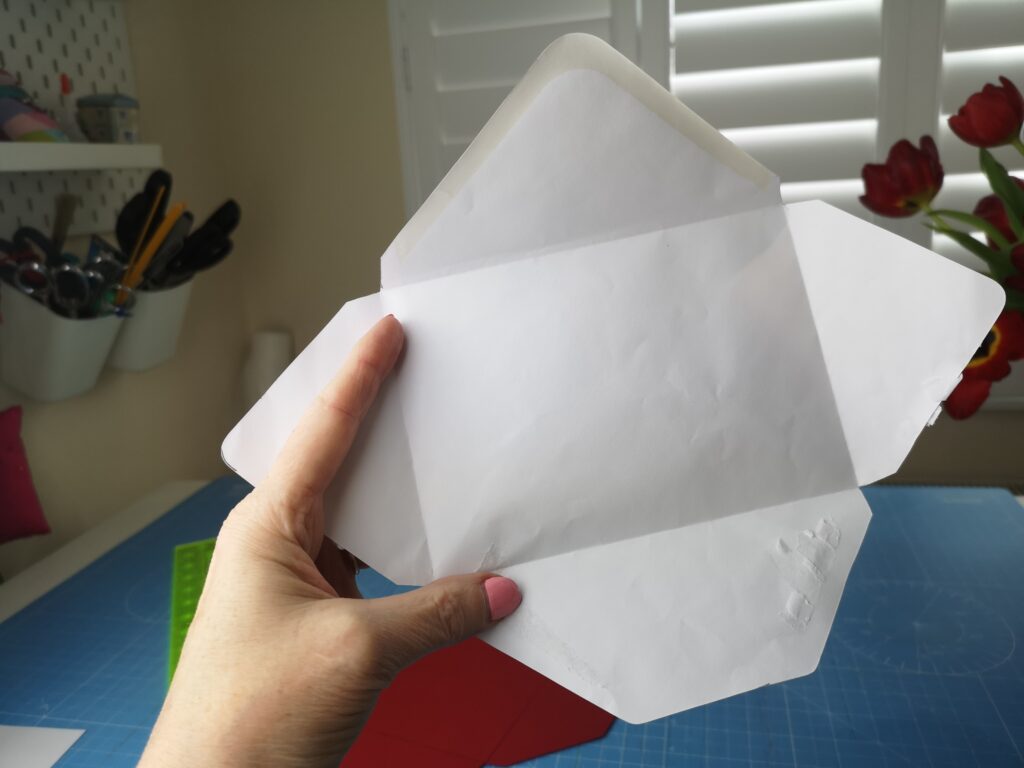
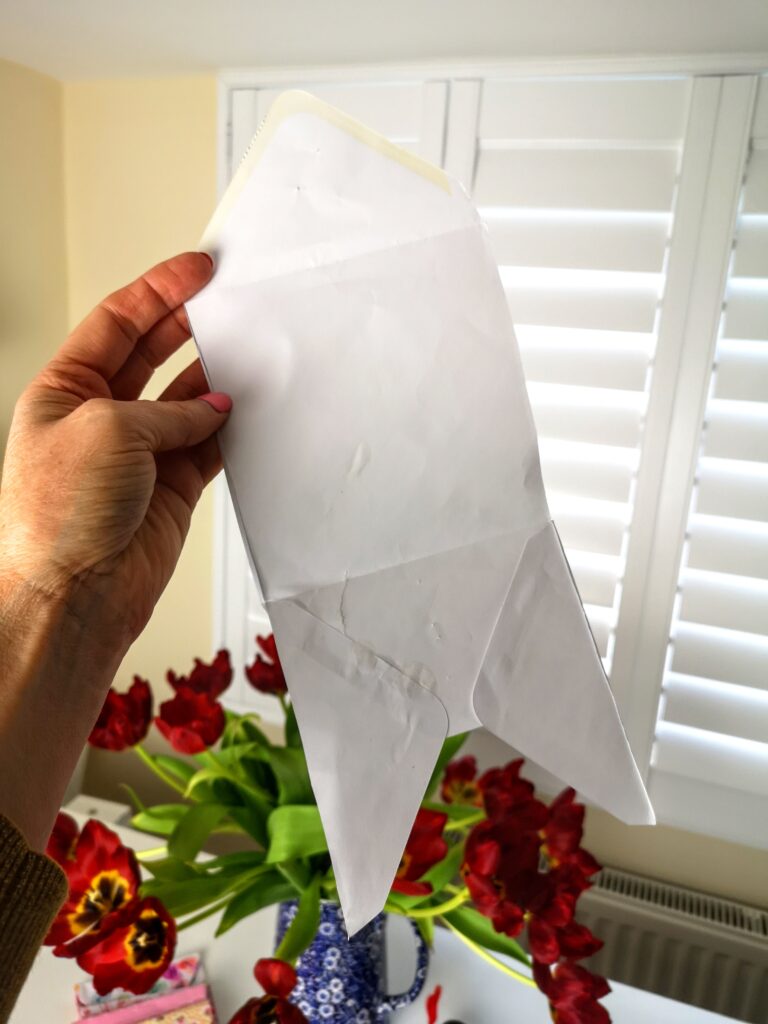
I started looking for downloadable envelope templates online. Then it occurred to me that I had just what I needed in my desk drawer. I found a couple of envelopes and gently pulled the flaps apart. Hey presto, a perfect template. Ruffle through your drawers and see what size and shape envelopes you like. After some experimentation, I decided to use two slightly different envelope shapes that are deconstructed in different ways. I’ll start with the classic rectangular envelope.

The classic rectangular envelope
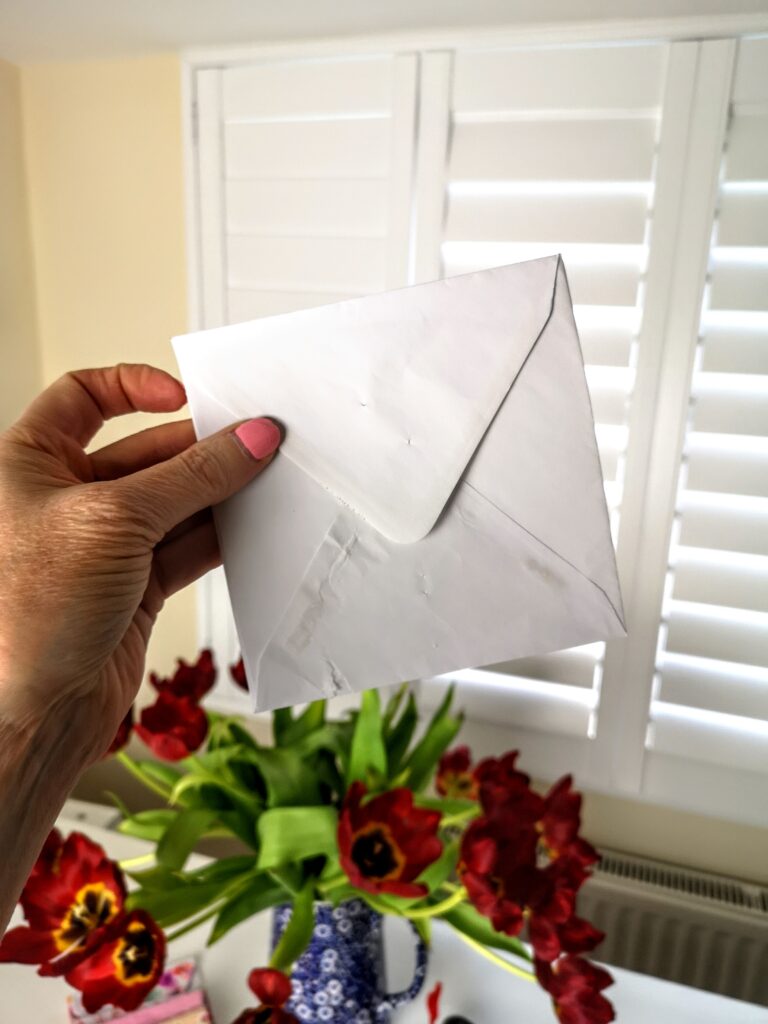
The first template is a classic rectangular envelope shape. Simply unstick the flaps of an envelope. Be gentle so the paper doesn’t tear. This method will give you roughly a square shaped template which refolds into a rectangular envelope. The end result is a double-sided fabric envelope that is assembled exactly like the paper one.
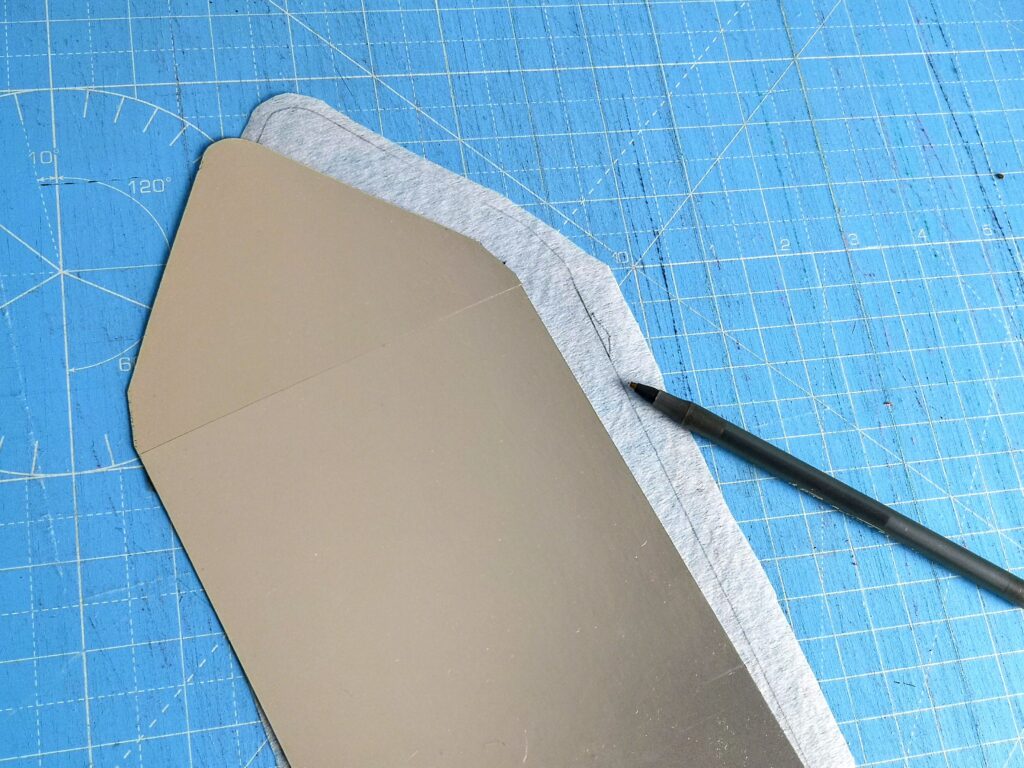
Because I wanted to make a bunch of them, I traced the envelopes onto card to make sturdy templates that I could easily trace around.
Tracing the template
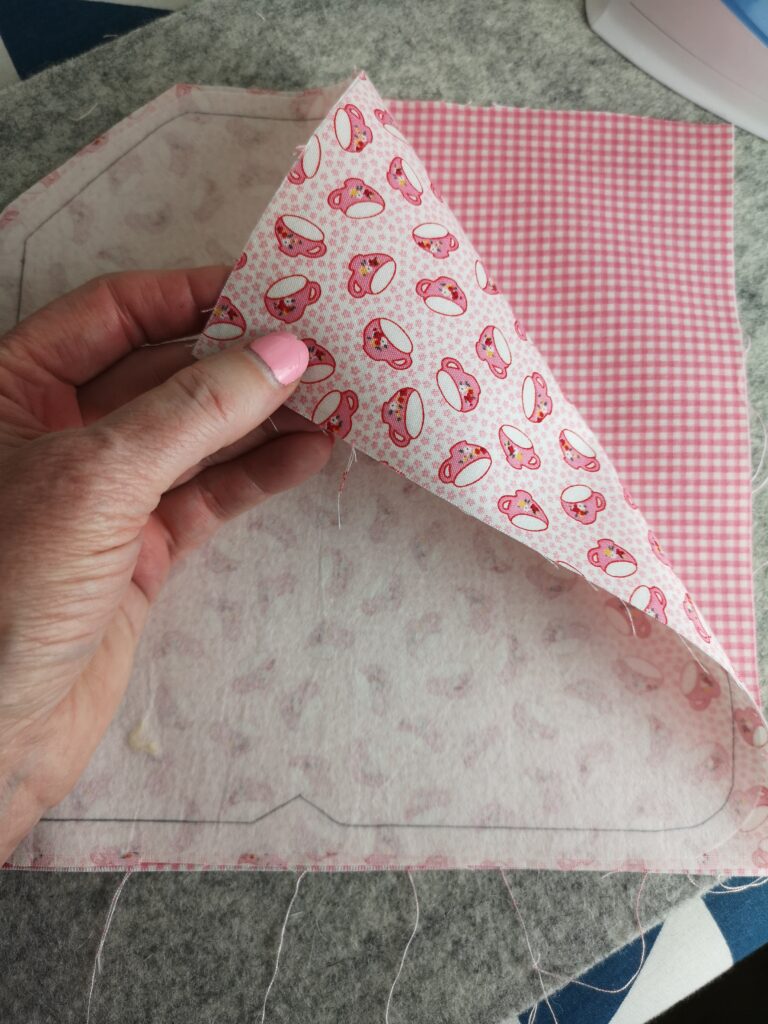
Begin by tracing the envelope template directly on the Interfacing. I found that the stiffer interfacing worked best. Use a pen to trace around the envelope template directly on the interfacing. Later this traced line will become your stitching line.

Cutting out
- Now cut OUTSIDE the traced line at least a centimetre. This creates your seam allowance.
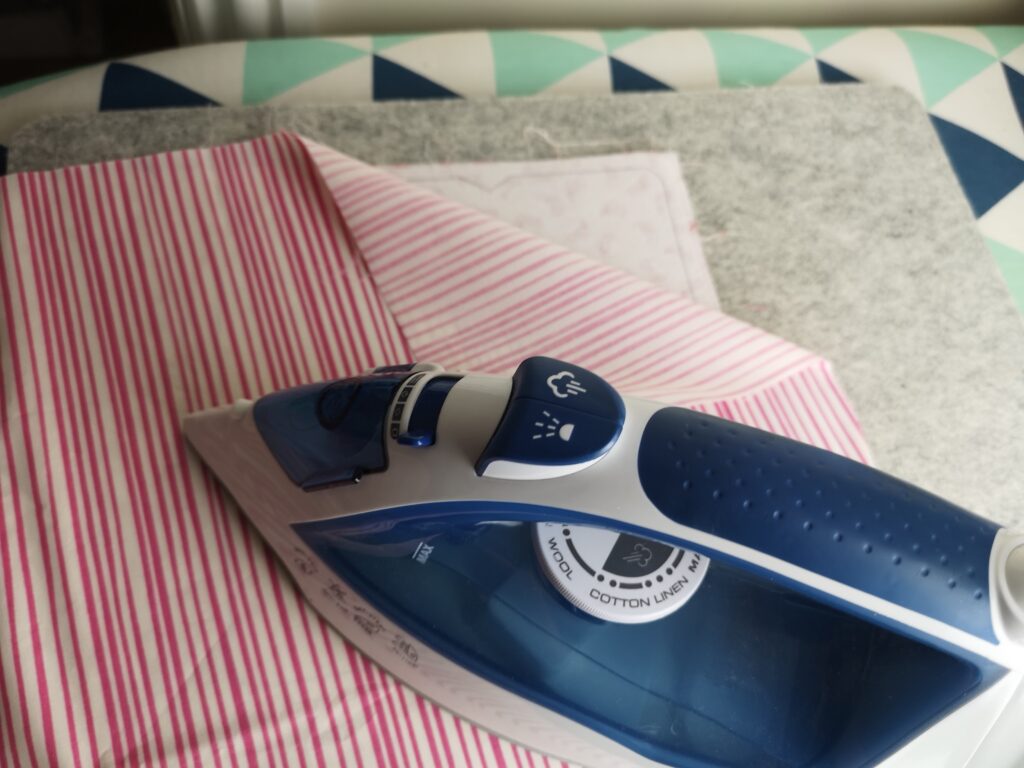
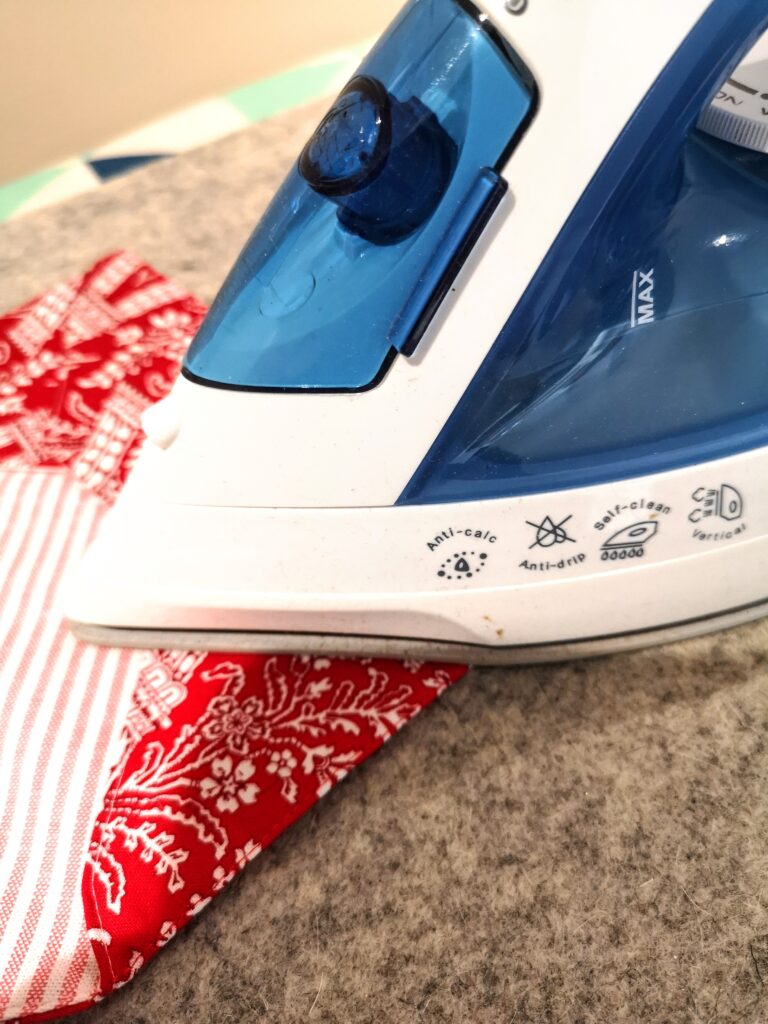
- Next iron the interfacing to the back of your chosen fabric. I use a piece of scrap fabric to keep from scorching or melting the interfacing. If your fabric is directional think about the way the fabric will lay when it is folded back into the envelope shape.
- After this, cut the fabric just at the edge of the interfacing. Bearing in mind that the traced line is your stitching line so you want to leave about 1.5 cm or a quarter inch seam allowance outside the stitched line.
- Now lay this piece of interfaced fabric, right sides together on the fabric that will be on the inside of your envelope and cut around it.
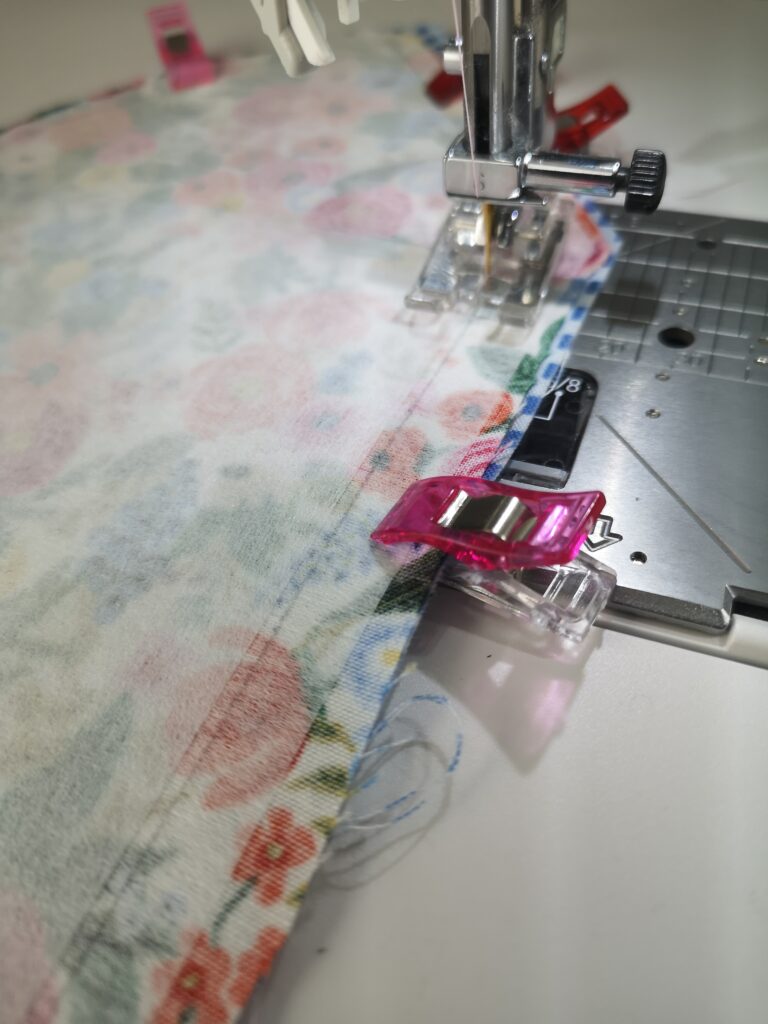
Stitching both sides together
Excellent. You now have the inside and the outside of your fabric envelope all ready to stitch together. Simply put right sides together with the interfacing on top and stitch along the traced line. Leave a 2 inch gap for turning the envelope right side out. Back stitch at the start and finish.
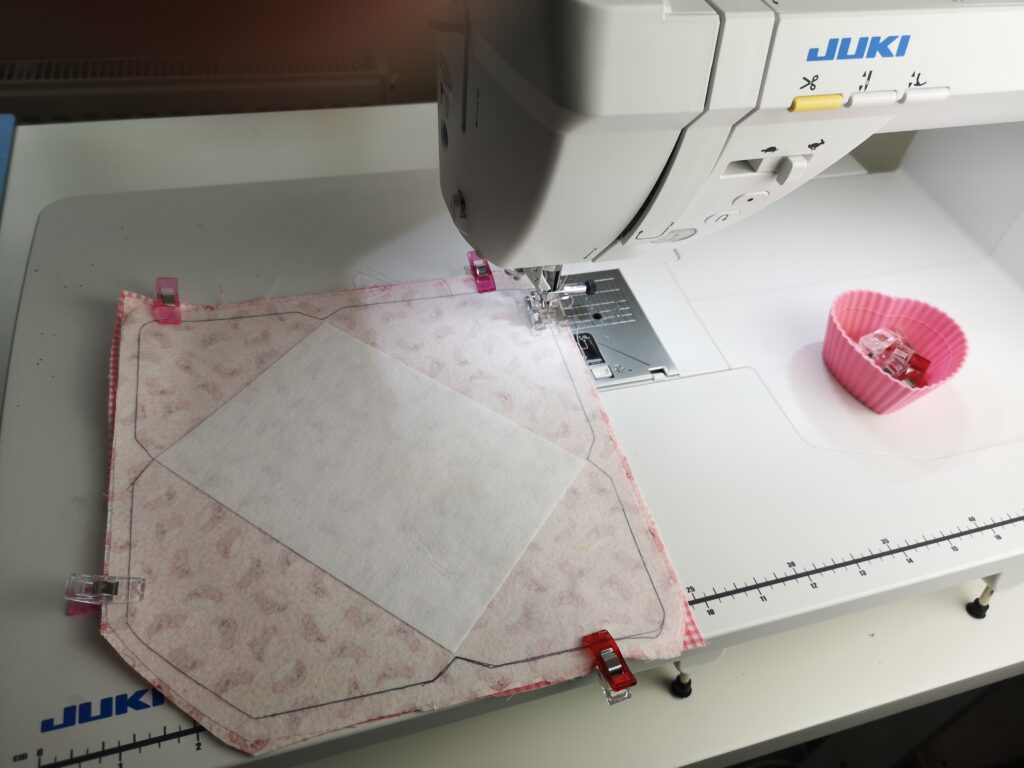
At this point, if you want to give the envelope a bit more structure, add another piece of interfacing cut to the size of your closed envelope. And iron this on top of your interfacing. Again use the original paper envelope as your template so you get an accurate placement. I’ve made the envelopes both ways, with and without this extra bit of interfacing. Both work fine.
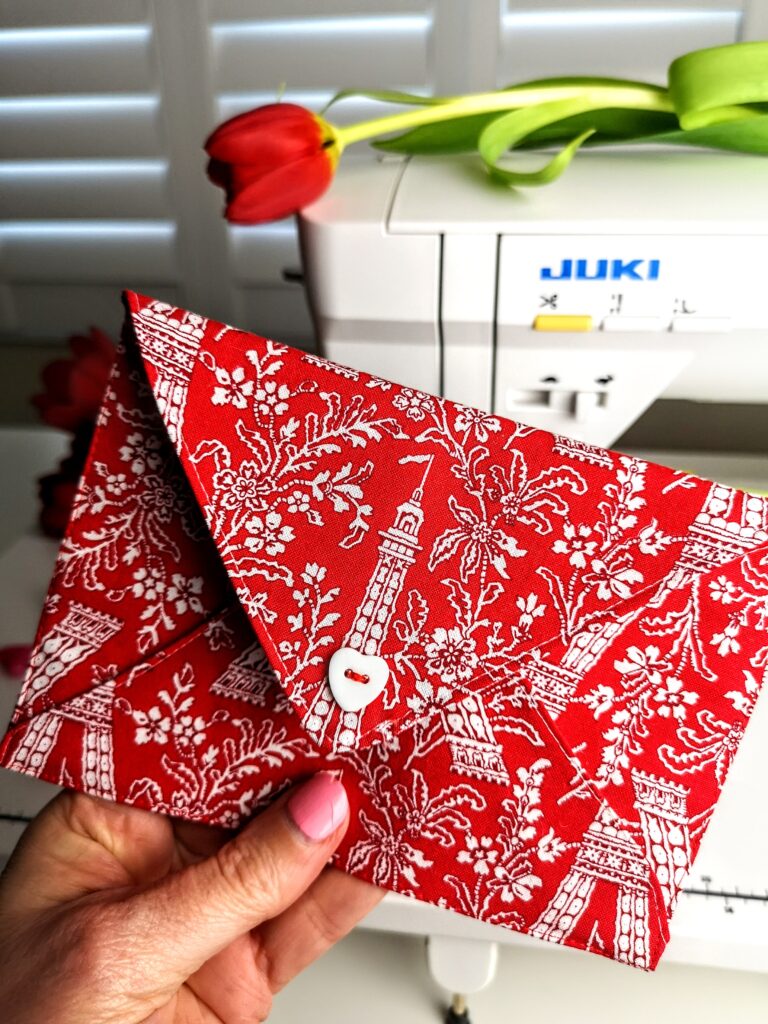
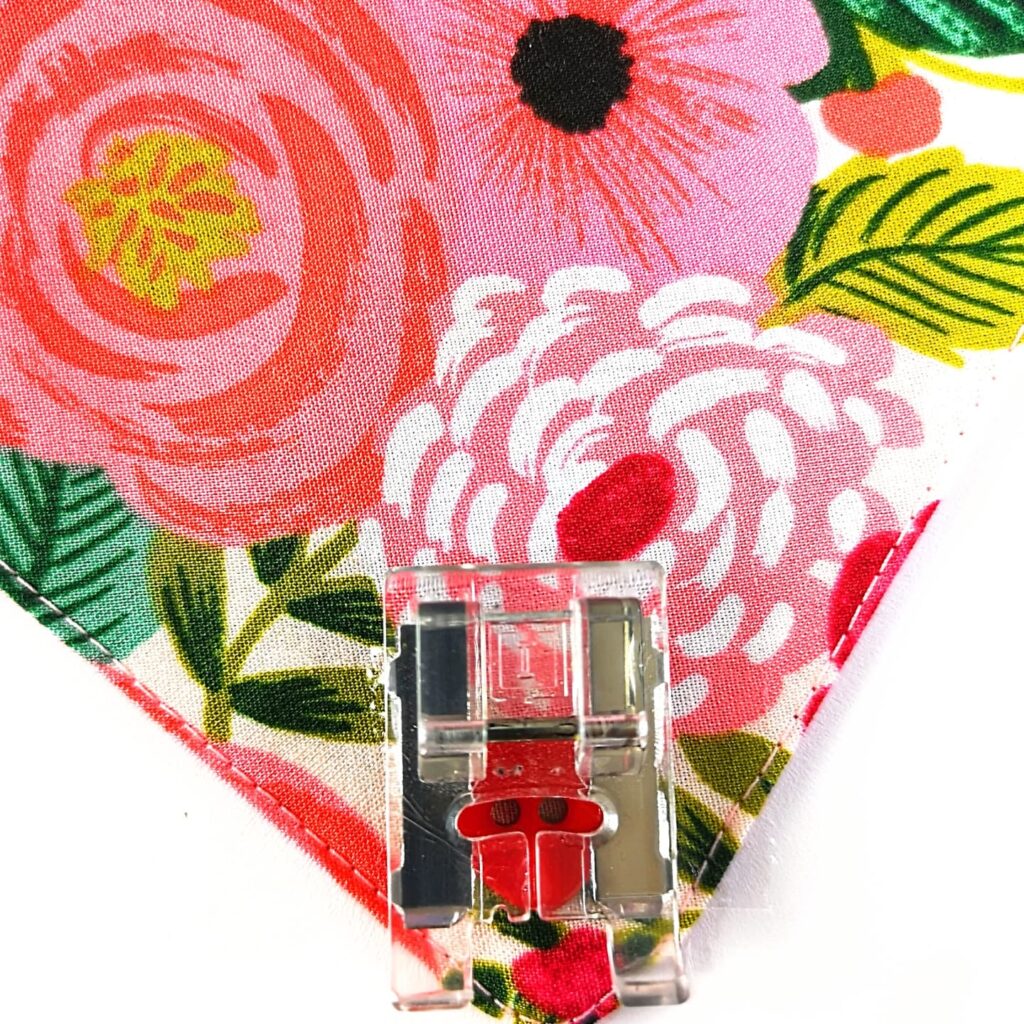
Now reach through the gap, grab a corner and pull it through. Essentially turning your envelope so the right sides are on the outside. Use a tool to poke all the corners and little triangles into shape. Press it and press the opening shut. Then topstitch all around the edge. Brilliant. Your classic rectangular envelope is now stitched together.
Finishing the Classic Rectangular Envelope
The classic rectangular envelope simply needs pressing into shape and sticking the lower flaps together, exactly like the paper envelope. I tried hemming tape along the lower flap edges. This worked fine. And I also tried using two types of fabric glue. All worked well. A glue stick might work too.
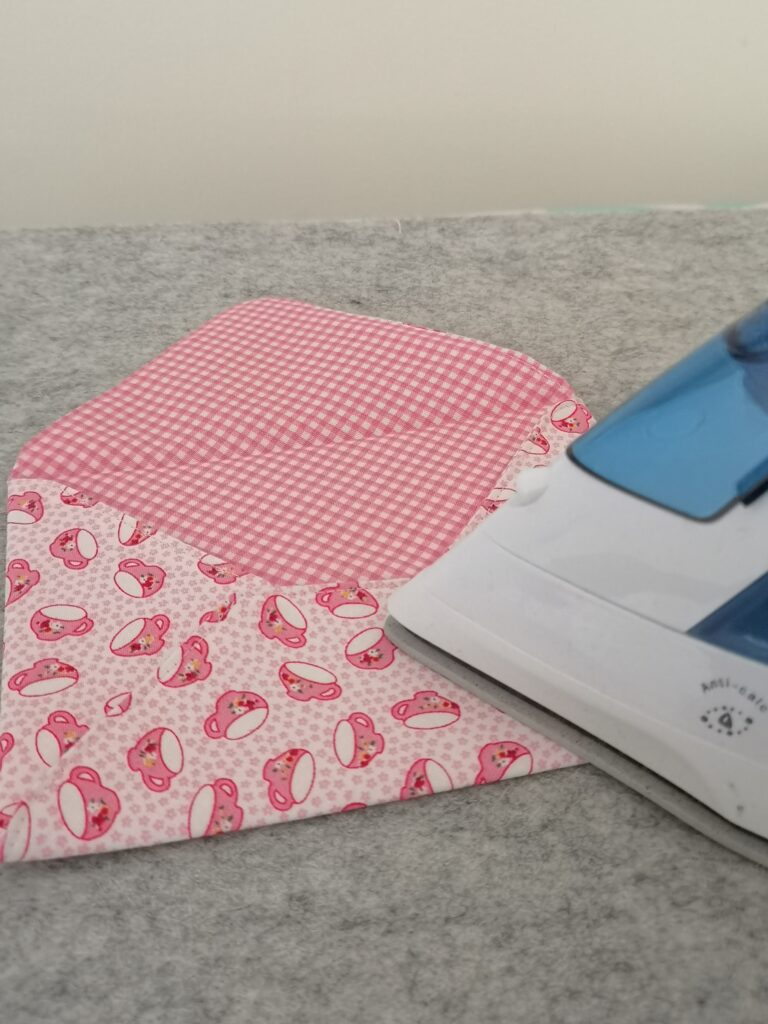
The final step the this classic envelope is to topstitch, very close to the edge down the side, across the bottom edge, and up the other side. This will help the classic envelope to hold its shape.
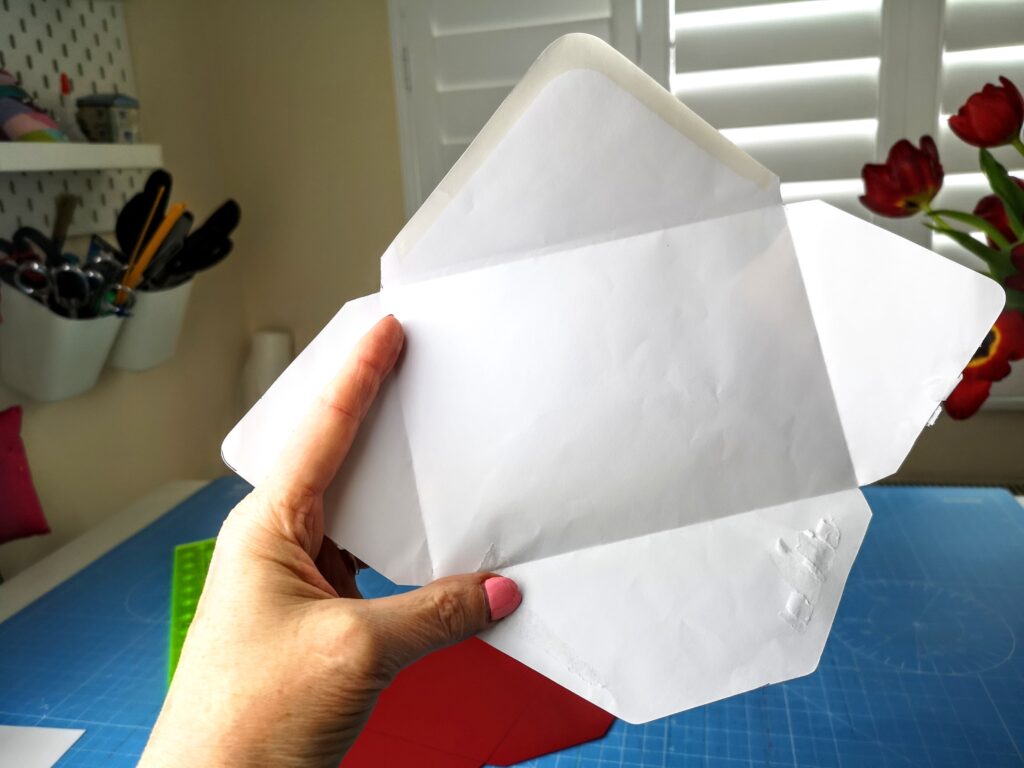
The square envelope
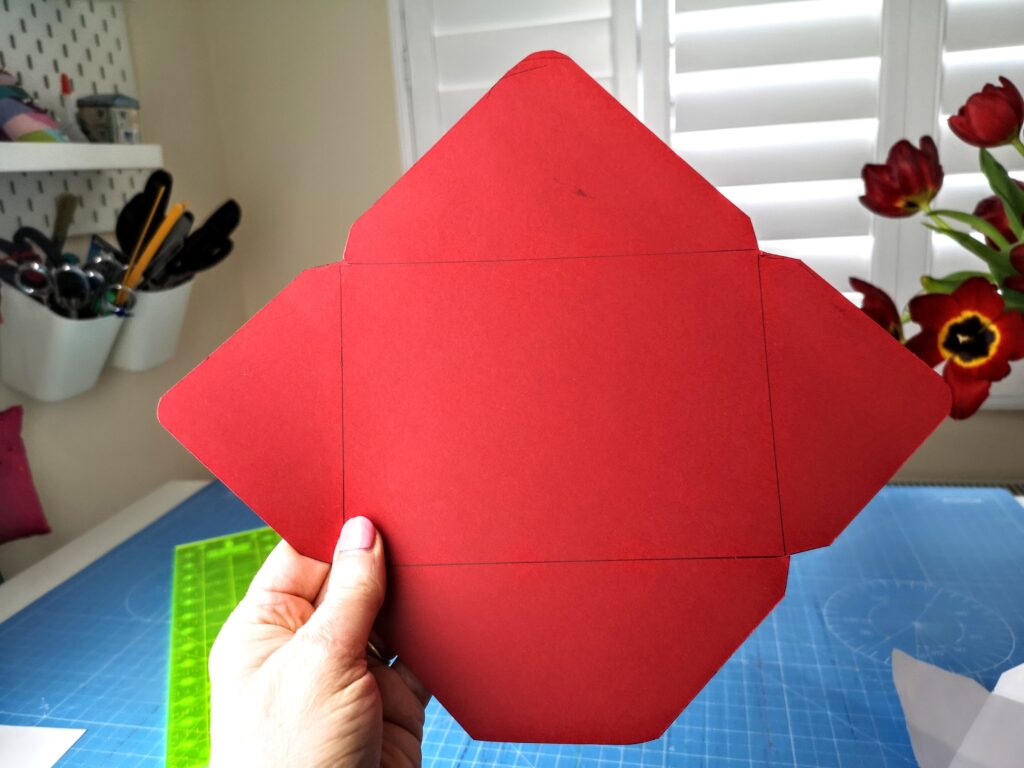
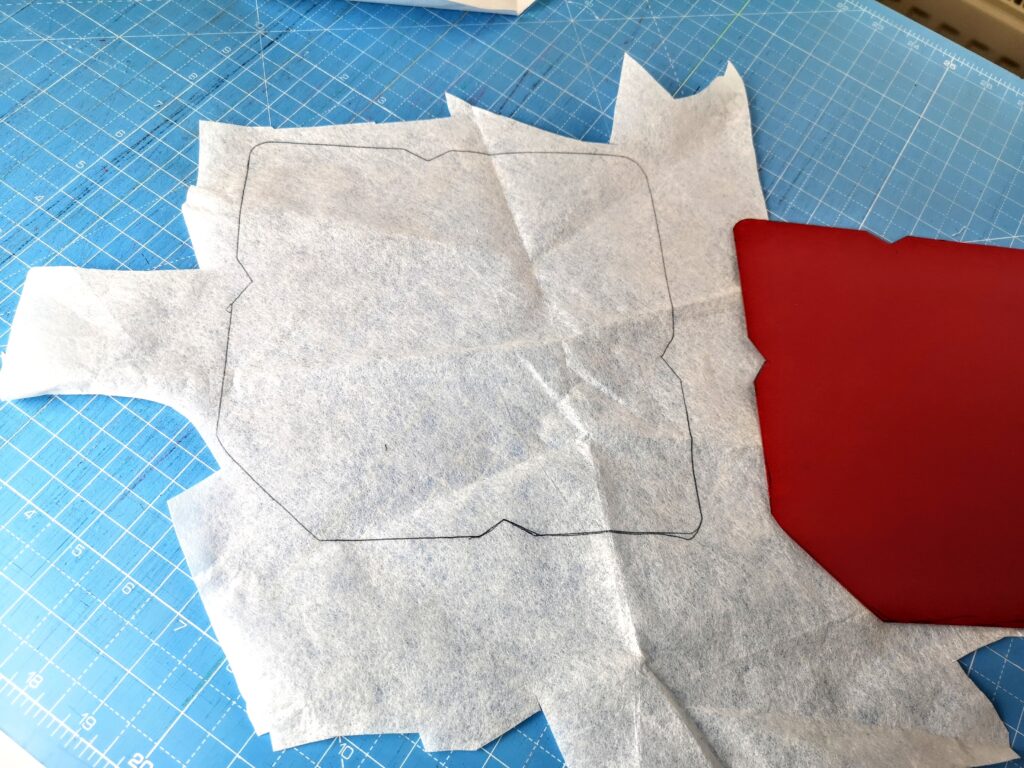
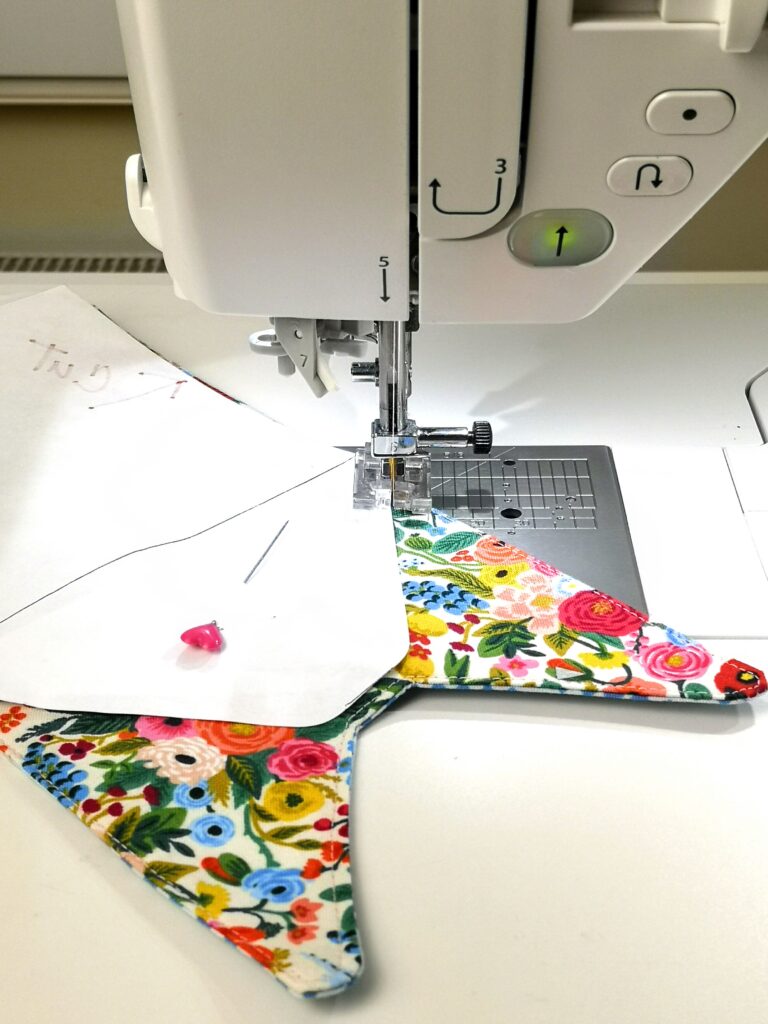
The second template comes from a square envelope that was de-constructed slightly differently. Instead of tearing the flaps apart, I cut down the edges, creating a long arrow or rocket shaped template that could be folded into an envelope shape and stitched up along the sides.
It’s simply just another way to deconstruct an envelope. I’ve traced it onto this shiny card to make a template.
Now use the template to trace the arrow/rocket shape directly onto the non-sticky side of some iron on interfacing. However, this time you are going to cut OUTSIDE the drawn line about 1.5cm or roughly a quarter inch. This is going to be your seam allowance.
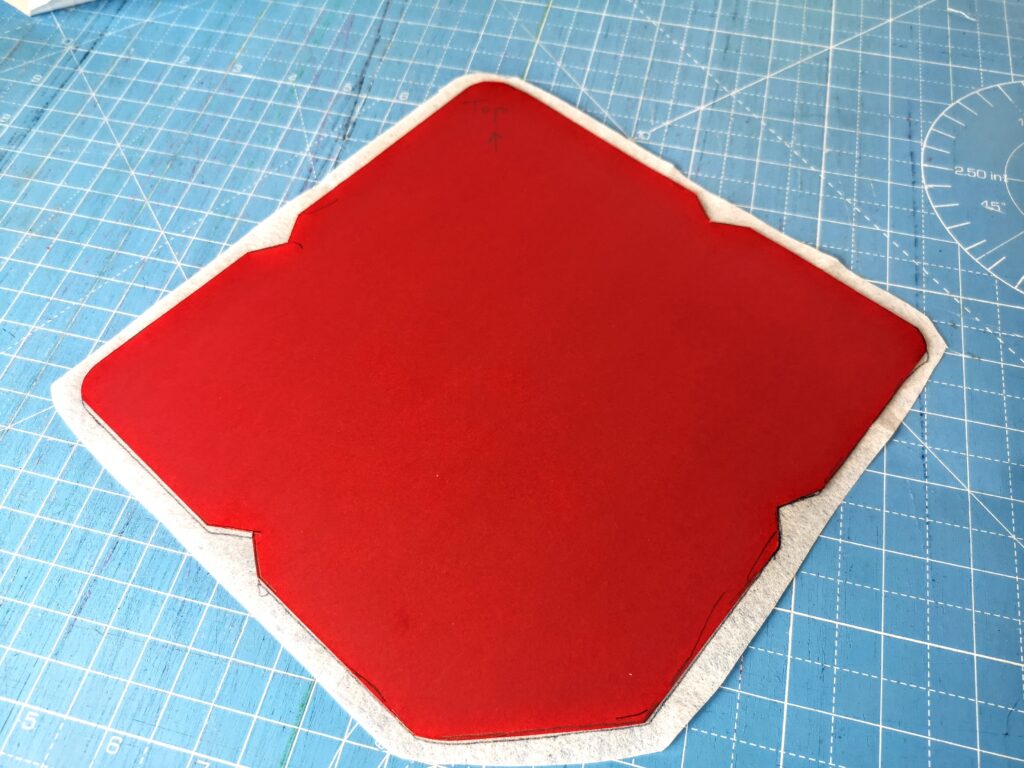
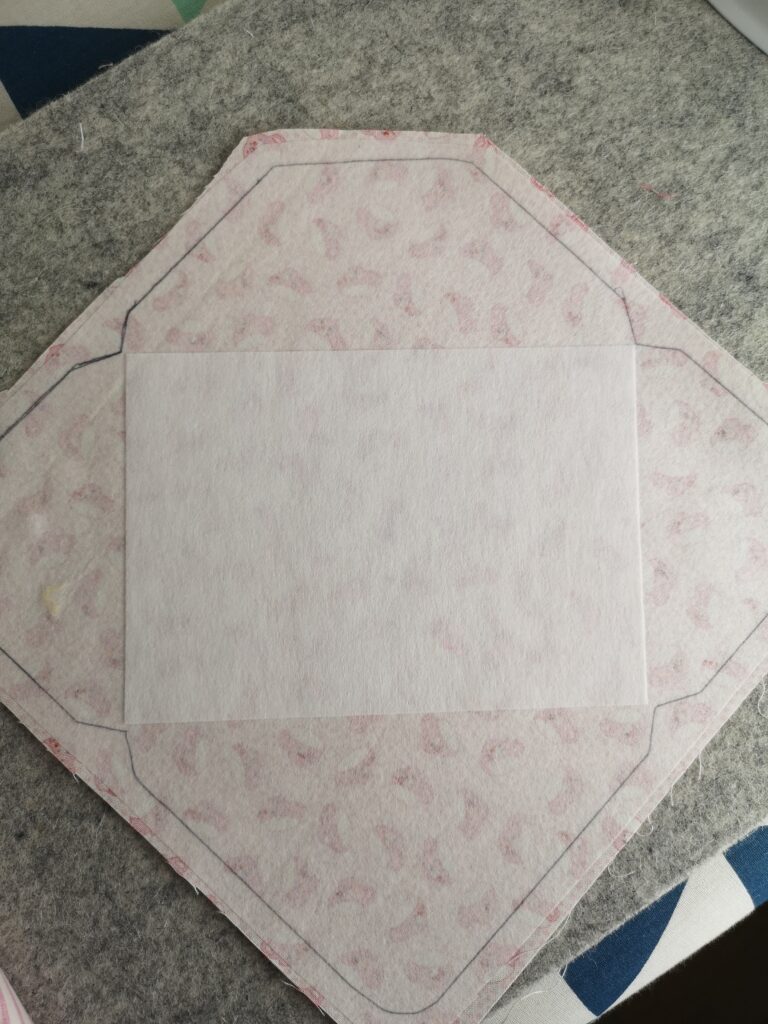
Next press the interfacing to the wrong side of the fabric you’ve chosen for the outside of the envelope. Use a bit of spare fabric between the iron and the interfacing to keep from melting or scorching it. Cut it out again OUTSIDE the traced line to leave a seam allowance. Just use the edge of the interfacing. At this point you may want to add an extra square of interfacing to give the envelope more structure. Finally cut out another rocket shape of fabric for the inside of the envelope.
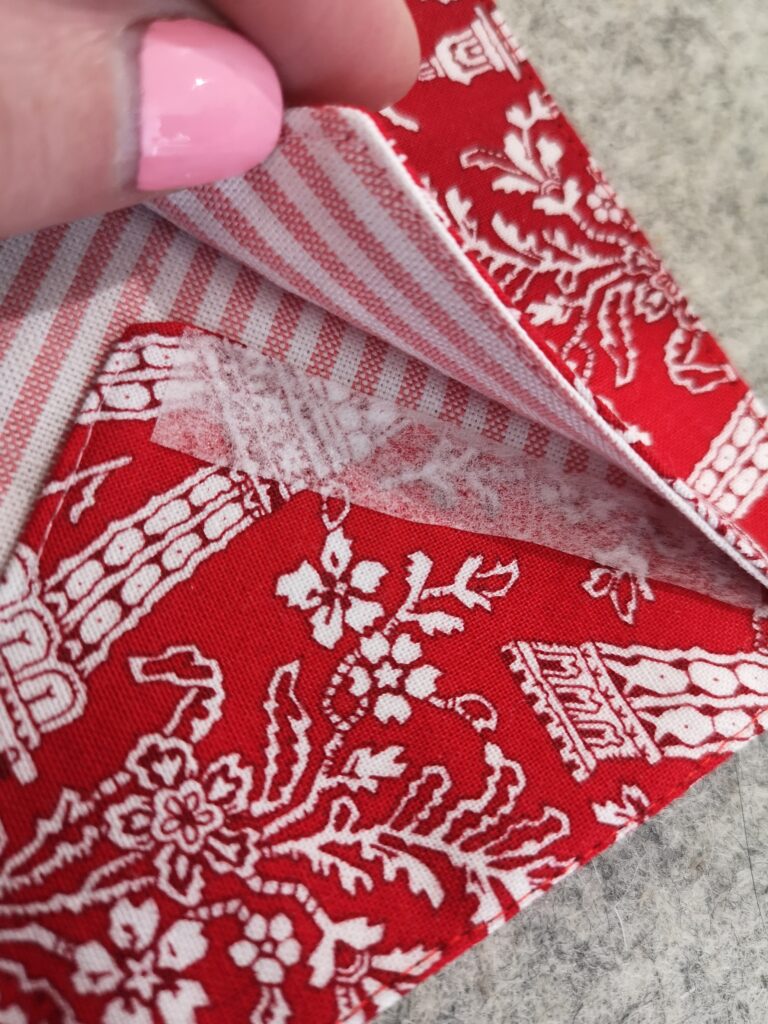
Put right sides of your inside and outside fabric together with the interfacing on top. Stitch around the traced line leaving a gap of a couple inches so that you can pull in inside out.
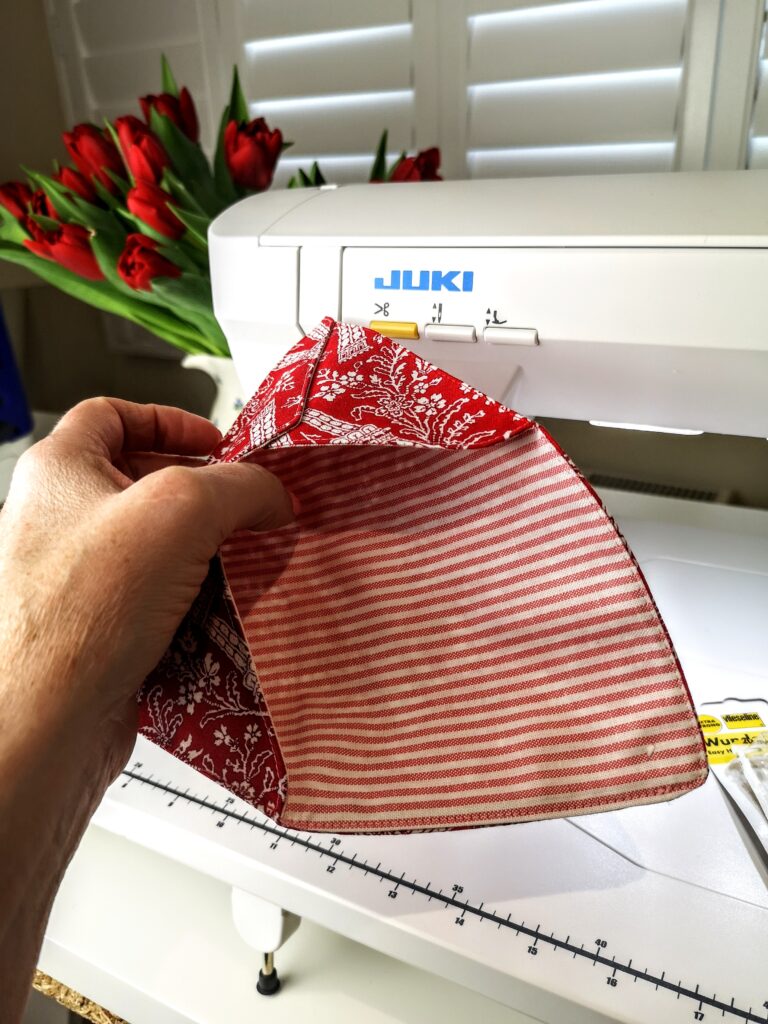
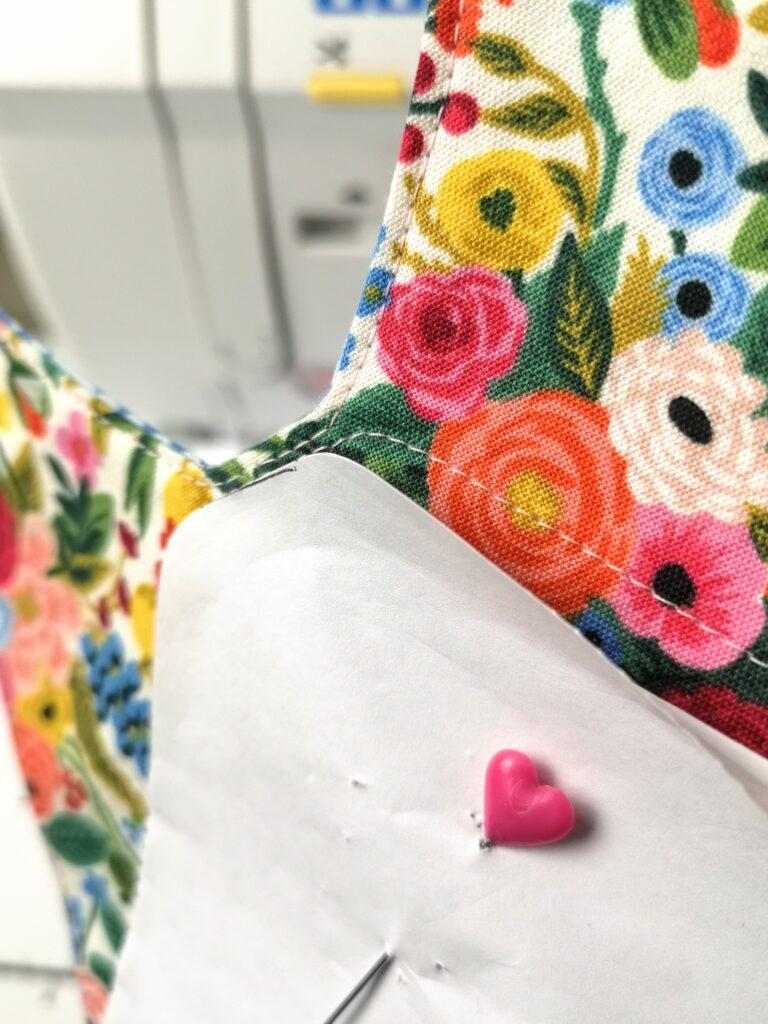
Trim your seam allowance. Cut into the seam allowance at the corners and the rounded edges. (But don’t cut the stitching). Pull through and press. Topstitch around the outside edge to close the gap.
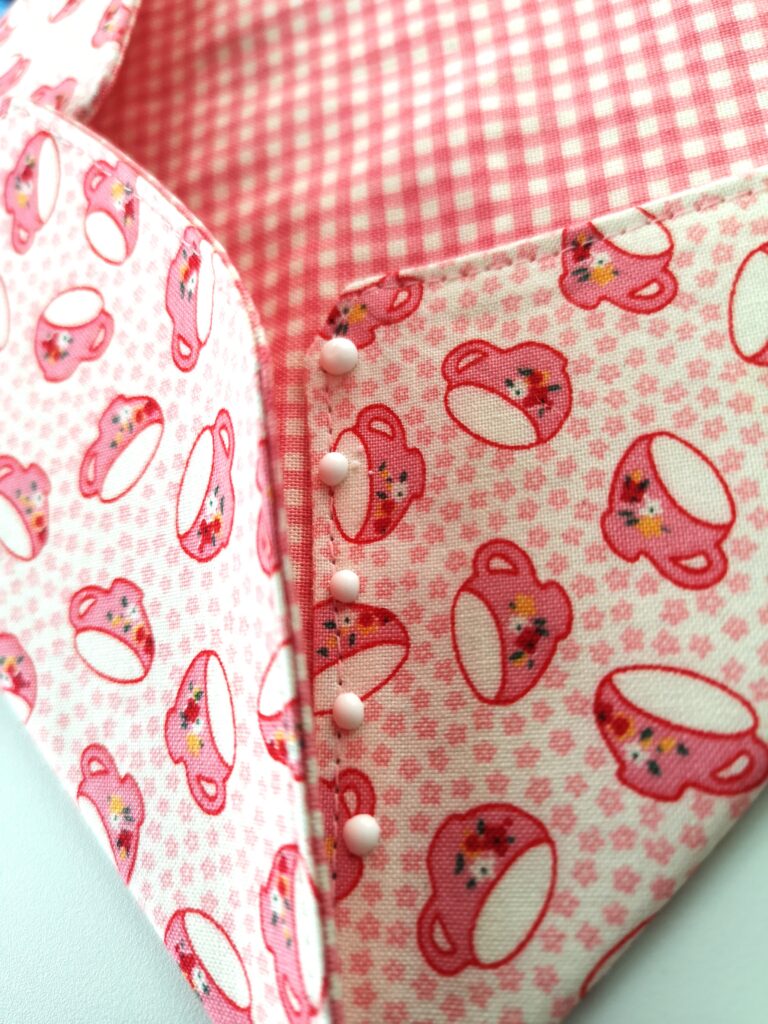
Finishing the Square envelope
I found the square envelopes simpler to sew. But they don’t come together (or apart) quite like the original envelope. The arrow/rocket shape does give the suggestion of flaps when folded up. But I thought that some extra stitching would help. Using the triangular bottom flap of the original paper envelope, I stitched around the edges hoping to create a faux flap. Contrasting thread would probably help to create this illusion.
Lastly the square envelope needs folding into thirds. The top down and the bottom up and stitched into place. Down one side, across the bottom edge and up the other side, quite close to the edge. And that’s the square envelope finished
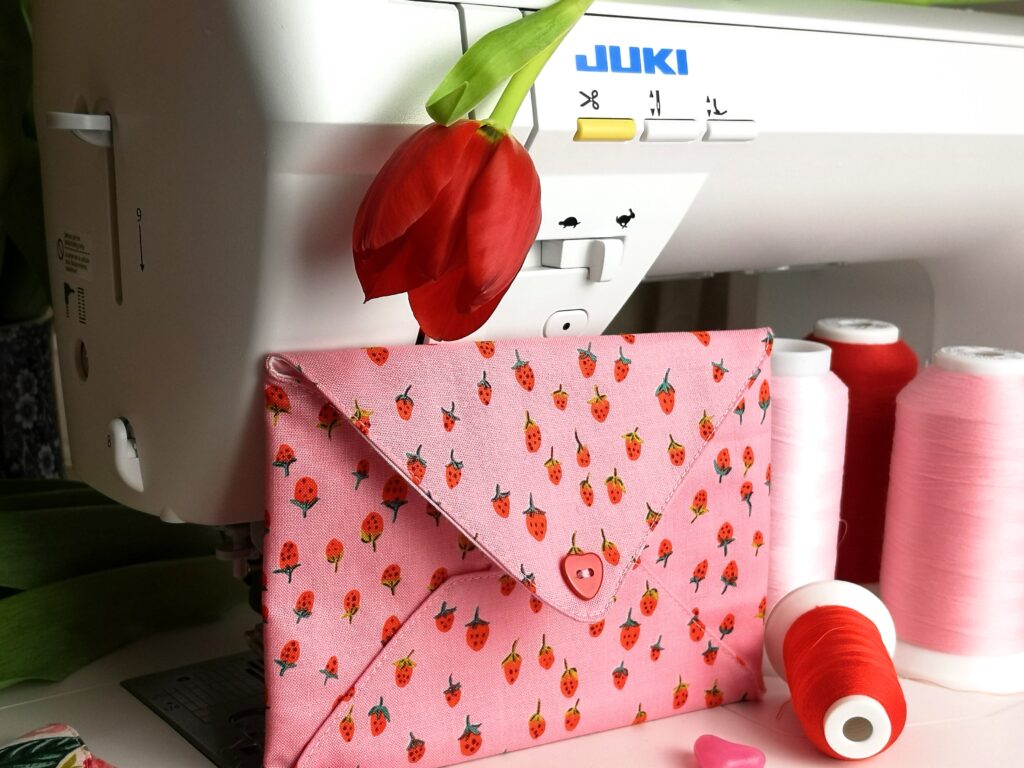
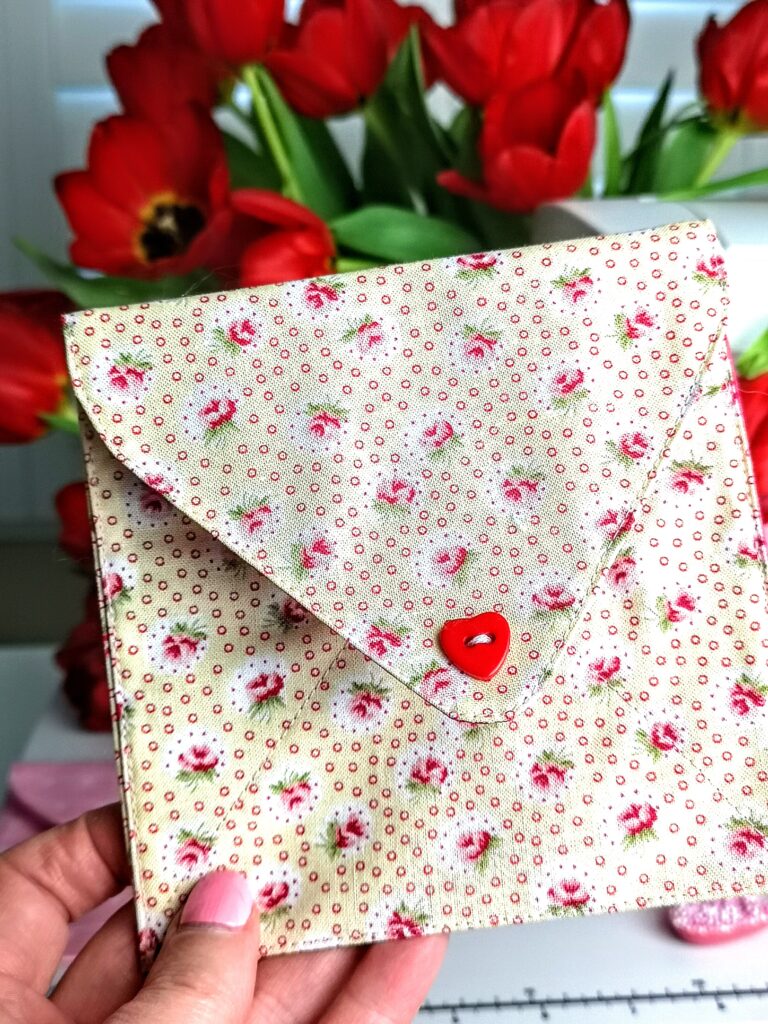
I have to say, I really do love the way the faux flaps turned out on this version.
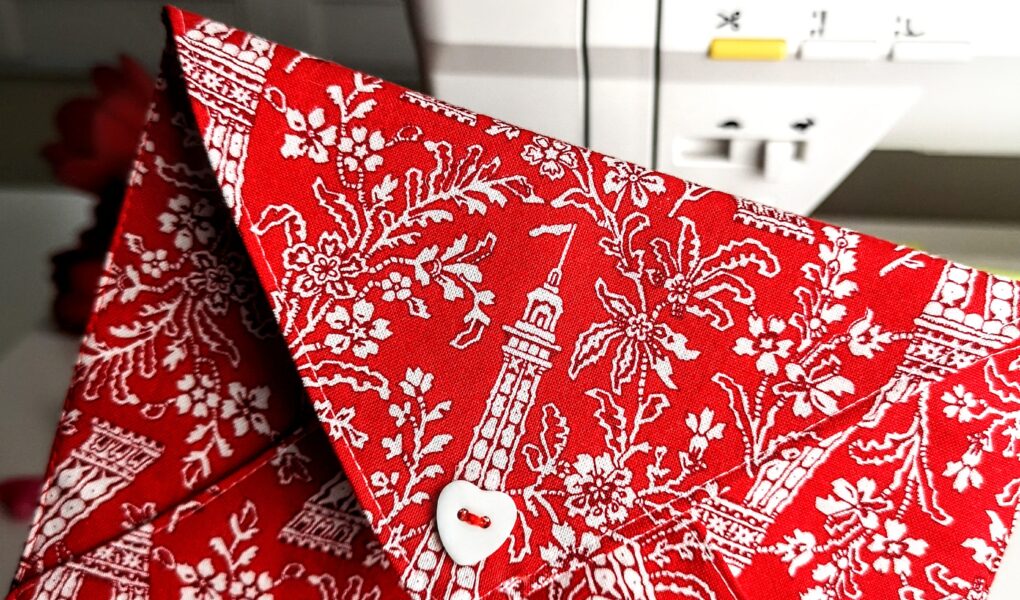
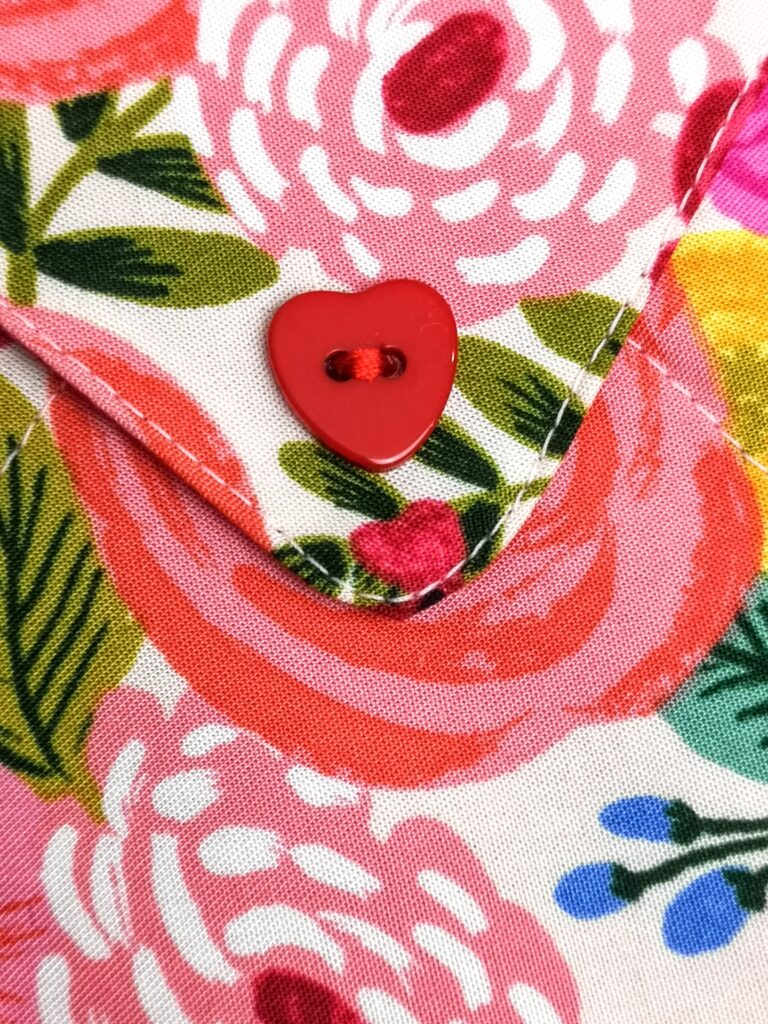
Adding a heart button
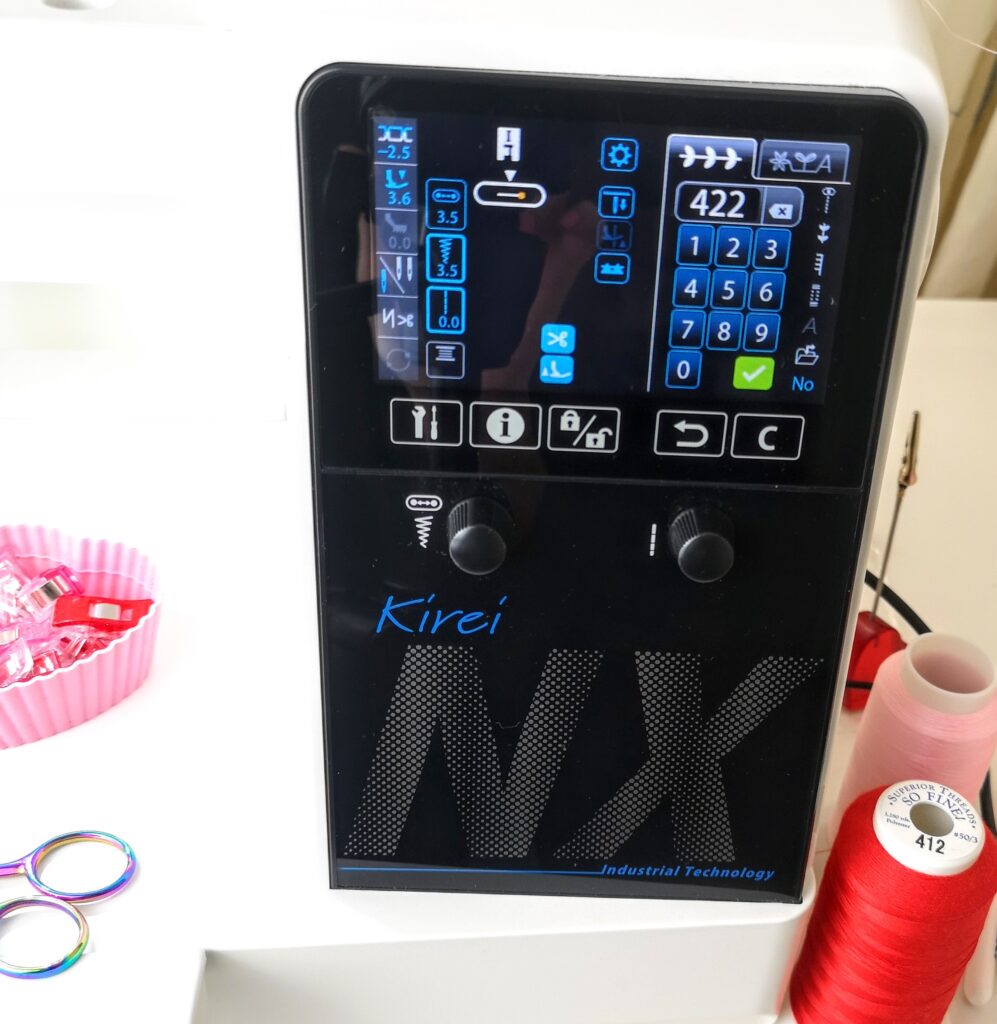
I wanted to add some heart buttons to my envelopes. But by this time I had quite a stack of Valentine fabric envelopes! It would take me forever to do it by hand. So I decided to stitch them by machine. You can find out how in this Stitching Buttons by Machine post. The Juki NX7 has a special stitch #422 just for stitching buttons.
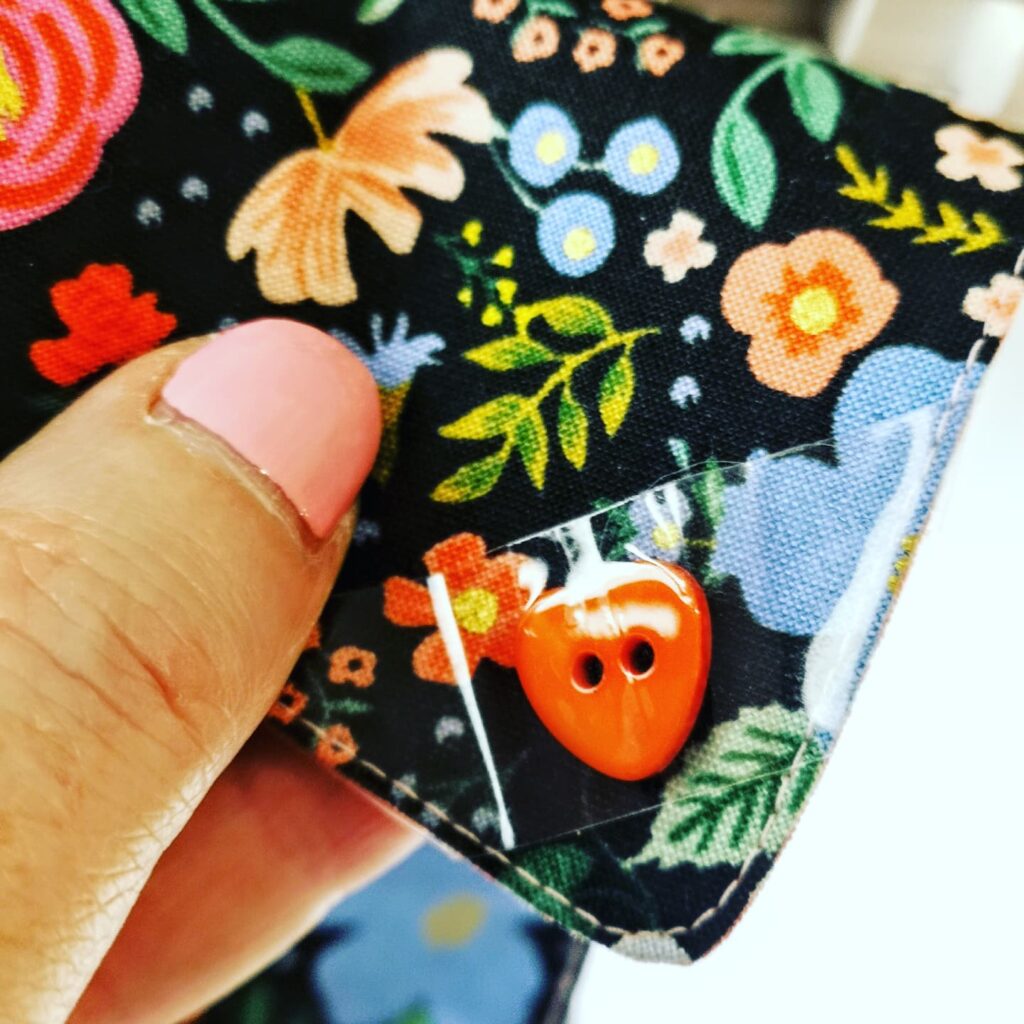
I decided not to go for buttonholes, mainly to save some time. So my buttons are really faux! I did get some Velcro dots that I could use for closure if desired. You could, of course make buttonholes on the top flap and stitch the button underneath. But my faux buttons were stitched on the top flap. I thought they looked pretty. Adding the button at this stage works well for both types of envelope.
Final touches
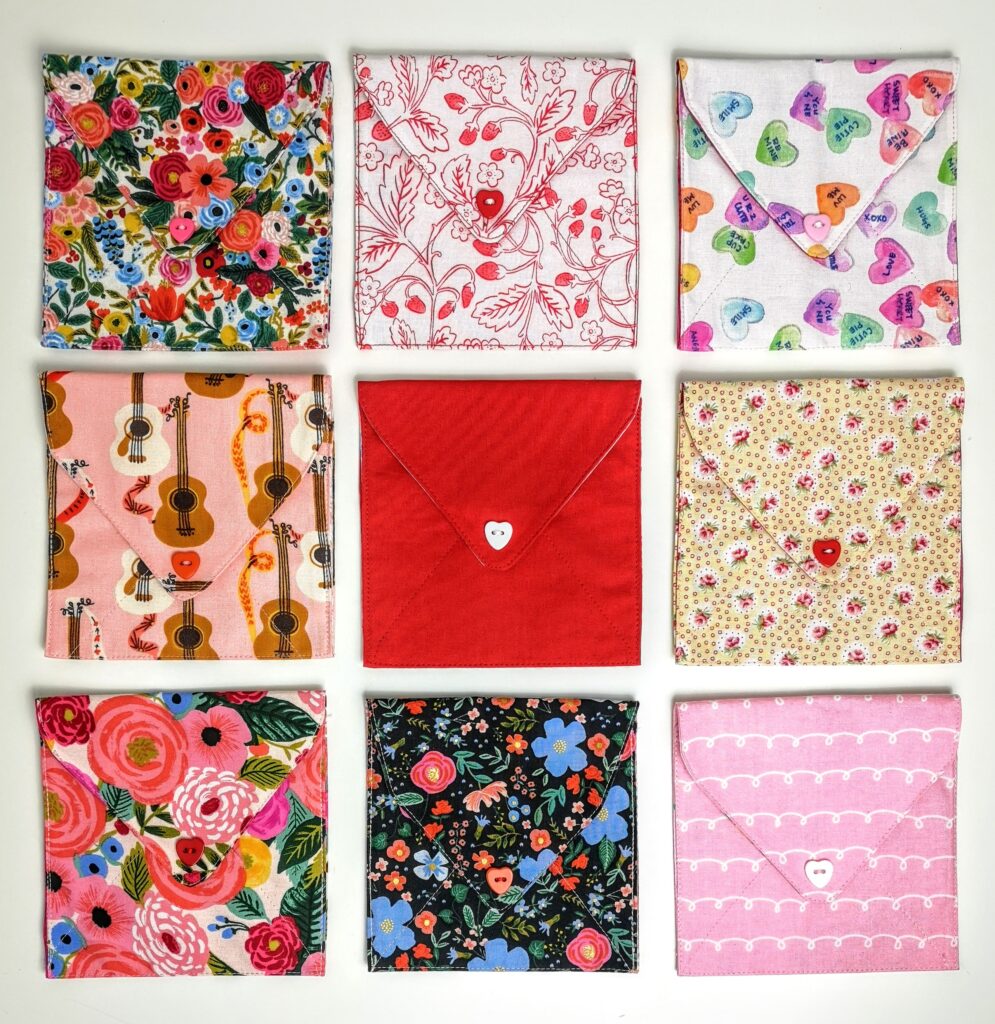
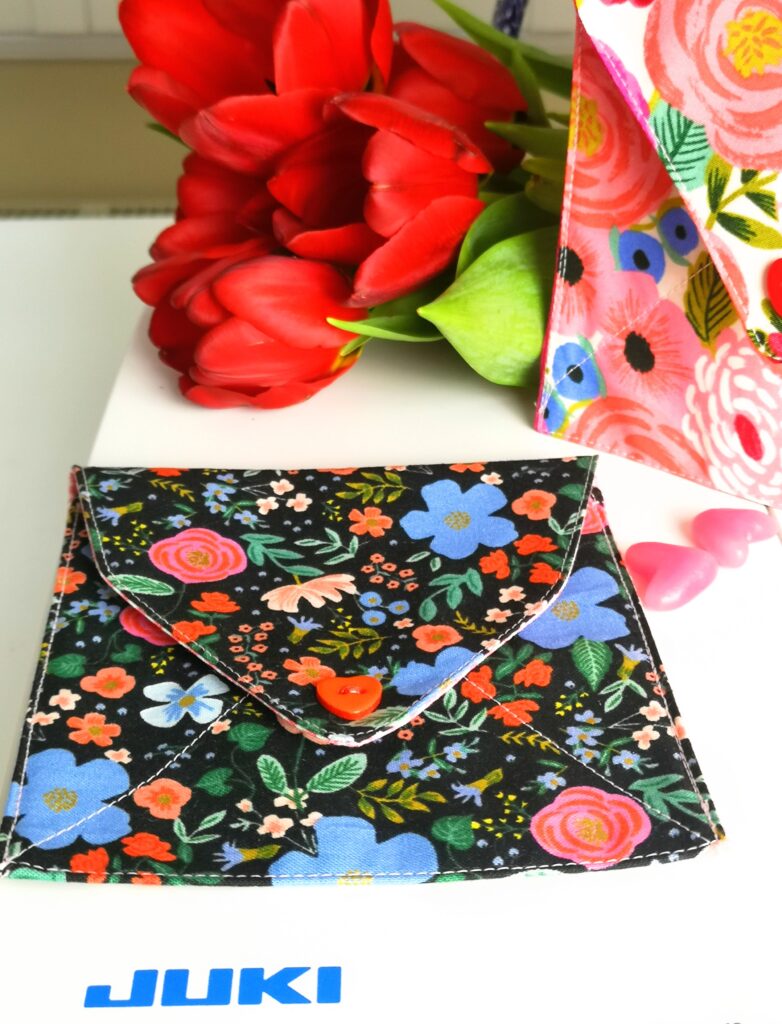
Well, the first thing that I did was to make some more! I really enjoyed putting different fabrics together and playing with the buttons. Once the envelopes were finished all that was needed was something to go inside. It could be a little note, or letter and some sweeties.
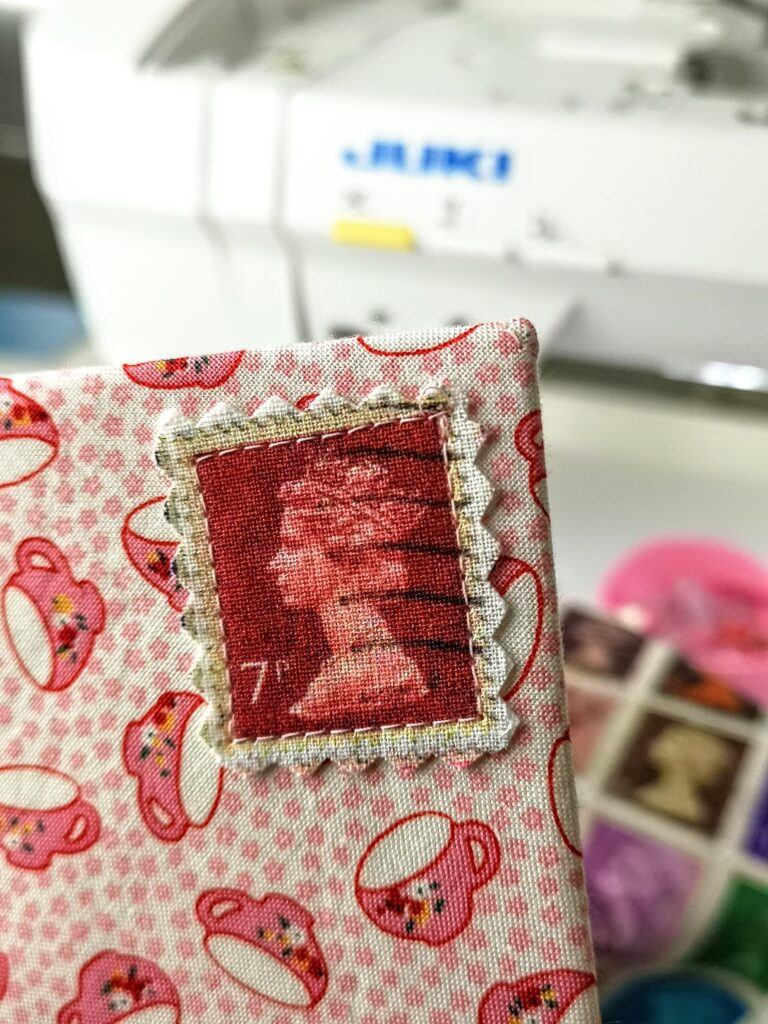
I’m going to use a sticky label to write the name, so that the envelopes can be reused. A homemade fabric stamp could be just the final touch. If you want to stitch the fabric stamp, you’ll need to add the stamp at the same stage as you add the faux button, before you stitch or glue the sides together. Alternatively, you could simply glue it in place at the end.
I hope you’ll enjoy making DIY Fabric Envelopes as much as I did. It was so much fun playing with my stash fabrics and making something to share some love with family and friends. Fabric envelopes are fun for Valentine’s Day but they could be made for any occasion throughout the year. Best of all you can reuse them again and again.