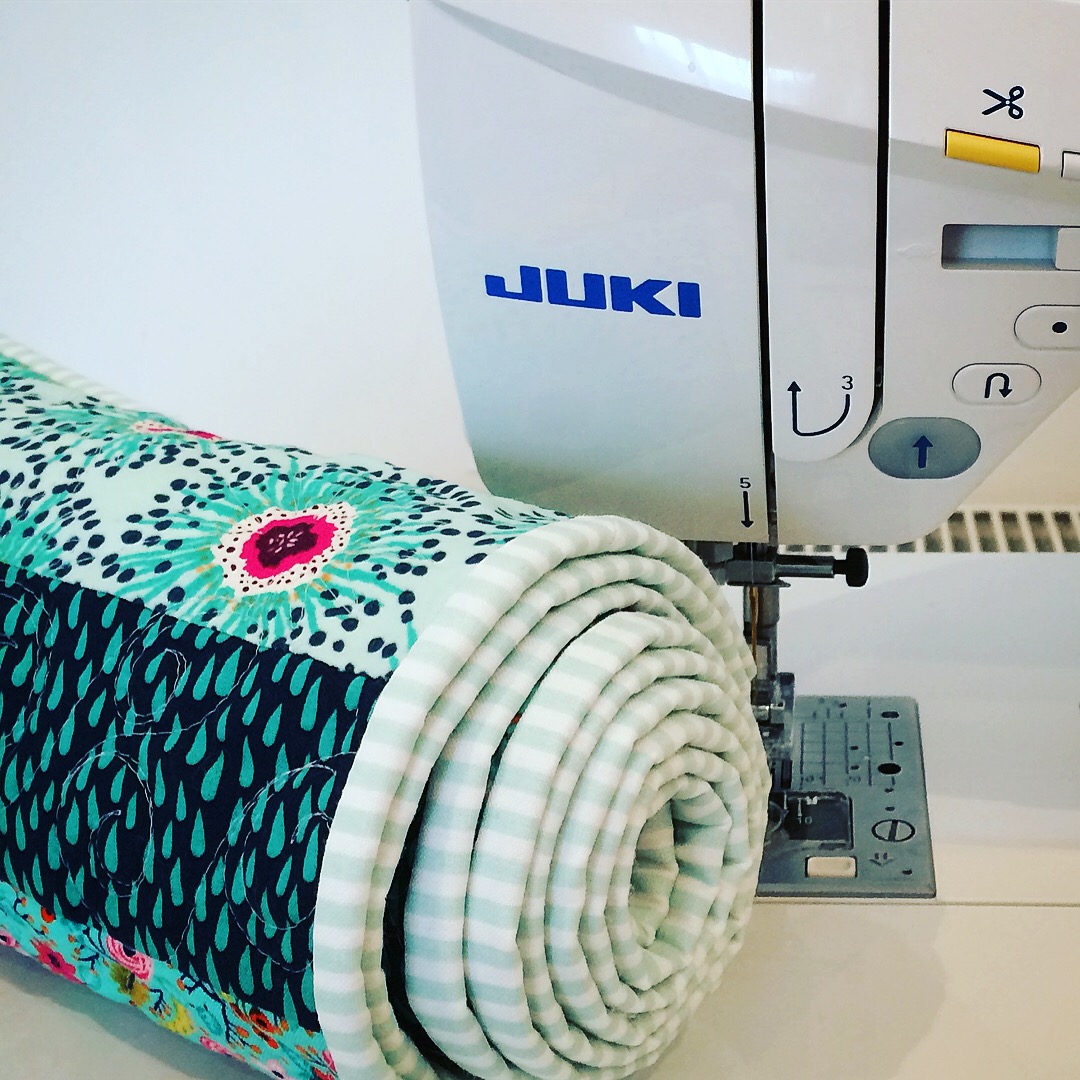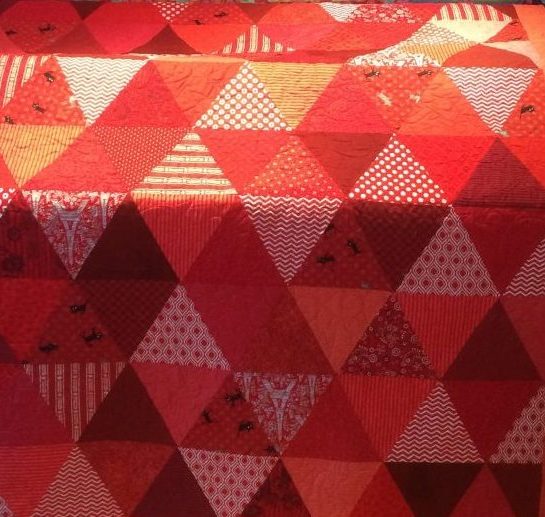

We’ll be taking you step by step to show how we quilted Pete’s red triangle quilt. Every now and then it’s good to go through the entire process of making a quilt. Earlier, we posted about piecing the red triangle quilt Here we’ll explore the quilting process. There are many ways to quilt a quilt. For this project I’m using a Juki TL 2200 QVP Mini straight stitch on an 8-foot Machine Quilter frame. Together they behave like a little long arm. Like many projects, it’s all about the preparation.
Preparing the top
Once the triangles were pieced together, I incorporated a narrow red border. Because they’re cut on the bias, triangles can easily get pulled out of shape. The extra border stabilised the bias fabrics and limited the distortion. Now I’m ready to prepare the top for quilting.
Adding side sashing
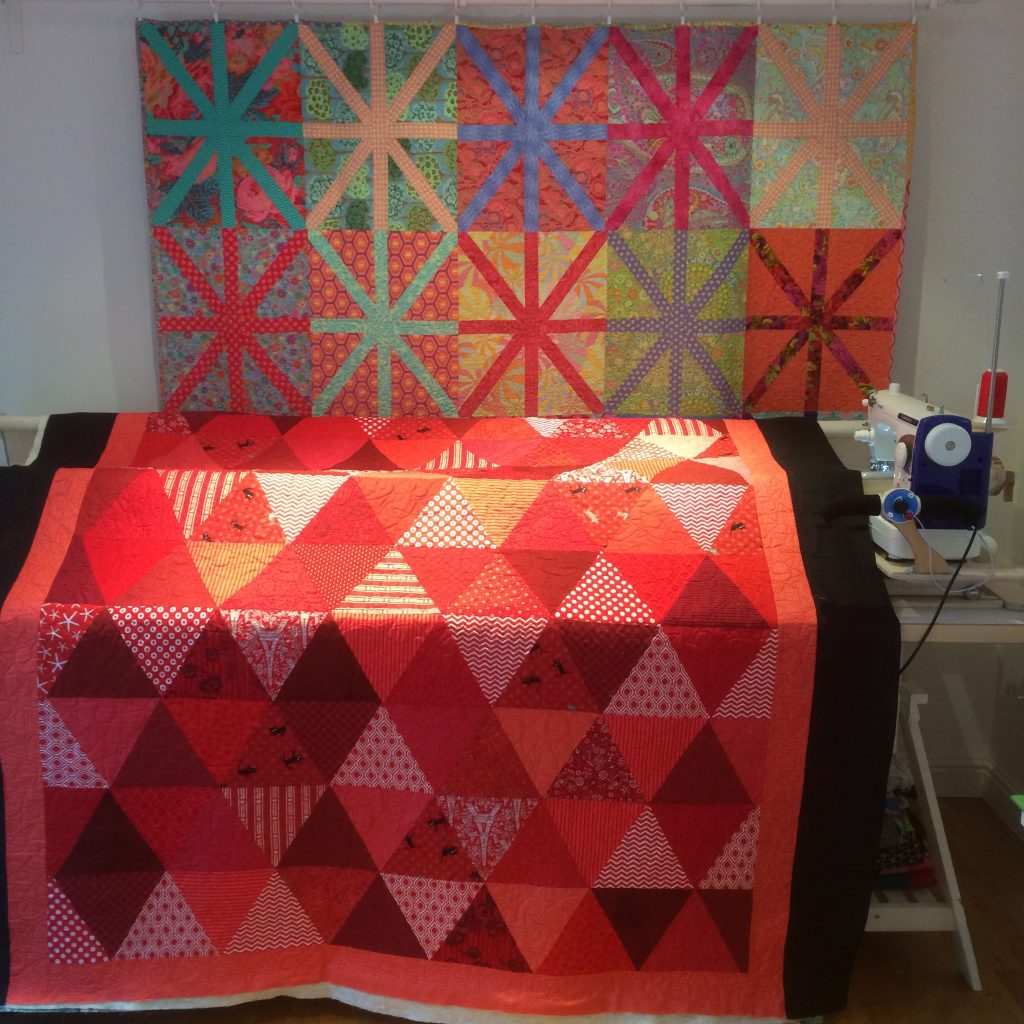
Side sashing is an idea that I picked up from long arm quilters. I find it SUPER helpful for lots of reasons. Here’s what you do and why. Choose some scrap fabric and add it to the sides of your quilt all the way around. I had lots of black, so I used that. The width of the sashing can vary depending on the available space, but I try to have one side at least 4 inches wide while the other sides can be more narrow, perhaps between 2 and 3 inches. Think of the triangle quilt like a stage, this side sashing is going to be OFF stage. It’s not actually part of my quilt. I’m going to slice it off with my rotary cutter when I’m finished the quilting.
True confession time
I still get nervous each time I begin to quilt a new project. The more time I’ve invested in making the top, the more nervous I get about quilting it. This is where the side sashing comes in. I can use the OFF STAGE side sashing to get over my initial jitters. I’ll begin stitching on this side sashing fabric. I’ll practice my line design. I’ll also check my tension and make sure that there’s a good balance between my top and bottom threads. Once everything is running smoothly, I’ll move, ON STAGE, into my actual quilt.
The side sashing is where I will usually start and stop stitching. This keeps my thread tails in a place that won’t show and doesn’t matter because I’m going to slice it off at the end. As I move through my quilt, I will always have an OFF stage place to sort my tension and play with my line design.
The side sashing is also where I will attach the side tension clips on my quilting frame. This will give me a more even tension and keep the bed of my sewing machine from bumping into the clips as I get close to either side.

Sorting the layers
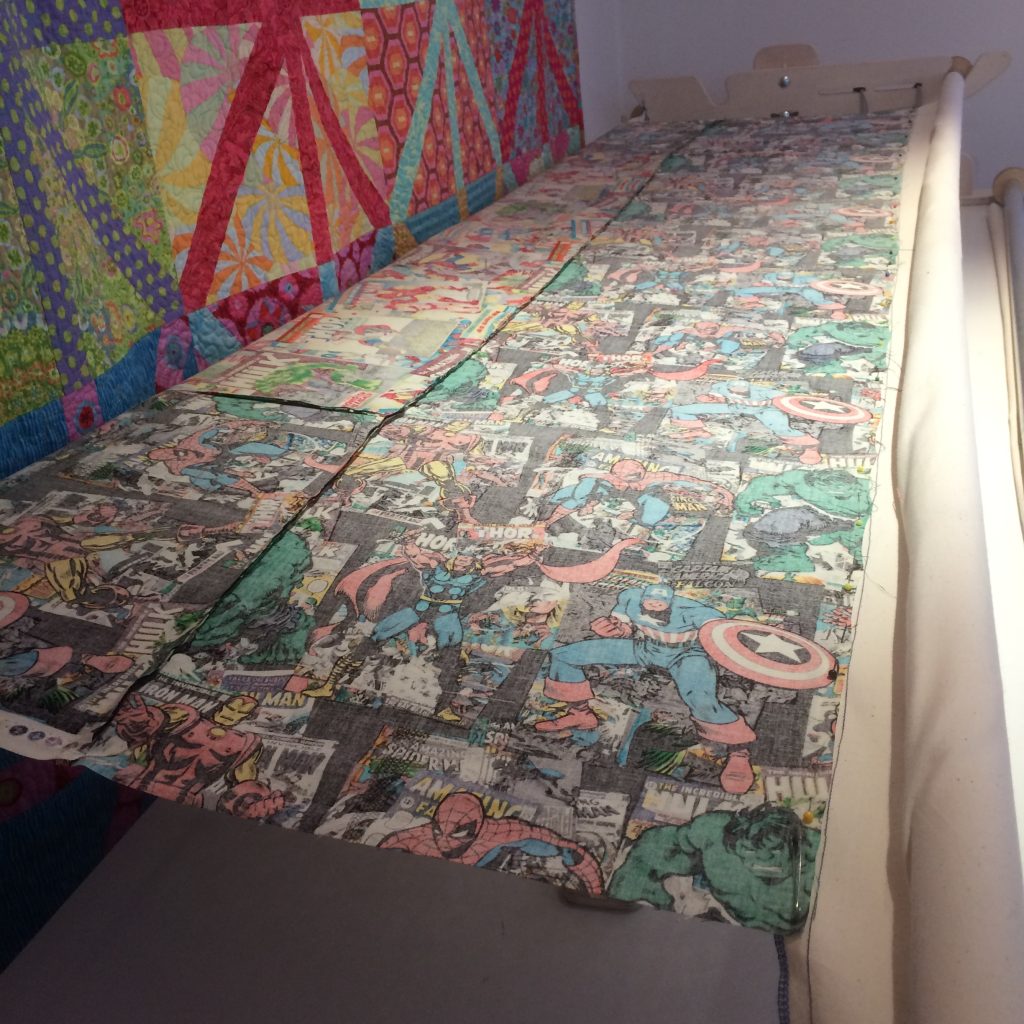
The photo above shows the black side sashing on each side of the quilt top. Once I’ve added the top and bottom side sashing, I’ll make sure to cut the backing and wadding big enough to fit. You can see the layers stacked on the carpet.
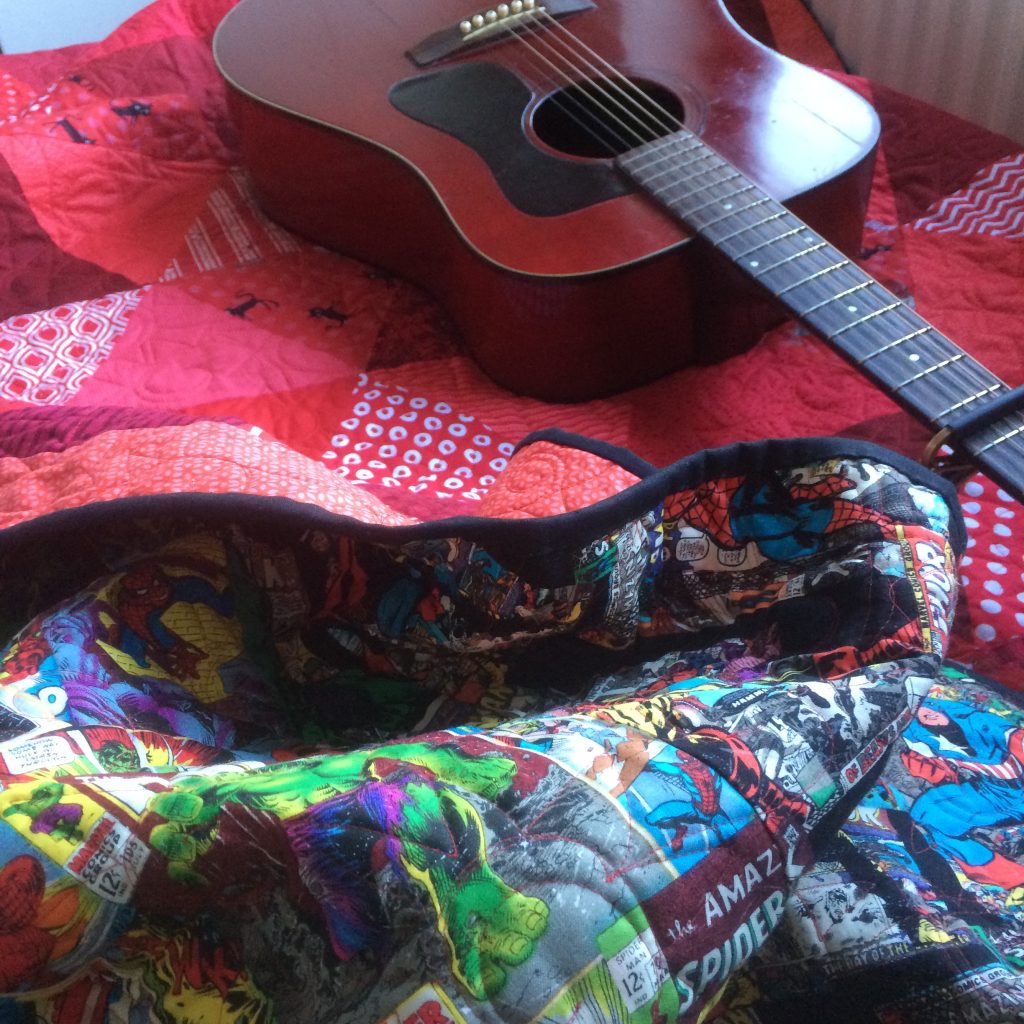
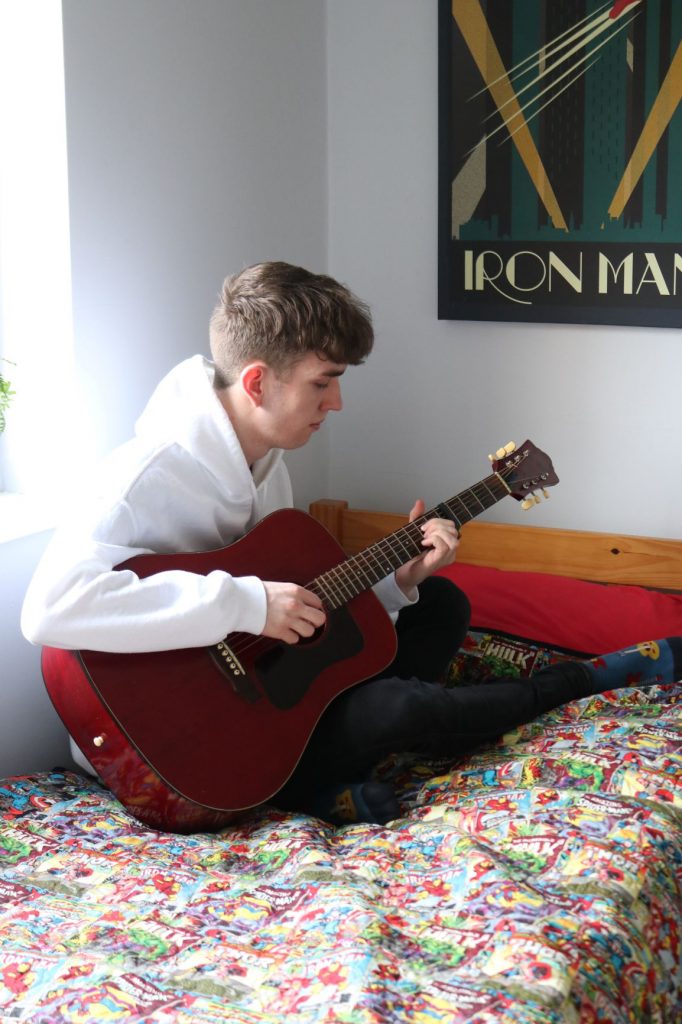
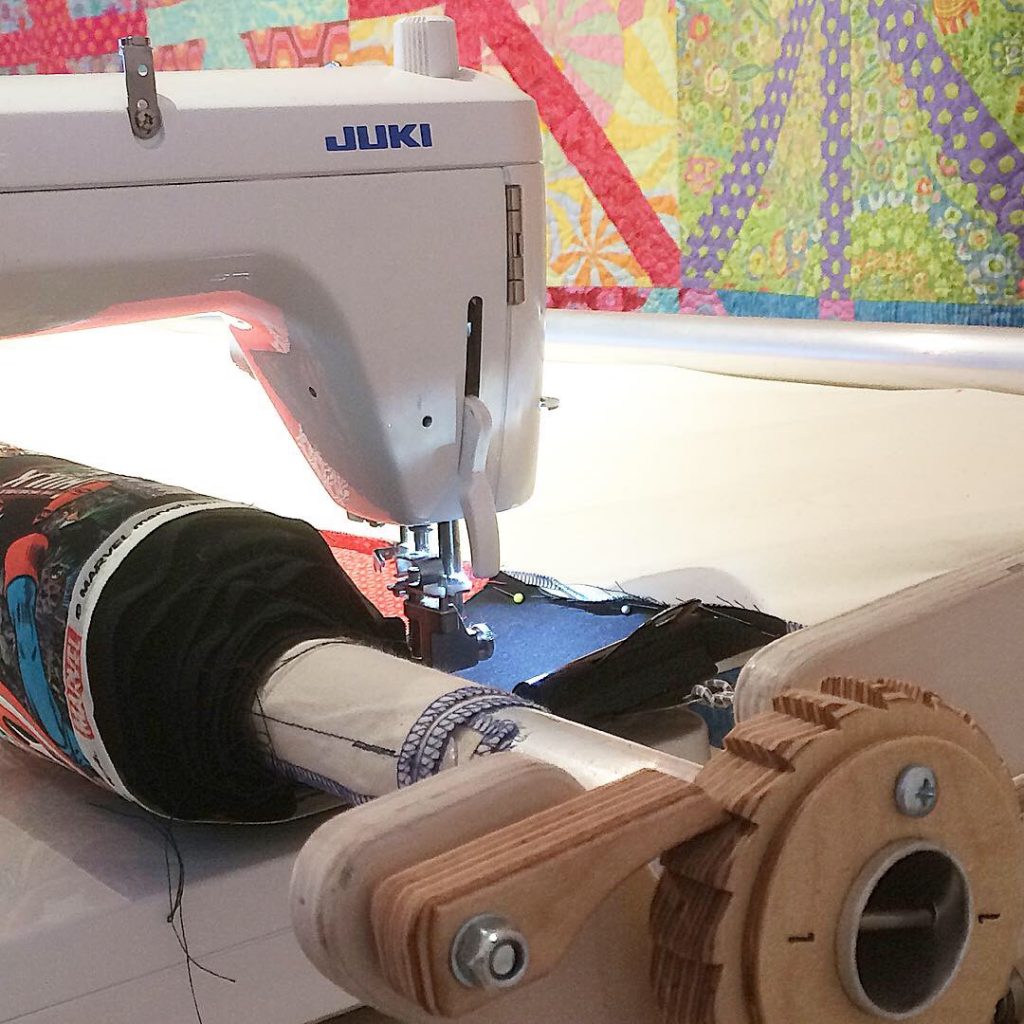
I like having a patterned backing fabric. This Marvel Comic fabric is going to make my son smile. The backing fabric is half the quilt and well worth making it marvellous. Besides looking interesting, a patterned backing fabric will hide any quilting mistakes. I tend to go for the flatter need-punched wadding or batting. For this quilt I used Hobbs 80/20.
Loading the Backing 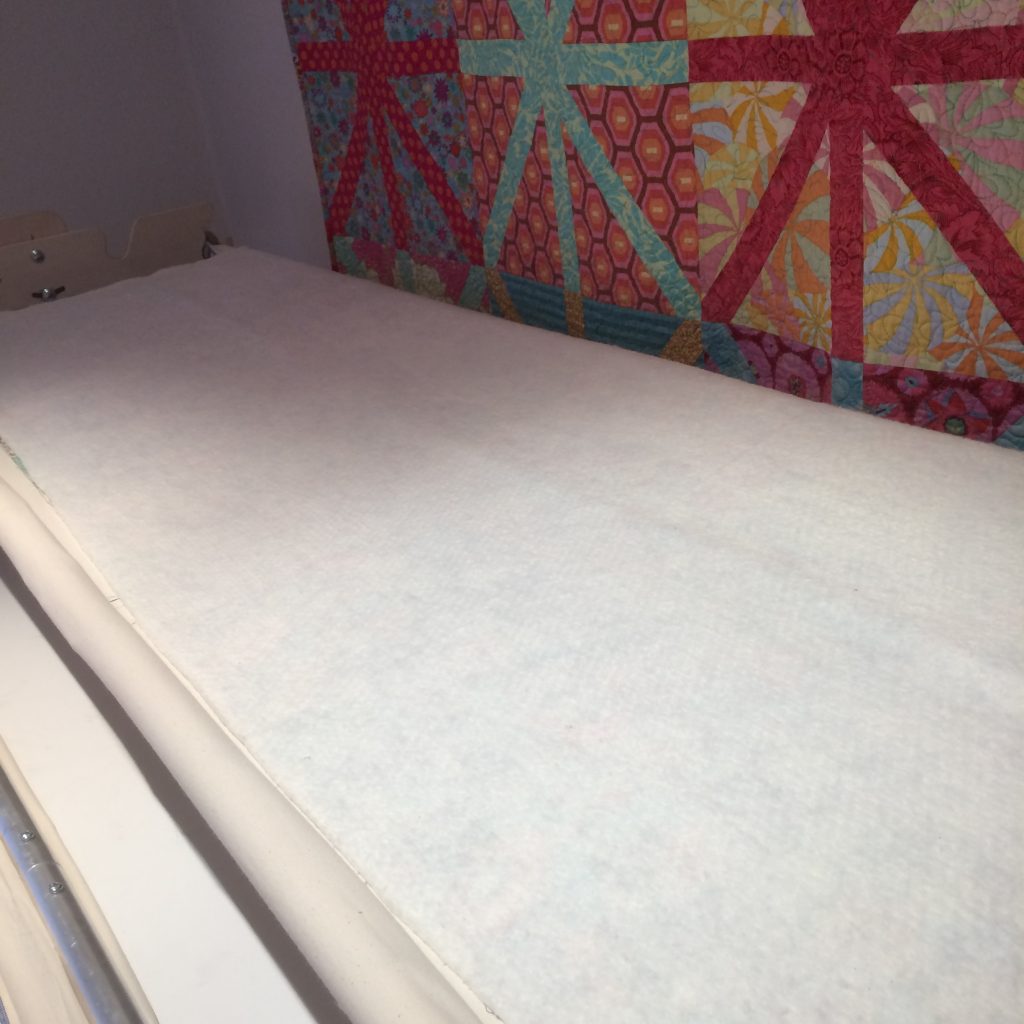
Loading the wadding 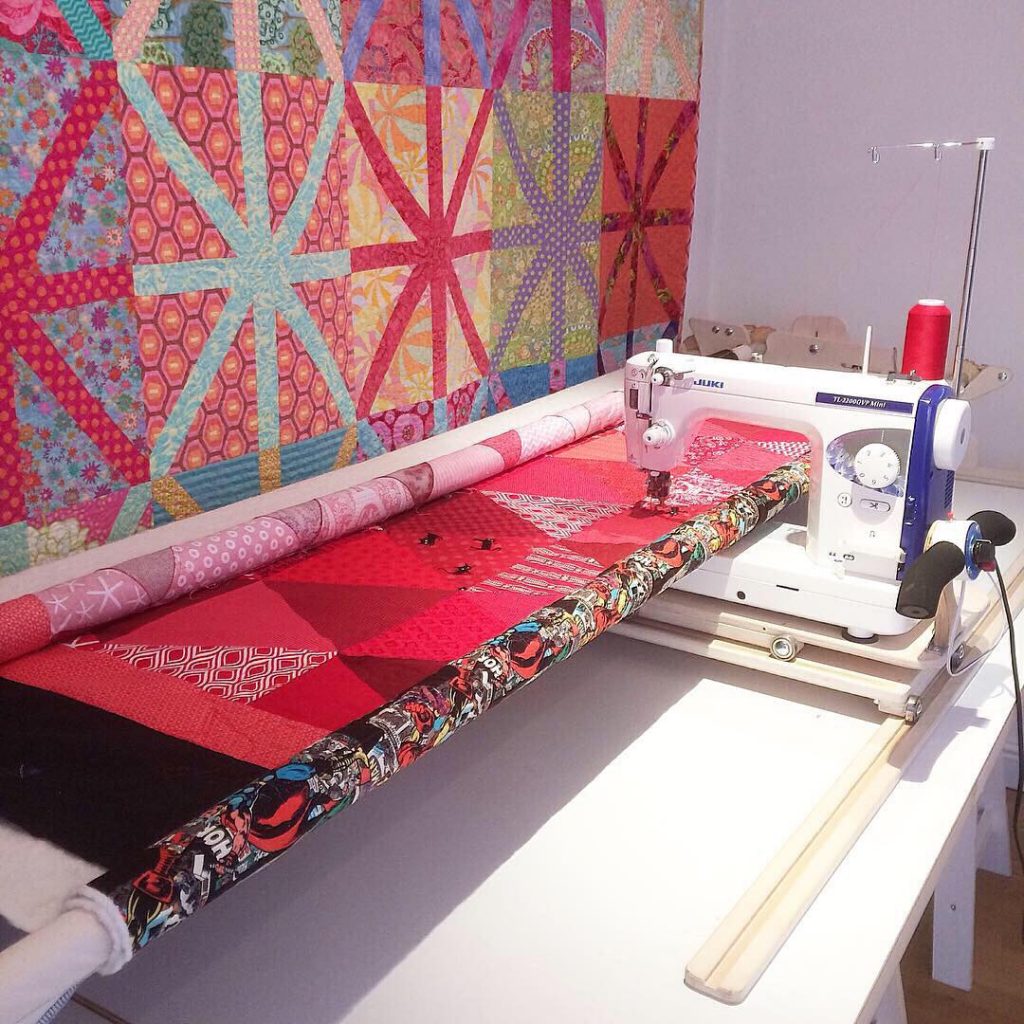
Loading the top
Loading the layers
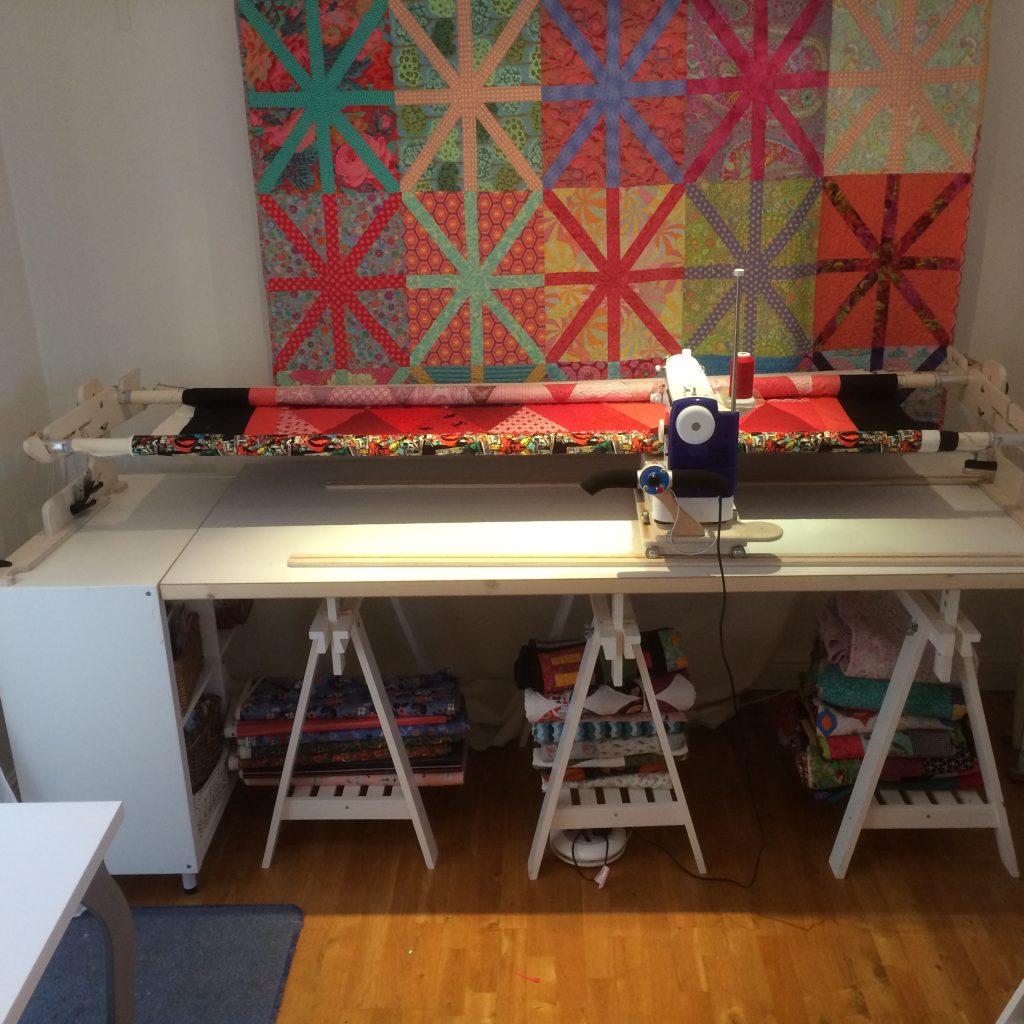
I use a quilting frame, like a little long arm for my quilting. The frame perfectly tensions the layers of my quilt so there is no need to baste, tack or glue the layers together. I load the layers of the quilt on the frame by pinning them to the fabric leaders riveted to the fabric poles. You can see how here. First, I load the backing fabric, then the wadding and finally the top. The frame allows me to tension each layer separately, so the layers are held together nice and snug giving me a perfectly tensioned canvas ready for the quilting.
Choosing the thread
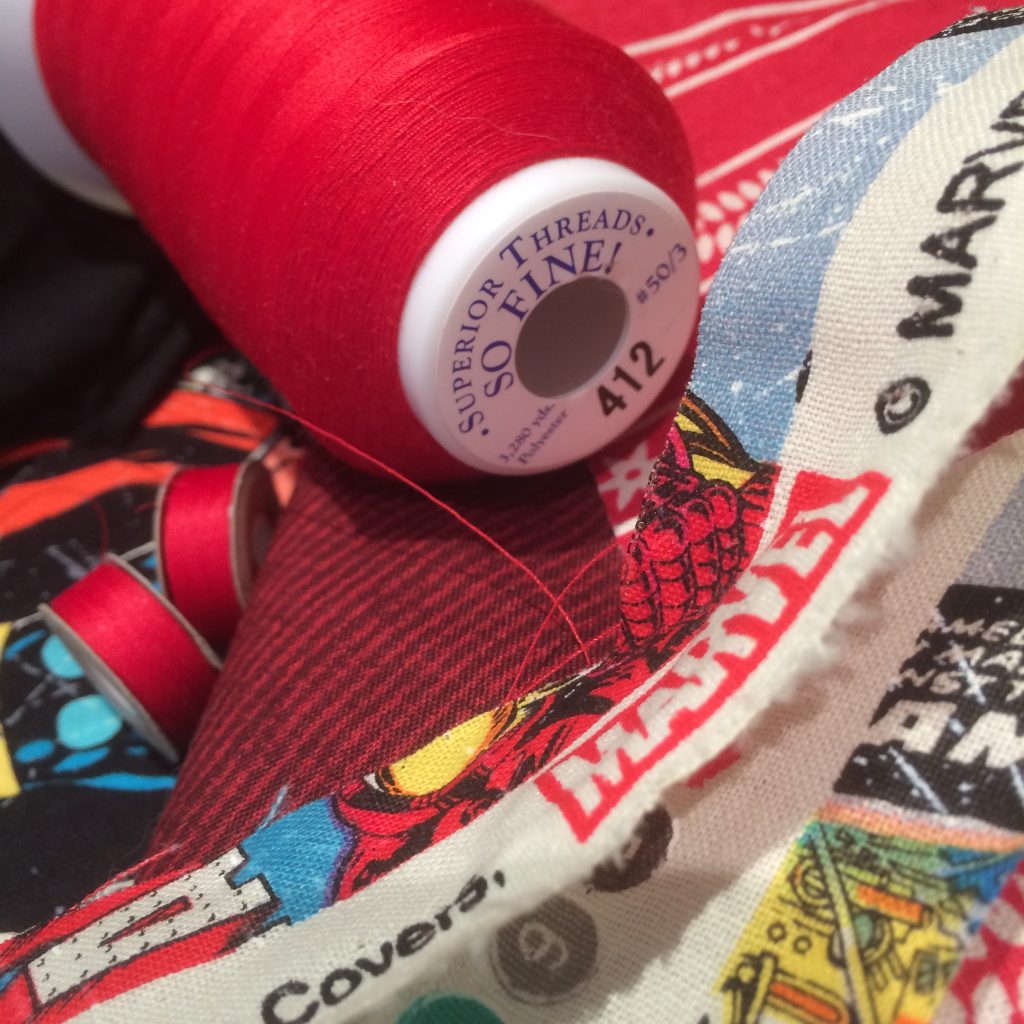
Auditioning threads for a quilt is one of my favourite things! The colours, thickness and fibres make a huge difference to the quilting process and overall look. For this quilt I wanted a thread that blended into the top. I chose a bright red #412 called Hot Chilies from the So Fine #50 range of Superior Threads. This gave me a fine matt line of stitching. It creates texture without drawing too much attention to itself. For the bobbin I chose a bright red Bottom Line thread #627 that is pre-wound on cardboard bobbins. They fit my Juki TL QVP Mini beautifully. The 60-weight thread gives a very fine line and works well with the So Fine #50 on top. This bobbin thread will blend beautifully, disappearing completely into the bright Marvel Comics fabric that I used for the backing.
So Fine #50 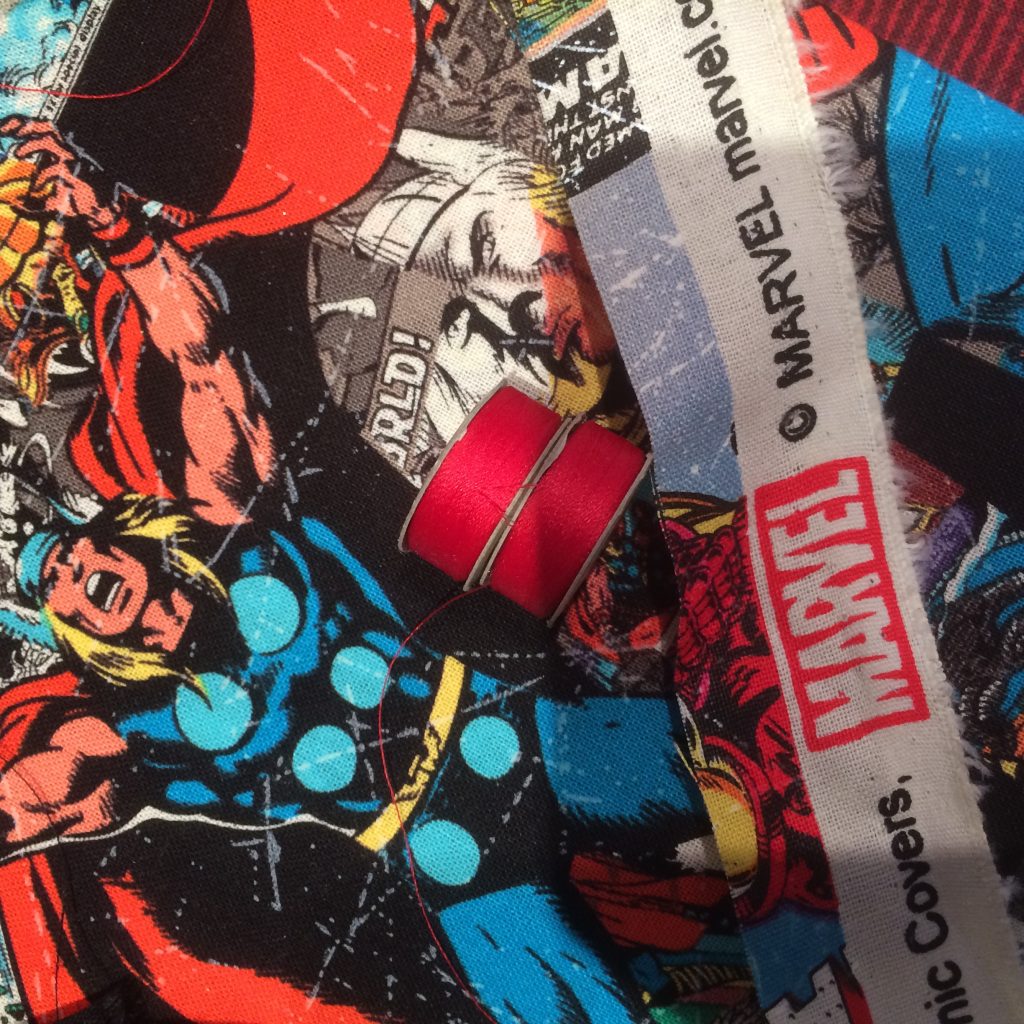
Bottom Line Prewounds 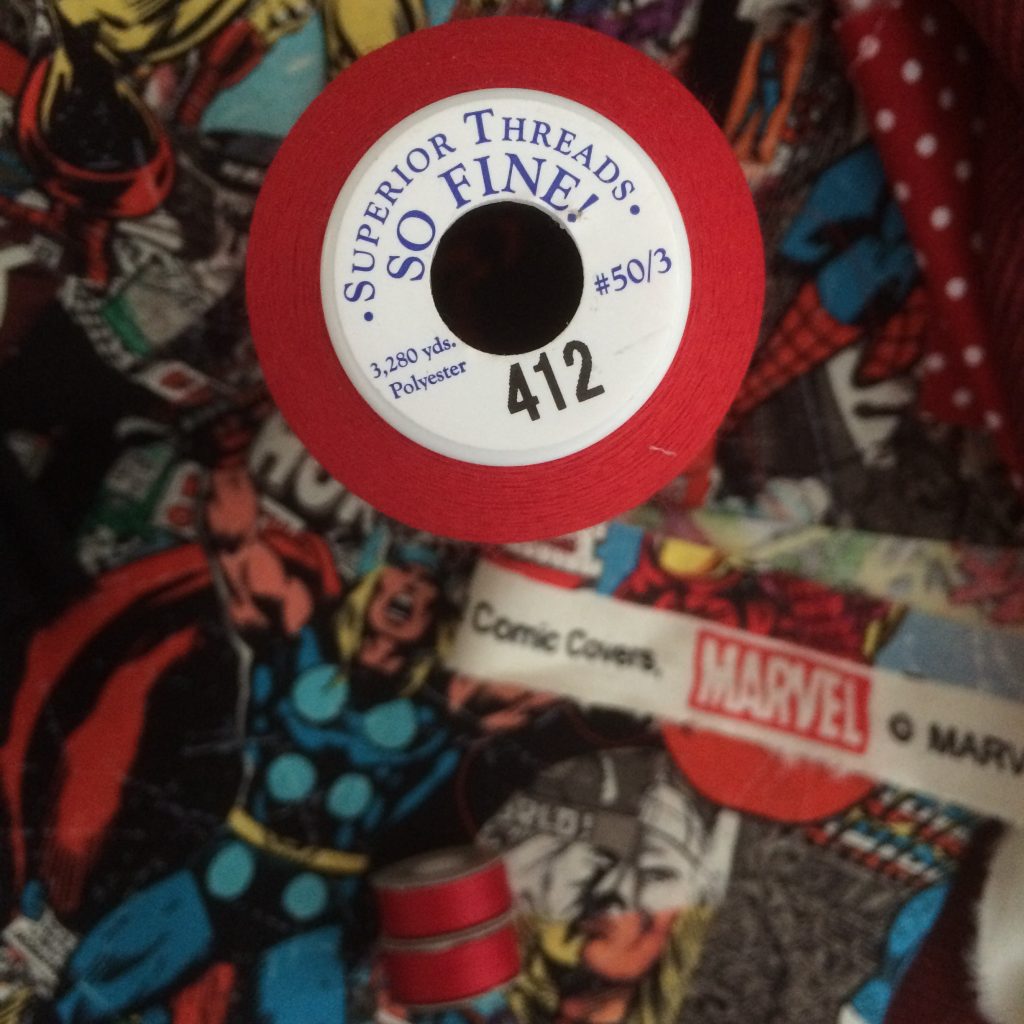
all from Superior Threads
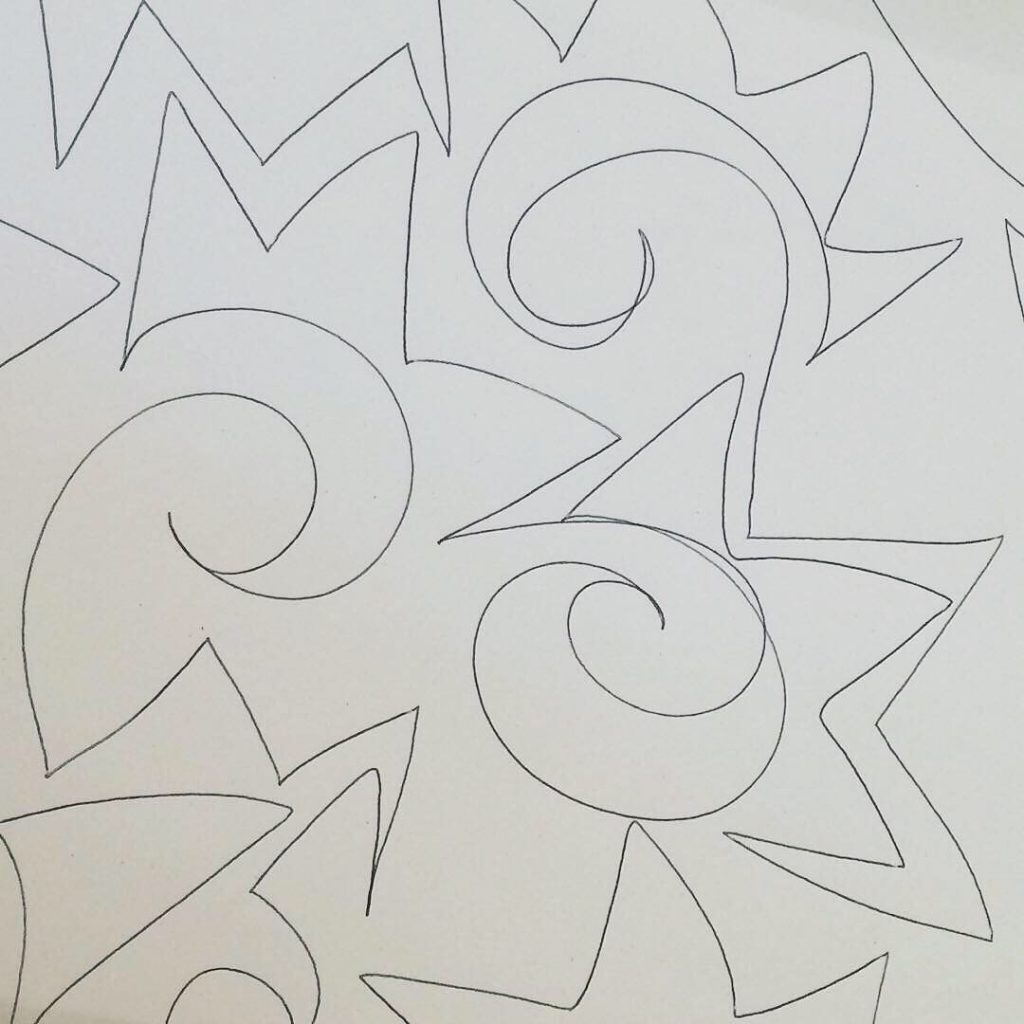
Choosing a quilting pattern
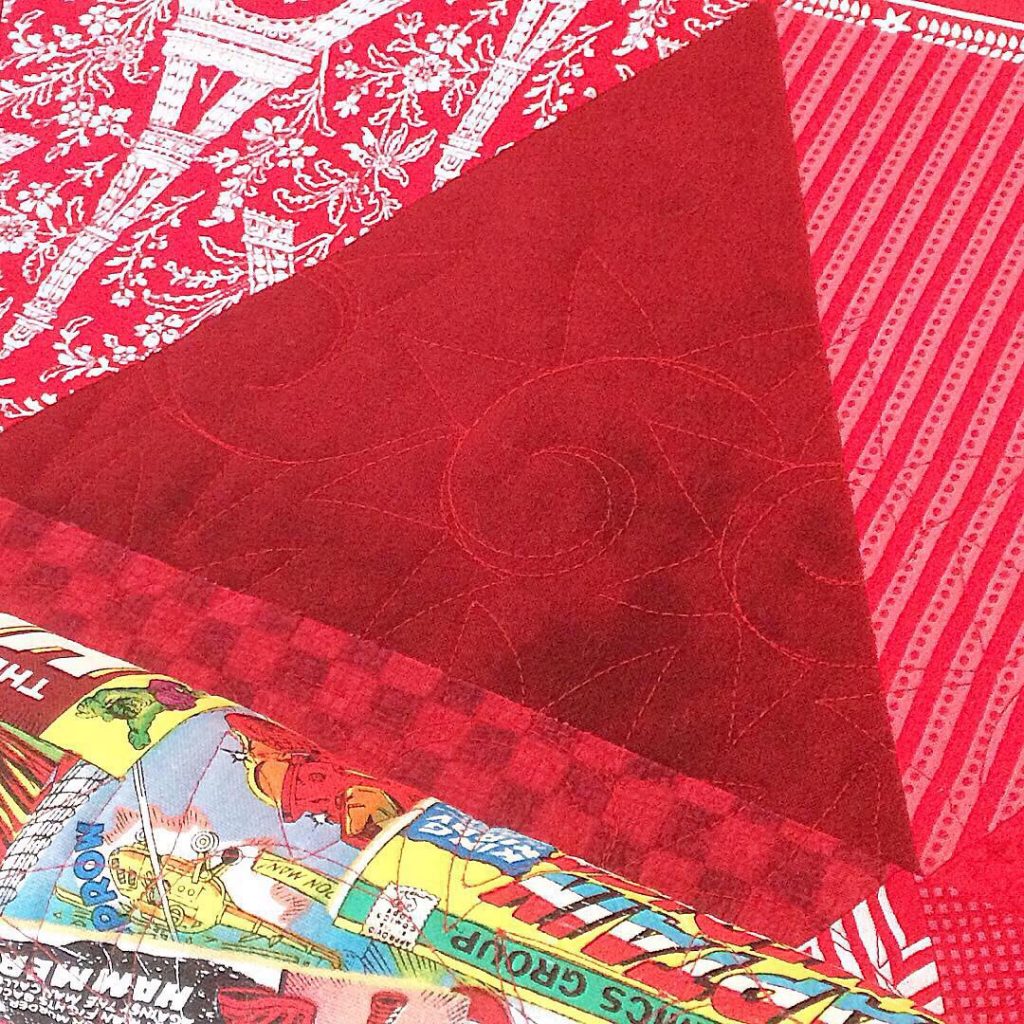
There are so many line designs! I wanted an overall pattern for this quilt, something to soften the angularity of the pieced pattern. In the end I was inspired by the ratchets on the quilting frame. I came up with a simple hook echoed with a zigzag pattern. By aiming the hooks in different directions and echoing the zigzags, I was able to create an overall pattern that I could move around my available space. Dovetailing the ratchet shapes onto each other enabled me to create an interesting overall pattern.
The zigzag pointy bits in the pattern were very helpful. To get a point, you need to pause and the pause gives you some thinking time so you can decide where you’re going to go next. If I need to , I can stop quilting at a pointy bit of my line design and walk away. When I come back later, I can begin again seamlessly.
Notice that I’ve drawn out my design on paper. Doodling a quilting design on paper is how you get good at creating the pattern and moving it around your available space. Practising with pen on paper first is the best way to get good with needle & thread on fabric later.
Getting your sewing machine ready to quilt

Juki TL QVP Mini
I’m using the Juki TL 2200 QVP Mini straight stitch. This machine has 4 features that make it idealfor free motion quilting on or off a frame. There’s an entire post about how to prepare your Juki straight stitch for free motion quilting. It has clear photos and video clips that take you step by step through all the things you’ll need to do to get a great line of stitching. Here’s a brief summary.
- First drop your feed dogs
- Next put on your free motion darning foot
- Then change your needle to a 100/16 Topstitch needle
- Now loosen the top tension to between 1 and 2 on the dial
- Finally loosen the bobbin tension.
Working my way through the quilt
Finally, we get to the quilting! The quilt sandwich is loaded. The sewing machine is threaded and tensioned. I’ve practised my quilting pattern on paper. Now I’m ready to start the quilting.
I begin with the needle down. I’m starting on the side sashing. It gives me a little space to practice and get over my jitters. The Juki TL QVP Mini is a lock stitch machine. This means that I don’t actually need to pull the bobbin thread up to the top. I’ll do a few small circles in the side sashing to check my tension. The thread tail and the messy practice stitching will disappear with the side sashing when I cut it off at the end. When everything is running smoothly, I’ll move into my actual quilt.
About the speed
Getting a good line of stitching requires a certain amount of speed. I need to coordinate the speed of the needle with the speed that I move the sewing machine on the carriage. To get a good line of stitching, I need fast needle speed and a comparatively slow and smooth carriage speed.
Fast sewing machine speed
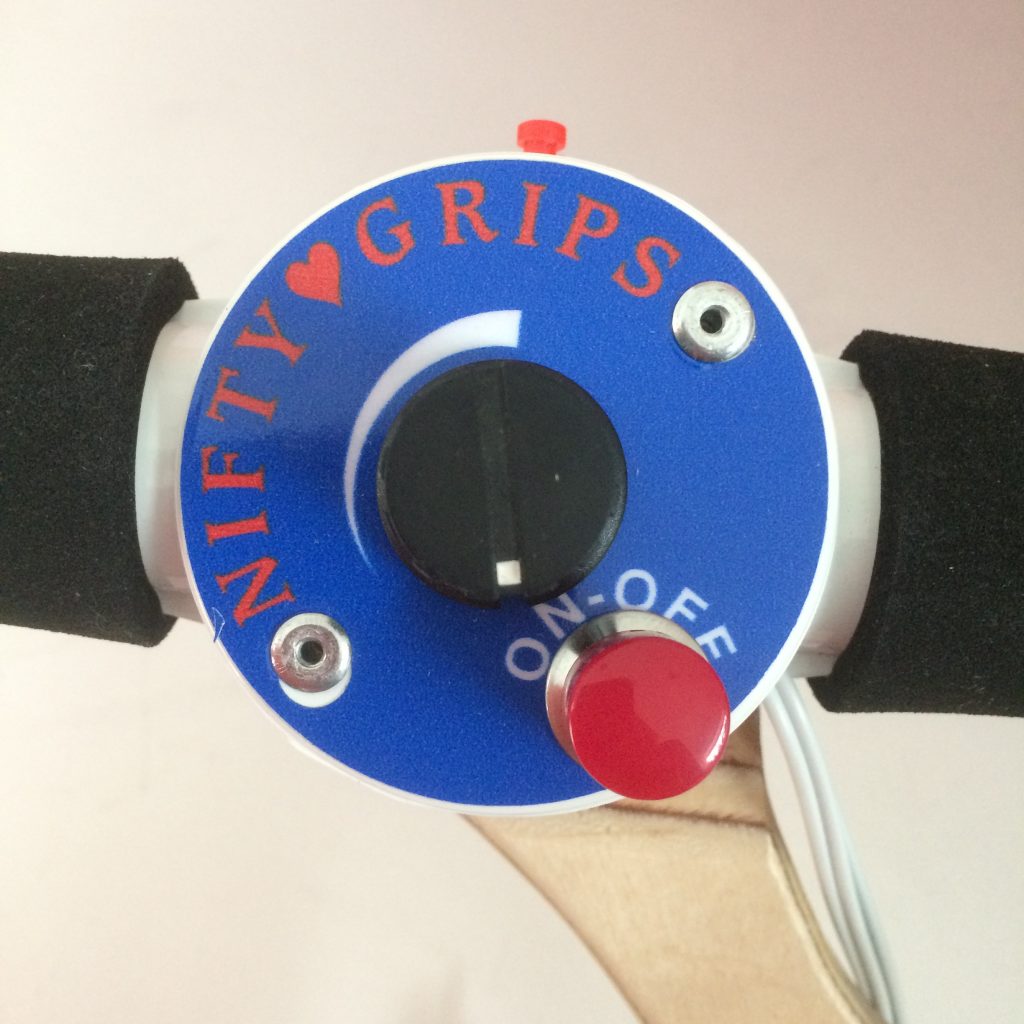
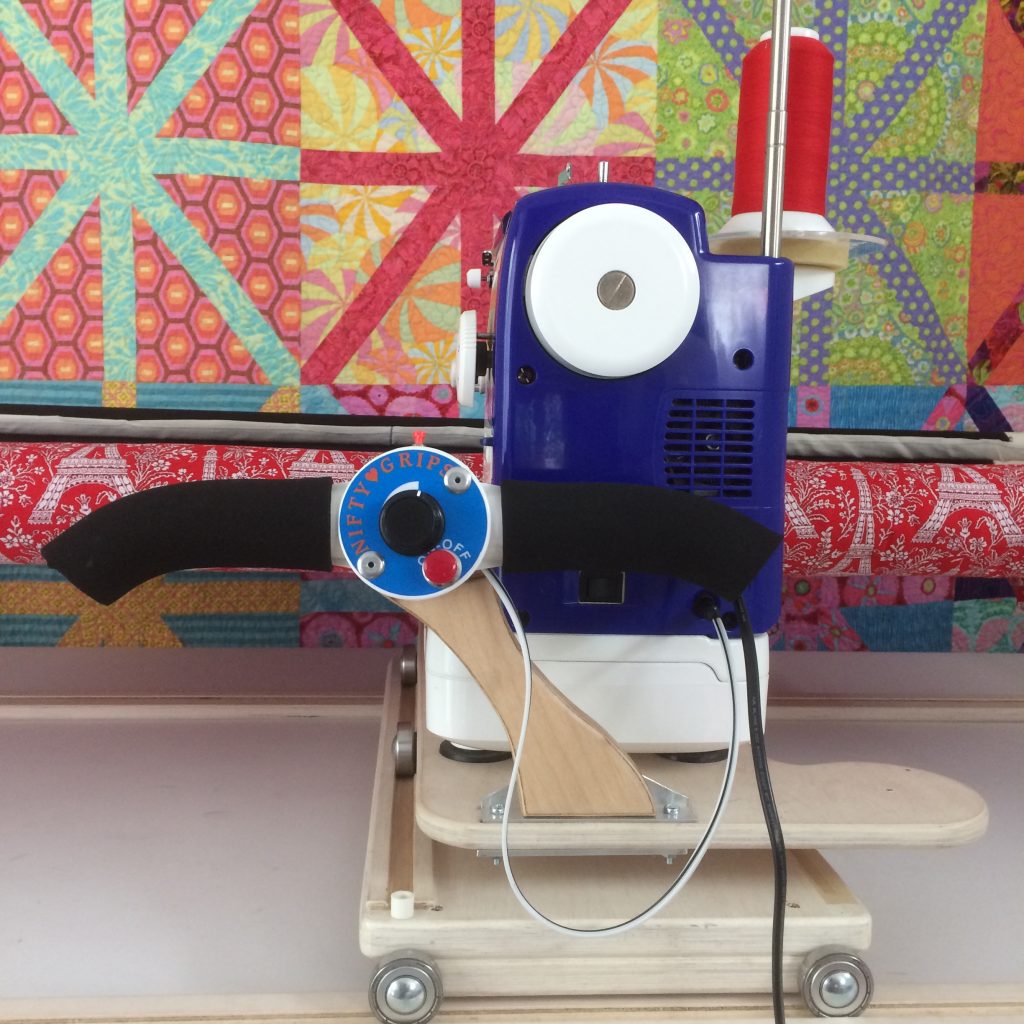
I’m using a set of speed control handles that bypass the foot pedal. Instead of pressing the foot pedal, I can adjust the speed with my fingers using the dial. This allows me to work from my centre just like a long arm.
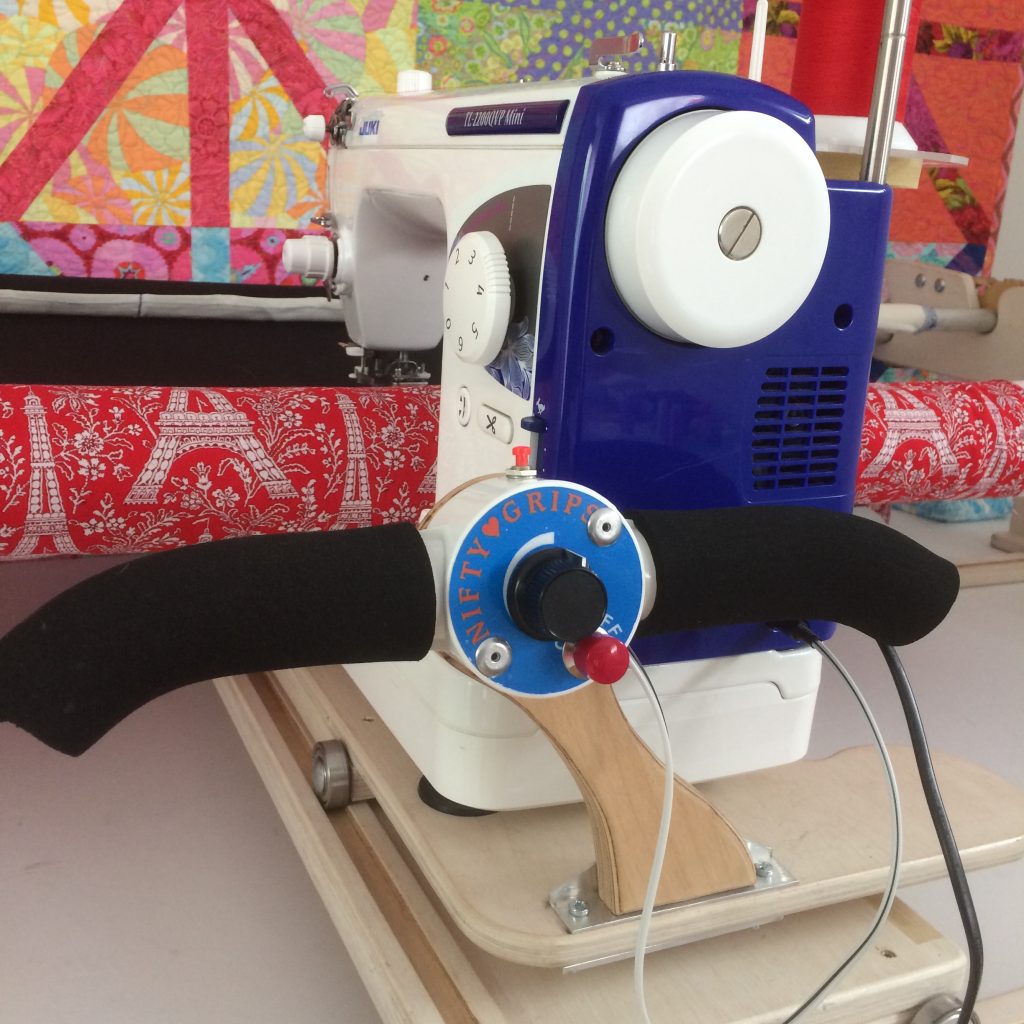
I need a needle speed that is fast enough to get a smooth and flowing line of stitching. Most domestic sewing machines barely go 1000 stitches per minute. The Juki long arm does 2200 stitches per minute. The Juki TL QVP Mini goes 1500 stitches per minute. Because we’re using the Juki TL QVP Mini like a long arm, we’ll need to get used to a faster needle speed. The Juki QVP Mini is a powerful workhorse. She’s happy to go fast. She purrs.
Slow and steady carriage speed.
Frames have a set of carriages that ride on tracks. The sewing machine sits on the carriages. The handles on the carriage allow the sewing machine to be guided every-which-way across the top of your quilt. Just like a long arm. The carriage moves so easily! You can guide it with a finger.
It’s easy to move the carriage too fast and set the needle speed too slow. If you do that you will break your needle. The rule of thumb here is to set the needle speed faster than you are comfortable with. Then aim to move the carriage slowly and smoothly. You need a certain amount of carriage speed to get a nice and flowing line of stitching. It’s a bit like riding a bike. If you go too slow you start to wobble and fall off. But if you go too fast you’ll get very long stitches and break your needle. The key is to find the balance. Just like riding a bike it seems hard before you do it and easy afterwards.
There and back again
A quilting frame allows you to quilt back and forth along the entire length of your quilt. The fabric layers are perfectly tensioned just like a long arm. this leaves you free to concentrate on your stitching.
I’ll begin on the black side sashing to practice a bit and get my tension balanced. Then I’ll move into the quilt proper. I designed the quilting pattern so that I could move with it. I can echo the ratchets and change the direction of the hook in order to nestle one shape into the next. I’m aiming to create hills and valleys of these shapes as I move back and forth across the length of the quilt. I’ll go over the hills and down into the valleys and dovetail one line of quilting into the next. This will disguise the fact hat I’ve been quilting in lines.
All done!
When I get to the end, I’ll unpin the quilt from the leader fabric. But before I do, notice how the height of this Juki TL QVP Mini makes room for this fabric roll under the arm. That’s why the height of the arm is even more important than the length!
Finally, I’ll unpin the quilt from the leaders. The layers of the quilt were pinned on straight and square. The frame tension was even and steady so the quilt hasn’t been distorted by wrestling with it under the arm of the sewing machine. It went on straight and square. It was quilted straight and square. It comes off straight and square. How good is that!
Finishing touches
Throwing the finished quilt over the frame is one of my favourite parts! I get to see how the light falls against the surface patterns. Now all that remains is to slice off the black side sashing and add the binding. We chose a black binding because it looked great on both sides of the quilt.
This has been a long post. I hope most people will just glance at the pictures. But we’ve gone into detail for the few followers who want a comprehensive view of quilting on a frame with the Juki TL QVP Mini straight stitch from start to finish. We think it’s a marvel.