Look who's having a BIRTHDAY!
Juki TLQVP Mini Main Blog

Baby Whole Cloth Quilts

Higgs & Higgs fabric for Emily's baby whole clothHave you noticed that Baby Whole Cloth quilts seem to be popping up everywhere?


We think that these little whole cloth quilts are simply fantastic. They focus on the fabric. And really, there is so much gorgeous fabric around why cut it up? The fast and simple project can make the perfect gift for a special someone. Emily's godson was turning one and she knew she wanted to make him a quilt. With just one week to go until the big day, Emily decided to keep it simple and go for a Baby Whole Cloth.

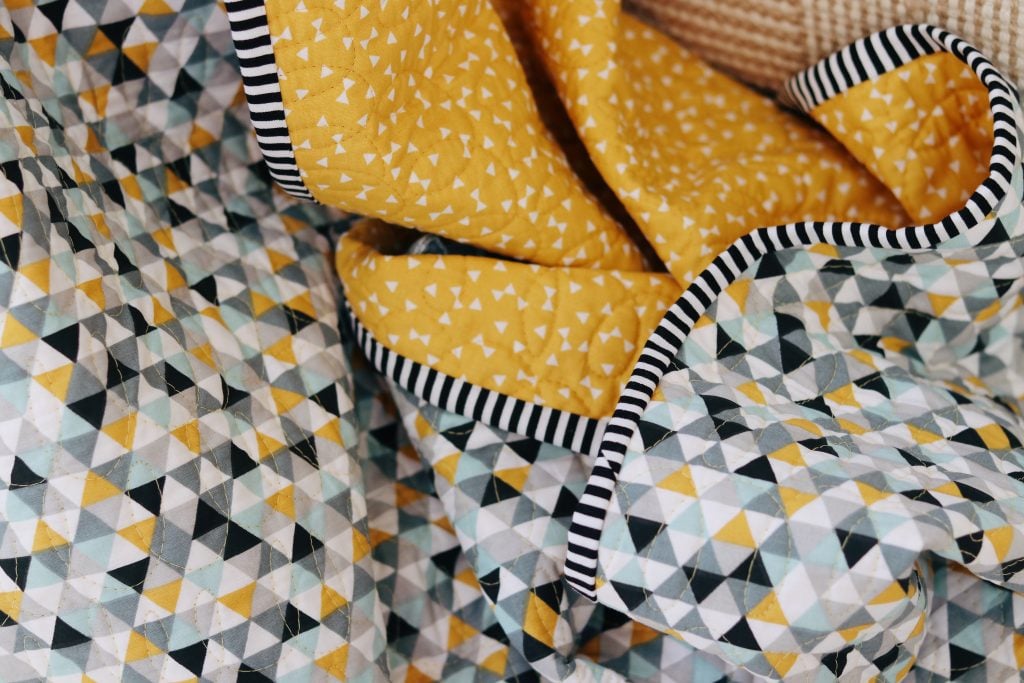
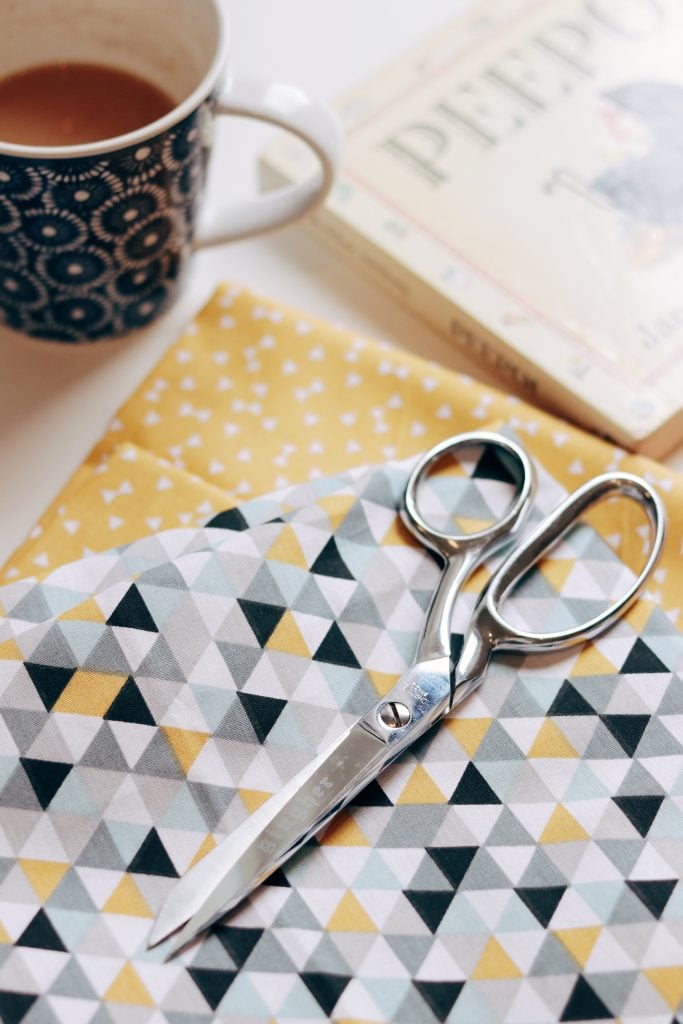
Emily discovered the Higgs & Higgs fabric shop at the Festival of Quilts last summer. The modern fabric selection suited Emily's clean minimal Scandinavian style. She was drawn to geometric shapes and something with a good pop of colour.

Baby Whole Cloth Recipe:

The idea is so simple. Sandwich some wadding between two lengths of complimentary fabric. Stitch together and bind.

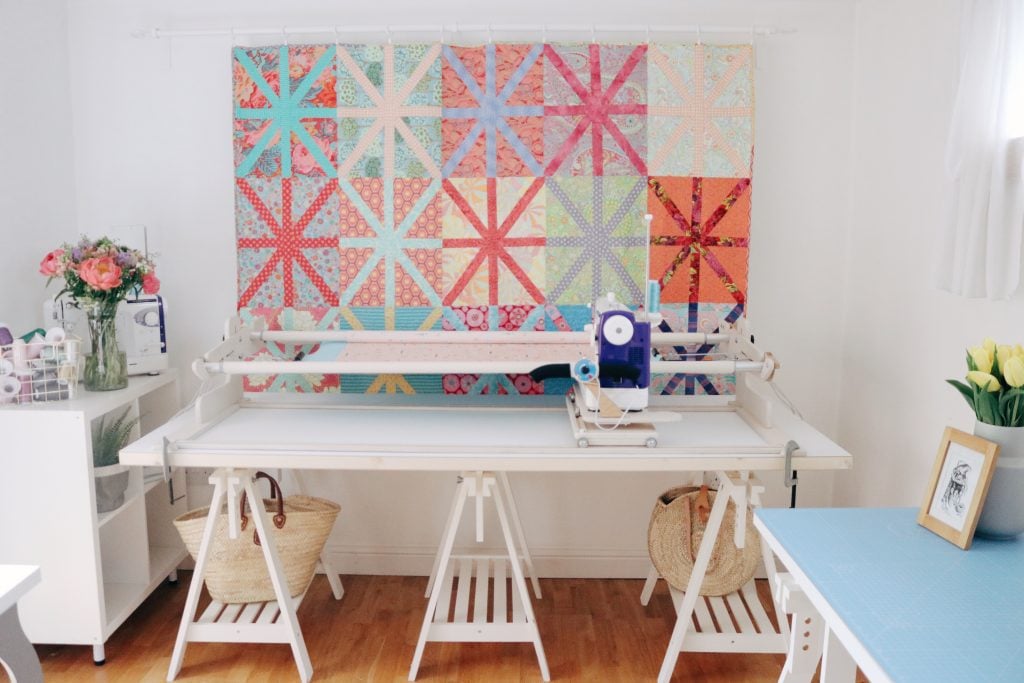
Emily got two 1 metre length pieces that were 130 cm wide. She chose a thin needle punched wadding; Warm & Natural as she wanted something breathable, soft and flexible. Many of the baby whole cloth quilts we've seen are straight line quilted but because the birthday celebration was just a few days away, Emily decided to free motion quilt a simple linear loop pattern on a 6-foot Machine Quilter frame. Using a quilting frame was going to get it quilted so much faster!

6-foot Machine Quilter frame


Getting the fabric ready to quilt.

Before cutting the wadding, we added some side sashing to the edges of the top and backing fabric. Then we cut the wadding a bit longer and wider. Adding the side sashing fabric is a long arm trick. It gives a space to start and stop quilting. It's an 'off stage' place to practice the line design and sort out any tension problems. It also allows you to free motion quilt over the edges making for lovely even stitching right up to the edges and beyond. Later when the quilt comes off the frame we will slice off this side sashing with a rotary cutter.

adding the side sashing
ide sashing helps when you need to sort out the tension

Loading the baby whole cloth quilt on the frame.

A Machine Quilter frame perfectly tensions each layer of the quilt sandwich. Leader fabric riveted to the fabric poles, holds the quilt away from the poles. The quilt layers are pinned to the leader fabric. first the backing fabric, then the wadding and finally the top. When the quilt layers are loaded on the fabric poles, the ratchets enable you to tension each layer of the quilt perfectly. There will never be any rucks or wrinkles on the back. You can find a complete blog post about loading a quilt on a frame here.

Pinning the backing fabric on the leader
Loading the wadding on the frame
Loading the quilt top on the frame

Getting ready to quilt.

Now comes the fun part; the quilting! The quilting frame turns this Juki TL QVP Mini straight stitch sewing machine into a PEN. And the quilting will simply be drawing with the needle. We've put a 100/16 Topstitch needle in the machine. The larger eye of this needle keeps the thread from shredding or breaking. Now we just needed to decide what INK to use. So we auditioned various threads. Emily wanted a matt look so we went for the So Fine #50 and auditioned a variety of colours against the geometrical top fabric. We wanted a colour that blended in enough to hide the inevitable mistakes. But the thread needed to show up enough so that we could see what we were stitching. Emily chose the yellow So Fine #50 for the top and  matching yellow Bottom Line pre-wounds to go in the bobbin.

Auditioning the So Fine #50 threads
Doodling the line design on paper first

Next Emily decided on the quilting design. Keeping it super fun and simple, we chose pickle shaped loop that went straight across the quilt in lines. The linear pattern works well with the modern feel of the project. And design wise, the curves in the quilting compliment the angular geometric patterns in the fabric.

Starting in the side sashing to play with the design
rolling on the frame
Loops all in a line

Now you see it, now you don't!

After practising a bit in the side sashing, Emily started stitching loop-de-loops all the way across, swirling the machine around, working from one side to the other and then back again. Practising on a bit of paper first helped. Doodling the design encourages muscle memory which helps your mind to reproduce the pattern. As often with the quilting, the pattern is showing up better on the back. The elongated loops are easier to see on the roll of yellow backing fabric.

The upside of this very patterned fabric is that it was hard to see the mistakes.  This made it easier for Emily to relax and enjoy the process. Of course, the more she relaxed, the less mistakes she made! Emily completed quilting this little whole cloth in less than two hours. It looked great! The whole process was a real confidence builder.

Finishing Touches

We took the quilt off the frame and sliced off the side sashing. Getting rid of all the messy bits and straightening off the edges made such a difference!

Slicing off the side sashing

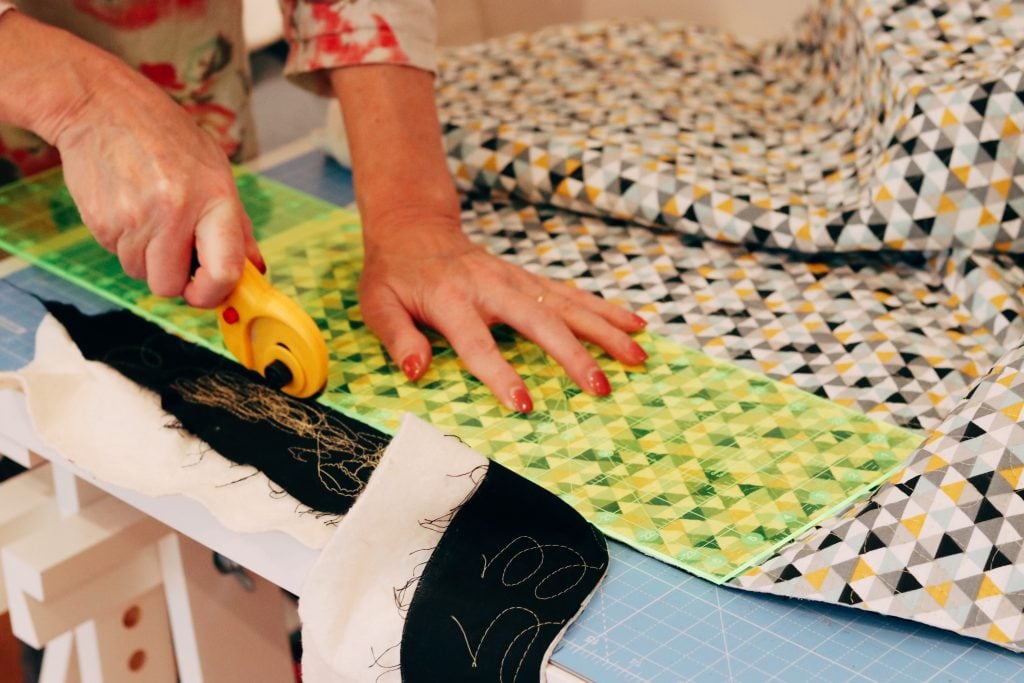
Now we were ready for the binding. We chose this black and white stripe for a bit of zing! Megan Pits from Canoe Ridge Creations does an awesome two part Double Fold Binding Tutorial. We followed both parts step by step and the binding came together beautifully. Once the binding was machine stitched to the quilt, Emily took it home to complete the binding by hand. Hand stitching by the wood fire with a movie in the background was so relaxing. Ironically, sewing the binding took longer than the quilting! But the end result was worth it. For a final bonus surprise, Emily appliqued an old shirt pocket to the back to hold a little toy.

Ironing the binding
Stripes
Machine stitching the binding with the Juki DX7
Machine stitching on the quilt top
sorting the corners
Hand stitching on the back
baby whole cloth finished
All finished and ready to gift!

The end result is a complete little whole cloth baby quilt. Emily is thrilled to be able to give her godson and his mum a unique one-of-a-kind handmade gift. It's perfect for dragging around the house, nappy changing, snuggling on the sofa or sleeping in his little cot. Start to finish, it came together in just 3 days! But Emily hope's that it will give her little godson years of enjoyment, especially with the secret pocket. When it comes to putting together gifts there is nothing quite like the feeling of producing something homemade.

You can read more about this baby whole cloth quilt on Emily's Brick Dust and Glitter blog post.

Look who's having a BIRTHDAY!
What a cutie! I think he'll love it.
Baby whole cloth quilt
Baby whole cloth quilt.

You may also like...

Leave a Reply

Your email address will not be published. Required fields are marked *